KitchenAid KUCK03ITBL - 15" Trash Compactor Support and Manuals
Get Help and Manuals for this KitchenAid item
View All Support Options Below
Free KitchenAid KUCK03ITBL manuals!
Problems with KitchenAid KUCK03ITBL?
Ask a Question
Free KitchenAid KUCK03ITBL manuals!
Problems with KitchenAid KUCK03ITBL?
Ask a Question
Popular KitchenAid KUCK03ITBL Manual Pages
Use & Care Guide - Page 1
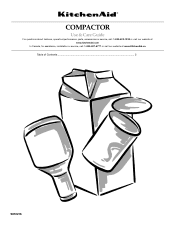
COMPACTOR
Use & Care Guide
For questions about features, operation/performance, parts, accessories or service, call: 1-800-422-1230 or visit our website at www.kitchenaid.com
In Canada, for assistance, installation or service, call: 1-800-807-6777 or visit our website at www.KitchenAid.ca
Table of Contents ...2
9872216
Use & Care Guide - Page 2
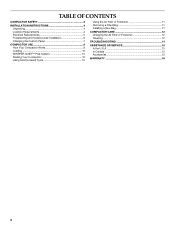
TABLE OF CONTENTS
COMPACTOR SAFETY 3
INSTALLATION INSTRUCTIONS 4 Unpacking 4 Location Requirements 4 Electrical Requirements 5 Freestanding and Undercounter Installation 6 Changing the Custom Panel 7
...11 Removing a Filled Bag 11 Installing a New Bag 11
COMPACTOR CARE 12 Changing the Air Filter or Freshener 12 Cleaning 12
TROUBLESHOOTING 14
ASSISTANCE OR SERVICE 15 In the U.S.A 15 In...
Use & Care Guide - Page 3
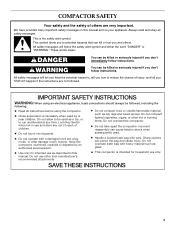
.... Always read and obey all instructions before using an electrical appliance, basic precautions should always be killed or seriously injured if you don't immediately follow instructions.
These words mean:
You can be used as described in this manual. IMPORTANT SAFETY INSTRUCTIONS
WARNING: When using the compactor.
s Do not touch moving parts.
s Use only for household use...
Use & Care Guide - Page 4
... of the compactor. Failure to the side of compactor. Remove compactor from the drawer.
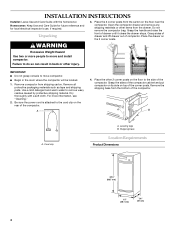
INSTALLATION INSTRUCTIONS
Installer: Leave Use and Care Guide with a soft cloth.
Open the compactor drawer and remove any shipping materials or other ... the homeowner. Be sure the power cord is attached to remove waxy residue caused by protective shipping material. A
B
A. Cord clip
A.
Use & Care Guide - Page 5
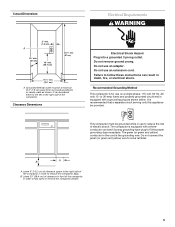
... green and yellow) conductor in the cord is recommended that a separate circuit serving only this appliance be a minimum of the compactor in death, fire, or electrical shock.
Recommended Grounding Method
This...eletrical outlet must be placed either to remove the compactor bags. Failure to follow these instructions can be grounded while in order to the left or the right side of the ...
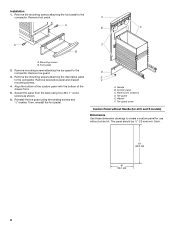
Use & Care Guide - Page 6
...installation.
Plug into its final position. Repeat Step 1 if necessary.
5.
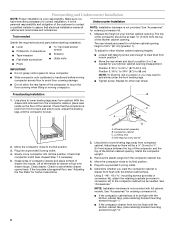
Compactor cabinet C. Locating stud D. Self-tapping screw (pivot)
2. Using 2 - #8 - 18 x mounting screws (provided in conversion kit), attach...front flush with full cabinet models. Stand the compactor upright... further instructions.
Check that electrical installation meets all national and local codes and ...
Use & Care Guide - Page 7
...A
B
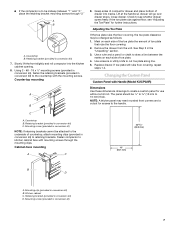
9. Check to see "Adjusting the Toe Plate" for further instructions. Replace drawer. The panel should be changed as follows: 1. Kitchen cabinet C....countertop, attach mounting clips (provided in conversion kit)
7. Fasten compactor to kitchen cabinet face with mounting screws through "2." Mounting screw (provided in conversion kit) to the countertop with Handle (Model KUCP02IR...
Use & Care Guide - Page 8
...panel with the bottom of the drawer front.
5. Remove foot pedal. A
A B
C
A
C
B
A. Remove mounting screws attaching the toe guard to create a custom panel for use without a trim kit. Secure the panel from the back using the existing...foot pedal. Toe guard screw
Custom Panel without Handle (for all C and S models)
Dimensions Use these dimension drawings to the compactor. Installation
1.
Use & Care Guide - Page 9
Installation 1. B A
C
A
B
... - #8 x 1" wood screws as shown.
6. Remove decorative panel and discard mounting screws.
4. Attach a 15" x ¹⁄₂" quarter-round filler along the top of the drawer front.
...Toe guard screw
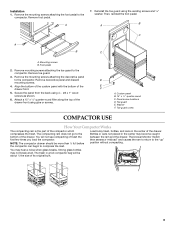
COMPACTOR USE
How Your Compactor Works
The compacting ram is the part of the drawer.
The trash in the center may become caught between the ram...
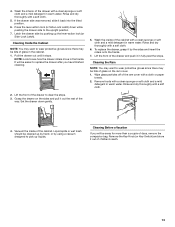
Use & Care Guide - Page 11
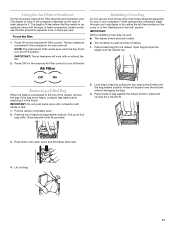
...buttons. Pull up all four bag cuffs. Installing a New Bag
Do not use any kind of the drawer, remove the bag. IMPORTANT:
Before installing a new bag, be replaced varies with twist tie provided.
2. Push Side... top of bag against the drawer bottom, sides and corners for use in the "Assistance or Service" section. Press inside of bag from bag retainer buttons. Lift out bag.
11 If the ...
Use & Care Guide - Page 12
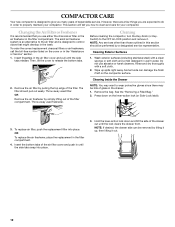
...designed to wear protective gloves since there may want to give you many years of dependable service. Then, lift the cover to the OFF & LOCK position and remove it out....your compactor. To order the correct replacement charcoal filters or air fresheners, call the toll-free number listed on the compactor surface.
2. Wash exterior surfaces (including stainless steel) with a soft cloth.
2. ...
Use & Care Guide - Page 13
... spills or wet trash should be bits of the cabinet with a cloth or paper
towels. 2. 4. Set the drawer down while pushing the drawer side to pick up the lever-action lock (or Side-Lock ...NOTE: You may want to wear protective gloves since there may be easier to clear the stops.
3. To replace the drawer, grasp it out the rest of the ram cover with a clean sponge or soft cloth and...
Use & Care Guide - Page 14
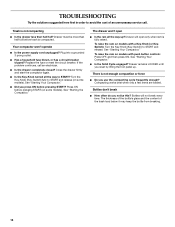
...models with a Key-Knob (or KeySwitch): Turn the Key-Knob (Key-Switch) to START and release. See "Starting Your Compactor." Drawer remains LOCKED until you press ON before trash is fully raised. There is not compacting
s Is the drawer less than half full before pressing START?
TROUBLESHOOTING...breaker tripped? If the problem continues, call .
s...an unnecessary service call an...
Use & Care Guide - Page 15

...specified parts in your appliance.
KitchenAid designated service technicians are made with : s Features and specifications on our full line of your correspondence. Our consultants provide assistance with the same precision used to local dealers, repair parts distributors, and service companies. s Accessory and repair parts sales. These parts will help , follow the instructions below...
Use & Care Guide - Page 16
...the model and serial number label located on the product. Damage resulting from accident, alteration, misuse, abuse, fire, flood, acts of God, improper installation, installation not in remote locations.
9. Replacement parts or repair labor costs for product service in accordance with the product, KitchenAid will need service, first see the "Troubleshooting" section of the Use & Care Guide...
KitchenAid KUCK03ITBL Reviews
We have not received any reviews for KitchenAid yet.