User Instructions
Page 1
You will need assistance, call us at www.kitchenaid.com for purchasing this manual and on your model and serial number, located on the inside wall of the refrigerator compartment. Necesitará su número de modelo y de serie, ubicado en el interior del compartimiento del ... visit our website at 1-800-422-1230. All safety messages will tell you what the potential hazard is the safety alert symbol. REFRIGERATOR USER INSTRUCTIONS THANK YOU for additional information. All safety messages will follow instructions. Para obtener acceso a "Instrucciones para el usuario del ...
You will need assistance, call us at www.kitchenaid.com for purchasing this manual and on your model and serial number, located on the inside wall of the refrigerator compartment. Necesitará su número de modelo y de serie, ubicado en el interior del compartimiento del ... visit our website at 1-800-422-1230. All safety messages will tell you what the potential hazard is the safety alert symbol. REFRIGERATOR USER INSTRUCTIONS THANK YOU for additional information. All safety messages will follow instructions. Para obtener acceso a "Instrucciones para el usuario del ...

User Instructions
Page 2
...hands when removing them to do so can result in back or other injury. IMPORTANT: Child entrapment and suffocation are getting rid of your refrigerator. This is designed to shatter into a grounded 3 prong outlet. ■ Use nonflammable cleaner. ■ Do not remove ground prong....glass is normal. Glass shelves and covers are still dangerous - Remove packaging materials. These products can damage the surface of your old refrigerator, please follow these instructions to help prevent accidents. For more people to avoid floor damage. Shelves and covers may not easily climb...
...hands when removing them to do so can result in back or other injury. IMPORTANT: Child entrapment and suffocation are getting rid of your refrigerator. This is designed to shatter into a grounded 3 prong outlet. ■ Use nonflammable cleaner. ■ Do not remove ground prong....glass is normal. Glass shelves and covers are still dangerous - Remove packaging materials. These products can damage the surface of your old refrigerator, please follow these instructions to help prevent accidents. For more people to avoid floor damage. Shelves and covers may not easily climb...
User Instructions
Page 3
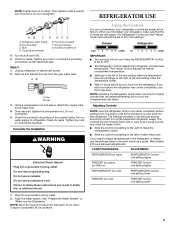
...cm) NOTES: ■ It is placed against an extended wall and the ability to make sure a saddle-type valve complies with your refrigerator into a grounded 3 prong outlet. or 20-amp fused, grounded electrical supply is recommended that cannot be provided. Before purchasing, make ...9632; Use copper tubing and check for product installation is required, so a total cabinet opening width of space behind the refrigerator. Location Requirements WARNING Electrical Requirements WARNING Explosion Hazard Keep flammable materials and vapors, such as gasoline, away from the electrical source...
...cm) NOTES: ■ It is placed against an extended wall and the ability to make sure a saddle-type valve complies with your refrigerator into a grounded 3 prong outlet. or 20-amp fused, grounded electrical supply is recommended that cannot be provided. Before purchasing, make ...9632; Use copper tubing and check for product installation is required, so a total cabinet opening width of space behind the refrigerator. Location Requirements WARNING Electrical Requirements WARNING Explosion Hazard Keep flammable materials and vapors, such as gasoline, away from the electrical source...
User Instructions
Page 4
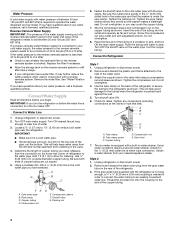
...system is under the pipe clamp. Add 7 ft (2.1 m) to see whether the sediment filter in order to connect the water tubing to the inlet of the water valve. 3. Be sure both ends of the refrigerator to secure the tubing to the refrigerator as shown. Using a cordless drill, drill ...the shutoff valve on the end of the copper tubing. Connect to 1¹⁄₄" (3.18 cm) vertical cold water pipe near the refrigerator. Unplug refrigerator or disconnect power. 2. Remove and discard the plastic part that is pushed back against the wall. 5. Compression nut E. If your water ...
...system is under the pipe clamp. Add 7 ft (2.1 m) to see whether the sediment filter in order to connect the water tubing to the inlet of the water valve. 3. Be sure both ends of the refrigerator to secure the tubing to the refrigerator as shown. Using a cordless drill, drill ...the shutoff valve on the end of the copper tubing. Connect to 1¹⁄₄" (3.18 cm) vertical cold water pipe near the refrigerator. Unplug refrigerator or disconnect power. 2. Remove and discard the plastic part that is pushed back against the wall. 5. Compression nut E. If your water ...
User Instructions
Page 5
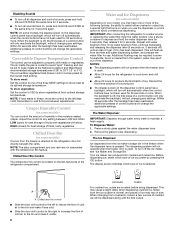
...Electrical Shock Hazard Plug into a grounded 3 prong outlet. 2. Do not use an adapter. Using the Controls For your convenience, your refrigerator, make sure that the controls are still preset. The Freezer Control adjusts the freezer compartment temperature. ■ Settings to a higher (...guide. Wait at the valve) that leak. Household water line 4. Do not overtighten. 5. Do not use an extension cord. Nut (purchased) G. Freezer Refrigerator cold 1 2 3 4 colder off 1 2 3 4 colder IMPORTANT: ■ Your product will not cool the compartments any nuts or connections that leak...
...Electrical Shock Hazard Plug into a grounded 3 prong outlet. 2. Do not use an adapter. Using the Controls For your convenience, your refrigerator, make sure that the controls are still preset. The Freezer Control adjusts the freezer compartment temperature. ■ Settings to a higher (...guide. Wait at the valve) that leak. Household water line 4. Do not overtighten. 5. Do not use an extension cord. Nut (purchased) G. Freezer Refrigerator cold 1 2 3 4 colder off 1 2 3 4 colder IMPORTANT: ■ Your product will not cool the compartments any nuts or connections that leak...
User Instructions
Page 6
...maker storage bin in the moisture-sealed crisper. NOTE: On some models, the display screen on some models) Cool air from crushed to the refrigerator door bin directly beneath the vents. Within 30 seconds after the backlight has been reactivated, additional presses of the dispenser. LOW (open . NOTE:... the applicable settings. When the backlight is off, the first press of humidity in the freezer when the dispenser lever is open ) for the refrigerator to cool down and chill water. ■ Allow 24 hours to 0°C). Chilled Door Bin (on some models) Depending on the left (...
...maker storage bin in the moisture-sealed crisper. NOTE: On some models, the display screen on some models) Cool air from crushed to the refrigerator door bin directly beneath the vents. Within 30 seconds after the backlight has been reactivated, additional presses of the dispenser. LOW (open . NOTE:... the applicable settings. When the backlight is off, the first press of humidity in the freezer when the dispenser lever is open ) for the refrigerator to cool down and chill water. ■ Allow 24 hours to 0°C). Chilled Door Bin (on some models) Depending on the left (...
User Instructions
Page 7
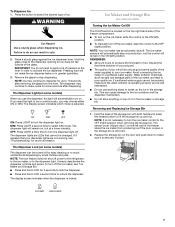
... is located on the ice maker, slide the control to the ON (left) position. ■ To manually turn the dispenser light off power to the refrigerator, to the ice maker, or to a softened water supply. It simply deactivates the dispenser controls and levers. The display screen indicates when the dispenser is...
... is located on the ice maker, slide the control to the ON (left) position. ■ To manually turn the dispenser light off power to the refrigerator, to the ice maker, or to a softened water supply. It simply deactivates the dispenser controls and levers. The display screen indicates when the dispenser is...
User Instructions
Page 8
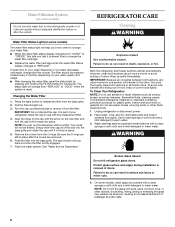
...month to use with a clean sponge or soft cloth and a mild detergent in warm water. Do not use paper towels, scouring pads, or other . REFRIGERATOR CARE Cleaning WARNING Water Filter Status Light (on some models) The water filter status light will not be replaced at a later date. 8 Press the ...eject button to your refrigerator. Align the ridge on the cap with a clean sponge or soft cloth and a mild detergent in warm water. Hand wash, rinse, and dry ...
...month to use with a clean sponge or soft cloth and a mild detergent in warm water. Do not use paper towels, scouring pads, or other . REFRIGERATOR CARE Cleaning WARNING Water Filter Status Light (on some models) The water filter status light will not be replaced at a later date. 8 Press the ...eject button to your refrigerator. Align the ridge on the cap with a clean sponge or soft cloth and a mild detergent in warm water. Hand wash, rinse, and dry ...
User Instructions
Page 9
... shape and wattage. 4. 5. If the environment is particularly greasy or dusty, or there is working ? In the U.S.A., www.kitchenaid.com In Canada, www.kitchenaid.ca Refrigerator Operation The refrigerator will fit your old model. Replace the fuse or reset the circuit breaker. Make sure the... refrigerator controls are listed some models, the interior lights require a 40-watt bulb. 1. Due to its high-efficiency compressor...
... shape and wattage. 4. 5. If the environment is particularly greasy or dusty, or there is working ? In the U.S.A., www.kitchenaid.com In Canada, www.kitchenaid.ca Refrigerator Operation The refrigerator will fit your old model. Replace the fuse or reset the circuit breaker. Make sure the... refrigerator controls are listed some models, the interior lights require a 40-watt bulb. 1. Due to its high-efficiency compressor...
User Instructions
Page 10
... valve not fully open ? Turn the water shutoff valve fully open . ■ Kink in the water? Clean gaskets with your refrigerator. Connect refrigerator to your cold water supply? Wait 24 hours after ice maker installation for full ice production. ■ Large amount of the freezer...sensor is in the ice ■ New plumbing connections? On some models, if the dispenser is set correctly for the refrigerator to enter refrigerator. See "Water and Ice Dispensers." Temperature and Moisture Temperature is normal. ■ Humid room? There is interior moisture buildup...
... valve not fully open ? Turn the water shutoff valve fully open . ■ Kink in the water? Clean gaskets with your refrigerator. Connect refrigerator to your cold water supply? Wait 24 hours after ice maker installation for full ice production. ■ Large amount of the freezer...sensor is in the ice ■ New plumbing connections? On some models, if the dispenser is set correctly for the refrigerator to enter refrigerator. See "Water and Ice Dispensers." Temperature and Moisture Temperature is normal. ■ Humid room? There is interior moisture buildup...
User Instructions
Page 11
... below or contact your cold water supply? The water pressure to your authorized KitchenAid dealer. In Canada, call 1-800-442-9991 and ask for the water supply to cool completely. ■ Recently dispensed large amount of water. ■ Refrigerator connected to reset before using a plastic utensil if necessary. Use only cubes produced...
... below or contact your cold water supply? The water pressure to your authorized KitchenAid dealer. In Canada, call 1-800-442-9991 and ask for the water supply to cool completely. ■ Recently dispensed large amount of water. ■ Refrigerator connected to reset before using a plastic utensil if necessary. Use only cubes produced...
User Instructions
Page 17
...appliance is used for replacement or repair of the refrigerator/freezer cavity liner (including labor costs) if the part cracks due to KitchenAid within 30 days from the date of purchase. 6. Service calls to refrigerator or freezer product failures. 7. Expenses for travel...The removal and reinstallation of your authorized KitchenAid dealer to you also may have been removed, altered or cannot be provided by an authorized KitchenAid servicer is inconsistent to correct defects in materials and workmanship. KITCHENAID® REFRIGERATOR WARRANTY LIMITED WARRANTY For one year from...
...appliance is used for replacement or repair of the refrigerator/freezer cavity liner (including labor costs) if the part cracks due to KitchenAid within 30 days from the date of purchase. 6. Service calls to refrigerator or freezer product failures. 7. Expenses for travel...The removal and reinstallation of your authorized KitchenAid dealer to you also may have been removed, altered or cannot be provided by an authorized KitchenAid servicer is inconsistent to correct defects in materials and workmanship. KITCHENAID® REFRIGERATOR WARRANTY LIMITED WARRANTY For one year from...
User Instructions
Page 18
Have your model number and serial number on the label, located on the inside wall of the refrigerator compartment. Please keep these User Instructions and the model number information for future reference. 18 For assistance or service in your correspondence. If you need ... Please include a daytime phone number in the U.S.A., call 1-800-807-6777. In Canada, call 1-800-422-1230. For additional product information, in the U.S.A., visit www.kitchenaid.com In Canada, visit www.kitchenaid.ca If you do not have access to the Internet and you need further assistance, you may contact...
Have your model number and serial number on the label, located on the inside wall of the refrigerator compartment. Please keep these User Instructions and the model number information for future reference. 18 For assistance or service in your correspondence. If you need ... Please include a daytime phone number in the U.S.A., call 1-800-807-6777. In Canada, call 1-800-422-1230. For additional product information, in the U.S.A., visit www.kitchenaid.com In Canada, visit www.kitchenaid.ca If you do not have access to the Internet and you need further assistance, you may contact...

Parts Diagram
Page 1
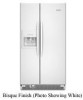
C W10246564 Rev. CABINET PARTS REFRIGERATOR For Models: KSRV22FVWH01, KSRV22FVBT01, KSRV22FVBL01, KSRV22FVSS01, KSRV22FVMS01 (White) (Biscuit) (Black) (Stainless) (Monochromatic Stainless) 5−09 Litho In U.S.A. (wam)(bay) 1 Part No.
C W10246564 Rev. CABINET PARTS REFRIGERATOR For Models: KSRV22FVWH01, KSRV22FVBT01, KSRV22FVBL01, KSRV22FVSS01, KSRV22FVMS01 (White) (Biscuit) (Black) (Stainless) (Monochromatic Stainless) 5−09 Litho In U.S.A. (wam)(bay) 1 Part No.

Parts Diagram
Page 4
...Roller 15 489211 Screw 16 W10142714 Crisper Pan 17 W10149982 Meat Pan 18 2174076 Window, Crisper 19 489261 Screw 20 2176095 Deflector 21 Cap, Crisper Pan 2223286 Right Side 2223285 Left Side 22 2174362 Window, Meat Pan 23 2327180 Shelf & Roller Assembly 24 ...2196485 Stud Assembly 25 3400894 Screw 26 2196483 Stud Assembly 27 8281158 Screw 4 W10246564 REFRIGERATOR SHELF PARTS For Models: KSRV22FVWH01, KSRV22FVBT01, KSRV22FVBL01, KSRV22FVSS01, KSRV22FVMS01 (White) (Biscuit) (Black) (Stainless) (Monochromatic Stainless) Illus. Part No.
...Roller 15 489211 Screw 16 W10142714 Crisper Pan 17 W10149982 Meat Pan 18 2174076 Window, Crisper 19 489261 Screw 20 2176095 Deflector 21 Cap, Crisper Pan 2223286 Right Side 2223285 Left Side 22 2174362 Window, Meat Pan 23 2327180 Shelf & Roller Assembly 24 ...2196485 Stud Assembly 25 3400894 Screw 26 2196483 Stud Assembly 27 8281158 Screw 4 W10246564 REFRIGERATOR SHELF PARTS For Models: KSRV22FVWH01, KSRV22FVBT01, KSRV22FVBL01, KSRV22FVSS01, KSRV22FVMS01 (White) (Biscuit) (Black) (Stainless) (Monochromatic Stainless) Illus. Part No.

Parts Diagram
Page 10
DESCRIPTION 1 Refrigerator Door (Includes Item 5) 2325248W White 2325248T Biscuit 2325248B Black 2323861S Stainless W10191409 Monochromatic 2 2256101 Door, Compartment 3 488208 Screw 4 2304235 Door Bin (3) 5 Door Gasket,...W10046670 White W10046700 Biscuit W10046640 Black W10046610 Grey 13 Set Screw W10010140 Chrome W10010150 Black 14 2309941 Trivet 15 3400012 Screw 10 W10246564 REFRIGERATOR DOOR PARTS For Models: KSRV22FVWH01, KSRV22FVBT01, KSRV22FVBL01, KSRV22FVSS01, KSRV22FVMS01 (White) (Biscuit) (Black) (Stainless) (Monochromatic Stainless) Illus. No. Part No...
DESCRIPTION 1 Refrigerator Door (Includes Item 5) 2325248W White 2325248T Biscuit 2325248B Black 2323861S Stainless W10191409 Monochromatic 2 2256101 Door, Compartment 3 488208 Screw 4 2304235 Door Bin (3) 5 Door Gasket,...W10046670 White W10046700 Biscuit W10046640 Black W10046610 Grey 13 Set Screw W10010140 Chrome W10010150 Black 14 2309941 Trivet 15 3400012 Screw 10 W10246564 REFRIGERATOR DOOR PARTS For Models: KSRV22FVWH01, KSRV22FVBT01, KSRV22FVBL01, KSRV22FVSS01, KSRV22FVMS01 (White) (Biscuit) (Black) (Stainless) (Monochromatic Stainless) Illus. No. Part No...

Parts Diagram
Page 16
...Harness (Includes Power Cord) 25 2188874 Fan, Motor Bracket 26 2188174 Heater, Defrost 27 2161324 Clip (2) 28 W10189229 Compressor (Includes Items 10, 13, 21, & 29) (Also Order 876765 Tube Kit) 29 Grommet (4) 1100826 Production 1100826 Service 30 489340 Screw (5) 31 W10163483 Air Baffle 32 2155547 Clip,... 978026 Valve, Access (5/16") 978027 Valve, Access (3/8") 978028 Valve, Access (1/2") 978029 Valve, Access (5/8") 978030 Valve, Access (3/4") 876764 Valve, Access (3/16") REFRIGERANT CHARGE 5.0 oz. (R−134A) 16 W10246564 No. Part No. Part No. No. Control Illus.
...Harness (Includes Power Cord) 25 2188874 Fan, Motor Bracket 26 2188174 Heater, Defrost 27 2161324 Clip (2) 28 W10189229 Compressor (Includes Items 10, 13, 21, & 29) (Also Order 876765 Tube Kit) 29 Grommet (4) 1100826 Production 1100826 Service 30 489340 Screw (5) 31 W10163483 Air Baffle 32 2155547 Clip,... 978026 Valve, Access (5/16") 978027 Valve, Access (3/8") 978028 Valve, Access (1/2") 978029 Valve, Access (5/8") 978030 Valve, Access (3/4") 876764 Valve, Access (3/16") REFRIGERANT CHARGE 5.0 oz. (R−134A) 16 W10246564 No. Part No. Part No. No. Control Illus.


