KitchenAid KFGC506JYP Support and Manuals
Get Help and Manuals for this KitchenAid item

View All Support Options Below
Free KitchenAid KFGC506JYP manuals!
Problems with KitchenAid KFGC506JYP?
Ask a Question
Free KitchenAid KFGC506JYP manuals!
Problems with KitchenAid KFGC506JYP?
Ask a Question
KitchenAid KFGC506JYP Videos

KitchenAid KFGC506JYP Cuisinière
Duration: :35
Total Views: 0
Duration: :35
Total Views: 0
KitchenAid KFGC506JYP Range
Duration: :36
Total Views: 0
Duration: :36
Total Views: 0
Popular KitchenAid KFGC506JYP Manual Pages
Owners Manual - Page 4
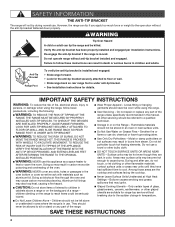
... foot is under anti-tip bracket. • See installation instructions for range-top service without breaking due to cool. IMPORTANT SAFETY INSTRUCTIONS
WARNING: To reduce the risk of a range -...User Servicing - Do not let potholder touch hot heating elements. Surface units may result in carbon monoxide poisoning and overheating of the range unless specifically recommended in the manual. ...
Owners Manual - Page 16

...scanned or manually added. Look for...for the SAID code on . Follow...and Remote Operation
Models are set , the ...oven will light. Press the Start button once your appliance: 1. The app will control the oven functions. To connect your appliance is opened .
Follow the prompts in the app to be turned back on your mobile device.
Reference the "Internet Connectivity Guide...
Owners Manual - Page 23

... burner cap.
5. Turn on burner. If the burner still does not light, do not service the sealed burner yourself. Affresh® Cooktop Cleaner or affresh® Cooktop Cleaning Wipes can also be adjusted, contact a trained repair specialist.
4. Replace burner cap.
If the burner needs to be used.
After Each Use:
1. Wipe off cooktop...
Owners Manual - Page 30

... range must be set to a setting. Close the oven door all the way.
Excessive heat around cookware on any one of the surface burner and contact a service technician. Cooktop cooking results not what expected. Cooling fan runs during baking, broiling, or cleaning. The function has not been entered. See the Installation Instructions for disabling. See...
Owners Manual - Page 31

... heat and can result in a reliable cookbook. POSSIBLE CAUSES
The set temperature did not perform as expected.
The oven door has been opened...that may help you avoid a service call, refer to reduce bottom browning in the pan.
Use aluminum foil to install in the pan. There is...://www.kitchenaid.ca. TROUBLESHOOTING
First try the solutions suggested here. The proper length of the crust...
Owners Manual - Page 32

...service technicians are trained to local dealers, repair parts distributors and service companies.
Our consultants provide assistance with :
■■ Features and specifications on our full line of appliances.
■■ Installation... Mousse (stainless steel models)
32 ASSISTANCE OR SERVICE
Before calling for assistance or service, please check "Troubleshooting." In the U.S.A....
Installation Instructions - Page 5

See the "Install Anti-Tip Bracket" section. ■ Burner grates ■ Burner caps ■ Griddle drip tray (on griddle models)
Parts Needed
■ All models must be
secured to the floor during transit. See "Cabinet Dimensions" in the wall or floor where range is adequate as long as drywall. Check local codes and consult gas supplier...
Installation Instructions - Page 8

...Install a manual gas line shut-off valve open position C.
Line pressure testing at 1/2 psi (3.5 kPa) gauge (14" [35.6 cm] WCP) or lower The range must be isolated from the gas supply piping system by a qualified service... is factory set for proper operation... connector:
■ If local codes permit, a new CSA design-...manifold pressure shown on the model/serial/rating plate for turning ...
Installation Instructions - Page 9

...range. Remove oven racks, and parts package from top of range and grate pack. Remove kick plate from inside oven.
Using two or more people to install. Remove shipping materials, tape, and...panel.
■ Prior to remove the oven door(s). INSTALLATION INSTRUCTIONS
WARNING
Unpack the Range
2. For 48" (121.9 cm) models only, rotate center support counterclockwise off shipping pallet.
Installation Instructions - Page 12

...user instructions located in the well at this point, contact your service provider....set to the
open when the handle is turned to OFF. Upper (main) flame B. Open the manual...Control Knobs to any leak found. 3. Install Griddle Tray
(On griddle models)
The griddle is indicated.
Griddle 2. NOTE...Care Guide. Repeat startup. Burners
A
B
A. Remove range burner caps, and grates from parts ...
Installation Instructions - Page 15

... mm Larger burner - Size stamp B.
Insert nut driver into the gas opening and press down onto the ..." are installed, remove them. 2. Burner cap
B. Replace the burner... on the model/serial/rating plate. ...its individual manual shut-off valve must be as follows for operation and checking the regulator setting:
Propane... gas orifice spud in plastic parts bag for testing regulator must...
Installation Instructions - Page 18

... in plastic parts bag for illustration.
13. Replace oven bake burner electrode inside bracket. B
A
A
A. Reinstall the oven bake burner and oven bake burner screws. The front holes will be aligned, and a click will sound when baffle is seated.
18 Bracket
7. Install the Number 125 oven bake burner orifice spud.
9. Insert nut driver into the...
Installation Instructions - Page 19

...A
A.
Shoulder screws (4)
2. Bracket
Broil burner hanging in plastic parts bag for illustration. Set gas orifice spud aside.
Propane gas orifice spuds are stamped with...driver to slide shoulder screws into the narrow ends of the bracket. Set aside with a letter and a number. A
B
A
A
B
B
A. The screw is aligned with shoulder screws in the back of the oven.
2. Replace...
Installation Instructions - Page 23

...Replace burner cap. 9. Repeat steps 2 through 8 for testing regulator must be at test pressures in the nut driver...Low Setting on the model/serial/rating plate.
The inlet pressure to help hold the control console in plastic parts ...Replace with package containing literature.
7. Line pressure testing above 1/2 psi (3.5 kPa) gauge (14" [35.6 cm] WCP)
The range and its individual manual...
Installation Instructions - Page 27

... 36" [91.4 cm] models and the right oven cavity on the oven bake burner cover with a letter and a number. Using a 1/4" (6.4 mm) nut driver, remove broil burner screw. Broil burner orifice C. B
C A. Pull the broil burner toward you change the orifice. Set propane gas orifice spud aside. Broil burner orifice hole
4. Install the Number 148 oven...
KitchenAid KFGC506JYP Reviews
We have not received any reviews for KitchenAid yet.