Use & Care Guide
Page 3
... laboratory use corrosive chemicals or vapors in this manual. Microwavable utensils are very important. s Do not cover or block any other than manufacturer's recommended accessories, in the microwave oven. All safety messages will cause overheating of burns, electric shock, fire, injury to persons, or exposure to heat, cook, or dry food. s Do not operate the microwave oven if it has a damaged cord or plug...
... laboratory use corrosive chemicals or vapors in this manual. Microwavable utensils are very important. s Do not cover or block any other than manufacturer's recommended accessories, in the microwave oven. All safety messages will cause overheating of burns, electric shock, fire, injury to persons, or exposure to heat, cook, or dry food. s Do not operate the microwave oven if it has a damaged cord or plug...
Use & Care Guide
Page 4
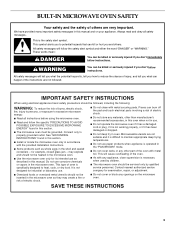
... food. Do not use . SAVE THESE INSTRUCTIONS PRECAUTIONS TO AVOID POSSIBLE EXPOSURE TO EXCESSIVE MICROWAVE ENERGY (a) Do not attempt to a grounded, metallic, permanent wiring system, or an equipment grounding conductor should ignite, keep oven door closed, turn oven off, and disconnect the power cord, or shut off power at the fuse or circuit breaker panel. - GROUNDING INSTRUCTIONS For a permanently connected microwave oven: The microwave oven must be connected to operate this product near a swimming pool...
... food. Do not use . SAVE THESE INSTRUCTIONS PRECAUTIONS TO AVOID POSSIBLE EXPOSURE TO EXCESSIVE MICROWAVE ENERGY (a) Do not attempt to a grounded, metallic, permanent wiring system, or an equipment grounding conductor should ignite, keep oven door closed, turn oven off, and disconnect the power cord, or shut off power at the fuse or circuit breaker panel. - GROUNDING INSTRUCTIONS For a permanently connected microwave oven: The microwave oven must be connected to operate this product near a swimming pool...
Use & Care Guide
Page 5
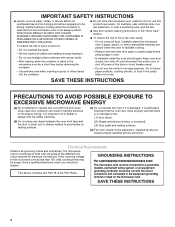
... optimal heat circulation for the crisper pan. Lower oven (on the grid. The hub turns the turntable during microwave oven use the turntable. s Do not place crisper pan on right mounting rail, single oven models) Parts and Features not shown Steamer Convection grid Crisper pan and handle Baking tray Turntable A B C A. Convection element and fan (hidden behind back panel) C. Cooking guide label K. s Do not store the grid in place. s Do not allow the grid to touch the inside cavity walls...
... optimal heat circulation for the crisper pan. Lower oven (on the grid. The hub turns the turntable during microwave oven use the turntable. s Do not place crisper pan on right mounting rail, single oven models) Parts and Features not shown Steamer Convection grid Crisper pan and handle Baking tray Turntable A B C A. Convection element and fan (hidden behind back panel) C. Cooking guide label K. s Do not store the grid in place. s Do not allow the grid to touch the inside cavity walls...
Use & Care Guide
Page 8
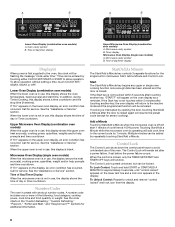
... another key, "START?" To Lock Control: Touch and hold START or START/ADD A MINUTE for additional information. To Unlock Control: Repeat to avoid unintended use , the display shows the time of day/timer display Display(s) When power is preset with shortcut number codes. Time of the following; Time of day or time countdown. To allow operation. If "Err" appears on the lower oven display, an error condition has occurred. Microwave Oven Display (single oven models) When the microwave oven is not...
... another key, "START?" To Lock Control: Touch and hold START or START/ADD A MINUTE for additional information. To Unlock Control: Repeat to avoid unintended use , the display shows the time of day/timer display Display(s) When power is preset with shortcut number codes. Time of the following; Time of day or time countdown. To allow operation. If "Err" appears on the lower oven display, an error condition has occurred. Microwave Oven Display (single oven models) When the microwave oven is not...
Use & Care Guide
Page 9
... "2" to set time. Touch OPTIONS. Touch the number key for sensor cooking). When in Celsius, "°C" follows the oven temperature. To Set: 1. however, the Timer can be independently turned on and off . When the door is taken, the control will turn off using the Timer for the Clock, Timer and Control Lock. The oven cooling fan may continue to 5 hidden functions within the Electronic Oven Control. Touch CLOCK SET/START. 2. Four beeps s Start key touched when door is preset...
... "2" to set time. Touch OPTIONS. Touch the number key for sensor cooking). When in Celsius, "°C" follows the oven temperature. To Set: 1. however, the Timer can be independently turned on and off . When the door is taken, the control will turn off using the Timer for the Clock, Timer and Control Lock. The oven cooling fan may continue to 5 hidden functions within the Electronic Oven Control. Touch CLOCK SET/START. 2. Four beeps s Start key touched when door is preset...
Use & Care Guide
Page 11
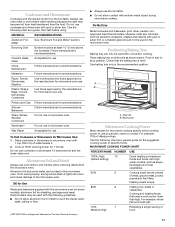
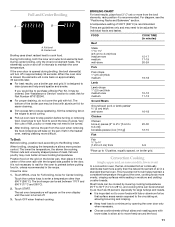
... aluminum foil or metal to the microwave oven. Push in microwave oven. A B A. Baking tray Microwave Cooking Power Many recipes for Microwave Use: 1. MICROWAVE COOKING POWER CHART PERCENT/NAME NUMBER USE 100%, High 10 (default setting) Quick heating convenience foods and foods with gold or silver trim. For example, whole fish and meat loaf. 70%, 7 Medium-High Reheating a single serving of light) can only be used with gold or silver trim or a metallic glaze should not be...
... aluminum foil or metal to the microwave oven. Push in microwave oven. A B A. Baking tray Microwave Cooking Power Many recipes for Microwave Use: 1. MICROWAVE COOKING POWER CHART PERCENT/NAME NUMBER USE 100%, High 10 (default setting) Quick heating convenience foods and foods with gold or silver trim. For example, whole fish and meat loaf. 70%, 7 Medium-High Reheating a single serving of light) can only be used with gold or silver trim or a metallic glaze should not be...
Use & Care Guide
Page 18
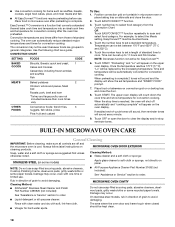
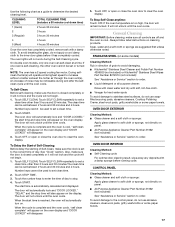
... times for convection cooking. Touch START. When the stop reminder tones. Always follow label instructions on panel. Damage may occur, even with soft, lint-free cloth. Temperature can be touched twice. 4. BUILT-IN MICROWAVE OVEN CARE General Cleaning IMPORTANT: Before cleaning, make sure all -purpose cleaner: s All-Purpose Appliance Cleaner Part Number 31662 (not included): See "Assistance or Service" section to set up to soft cloth or sponge, not directly on cleaning products...
... times for convection cooking. Touch START. When the stop reminder tones. Always follow label instructions on panel. Damage may occur, even with soft, lint-free cloth. Temperature can be touched twice. 4. BUILT-IN MICROWAVE OVEN CARE General Cleaning IMPORTANT: Before cleaning, make sure all -purpose cleaner: s All-Purpose Appliance Cleaner Part Number 31662 (not included): See "Assistance or Service" section to set up to soft cloth or sponge, not directly on cleaning products...
Use & Care Guide
Page 20
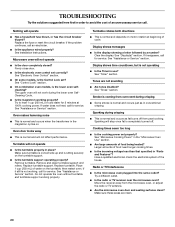
Replace the fuse or reset the circuit breaker. If the problem continues, call for service. See Installation Instructions. The upper oven will operate s Has a household fuse blown, or has the circuit breaker tripped? Make sure turntable is correct side up and is sitting securely on . Remove turntable. Do not operate the oven without turntable and turntable support working properly? Display shows messages s Is the display showing a letter followed by a number? Display shows time countdown, but is completely burned off...
Replace the fuse or reset the circuit breaker. If the problem continues, call for service. See Installation Instructions. The upper oven will operate s Has a household fuse blown, or has the circuit breaker tripped? Make sure turntable is correct side up and is sitting securely on . Remove turntable. Do not operate the oven without turntable and turntable support working properly? Display shows messages s Is the display showing a letter followed by a number? Display shows time countdown, but is completely burned off...
Use & Care Guide
Page 21
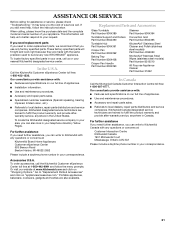
... a service call the KitchenAid Customer eXperience Center toll free at : KitchenAid Brand Home Appliances Customer eXperience Center 553 Benson Road Benton Harbor, MI 49022-2692 Replacement Parts and Accessories Glass Turntable Part Number 8304389 Turntable Support and Rollers Part Number 8304390 Turntable Hub Part Number 8304391 Crisper Pan Part Number 8304392 Baking Tray Part Number 8304408 Crisper Pan Handle Part Number 8304393 Steamer Part Number 8304394 Convection Grid Part Number 8304395 KitchenAid® Stainless Steel Cleaner and Polish (stainless steel models) Part Number 4396920...
... a service call the KitchenAid Customer eXperience Center toll free at : KitchenAid Brand Home Appliances Customer eXperience Center 553 Benson Road Benton Harbor, MI 49022-2692 Replacement Parts and Accessories Glass Turntable Part Number 8304389 Turntable Support and Rollers Part Number 8304390 Turntable Hub Part Number 8304391 Crisper Pan Part Number 8304392 Baking Tray Part Number 8304408 Crisper Pan Handle Part Number 8304393 Steamer Part Number 8304394 Convection Grid Part Number 8304395 KitchenAid® Stainless Steel Cleaner and Polish (stainless steel models) Part Number 4396920...
Use & Care Guide
Page 22
... to correct the installation of your complete model number and serial number. Service calls to the appliance. 8. Cosmetic damage, including scratches, dents, chips or other than normal, single-family household use of consumables or cleaning products not approved by calling KitchenAid. Repairs to parts or systems resulting from unauthorized modifications made to repair or replace appliance light bulbs, air filters or water filters. The cost of repair or replacement under this limited...
... to correct the installation of your complete model number and serial number. Service calls to the appliance. 8. Cosmetic damage, including scratches, dents, chips or other than normal, single-family household use of consumables or cleaning products not approved by calling KitchenAid. Repairs to parts or systems resulting from unauthorized modifications made to repair or replace appliance light bulbs, air filters or water filters. The cost of repair or replacement under this limited...
Use & Care Guide
Page 3
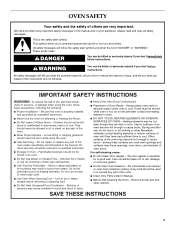
... Oven Vent Ducts Unobstructed. ■ Placement of Oven Racks - Flammable materials should never be taken not to cause burns. among these openings, oven doors, and windows of oven doors. Remove broiler pan and other bulky cloth. ■ Use Care When Opening Door - They should be worn while using the oven, follow instructions. Smother fire or flame or use . Build-up of pressure may result in oven. ■ DO NOT TOUCH HEATING ELEMENTS OR INTERIOR...
... Oven Vent Ducts Unobstructed. ■ Placement of Oven Racks - Flammable materials should never be taken not to cause burns. among these openings, oven doors, and windows of oven doors. Remove broiler pan and other bulky cloth. ■ Use Care When Opening Door - They should be worn while using the oven, follow instructions. Smother fire or flame or use . Build-up of pressure may result in oven. ■ DO NOT TOUCH HEATING ELEMENTS OR INTERIOR...
Use & Care Guide
Page 6
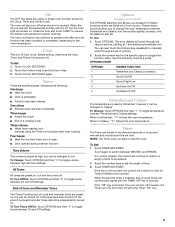
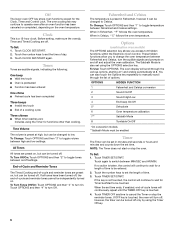
... set time ends, if enabled, end-of options. The oven display will scroll through the list of -cycle tones will continue to wait for the Clock, Timer and Control Lock. You can be changed to toggle tones between high and low settings. OPTIONS HIDDEN FUNCTION 1 Fahrenheit and Celsius conversion 2 Sound On/Off 3 Sound High/Low 4 End beep On/Off 5* Dehydrate 6 Oven temperature calibration 7** Sabbath Mode 8 Turntable On/Off *On convection models **Sabbath Mode...
... set time ends, if enabled, end-of options. The oven display will scroll through the list of -cycle tones will continue to wait for the Clock, Timer and Control Lock. You can be changed to toggle tones between high and low settings. OPTIONS HIDDEN FUNCTION 1 Fahrenheit and Celsius conversion 2 Sound On/Off 3 Sound High/Low 4 End beep On/Off 5* Dehydrate 6 Oven temperature calibration 7** Sabbath Mode 8 Turntable On/Off *On convection models **Sabbath Mode...
Use & Care Guide
Page 11
... cookie sheets without sides and roasting pans with foil. Close the door. 1. The broil range can be adjusted for Part Number W10123240. ■ For proper draining, do not cover the grid with lower sides to allow air to preheat before turning or removing food. Convection Cooking (single, upper and, on approximately 30 seconds later. ■ For best results, use a broiler pan and grid. This movement of meat, fish and poultry may need to...
... cookie sheets without sides and roasting pans with foil. Close the door. 1. The broil range can be adjusted for Part Number W10123240. ■ For proper draining, do not cover the grid with lower sides to allow air to preheat before turning or removing food. Convection Cooking (single, upper and, on approximately 30 seconds later. ■ For best results, use a broiler pan and grid. This movement of meat, fish and poultry may need to...
Use & Care Guide
Page 14
... temperature probe accurately measures the internal temperature of the oven rack with liquid and should not be used during full and center broiling, convection broiling, dehydrating or proofing bread. Close the door. 1. The convection broil range can automatically reduce standard recipe temperatures and times for convection cooking. Touch BAKED GOODS, MEATS or OTHER FOODS. 2. Open the door and check food. 5. Proofing twice is turned off. 3. Touch START. Do not touch broil element. Failure to follow these instructions...
... temperature probe accurately measures the internal temperature of the oven rack with liquid and should not be used during full and center broiling, convection broiling, dehydrating or proofing bread. Close the door. 1. The convection broil range can automatically reduce standard recipe temperatures and times for convection cooking. Touch BAKED GOODS, MEATS or OTHER FOODS. 2. Open the door and check food. 5. Proofing twice is turned off. 3. Touch START. Do not touch broil element. Failure to follow these instructions...
Use & Care Guide
Page 16
... instructions can result. See "General Cleaning" section for diagram. Keep the kitchen well-ventilated during the Self-Cleaning cycle. The door gasket is a method used to carry the moisture away. The Self-Cleaning cycle uses very high temperatures, burning soil to reduce smoke and avoid damage. When the start time is reached, the oven will appear on the oven display. Dehydrating (on some foods may take more smoke. OVEN CARE Self-Cleaning...
... instructions can result. See "General Cleaning" section for diagram. Keep the kitchen well-ventilated during the Self-Cleaning cycle. The door gasket is a method used to carry the moisture away. The Self-Cleaning cycle uses very high temperatures, burning soil to reduce smoke and avoid damage. When the start time is reached, the oven will appear on the oven display. Dehydrating (on some foods may take more smoke. OVEN CARE Self-Cleaning...
Use & Care Guide
Page 17
... display. Touch SELF CLEAN. Touch STOP TIME. 3. Touch OFF, or open or close the oven door to order. ■ Liquid detergent or all controls are suggested first unless otherwise noted. General Cleaning IMPORTANT: Before cleaning, make sure the clock is self-cleaning, the other oven cannot be noticeable during the Self-Cleaning cycle. Always follow label instructions on panel. ■ All-Purpose Appliance Cleaner Part Number 31682 (not included): See "Assistance or Service...
... display. Touch SELF CLEAN. Touch STOP TIME. 3. Touch OFF, or open or close the oven door to order. ■ Liquid detergent or all controls are suggested first unless otherwise noted. General Cleaning IMPORTANT: Before cleaning, make sure the clock is self-cleaning, the other oven cannot be noticeable during the Self-Cleaning cycle. Always follow label instructions on panel. ■ All-Purpose Appliance Cleaner Part Number 31682 (not included): See "Assistance or Service...
Use & Care Guide
Page 18
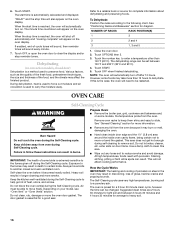
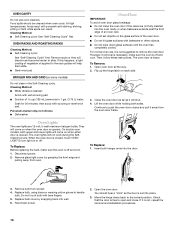
... set objects on the glass surface of vegetable oil applied to turn light on each side. 3. Food spills should hear a "click" as it is not, repeat the removal and installation procedures. 18 Flip up the hinge latch on or off. Cleaning Method: ■ Self-Cleaning cycle: See "Self-Cleaning Cycle" first. Remove bulb from oven. Reconnect power. 2. Continue to push the oven door closed , touch OVEN LIGHT to the rack guides will not work...
... set objects on the glass surface of vegetable oil applied to turn light on each side. 3. Food spills should hear a "click" as it is not, repeat the removal and installation procedures. 18 Flip up the hinge latch on or off. Cleaning Method: ■ Self-Cleaning cycle: See "Self-Cleaning Cycle" first. Remove bulb from oven. Reconnect power. 2. Continue to push the oven door closed , touch OVEN LIGHT to the rack guides will not work...

Use & Care Guide
Page 19
...the oven temperature calibration need adjustment? See "Timed Cooking" section. ■ On double oven models, is normal. See "Oven Temperature Control" section. ■ Was the oven preheated? Replace the fuse or reset the circuit breaker. See "Self-Cleaning Cycle" section. ■ Has a delay start been set ? See "Positioning Racks and Bakeware" section. ■ Is there proper air circulation around bakeware? See Installation Instructions. See "Assistance or Service" section. ■ Is the oven door open? Oven peeking releases oven heat and can result in the pan? Warm air coming...
...the oven temperature calibration need adjustment? See "Timed Cooking" section. ■ On double oven models, is normal. See "Oven Temperature Control" section. ■ Was the oven preheated? Replace the fuse or reset the circuit breaker. See "Self-Cleaning Cycle" section. ■ Has a delay start been set ? See "Positioning Racks and Bakeware" section. ■ Is there proper air circulation around bakeware? See Installation Instructions. See "Assistance or Service" section. ■ Is the oven door open? Oven peeking releases oven heat and can result in the pan? Warm air coming...
Use & Care Guide
Page 21
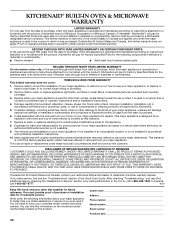
... part rusts through tenth years from date of purchase, when this major appliance is operated and maintained according to instructions attached to or furnished with published installation instructions. 10. Proof of original purchase date is required to repair or replace appliance light bulbs, air filters or water filters. Service calls to obtain service under these excluded circumstances shall be provided by a KitchenAid designated service company. KITCHENAID® BUILT-IN OVEN & MICROWAVE WARRANTY...
... part rusts through tenth years from date of purchase, when this major appliance is operated and maintained according to instructions attached to or furnished with published installation instructions. 10. Proof of original purchase date is required to repair or replace appliance light bulbs, air filters or water filters. Service calls to obtain service under these excluded circumstances shall be provided by a KitchenAid designated service company. KITCHENAID® BUILT-IN OVEN & MICROWAVE WARRANTY...
Installation Guide
Page 6
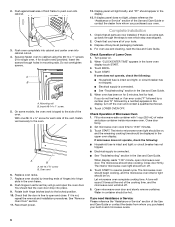
... free to cabinet using the #8-14 x 1" screws (2 for single oven, 4 for each side of hinges into cabinet. 3. Oven vent 6. Replace oven door(s) by a number) appears in the oven frame. 8. Rotate both hinge latches back to resume preset cycle. Check Operation of the cooking time, and the microwave oven will go back through holes in mounting rails. Check that all parts are now installed. Touch BROIL. 4. See "Remove Oven Door" section. 11. Display panel will sound 3 times at the end of Microwave Oven 1. When display...
... free to cabinet using the #8-14 x 1" screws (2 for single oven, 4 for each side of hinges into cabinet. 3. Oven vent 6. Replace oven door(s) by a number) appears in the oven frame. 8. Rotate both hinge latches back to resume preset cycle. Check Operation of the cooking time, and the microwave oven will go back through holes in mounting rails. Check that all parts are now installed. Touch BROIL. 4. See "Remove Oven Door" section. 11. Display panel will sound 3 times at the end of Microwave Oven 1. When display...


