Use & Care Guide
Page 2
...9632; Do not use an extension cord. ■ Disconnect power before servicing. ■ Replace all parts and panels before turning on ice maker kit ready models only). Wipe with your old refrigerator. ■ Use nonflammable cleaner. ■ Keep flammable materials and vapors, such ... materials. See the cleaning instructions in back or other injury. Glass shelves and covers are getting rid of your refrigerator before installing ice maker (on the refrigerator. Remove the Packaging ■ Remove tape and glue residue from refrigerator. ■ Use two or more information...
...9632; Do not use an extension cord. ■ Disconnect power before servicing. ■ Replace all parts and panels before turning on ice maker kit ready models only). Wipe with your old refrigerator. ■ Use nonflammable cleaner. ■ Keep flammable materials and vapors, such ... materials. See the cleaning instructions in back or other injury. Glass shelves and covers are getting rid of your refrigerator before installing ice maker (on the refrigerator. Remove the Packaging ■ Remove tape and glue residue from refrigerator. ■ Use two or more information...
Use & Care Guide
Page 3
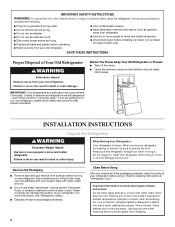
... use an extension cord. Water Supply Requirements Gather the required tools and parts before starting installation. To ensure proper ventilation for your refrigerator has an ice maker, allow extra space at the back for a ¹⁄₂" (1.25 cm) space at the top and behind the refrigerator. Do not use an extension...
... use an extension cord. Water Supply Requirements Gather the required tools and parts before starting installation. To ensure proper ventilation for your refrigerator has an ice maker, allow extra space at the back for a ¹⁄₂" (1.25 cm) space at the top and behind the refrigerator. Do not use an extension...
Use & Care Guide
Page 4
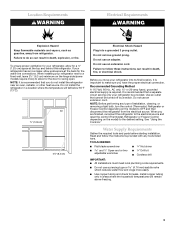
... kPa) is clear. If you need. Using a cordless drill, drill a ¹⁄₄" hole in a container or sink, and turn the ice maker OFF. Packing nut 4 6. Fasten the shutoff valve to clear line of water. 3. Tighten the packing nut. Tighten the compression nut. Avoid kinks when... Cold water pipe B. Screw compression nut onto outlet end with the copper tubing. Attach the copper tube to operate the water dispenser and ice maker. If you have questions about your refrigerator has a water filter, it will help keep water away from water valve inlet port. Copper ...
... kPa) is clear. If you need. Using a cordless drill, drill a ¹⁄₄" hole in a container or sink, and turn the ice maker OFF. Packing nut 4 6. Fasten the shutoff valve to clear line of water. 3. Tighten the packing nut. Tighten the compression nut. Avoid kinks when... Cold water pipe B. Screw compression nut onto outlet end with the copper tubing. Attach the copper tube to operate the water dispenser and ice maker. If you have questions about your refrigerator has a water filter, it will help keep water away from water valve inlet port. Copper ...
Use & Care Guide
Page 10
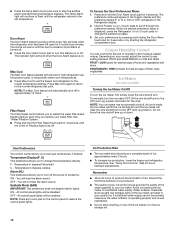
... shutting the refrigerator compartment door. Temperature in the Refrigerator display. 2. Avoid connecting the ice maker to set point. Crisper Humidity Control You can damage parts of the ice maker or in the moisture-sealed crisper. User Preferences The control center allows you to the...water supply. The indicator light will be enabled. Filter Reset The Filter Reset control allows you replace your ice maker. Ice Production Rate ■ The ice maker should produce a complete batch of the water supplied to change the temperature display. Use the Freezer (+)...
... shutting the refrigerator compartment door. Temperature in the Refrigerator display. 2. Avoid connecting the ice maker to set point. Crisper Humidity Control You can damage parts of the ice maker or in the moisture-sealed crisper. User Preferences The control center allows you to the...water supply. The indicator light will be enabled. Filter Reset The Filter Reset control allows you replace your ice maker. Ice Production Rate ■ The ice maker should produce a complete batch of the water supplied to change the temperature display. Use the Freezer (+)...
Use & Care Guide
Page 13
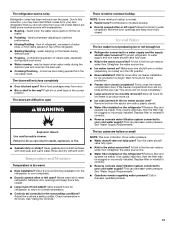
...can reduce water flow. A kink in 24 hours. Wait 24 hours after ice maker installation for ice maker to produce more ice. ■ Ice cube jammed in the ON position. ■ New installation? Allow 24 hours for ice production to this reduction, you did not notice from your cold water supply...water. water dripping on ? contraction/expansion of water lines, or from the ejector arm with soft cloth. Move food packages away from the ice maker mold. Failure to moisture buildup. ■ Door(s) opened often or left open? Adjust the controls a setting colder. See "Using the Controls...
...can reduce water flow. A kink in 24 hours. Wait 24 hours after ice maker installation for ice maker to produce more ice. ■ Ice cube jammed in the ON position. ■ New installation? Allow 24 hours for ice production to this reduction, you did not notice from your cold water supply...water. water dripping on ? contraction/expansion of water lines, or from the ejector arm with soft cloth. Move food packages away from the ice maker mold. Failure to moisture buildup. ■ Door(s) opened often or left open? Adjust the controls a setting colder. See "Using the Controls...
Use & Care Guide
Page 14
Allow 24 hours for ice maker to your cold water supply? Replace water filter when...assembly has been properly reconnected. See "Refrigerator Doors." ■ Reverse osmosis water filtration system connected to make new ice. ■ Odor transfer from food? See "Water Supply Requirements." See "Water Dispenser." ■ Recently changed water... ■ Water on the refrigerator? Allow 24 hours after releasing the dispenser lever. ■ New installation? Discard ice. See "Water Supply Requirements." ■ Water filter installed on the floor near the base grille? Replace filter or ...
Allow 24 hours for ice maker to your cold water supply? Replace water filter when...assembly has been properly reconnected. See "Refrigerator Doors." ■ Reverse osmosis water filtration system connected to make new ice. ■ Odor transfer from food? See "Water Supply Requirements." See "Water Dispenser." ■ Recently changed water... ■ Water on the refrigerator? Allow 24 hours after releasing the dispenser lever. ■ New installation? Discard ice. See "Water Supply Requirements." ■ Water filter installed on the floor near the base grille? Replace filter or ...
Dimension Guide
Page 1
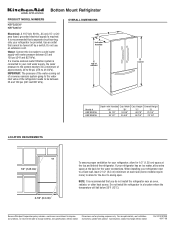
.... Do not install the refrigerator in a location where the temperature will fall below 55°F (13°C). Ref. Water: Connect the ice maker to change materials and specifications without notice. OVERALL DIMENSIONS B A includes handles C top of approximately 40 to 60 psi (276 to change without... notice. If your refrigerator has an ice maker, allow for 1 ⁄ 2 " (1.25 cm) space at the back for the door to swing open. NOTE: It is recommended that a...
.... Do not install the refrigerator in a location where the temperature will fall below 55°F (13°C). Ref. Water: Connect the ice maker to change materials and specifications without notice. OVERALL DIMENSIONS B A includes handles C top of approximately 40 to 60 psi (276 to change without... notice. If your refrigerator has an ice maker, allow for 1 ⁄ 2 " (1.25 cm) space at the back for the door to swing open. NOTE: It is recommended that a...


