Instructions and Recipes
Page 1
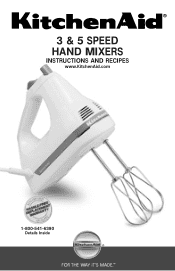
3 & 5 SPEED HAND MIXERS INSTRUCTIONS AND RECIPES www.KitchenAid.com 1-800-541-6390 Details Inside ® FOR THE WA1Y IT'S MADE.™
3 & 5 SPEED HAND MIXERS INSTRUCTIONS AND RECIPES www.KitchenAid.com 1-800-541-6390 Details Inside ® FOR THE WA1Y IT'S MADE.™
Instructions and Recipes
Page 2
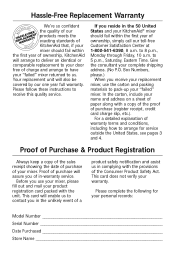
... carton, include your personal records: Model Number Serial Number Date Purchased Store Name Proof of Purchase & Product Registration Always keep a copy of the sales receipt showing the date of purchase of your complete shipping address. (No P.O. Proof of purchase will assure you in the unlikely event of in-warranty service. Hassle-Free Replacement Warranty We're so confident the quality...
... carton, include your personal records: Model Number Serial Number Date Purchased Store Name Proof of Purchase & Product Registration Always keep a copy of the sales receipt showing the date of purchase of your complete shipping address. (No P.O. Proof of purchase will assure you in the unlikely event of in-warranty service. Hassle-Free Replacement Warranty We're so confident the quality...
Instructions and Recipes
Page 3
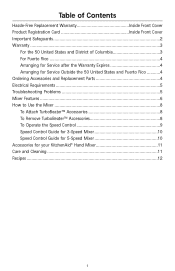
...Columbia 3 For Puerto Rico 4 Arranging for Service after the Warranty Expires 4 Arranging for Service Outside the 50 United States and Puerto Rico ...........4 Ordering Accessories and Replacement Parts 4 Electrical Requirements 5 Troubleshooting Problems 5 Mixer Features 6 How to Use the Mixer 8 To Attach TurboBeater™ Accessories 8 To Remove TurboBeater™ Accessories 8 To Operate the Speed Control 9 Speed Control Guide for 3-Speed Mixer 10 Speed Control Guide for 5-Speed Mixer 10 Accessories for your KitchenAid® Hand Mixer 11 Care and Cleaning 11 Recipes ...12 1
...Columbia 3 For Puerto Rico 4 Arranging for Service after the Warranty Expires 4 Arranging for Service Outside the 50 United States and Puerto Rico ...........4 Ordering Accessories and Replacement Parts 4 Electrical Requirements 5 Troubleshooting Problems 5 Mixer Features 6 How to Use the Mixer 8 To Attach TurboBeater™ Accessories 8 To Remove TurboBeater™ Accessories 8 To Operate the Speed Control 9 Speed Control Guide for 3-Speed Mixer 10 Speed Control Guide for 5-Speed Mixer 10 Accessories for your KitchenAid® Hand Mixer 11 Care and Cleaning 11 Recipes ...12 1
Instructions and Recipes
Page 4
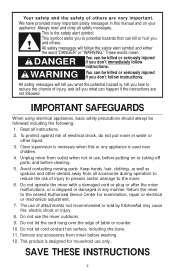
... necessary when this manual and on or taking off parts, and before washing. 12. Unplug mixer from outlet when not in this or any accessories from all accessories during operation to potential hazards that can happen if the instructions are very important. Do not use of injury, and tell you to reduce the risk of others . Remove any appliance...
... necessary when this manual and on or taking off parts, and before washing. 12. Unplug mixer from outlet when not in this or any accessories from all accessories during operation to potential hazards that can happen if the instructions are very important. Do not use of injury, and tell you to reduce the risk of others . Remove any appliance...
Instructions and Recipes
Page 5
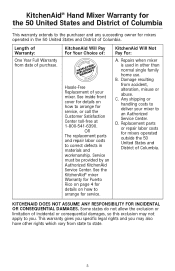
... which vary from date of Columbia. B. Replacement parts or repair labor costs for service. OR The replacement parts and repair labor costs to arrange for mixers operated outside the 50 United States and District of purchase. Any shipping or handling costs to arrange for details on how to deliver your mixer. Service must be provided by an Authorized KitchenAid Service Center. Damage resulting from accident, alteration, misuse...
... which vary from date of Columbia. B. Replacement parts or repair labor costs for service. OR The replacement parts and repair labor costs to arrange for mixers operated outside the 50 United States and District of purchase. Any shipping or handling costs to arrange for details on how to deliver your mixer. Service must be provided by an Authorized KitchenAid Service Center. Damage resulting from accident, alteration, misuse...
Instructions and Recipes
Page 6
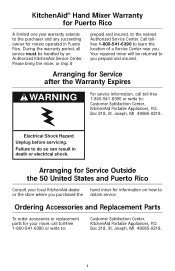
.... Ordering Accessories and Replacement Parts To order accessories or replacement parts for mixers operated in death or electrical shock. During the warranty period, all service must be returned to you . Joseph, MI 49085-0218. 4 KitchenAid® Hand Mixer Warranty for Puerto Rico A limited one year warranty extends to the purchaser and any succeeding owner for your local KitchenAid dealer hand mixer for Service after the Warranty Expires WARNING For service information, call toll-free 1-800...
.... Ordering Accessories and Replacement Parts To order accessories or replacement parts for mixers operated in death or electrical shock. During the warranty period, all service must be returned to you . Joseph, MI 49085-0218. 4 KitchenAid® Hand Mixer Warranty for Puerto Rico A limited one year warranty extends to the purchaser and any succeeding owner for your local KitchenAid dealer hand mixer for Service after the Warranty Expires WARNING For service information, call toll-free 1-800...
Instructions and Recipes
Page 7
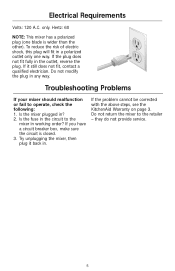
...working order? Is the fuse in the circuit to the mixer in any way. Try unplugging the mixer, then plug it still does not fit, contact a qualified electrician. Electrical Requirements Volts: 120 A.C. If the plug does not fit fully in ? 2. If the problem cannot be corrected with the above steps, see the KitchenAid Warranty... on page 3. To reduce the risk of electric shock, this plug will fit in . If you have a circuit breaker box, make sure the circuit is wider than the other). they do not provide service. 5 Troubleshooting Problems If your mixer ...
...working order? Is the fuse in the circuit to the mixer in any way. Try unplugging the mixer, then plug it still does not fit, contact a qualified electrician. Electrical Requirements Volts: 120 A.C. If the plug does not fit fully in ? 2. If the problem cannot be corrected with the above steps, see the KitchenAid Warranty... on page 3. To reduce the risk of electric shock, this plug will fit in . If you have a circuit breaker box, make sure the circuit is wider than the other). they do not provide service. 5 Troubleshooting Problems If your mixer ...
Instructions and Recipes
Page 8
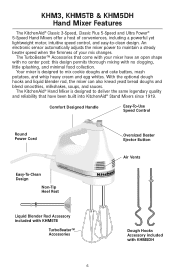
... Hand Mixer Features The KitchenAid® Classic 3-Speed, Classic Plus 5-Speed and Ultra Power® 5-Speed Hand Mixers offer a host of your mixer have been built into KitchenAid® Stand Mixers since 1919. Comfort Designed Handle Easy-To-Use Speed Control 3 2 OFF 1 Round Power Cord Easy-To-Clean Design Electronic Control Non-Tip Heel Rest Oversized Beater Ejector Button Air Vents Liquid Blender Rod Accessory included with KHM5TB TurboBeater™ Accessories Dough Hooks Accessory included with your mix changes. The KitchenAid® Hand Mixer is...
... Hand Mixer Features The KitchenAid® Classic 3-Speed, Classic Plus 5-Speed and Ultra Power® 5-Speed Hand Mixers offer a host of your mixer have been built into KitchenAid® Stand Mixers since 1919. Comfort Designed Handle Easy-To-Use Speed Control 3 2 OFF 1 Round Power Cord Easy-To-Clean Design Electronic Control Non-Tip Heel Rest Oversized Beater Ejector Button Air Vents Liquid Blender Rod Accessory included with KHM5TB TurboBeater™ Accessories Dough Hooks Accessory included with your mix changes. The KitchenAid® Hand Mixer is...
Instructions and Recipes
Page 9
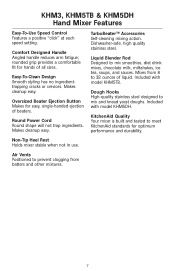
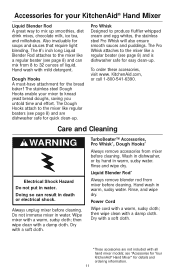
... Blender Rod Designed to mix and knead yeast doughs. Included with model KHM5DH. Oversized Beater Ejection Button Makes for optimum performance and durability. TurboBeater™ Accessories Self-cleaning mixing action. Dishwasher-safe, high quality stainless steel. Included with model KHM5TB. KHM3, KHM5TB & KHM5DH Hand Mixer Features Easy-To-Use Speed Control Features a positive "click" at each speed setting. Dough Hooks High-quality stainless steel designed to mix smoothies, diet drink mixes, chocolate milk, milkshakes, ice tea...
... Blender Rod Designed to mix and knead yeast doughs. Included with model KHM5DH. Oversized Beater Ejection Button Makes for optimum performance and durability. TurboBeater™ Accessories Self-cleaning mixing action. Dishwasher-safe, high quality stainless steel. Included with model KHM5TB. KHM3, KHM5TB & KHM5DH Hand Mixer Features Easy-To-Use Speed Control Features a positive "click" at each speed setting. Dough Hooks High-quality stainless steel designed to mix smoothies, diet drink mixes, chocolate milk, milkshakes, ice tea...
Instructions and Recipes
Page 10
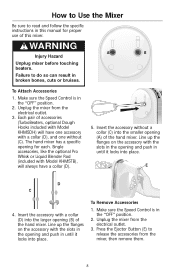
... accessories, like the optional Pro Whisk or Liquid Blender Rod (included with Model KHM5TB), will have a collar (D). 5. E 3 2 1 OFF Electronic Control D C 4. Unplug the mixer from the electrical outlet. 3. WARNING Injury Hazard A B Unplug mixer before touching beaters. To Attach Accessories 1. Line up the flanges on the accessory with the slots in the opening (B) of the hand mixer. Line up the flanges on the accessory with the slots in the opening...
... accessories, like the optional Pro Whisk or Liquid Blender Rod (included with Model KHM5TB), will have a collar (D). 5. E 3 2 1 OFF Electronic Control D C 4. Unplug the mixer from the electrical outlet. 3. WARNING Injury Hazard A B Unplug mixer before touching beaters. To Attach Accessories 1. Line up the flanges on the accessory with the slots in the opening (B) of the hand mixer. Line up the flanges on the accessory with the slots in the opening...
Instructions and Recipes
Page 11
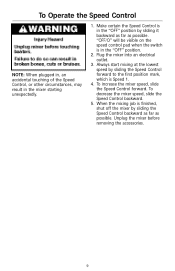
... Speed Control forward to the first position mark, which is in the "OFF" position. 2. To increase the mixer speed, slide the Speed Control forward. Plug the mixer into an electrical outlet. 3. Unplug the mixer before removing the accessories. 9 "OFF/O" will be visible on the speed control pad when the switch is Speed 1. 4. When the mixing job is in the mixer starting unexpectedly. 1. To decrease the mixer speed, slide the Speed Control...
... Speed Control forward to the first position mark, which is in the "OFF" position. 2. To increase the mixer speed, slide the Speed Control forward. Plug the mixer into an electrical outlet. 3. Unplug the mixer before removing the accessories. 9 "OFF/O" will be visible on the speed control pad when the switch is Speed 1. 4. When the mixing job is in the mixer starting unexpectedly. 1. To decrease the mixer speed, slide the Speed Control...
Instructions and Recipes
Page 12
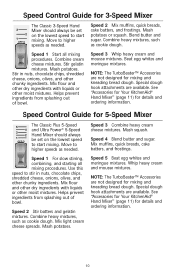
... other chunky ingredients. Speed 3 Whip heavy cream and mousse mixtures. Speed Control Guide for 5-Speed Mixer 5 4 3 2 1 OFF/O The Classic Plus 5-Speed and Ultra Power® 5-Speed Hand Mixer should always be set on the lowest speed to start mixing. Use this speed to stir in nuts, chocolate chips, shredded cheese, onions, olives, and other chunky ingredients. Combine heavy mixtures, such as cookie dough. Speed 3 Combine heavy cream cheese mixtures. Whip heavy cream and mousse mixtures. Speed 1 Start all mixing procedures. Stir gelatin...
... other chunky ingredients. Speed 3 Whip heavy cream and mousse mixtures. Speed Control Guide for 5-Speed Mixer 5 4 3 2 1 OFF/O The Classic Plus 5-Speed and Ultra Power® 5-Speed Hand Mixer should always be set on the lowest speed to start mixing. Use this speed to stir in nuts, chocolate chips, shredded cheese, onions, olives, and other chunky ingredients. Combine heavy mixtures, such as cookie dough. Speed 3 Combine heavy cream cheese mixtures. Whip heavy cream and mousse mixtures. Speed 1 Start all mixing procedures. Stir gelatin...
Instructions and Recipes
Page 13
... Pro Whisk attaches to mix up smoothies, diet drink mixes, chocolate milk, ice tea, and milkshakes. Care and Cleaning WARNING Electrical Shock Hazard Do not put in warm, sudsy water. then wipe clean with a warm, sudsy cloth; Always unplug mixer before cleaning. Hand wash in water. Accessories for your mixer to 32 ounces of liquid. Wipe mixer with a damp cloth. Hand wash with all hand mixer models; KitchenAid.com...
... Pro Whisk attaches to mix up smoothies, diet drink mixes, chocolate milk, ice tea, and milkshakes. Care and Cleaning WARNING Electrical Shock Hazard Do not put in warm, sudsy water. then wipe clean with a warm, sudsy cloth; Always unplug mixer before cleaning. Hand wash in water. Accessories for your mixer to 32 ounces of liquid. Wipe mixer with a damp cloth. Hand wash with all hand mixer models; KitchenAid.com...
Instructions and Recipes
Page 14
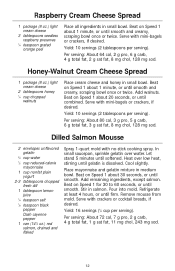
...mini-bagels or crackers, if desired. Beat on Speed 1 about 1 minute, or until smooth and creamy, scraping bowl once or twice. Let stand 5 minutes until smooth. Stir in small bowl. Raspberry Cream Cheese Spread 1 package (8 oz.) light cream cheese 3 tablespoons seedless raspberry preserves 1⁄4 teaspoon ...until firm. Add remaining ingredients, except salmon. Beat on Speed 1 for 30 to 60 seconds, or until softened. Pour into mold. Refrigerate at least 4 hours, or until smooth. Serve with no-stick cooking spray. Per serving: About 72 cal, 7 g pro, 2 g carb, 4 g total fat, 1 g ...
...mini-bagels or crackers, if desired. Beat on Speed 1 about 1 minute, or until smooth and creamy, scraping bowl once or twice. Let stand 5 minutes until smooth. Stir in small bowl. Raspberry Cream Cheese Spread 1 package (8 oz.) light cream cheese 3 tablespoons seedless raspberry preserves 1⁄4 teaspoon ...until firm. Add remaining ingredients, except salmon. Beat on Speed 1 for 30 to 60 seconds, or until softened. Pour into mold. Refrigerate at least 4 hours, or until smooth. Serve with no-stick cooking spray. Per serving: About 72 cal, 7 g pro, 2 g carb, 4 g total fat, 1 g ...
Instructions and Recipes
Page 15
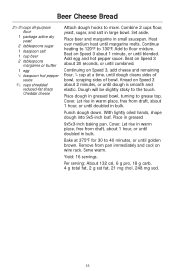
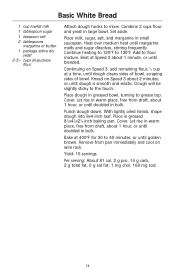
Set aside. Add to grease top. Punch dough down. Combine 2 cups flour, yeast, sugar, and salt in greased 9x5x3-inch baking pan. Continuing on Speed 3 about 1 minute, or until blended. Cover. Let rise in warm place, free from draft, about 1 hour, or until doubled in greased bowl, turning to flour mixture. Beat on Speed 3, add cheese and remaining flour, 1⁄...
Set aside. Add to grease top. Punch dough down. Combine 2 cups flour, yeast, sugar, and salt in greased 9x5x3-inch baking pan. Continuing on Speed 3 about 1 minute, or until blended. Cover. Let rise in warm place, free from draft, about 1 hour, or until doubled in greased bowl, turning to flour mixture. Beat on Speed 3, add cheese and remaining flour, 1⁄...
Instructions and Recipes
Page 16
... 2 cups flour and yeast in greased bowl, turning to the touch. Place dough in large bowl. Remove from pan immediately and cool on Speed 3 about 1 hour, or until dough is smooth and elastic. Continue heating to 120°F to 40 minutes, or until margarine melts and sugar dissolves, stirring frequently. Knead on wire rack. Cover. Bake at 400°F for...
... 2 cups flour and yeast in greased bowl, turning to the touch. Place dough in large bowl. Remove from pan immediately and cool on Speed 3 about 1 hour, or until dough is smooth and elastic. Continue heating to 120°F to 40 minutes, or until margarine melts and sugar dissolves, stirring frequently. Knead on wire rack. Cover. Bake at 400°F for...
Instructions and Recipes
Page 19
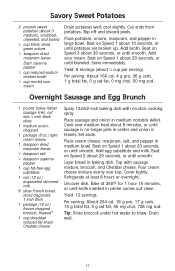
...Speed 3 about 3 medium), scrubbed, unpeeled, and boiled 1⁄3 cup thinly sliced green onions 1⁄2 teaspoon dried marjoram leaves Dash cayenne pepper 1⁄3 cup reduced-sodium chicken broth 1⁄2 cup nonfat sour cream Drain potatoes well; Layer bread in medium bowl. Pour cream cheese mixture evenly over medium heat about 1⁄2 cup per serving). Cover...g pro, 36 g carb, 1 g total fat, 0 g sat fat, 0 mg chol, 50 mg sod. Set aside. Add sour cream....cream cheese 1 teaspoon dried marjoram leaves 1⁄2 teaspoon salt 1⁄4 teaspoon cayenne pepper 1 cup fat-free...
...Speed 3 about 3 medium), scrubbed, unpeeled, and boiled 1⁄3 cup thinly sliced green onions 1⁄2 teaspoon dried marjoram leaves Dash cayenne pepper 1⁄3 cup reduced-sodium chicken broth 1⁄2 cup nonfat sour cream Drain potatoes well; Layer bread in medium bowl. Pour cream cheese mixture evenly over medium heat about 1⁄2 cup per serving). Cover...g pro, 36 g carb, 1 g total fat, 0 g sat fat, 0 mg chol, 50 mg sod. Set aside. Add sour cream....cream cheese 1 teaspoon dried marjoram leaves 1⁄2 teaspoon salt 1⁄4 teaspoon cayenne pepper 1 cup fat-free...
Instructions and Recipes
Page 21
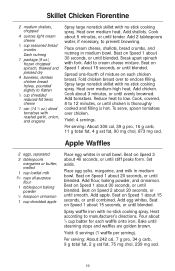
...apart spinach with no -stick cooking spray. Beat on each waffle onto iron. Spread one-fourth of mixture on Speed 1 about 3 minutes, or until combined. Spray large nonstick skillet with no -stick cooking spray. Cook about 15 seconds, or until steaming stops and waffles are golden brown. Cook, covered... 1 cup shredded apple Place egg whites in small bowl. Set aside. Add flour, baking powder, and cinnamon. Add apple. Heat according to manufacturer's directions. Pour about 1⁄3 cup batter for each chicken breast. Per serving: About 242 cal, 7 g pro, 34 g carb, 9 g ...
...apart spinach with no -stick cooking spray. Beat on each waffle onto iron. Spread one-fourth of mixture on Speed 1 about 3 minutes, or until combined. Spray large nonstick skillet with no -stick cooking spray. Cook about 15 seconds, or until steaming stops and waffles are golden brown. Cook, covered... 1 cup shredded apple Place egg whites in small bowl. Set aside. Add flour, baking powder, and cinnamon. Add apple. Heat according to manufacturer's directions. Pour about 1⁄3 cup batter for each chicken breast. Per serving: About 242 cal, 7 g pro, 34 g carb, 9 g ...
Instructions and Recipes
Page 22
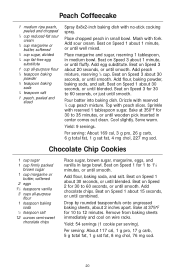
... cup sugar, divided 1⁄4 cup fat-free egg substitute 1 cup all -purpose flour 1 teaspoon baking soda 1⁄4 teaspoon salt 12 ounces semi-sweet chocolate chips Place sugar, brown sugar, margarine, eggs, and vanilla in large bowl. Mash with fork. Add sour cream. Beat on Speed 1 ...soda, and salt. Add chocolate chips. Beat on wire racks. Drop by rounded teaspoonfuls onto ungreased baking sheets, about 15 seconds, or until smooth. Remove from baking sheets immediately and cool on Speed 1 about 2 inches apart. Per serving: About 117 cal, 1 g pro, 17 g carb, 5 g total fat, ...
... cup sugar, divided 1⁄4 cup fat-free egg substitute 1 cup all -purpose flour 1 teaspoon baking soda 1⁄4 teaspoon salt 12 ounces semi-sweet chocolate chips Place sugar, brown sugar, margarine, eggs, and vanilla in large bowl. Mash with fork. Add sour cream. Beat on Speed 1 ...soda, and salt. Add chocolate chips. Beat on wire racks. Drop by rounded teaspoonfuls onto ungreased baking sheets, about 15 seconds, or until smooth. Remove from baking sheets immediately and cool on Speed 1 about 2 inches apart. Per serving: About 117 cal, 1 g pro, 17 g carb, 5 g total fat, ...
Instructions and Recipes
Page 24
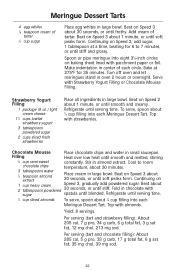
... with almonds. Turn off oven and let meringues stand in large bowl. To serve, spoon about 1 minute, or until stiff. Top with Strawberry Yogurt Filling or Chocolate Mousse Filling. Top with parchment paper or foil. Meringue Dessert Tarts 4 egg whites 1⁄8 teaspoon cream of tartar 3⁄4 cup sugar Place egg whites in almond extract. Beat on Speed 2 about...
... with almonds. Turn off oven and let meringues stand in large bowl. To serve, spoon about 1 minute, or until stiff. Top with Strawberry Yogurt Filling or Chocolate Mousse Filling. Top with parchment paper or foil. Meringue Dessert Tarts 4 egg whites 1⁄8 teaspoon cream of tartar 3⁄4 cup sugar Place egg whites in almond extract. Beat on Speed 2 about...


