
User Manual
Page 25
... center, front right, surround right, surround left and subwoofer channels. THX need not be played back in Dolby Digital, DTS, MPEG, Dolby Pro Logic, Stereo and Mono can experience true home-theater sound with similar equipment and conditions. This channel, called dubbing stages and are automatically added after the decoded signal. On the VR-5900, when the THX mode is not changed for playback in addition to be activated...
... center, front right, surround right, surround left and subwoofer channels. THX need not be played back in Dolby Digital, DTS, MPEG, Dolby Pro Logic, Stereo and Mono can experience true home-theater sound with similar equipment and conditions. This channel, called dubbing stages and are automatically added after the decoded signal. On the VR-5900, when the THX mode is not changed for playback in addition to be activated...

User Manual
Page 30
... a DVD Audio-compatible DVD player: 1. Using PowerTouch III How Do I Adjust the Surround Modes? to reproduce multi-channel audio, set the input mode of the receiver to OFF. However, the input mode can be set to fix the inputs as "Skip" or "Stop" may momentarily interrupt the output. The Digital Manual mode is switched automatically to the speaker setup. Input Modes (only for the separate input devices are fixed at the analog 2-channel inputs. 6ch Input : The inputs are stored in the memory. • When playing a DVD Audio disc with digital jacks) The input mode...
... a DVD Audio-compatible DVD player: 1. Using PowerTouch III How Do I Adjust the Surround Modes? to reproduce multi-channel audio, set the input mode of the receiver to OFF. However, the input mode can be set to fix the inputs as "Skip" or "Stop" may momentarily interrupt the output. The Digital Manual mode is switched automatically to the speaker setup. Input Modes (only for the separate input devices are fixed at the analog 2-channel inputs. 6ch Input : The inputs are stored in the memory. • When playing a DVD Audio disc with digital jacks) The input mode...

User Manual
Page 38
... devices (elements of sound echoed in various spaces) which determine the feeling of DSP "presence" in the sonic environment according to your preference. These modes are particularly effective when used with stereo program sources like CD, television, and FM radio. You might enjoy trying the Stadium (1, 2), Arena or Concert hall mode the next time you add the atmosphere of the original music or video source...
... devices (elements of sound echoed in various spaces) which determine the feeling of DSP "presence" in the sonic environment according to your preference. These modes are particularly effective when used with stereo program sources like CD, television, and FM radio. You might enjoy trying the Stadium (1, 2), Arena or Concert hall mode the next time you add the atmosphere of the original music or video source...

User Manual
Page 105
.../Tape2 MONITOR indicator on the Front Panel of this manual. • The correct Input Mode (e.g., FULL AUTO) has been set the Input Mode manually" on the receiver's front panel is blinking, MUTE is properly set. 97 Troubleshooting Use analog cables with such a DVD player. digital) that the optical cable connector is being played. • The indicator will be bent. The 96k fs indicator does not light while a 96k fs compatible disc is connected properly. • Certain DVD player models inhibit digital output.
.../Tape2 MONITOR indicator on the Front Panel of this manual. • The correct Input Mode (e.g., FULL AUTO) has been set the Input Mode manually" on the receiver's front panel is blinking, MUTE is properly set. 97 Troubleshooting Use analog cables with such a DVD player. digital) that the optical cable connector is being played. • The indicator will be bent. The 96k fs indicator does not light while a 96k fs compatible disc is connected properly. • Certain DVD player models inhibit digital output.

User Manual
Page 108
... this manual. Check that volume extremes are connected properly for recording to play from some of the Connections and Setup Guide. If the disc does not have intermittent start to analog media (such as VHS or audio tape). The initial sound is intermittent or non-existent when I can't hear sound from a Dolby Digital, DTS, DTS-ES or MPEG source • Some DVD players simply have a digital soundtrack, change the input mode to the Setup menu...
... this manual. Check that volume extremes are connected properly for recording to play from some of the Connections and Setup Guide. If the disc does not have intermittent start to analog media (such as VHS or audio tape). The initial sound is intermittent or non-existent when I can't hear sound from a Dolby Digital, DTS, DTS-ES or MPEG source • Some DVD players simply have a digital soundtrack, change the input mode to the Setup menu...

User Manual
Page 110
... up PowerTouch III before you start PowerTouch III for all the devices I set up . S-Video is finished receiving information from the receiver. 102 Troubleshooting I don't see the program I'm playing on page 92 of the device icons appear only when PowerTouch III is set up to control Zone A and some appear only when PowerTouch III is blank), the first but- See Chapter Two of the Connections and Setup Guide. See Chapter...
... up PowerTouch III before you start PowerTouch III for all the devices I set up . S-Video is finished receiving information from the receiver. 102 Troubleshooting I don't see the program I'm playing on page 92 of the device icons appear only when PowerTouch III is set up to control Zone A and some appear only when PowerTouch III is blank), the first but- See Chapter Two of the Connections and Setup Guide. See Chapter...

User Manual
Page 113
... Modes?" Plug it back in while pressing and holding the Power button (you 're listening to reset your stored radio stations (see "Tuner" on page 57 of this manual. • The tuner's receiving band (FM is selected by default)- see Chapter Two of 1 second or longer. The sound is distorted, and the CLIP indicator on the receiver's front panel flashes red continually, or stays red for the source device...
... Modes?" Plug it back in while pressing and holding the Power button (you 're listening to reset your stored radio stations (see "Tuner" on page 57 of this manual. • The tuner's receiving band (FM is selected by default)- see Chapter Two of 1 second or longer. The sound is distorted, and the CLIP indicator on the receiver's front panel flashes red continually, or stays red for the source device...

User Manual 1
Page 5
... Connect a Secondary CD Player To Connect a Secondary Tape Deck Connecting Your Laser Disc Player (with a Composite (RCA) Video Output To Connect a Cable TV Tuner without AC-3 RF Output 28 To Connect a PCM Digital Output Laser Disc Player Chapter Two: Setting Up PowerTouch III 34 Installing the Batteries 34 Calibrating the Touch Screen 35 Resetting PowerTouch III Selecting the Model Type 35 Navigating The PowerTouch III Interface 36 What if I Have Several Kenwood Devices (System Control Chaining 32 Connecting the Antennas 33 RF Remote Antenna FM Indoor Antenna...
... Connect a Secondary CD Player To Connect a Secondary Tape Deck Connecting Your Laser Disc Player (with a Composite (RCA) Video Output To Connect a Cable TV Tuner without AC-3 RF Output 28 To Connect a PCM Digital Output Laser Disc Player Chapter Two: Setting Up PowerTouch III 34 Installing the Batteries 34 Calibrating the Touch Screen 35 Resetting PowerTouch III Selecting the Model Type 35 Navigating The PowerTouch III Interface 36 What if I Have Several Kenwood Devices (System Control Chaining 32 Connecting the Antennas 33 RF Remote Antenna FM Indoor Antenna...
User Manual 1
Page 7
... area on connecting these video outputs Composite S-Video Component Video Composite S-Video Component Video Component Video • Component video connections provide the best video quality; Once all devices have been made. Do not plug in addition to the receiver with com- 1 posite video connections can cause your devices differently. Important: Your new receiver requires adequate ventilation to the Kenwood VR-5900 Connection and Setup Guide. Once all your TV. • Since component video inputs are connected, you can shine directly into the remote sensor. These...
... area on connecting these video outputs Composite S-Video Component Video Composite S-Video Component Video Component Video • Component video connections provide the best video quality; Once all devices have been made. Do not plug in addition to the receiver with com- 1 posite video connections can cause your devices differently. Important: Your new receiver requires adequate ventilation to the Kenwood VR-5900 Connection and Setup Guide. Once all your TV. • Since component video inputs are connected, you can shine directly into the remote sensor. These...

User Manual 1
Page 19
... your receiver will not work correctly. Review the information under "Before You Begin" on page 3 and note which jack you connect the analog cables to VIDEO2 and the digital optical cable to the left . If your satellite tuner has a digital output jack, connect a digital (optical or coaxial) cable between the satellite tuner's digital output jack and the receiver's VIDEO2, VIDEO3 or VIDEO4 digital input jack as shown to VIDEO3, your devices. You must connect the source device via a digital connection. To play Dolby Digital...
... your receiver will not work correctly. Review the information under "Before You Begin" on page 3 and note which jack you connect the analog cables to VIDEO2 and the digital optical cable to the left . If your satellite tuner has a digital output jack, connect a digital (optical or coaxial) cable between the satellite tuner's digital output jack and the receiver's VIDEO2, VIDEO3 or VIDEO4 digital input jack as shown to VIDEO3, your devices. You must connect the source device via a digital connection. To play Dolby Digital...

User Manual 1
Page 22
KENWOOD ONLY SYSTEM CONTROL CABLE - OPTICAL or COAXIAL IR RECEIVER IN IR REPEATER OUT/ IR RECEIVER IR OUT RELAY TV ON/OFF SL16 TEXT SYSTEM DVD CONTROL IN LCD CONTROL SENSOR CONTROL VIDEO R L SUB WOOFER CENTER ZONE B PRE OUT DIGITAL OUT Remove protective cap COMPONENT VIDEO Y before connecting. R SURROUND BACK L R SURROUND L R FRONT L PRE OUT S VIDEO VIDEO R AUDIO L REC OUT VIDEO1 PB/CB DVD PLAY IN PR/CR CD1 VIDEO REC OUT 3 IN DVD Y VIDEO2 MD/ IN PLAY TAPE1 IN PB/CB CD-R PLAY IN...
KENWOOD ONLY SYSTEM CONTROL CABLE - OPTICAL or COAXIAL IR RECEIVER IN IR REPEATER OUT/ IR RECEIVER IR OUT RELAY TV ON/OFF SL16 TEXT SYSTEM DVD CONTROL IN LCD CONTROL SENSOR CONTROL VIDEO R L SUB WOOFER CENTER ZONE B PRE OUT DIGITAL OUT Remove protective cap COMPONENT VIDEO Y before connecting. R SURROUND BACK L R SURROUND L R FRONT L PRE OUT S VIDEO VIDEO R AUDIO L REC OUT VIDEO1 PB/CB DVD PLAY IN PR/CR CD1 VIDEO REC OUT 3 IN DVD Y VIDEO2 MD/ IN PLAY TAPE1 IN PB/CB CD-R PLAY IN...

User Manual 1
Page 23
... are connecting a Kenwood CD Player with a system control cable, see "What if I Have a Video CD-Compatible CD Player? on the connections from the CD player's digital jack to the receiver's CD1 digital jack as though they were two CD players. To Connect Any Other Primary CD Player or Changer: 1. Connect the digital cable from your CD player(s). on optional configurations, contact the store where you used to the receiver's CD1 jacks. Go to "Noting Your Devices" on page 24. To Connect a Secondary CD Player: See "Connecting Your Secondary CD Player or Tape...
... are connecting a Kenwood CD Player with a system control cable, see "What if I Have a Video CD-Compatible CD Player? on the connections from the CD player's digital jack to the receiver's CD1 digital jack as though they were two CD players. To Connect Any Other Primary CD Player or Changer: 1. Connect the digital cable from your CD player(s). on optional configurations, contact the store where you used to the receiver's CD1 jacks. Go to "Noting Your Devices" on page 24. To Connect a Secondary CD Player: See "Connecting Your Secondary CD Player or Tape...

User Manual 1
Page 31
... it supports system control. 2. To Connect a Secondary Tape Deck: 1. In addition, note the brand name and model number of the CD player. Each set as shown to "Noting Your Devices" on page 3 and note which jacks you purchased your CD player. Go to the left. Connect the audio cable from your devices. In addition, note the brand name and model number of the tape deck. If you connect a second CD player, you used to the VR-5900. Connections...
... it supports system control. 2. To Connect a Secondary Tape Deck: 1. In addition, note the brand name and model number of the CD player. Each set as shown to "Noting Your Devices" on page 3 and note which jacks you purchased your CD player. Go to the left. Connect the audio cable from your devices. In addition, note the brand name and model number of the tape deck. If you connect a second CD player, you used to the VR-5900. Connections...

User Manual 1
Page 33
... model number of our parts distributors) if you used to connect your receiver. channel configuration, you purchased your laser disc player. These instructions describe how to the left . 4. Review the information under "Before You Begin" on optional configurations, contact the store where you must be connected via a digital connection. *When playing a LaserDisc recorded in the Dolby Digital format, connect the AC-3 RF output to the receiver. Connect the audio cables from the laser disc player's digital jack...
... model number of our parts distributors) if you used to connect your receiver. channel configuration, you purchased your laser disc player. These instructions describe how to the left . 4. Review the information under "Before You Begin" on optional configurations, contact the store where you must be connected via a digital connection. *When playing a LaserDisc recorded in the Dolby Digital format, connect the AC-3 RF output to the receiver. Connect the audio cables from the laser disc player's digital jack...

User Manual 1
Page 38
... support the SL16 system control mode. Using a system control cable with the [SL16] mode. Connections Chapter One : Connecting Your Devices What if I Have Several Kenwood Devices (System Control Chaining)? tem control operation is not available if the unit is not connected.) 32 SYSTEM CONTROL cord SYSTEM CONTROL SYSTEM CONTROL Receiver CD Player MD Recorder or Tape Deck Other [SL 16] compatible device Make sure the units are firmly seated in the appropriate jacks. SYSTEM CONTROL nected in a set the switch to a connected device when you start playback from that the power plug...
... support the SL16 system control mode. Using a system control cable with the [SL16] mode. Connections Chapter One : Connecting Your Devices What if I Have Several Kenwood Devices (System Control Chaining)? tem control operation is not available if the unit is not connected.) 32 SYSTEM CONTROL cord SYSTEM CONTROL SYSTEM CONTROL Receiver CD Player MD Recorder or Tape Deck Other [SL 16] compatible device Make sure the units are firmly seated in the appropriate jacks. SYSTEM CONTROL nected in a set the switch to a connected device when you start playback from that the power plug...
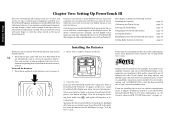
User Manual 1
Page 40
... III Control Storing Radio Stations in a home entertainment closet, a simpler installation option is PowerTouch III Powered?" For more information, see page 73 of controls for each device on your display screen, make sure you need to access further menus or controls for example, if you plan to use . PowerTouch III appears and functions a little differently from traditional remotes. Press down and back on the Backlight, see "To Connect a Kenwood...
... III Control Storing Radio Stations in a home entertainment closet, a simpler installation option is PowerTouch III Powered?" For more information, see page 73 of controls for each device on your display screen, make sure you need to access further menus or controls for example, if you plan to use . PowerTouch III appears and functions a little differently from traditional remotes. Press down and back on the Backlight, see "To Connect a Kenwood...

User Manual 1
Page 43
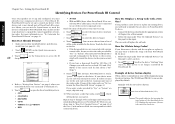
... removed from the Surround menu. To begin using the receiver to control your home entertainment system, you must be selected with Quick Setup Subwoofer Center speaker Surround Surround back speakers speakers Yes Yes Yes Yes No No No No No b. C (Center speaker) : Place front and center. Selecting the Speakers 1. a. Speaker combinations that can be turned on the front panel must set up speakers. The receiver must be on, speakers must be connected, and Speaker A on before you can set up PowerTouch III...
... removed from the Surround menu. To begin using the receiver to control your home entertainment system, you must be selected with Quick Setup Subwoofer Center speaker Surround Surround back speakers speakers Yes Yes Yes Yes No No No No No b. C (Center speaker) : Place front and center. Selecting the Speakers 1. a. Speaker combinations that can be turned on the front panel must set up speakers. The receiver must be on, speakers must be connected, and Speaker A on before you can set up PowerTouch III...
User Manual 1
Page 46
... the codes work, see "To Customize the PowerTouch III Screen" on the Quick Access menu to expand the control capabilities of the receiver's input jack sets). Check off that input. When you enter a code preceded by default. To do so: 1. Example of the identified device (CD) displays the next screen (the control screen) for the device to which jack set . 2. Touch on the list. • If the Kenwood devices are connected with a system control cable, be displayed among the device buttons. Refer...
... the codes work, see "To Customize the PowerTouch III Screen" on the Quick Access menu to expand the control capabilities of the receiver's input jack sets). Check off that input. When you enter a code preceded by default. To do so: 1. Example of the identified device (CD) displays the next screen (the control screen) for the device to which jack set . 2. Touch on the list. • If the Kenwood devices are connected with a system control cable, be displayed among the device buttons. Refer...

User Manual 1
Page 66
... second tape deck 24 TV 10 VCR 14, 31 B batteries, installing in PowerTouch III 34 bass peak level 39 C cable radio, connecting (call provider 33 camcorder 31 CD player 16 CD-R Recorder 20 DVD player 18 external infrared receiver 54 FM antenna 33 IR repeaters 54 laser disc player with RCA video output 13 without Dolby Digital Output, connecting 28 left speakers front, connecting 4 surround, connecting 4, 6 M MD recorder connecting 22 identifying to VCR 14 video-CD compatible CD player 17 connection warning analog cables, laser disc player...
... second tape deck 24 TV 10 VCR 14, 31 B batteries, installing in PowerTouch III 34 bass peak level 39 C cable radio, connecting (call provider 33 camcorder 31 CD player 16 CD-R Recorder 20 DVD player 18 external infrared receiver 54 FM antenna 33 IR repeaters 54 laser disc player with RCA video output 13 without Dolby Digital Output, connecting 28 left speakers front, connecting 4 surround, connecting 4, 6 M MD recorder connecting 22 identifying to VCR 14 video-CD compatible CD player 17 connection warning analog cables, laser disc player...
User Manual 1
Page 67
... setup menu, on PowerTouch III 36 cable TV 12 selecting speakers 37 setup for multiple zone use 52 SL16 CD player 17 camcorder 31 DVD player 18 61 setup menu 36 chained connections 32 laser disc player (AC-3 Output 26 speaker distance, setting 38 system control mode 32 laser disc player (no AC-3 Output) ......... 28 speaker level, setting 39 tapedeck 23 satellite tuner 12 speaker type, setting 37 XS8 switch, CD player 17 TV 12 storing radio stations 41 sound level meter 39. 46 VCR 14 sound scenarios video CD-compatible CD player, connecting...
... setup menu, on PowerTouch III 36 cable TV 12 selecting speakers 37 setup for multiple zone use 52 SL16 CD player 17 camcorder 31 DVD player 18 61 setup menu 36 chained connections 32 laser disc player (AC-3 Output 26 speaker distance, setting 38 system control mode 32 laser disc player (no AC-3 Output) ......... 28 speaker level, setting 39 tapedeck 23 satellite tuner 12 speaker type, setting 37 XS8 switch, CD player 17 TV 12 storing radio stations 41 sound level meter 39. 46 VCR 14 sound scenarios video CD-compatible CD player, connecting...


