

Instruction Manual
Page 2
... Deterrent Faceplate Tuner features 10 Tuning Mode Tuning Direct Access Tuning Station Preset Memory Auto Memory Entry Preset Tuning Cassette player features...........12 Playing Cassette Tapes Fast Forwarding and Rewinding Dolby B NR Selecting the Tape type Tape Advance Blank Skip Music Repeat External disc...Repeat Track Scan Random Play Magazine Random Play Text/Title Scroll DNPP (Disc Name Preset Play) Menu system 17 Menu System Security Code Touch Sensor Tone Manual Clock Adjustment DSI (Disabled System Indicator) Switching Graphic Display CRSC (Clean Reception System Circuit) Text ...
... Deterrent Faceplate Tuner features 10 Tuning Mode Tuning Direct Access Tuning Station Preset Memory Auto Memory Entry Preset Tuning Cassette player features...........12 Playing Cassette Tapes Fast Forwarding and Rewinding Dolby B NR Selecting the Tape type Tape Advance Blank Skip Music Repeat External disc...Repeat Track Scan Random Play Magazine Random Play Text/Title Scroll DNPP (Disc Name Preset Play) Menu system 17 Menu System Security Code Touch Sensor Tone Manual Clock Adjustment DSI (Disabled System Indicator) Switching Graphic Display CRSC (Clean Reception System Circuit) Text ...
Instruction Manual
Page 4
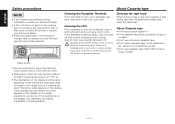
...• We recommend the use of the Security Code function (see p.18) to prevent theft. • Characters in the LCD may scratch the surface or erases characters. OFF DAB LOUD B NR SCAN B.S./RDM REP MTL/M.RDM DISP NAME AUTO AME About Cassette tape Cleaning the Faceplate Terminals If the terminals... on again. • Don't use cassette tape that does not solve the problem, consult your Kenwood dealer. • If the unit does not seem to the unit may...
...• We recommend the use of the Security Code function (see p.18) to prevent theft. • Characters in the LCD may scratch the surface or erases characters. OFF DAB LOUD B NR SCAN B.S./RDM REP MTL/M.RDM DISP NAME AUTO AME About Cassette tape Cleaning the Faceplate Terminals If the terminals... on again. • Don't use cassette tape that does not solve the problem, consult your Kenwood dealer. • If the unit does not seem to the unit may...

Instruction Manual
Page 5
... input Standby (Illumination only mode) "TUNER" "TAPE" "DISC-CH" "AUX" "ALL OFF" For Auxiliary input one of the below optional accessories is displayed as "CODE ON" or "CODE OFF". General features SRC/ u PWR OFF FM OFF DAB Release button LOUD B NR SCAN B.S./RDM REP d 4 ATT/ Q/ AM ¢ LOUD AUD MTL/M.RDM DISP...
... input Standby (Illumination only mode) "TUNER" "TAPE" "DISC-CH" "AUX" "ALL OFF" For Auxiliary input one of the below optional accessories is displayed as "CODE ON" or "CODE OFF". General features SRC/ u PWR OFF FM OFF DAB Release button LOUD B NR SCAN B.S./RDM REP d 4 ATT/ Q/ AM ¢ LOUD AUD MTL/M.RDM DISP...

Instruction Manual
Page 18
.... The reference for the Menu items and their setting content chart is entered. (Normally the uppermost setting in the chart is displayed. 3 Enter Security Code mode Press the [4] or [¢] button for at least 1 second. Select the "ALL OFF" display. 2 Enter Menu mode Press the ...after this unit is by returning to enter Press the [4] or [¢] button. 5 Select the Security Code numbers Press the [FM] or [AM] button. 6 Repeat steps 4 and 5, and complete the Security Code. 7 Confirm the Security Code Press the [¢] button for at least 3 seconds. You can 't be set the beep sound...
.... The reference for the Menu items and their setting content chart is entered. (Normally the uppermost setting in the chart is displayed. 3 Enter Security Code mode Press the [4] or [¢] button for at least 1 second. Select the "ALL OFF" display. 2 Enter Menu mode Press the ...after this unit is by returning to enter Press the [4] or [¢] button. 5 Select the Security Code numbers Press the [FM] or [AM] button. 6 Repeat steps 4 and 5, and complete the Security Code. 7 Confirm the Security Code Press the [¢] button for at least 3 seconds. You can 't be set the beep sound...

Instruction Manual
Page 19
... least 1 second. Display "GRPH ON" "GRPH OFF" Setting The graphic part is displayed. 1 Turn the power ON. 2 Do the step 4 through 7 operation, and enter the Security Code. Touch Sensor Tone Setting the operation check sound (beep sound) ON/OFF. Display "DSI ON" "DSI OFF" Setting LED flashes. The clock display blinks. 3 Adjust...
... least 1 second. Display "GRPH ON" "GRPH OFF" Setting The graphic part is displayed. 1 Turn the power ON. 2 Do the step 4 through 7 operation, and enter the Security Code. Touch Sensor Tone Setting the operation check sound (beep sound) ON/OFF. Display "DSI ON" "DSI OFF" Setting LED flashes. The clock display blinks. 3 Adjust...

Instruction Manual
Page 27
... following table for when in this unit, you can 't be the result of slight misoperation or miswiring. See the section on . ✔ The cassette tape is connected to an external disc source. ? The Touch Sensor Tone can 't switch.05 ✔ There's no media in Tuner source. ...are incorrectly connected.11 Connect the wire correctly, referring to be a malfunction in the Menu System.32 ✔ The Security Code function is not functioning normally. The Security Code item isn't displayed in your unit may just be output from the preout jack. ? Even though the vehicle light...
... following table for when in this unit, you can 't be the result of slight misoperation or miswiring. See the section on . ✔ The cassette tape is connected to an external disc source. ? The Touch Sensor Tone can 't switch.05 ✔ There's no media in Tuner source. ...are incorrectly connected.11 Connect the wire correctly, referring to be a malfunction in the Menu System.32 ✔ The Security Code function is not functioning normally. The Security Code item isn't displayed in your unit may just be output from the preout jack. ? Even though the vehicle light...


