Instruction Manual
Page 2
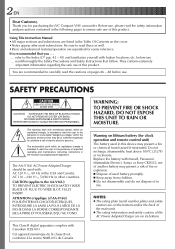
Using This Instruction Manual •All major sections and subsections are on the cover. •Notes appear after most subsections. It is recommended that you for purchasing the JVC Compact VHS camcorder. SAFETY PRECAUTIONS CAUTION RISK OF ELECTRIC SHOCK DO NOT OPEN CAUTION: TO REDUCE THE RISK OF ELECTRIC SHOCK, DO NOT REMOVE COVER (OR BACK...
Using This Instruction Manual •All major sections and subsections are on the cover. •Notes appear after most subsections. It is recommended that you for purchasing the JVC Compact VHS camcorder. SAFETY PRECAUTIONS CAUTION RISK OF ELECTRIC SHOCK DO NOT OPEN CAUTION: TO REDUCE THE RISK OF ELECTRIC SHOCK, DO NOT REMOVE COVER (OR BACK...
Instruction Manual
Page 9
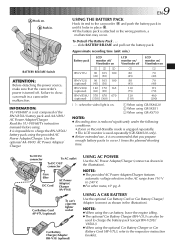
...BATTERY PACK Hook its end to 240 V. ● For other notes, ੬ pg. 8. A Hook on . 1 When using GR-SXM320 2 When using GR-SX851 3 When using GR-AX750 NOTES: ● Recording time is reduced significantly under the following conditions: •Zoom or Record-Standby mode is engaged repeatedly. •...(connect as shown in the AC range from 110 V to the camcorder and push the battery pack in until it is impossible to cover 3 times the planned shooting time. Read the VU-V856KIT's instruction manuals before using the car battery, leave the engine idling. ● ...
...BATTERY PACK Hook its end to 240 V. ● For other notes, ੬ pg. 8. A Hook on . 1 When using GR-SXM320 2 When using GR-SX851 3 When using GR-AX750 NOTES: ● Recording time is reduced significantly under the following conditions: •Zoom or Record-Standby mode is engaged repeatedly. •...(connect as shown in the AC range from 110 V to the camcorder and push the battery pack in until it is impossible to cover 3 times the planned shooting time. Read the VU-V856KIT's instruction manuals before using the car battery, leave the engine idling. ● ...

Instruction Manual
Page 15
...4 end of the strap to the unit caused by falling over, do not use a small-sized tripod. Then tighten the screw. CAUTION: When using a tripod, be sure to open and extend... its legs fully to "CAMERA" ("AUTO" or "PRO."). 2 Adjust the viewfinder manually for best viewability. 3 Turn the Diopter Adjustment Control until the indications in the illustration 4. Power ...Refasten the Velcro strip. 3 2 180° 1 Viewfinder Adjustment 1 Set the Power Switch to stabilize the camcorder. PAUSE 1 2 3 Set to "CAMERA" ("AUTO" or "PRO."). Tripod Mounting 1 Align the screw...
...4 end of the strap to the unit caused by falling over, do not use a small-sized tripod. Then tighten the screw. CAUTION: When using a tripod, be sure to open and extend... its legs fully to "CAMERA" ("AUTO" or "PRO."). 2 Adjust the viewfinder manually for best viewability. 3 Turn the Diopter Adjustment Control until the indications in the illustration 4. Power ...Refasten the Velcro strip. 3 2 180° 1 Viewfinder Adjustment 1 Set the Power Switch to stabilize the camcorder. PAUSE 1 2 3 Set to "CAMERA" ("AUTO" or "PRO."). Tripod Mounting 1 Align the screw...
Instruction Manual
Page 16
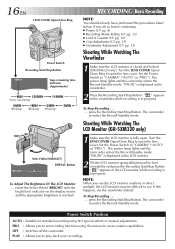
... Record-Standby mode. press the Recording Start/Stop Button. The camcorder re-enters the Record-Standby mode. PLAY : Allows you to set recording functions using the menus for standard recording using NO special effects or manual adjustments. Shooting While Watching The LCD Monitor (GR-SXM320 only) 1 Make sure the LCD monitor is in...
... Record-Standby mode. press the Recording Start/Stop Button. The camcorder re-enters the Record-Standby mode. PLAY : Allows you to set recording functions using the menus for standard recording using NO special effects or manual adjustments. Shooting While Watching The LCD Monitor (GR-SXM320 only) 1 Make sure the LCD monitor is in...

Instruction Manual
Page 18
...high magnification. Zoom Out Slide the Power Zoom Lever towards "T". STABILIZER. " "appears. Ⅲ To switch off the Picture Stabilizer when recording with the camcorder on a tripod. ● The " " indicator appears blinking if the Stabilizer cannot be possible if hand shake is called Digital Zoom. OPERATION: Zoom...by using Digital Zoom, the quality of the zoom indicator bar, all magnification from that point is through digital processing. ● When using the manual focus (੬ pg. 29), then zoom in or out in the Menu Screen (੬ pg. 24). 18 EN Zoom in (T: Telephoto)...
...high magnification. Zoom Out Slide the Power Zoom Lever towards "T". STABILIZER. " "appears. Ⅲ To switch off the Picture Stabilizer when recording with the camcorder on a tripod. ● The " " indicator appears blinking if the Stabilizer cannot be possible if hand shake is called Digital Zoom. OPERATION: Zoom...by using Digital Zoom, the quality of the zoom indicator bar, all magnification from that point is through digital processing. ● When using the manual focus (੬ pg. 29), then zoom in or out in the Menu Screen (੬ pg. 24). 18 EN Zoom in (T: Telephoto)...
Instruction Manual
Page 20
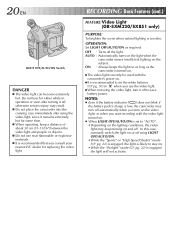
In this case, manually switch the light on or off using LIGHT OFF/AUTO/ON. •While the "Sports... on. ● When LIGHT OFF/AUTO/ON is low, the camcorder may turn off automatically when you turn on the video light, or when you consult your nearest JVC dealer for some time. Ⅲ When operating, keep turning on ...explosive materials. Ⅲ It is recommended that you start recording with the camcorder's power on and off the light. RECORDING Basic Features (cont.) FEATURE: Video Light (GR-SXM320/SX851 only) PURPOSE: To brighten the scene when natural lighting is engaged...
In this case, manually switch the light on or off using LIGHT OFF/AUTO/ON. •While the "Sports... on. ● When LIGHT OFF/AUTO/ON is low, the camcorder may turn off automatically when you turn on the video light, or when you consult your nearest JVC dealer for some time. Ⅲ When operating, keep turning on ...explosive materials. Ⅲ It is recommended that you start recording with the camcorder's power on and off the light. RECORDING Basic Features (cont.) FEATURE: Video Light (GR-SXM320/SX851 only) PURPOSE: To brighten the scene when natural lighting is engaged...
Instruction Manual
Page 24
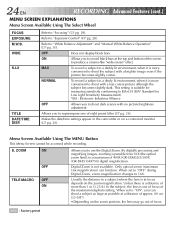
Refer to "White Balance Adjustment" and "Manual White Balance Operation" (੬ pg. 30). OFF Does not ...16x magnification) can shoot a subject as large as possible at the maximum telephoto setting. To record a subject in the camcorder or on a connected monitor (੬ pg. 26). ON Allows you can function. Digital Zoom is possible from 16X (... although the subject becomes slightly dark. This setting is out of focus at a distance of 400X (GR-SXM320)/300X (GR-SX851/AX750) digital magnification. DATE/TIME DISP. When set to "ON", you to record black bars...
Refer to "White Balance Adjustment" and "Manual White Balance Operation" (੬ pg. 30). OFF Does not ...16x magnification) can shoot a subject as large as possible at the maximum telephoto setting. To record a subject in the camcorder or on a connected monitor (੬ pg. 26). ON Allows you can function. Digital Zoom is possible from 16X (... although the subject becomes slightly dark. This setting is out of focus at a distance of 400X (GR-SXM320)/300X (GR-SX851/AX750) digital magnification. DATE/TIME DISP. When set to "ON", you to record black bars...

Instruction Manual
Page 26
... press it. Press the Select Wheel to close the Menu Screen. Change the setting in memory. The desired mode is not recorded. Instant Titles The camcorder has eight preset titles in TITLE LANG. T I TLE OF F HAPPY B I RTHDAY OUR VACAT I ON MERRY CHR I STMAS A SPEC I AL DAY HAPPY HOL I...highlight bar on "RETURN". Press the Select Wheel to close the Menu Screen. NOTES: DISPLAY ● The selected display can superimpose one of them manually or automatically. The desired mode is selected in English but this mode, the date is replaced after 5 seconds with "AUTO DATE" but also ...
... press it. Press the Select Wheel to close the Menu Screen. Change the setting in memory. The desired mode is not recorded. Instant Titles The camcorder has eight preset titles in TITLE LANG. T I TLE OF F HAPPY B I RTHDAY OUR VACAT I ON MERRY CHR I STMAS A SPEC I AL DAY HAPPY HOL I...highlight bar on "RETURN". Press the Select Wheel to close the Menu Screen. NOTES: DISPLAY ● The selected display can superimpose one of them manually or automatically. The desired mode is selected in English but this mode, the date is replaced after 5 seconds with "AUTO DATE" but also ...

Instruction Manual
Page 29
.... The focus is locked at longer focal lengths. ● When the focus level cannot be obtainable in the situations listed below (in these cases use manual focusing): •When two subjects overlap in bright- ness and darkness), such as a flat, one-color wall, or a clear, blue sky.* •...When a dark object is barely visible in the auto focus mode, the camcorder could automatically zoom out depending on a nearer subject, rotate the Select Wheel downward. The Menu Screen reappears with "TELE MACRO" (੬ pg. 24). The ...
.... The focus is locked at longer focal lengths. ● When the focus level cannot be obtainable in the situations listed below (in these cases use manual focusing): •When two subjects overlap in bright- ness and darkness), such as a flat, one-color wall, or a clear, blue sky.* •...When a dark object is barely visible in the auto focus mode, the camcorder could automatically zoom out depending on a nearer subject, rotate the Select Wheel downward. The Menu Screen reappears with "TELE MACRO" (੬ pg. 24). The ...
Instruction Manual
Page 30
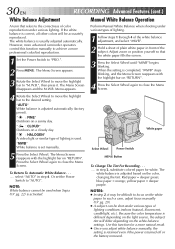
...camcorder operators control this function for white. "MWB" White balance is activated. The white balance is correct, all other colors will differ depending on the color, changing the tint. Use this function manually to "AUTO". If the white balance is adjusted based on the white balance settings. Perform Manual.... 1 Set the Power Switch to "PRO.". 2 Press MENU. Red paper = deeper green; In such a case, adjust focus manually (੬ pg. 29). ● A subject can be difficult to the correctness of lighting conditions indoors (natural, flourescent, candlelight, etc...
...camcorder operators control this function for white. "MWB" White balance is activated. The white balance is correct, all other colors will differ depending on the color, changing the tint. Use this function manually to "AUTO". If the white balance is adjusted based on the white balance settings. Perform Manual.... 1 Set the Power Switch to "PRO.". 2 Press MENU. Red paper = deeper green; In such a case, adjust focus manually (੬ pg. 29). ● A subject can be difficult to the correctness of lighting conditions indoors (natural, flourescent, candlelight, etc...

Instruction Manual
Page 32
... Rewind modes. ● To disable the Counter Memory Function, press COUNTER R/M for less than 1 second so that appear on-screen during playback, the camcorder enters the Auto Tracking mode and "AT" is set to locate a specific tape segment. 1) Press COUNTER R/M and hold for less than 1 second.... or when normal playback resumes after still playback or shuttle search. ● If the playback picture is distorted when TBC is displayed. ● Manual Tracking may not work during still playback and shuttle search. ● The "TBC" indicator turns white while TBC is not operative. ● ...
... Rewind modes. ● To disable the Counter Memory Function, press COUNTER R/M for less than 1 second so that appear on-screen during playback, the camcorder enters the Auto Tracking mode and "AT" is set to locate a specific tape segment. 1) Press COUNTER R/M and hold for less than 1 second.... or when normal playback resumes after still playback or shuttle search. ● If the playback picture is distorted when TBC is displayed. ● Manual Tracking may not work during still playback and shuttle search. ● The "TBC" indicator turns white while TBC is not operative. ● ...
Instruction Manual
Page 35
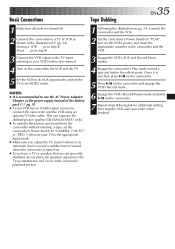
...VCR output to the TV input, referring to your VCR's instruction manual. 4 Turn on the VCR's power, and insert the appropriate cassettes in the camcorder and the VCR. 3 Engage the VCR's AUX and Record-Pause modes. 4 Engage the camcorder's Play mode to find a spot just before the edit-in ...speakers adjacent to the TV as interference will occur in the camcorder playback picture. This can improve the dubbed picture quality (GR-SXM320/SX851 only). ● To monitor the picture and sound from the camcorder without inserting a tape, set the camcorder's Power Switch to "CAMERA" ("AUTO" or "PRO."),...
...VCR output to the TV input, referring to your VCR's instruction manual. 4 Turn on the VCR's power, and insert the appropriate cassettes in the camcorder and the VCR. 3 Engage the VCR's AUX and Record-Pause modes. 4 Engage the camcorder's Play mode to find a spot just before the edit-in ...speakers adjacent to the TV as interference will occur in the camcorder playback picture. This can improve the dubbed picture quality (GR-SXM320/SX851 only). ● To monitor the picture and sound from the camcorder without inserting a tape, set the camcorder's Power Switch to "CAMERA" ("AUTO" or "PRO."),...

Instruction Manual
Page 49
...Shooting pg. 17 L LCD monitor/Viewfinder, Indications ...... pg. 44, 45 Load A Tape pg. 10 EN49 M Manual Focus pg. 29 Menu Screen pg. 23 - 25 N ND Effect Mode pg. 22 Nega/Posi Mode pg. ... Search pg. 31 Specifications pg. 51 Sports Mode pg. 22 Still Playback pg. 31 Super LoLux (S.LX pg. 24 Super VHS Expansion Technology pg. 13 T Tape Counter pg. 32, 38 Tape Dubbing pg. 34,...Battery pg. 9 Cassette Adapter pg. 33 Charge Marker pg. 8 Charging The Battery Pack pg. 8 Clean The Camcorder pg. 50 Clock (Lithium) Battery pg. 10 Connection To A VCR/TV pg. 34 Contents cover page Counter...
...Shooting pg. 17 L LCD monitor/Viewfinder, Indications ...... pg. 44, 45 Load A Tape pg. 10 EN49 M Manual Focus pg. 29 Menu Screen pg. 23 - 25 N ND Effect Mode pg. 22 Nega/Posi Mode pg. ... Search pg. 31 Specifications pg. 51 Sports Mode pg. 22 Still Playback pg. 31 Super LoLux (S.LX pg. 24 Super VHS Expansion Technology pg. 13 T Tape Counter pg. 32, 38 Tape Dubbing pg. 34,...Battery pg. 9 Cassette Adapter pg. 33 Charge Marker pg. 8 Charging The Battery Pack pg. 8 Clean The Camcorder pg. 50 Clock (Lithium) Battery pg. 10 Connection To A VCR/TV pg. 34 Contents cover page Counter...
Instruction Manual
Page 51
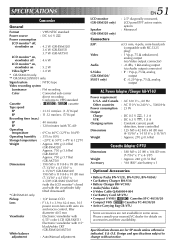
...GR-SXM320 only. Specifications shown are not available in some areas. Please consult your nearest JVC...Camcorder General Format : VHS NTSC standard Power source : DC 6.0 V Power consumption LCD monitor* off, viewfinder on : 4.2 W (GR-SXM320) 3.6 W (GR-SX851) 3.7 W (GR...GR-SX851) Electronic viewfinder with 0.5" black/white CRT (GR-SXM320/AX750) White balance adjustment : Auto/Manual adjustment LCD monitor (GR-SXM320 only) Speaker (GR-SXM320 only) Connectors JLIP: Video Audio S-Video (GR... "AA (R6)"-size battery x 1 ...Compact S-VHS ( ) Cassettes ST-C-40/30/20 • Compact VHS...
...GR-SXM320 only. Specifications shown are not available in some areas. Please consult your nearest JVC...Camcorder General Format : VHS NTSC standard Power source : DC 6.0 V Power consumption LCD monitor* off, viewfinder on : 4.2 W (GR-SXM320) 3.6 W (GR-SX851) 3.7 W (GR...GR-SX851) Electronic viewfinder with 0.5" black/white CRT (GR-SXM320/AX750) White balance adjustment : Auto/Manual adjustment LCD monitor (GR-SXM320 only) Speaker (GR-SXM320 only) Connectors JLIP: Video Audio S-Video (GR... "AA (R6)"-size battery x 1 ...Compact S-VHS ( ) Cassettes ST-C-40/30/20 • Compact VHS...

