
FAQs (English)
Page 1
... Motorola TIVO VIP508, VIP622 DRC800 Series 3, HD 720 0463 0091 DirecTV RC23 10463 o Codes for the brands Orion, Emerson, Memorex, Sansui, Sylvania, or Zenith. FAQs Insignia FY10 LCD TVs (NS-L19Q-10A, NS-L19W1Q-10A, NS-L22Q-10A, NS-L26Q-10A, NS-L32Q-10A, NS-L37Q-10A, NS-L42Q-10A) July 29, 2010 Setup ...1 Image/Picture Issues 5 Hardware Issues 8 Channel Issues ...8 General ...11 Audio Issues ...12 Setup 1.
... Motorola TIVO VIP508, VIP622 DRC800 Series 3, HD 720 0463 0091 DirecTV RC23 10463 o Codes for the brands Orion, Emerson, Memorex, Sansui, Sylvania, or Zenith. FAQs Insignia FY10 LCD TVs (NS-L19Q-10A, NS-L19W1Q-10A, NS-L22Q-10A, NS-L26Q-10A, NS-L32Q-10A, NS-L37Q-10A, NS-L42Q-10A) July 29, 2010 Setup ...1 Image/Picture Issues 5 Hardware Issues 8 Channel Issues ...8 General ...11 Audio Issues ...12 Setup 1.
FAQs (English)
Page 2
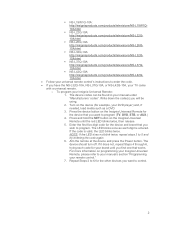
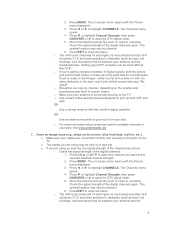
...6 for the device and brand that you wish to program. The device codes can be using. 2. Press the device button on programming your Insignia Universal Remote, please refer to your manual's section "Programming your manual under "Manufacturers' codes". If it does not, repeat Steps 4 through 6,... (TV, DVD, STB, or AUX.) 4. NOTE: If the LED does not blink twice, repeat steps 3 to 5 and try entering the code again. 6. Aim the remote at the device and press the Power button. NS-L19W1Q-10A: http://insigniaproducts.com/products/televisions/NS-L19W1Q10A.html NS-L22Q-10A: ...
...6 for the device and brand that you wish to program. The device codes can be using. 2. Press the device button on programming your Insignia Universal Remote, please refer to your manual's section "Programming your manual under "Manufacturers' codes". If it does not, repeat Steps 4 through 6,... (TV, DVD, STB, or AUX.) 4. NOTE: If the LED does not blink twice, repeat steps 3 to 5 and try entering the code again. 6. Aim the remote at the device and press the Power button. NS-L19W1Q-10A: http://insigniaproducts.com/products/televisions/NS-L19W1Q10A.html NS-L22Q-10A: ...
FAQs (English)
Page 3
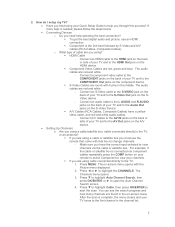
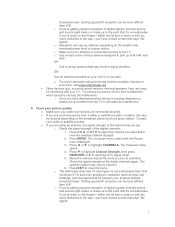
...? To get the best digital audio and picture, use the remote that box to the first channel in the on the back of your TV tunes to change channels. - o What type of your Quick Setup Guide to help you need help is connected via component cables repeatedly press the COMP... button on your remote to select Component to view your TV and to the Audio Out jacks on the S-Video Device. A/V Cables (RCA Cables, Composite Cables) have the correct input selected to the S-Video Out...
...? To get the best digital audio and picture, use the remote that box to the first channel in the on the back of your TV tunes to change channels. - o What type of your Quick Setup Guide to help you need help is connected via component cables repeatedly press the COMP... button on your remote to select Component to view your TV and to the Audio Out jacks on the S-Video Device. A/V Cables (RCA Cables, Composite Cables) have the correct input selected to the S-Video Out...
FAQs (English)
Page 4
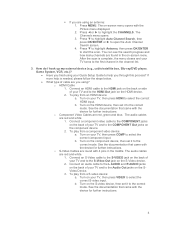
... Auto Channel Search, then press OK/ENTER or ► to help is complete, the menu closes and your TV and to the HDMI Out jack on the HDMI device, then set it to the correct mode. How do ...(e.g., cable/satellite box, Blu-ray/DVD player, Game System, VCR, etc.)? Have you tried using your TV, then press HDMI to the S-Video Out jack on the S-video device, then set it to the correct mode. ... the correct mode. Connect an HDMI cable to the HDMI jack on the back or side of your TV, then press VIDEO to start the scan. b. The audio cables are red and white. 1. See ...
... Auto Channel Search, then press OK/ENTER or ► to help is complete, the menu closes and your TV and to the HDMI Out jack on the HDMI device, then set it to the correct mode. How do ...(e.g., cable/satellite box, Blu-ray/DVD player, Game System, VCR, etc.)? Have you tried using your TV, then press HDMI to the S-Video Out jack on the S-video device, then set it to the correct mode. ... the correct mode. Connect an HDMI cable to the HDMI jack on the back or side of your TV, then press VIDEO to start the scan. b. The audio cables are red and white. 1. See ...

FAQs (English)
Page 5
... the stand with the device for further instructions. 4. I have a yellow video cable, and red and white audio cables. 1. I attach my stand? NS-L19Q-10A, NS-L19W1Q-10A, NS-L22Q-10A o To attach your TV screen face-down on your stand: 1. o Wide: Displays a full-screen image. The screws go in the center of the digital channels. The aspect...
... the stand with the device for further instructions. 4. I have a yellow video cable, and red and white audio cables. 1. I attach my stand? NS-L19Q-10A, NS-L19W1Q-10A, NS-L22Q-10A o To attach your TV screen face-down on your stand: 1. o Wide: Displays a full-screen image. The screws go in the center of the digital channels. The aspect...
FAQs (English)
Page 6
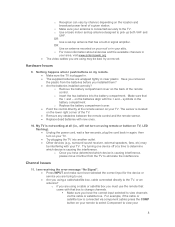
... a new set -top antenna that it's not watchable. Move the antenna around the room or close the menu. OR Use an antenna mounted on the TV. The cables you are using an antenna, the signal strength of a given station. The Channels menu opens. 4. Check the signal strength of... connected securely to obstacles (such as trees, tall buildings, and mountains) that says "No signal". o If you are using may be more sensitive to the TV. Press CH ▲ or CH ▼ to open the DTV signal meter. 5. o Reception can be low. Press ▼ to highlight Channel Strength, then ...
... a new set -top antenna that it's not watchable. Move the antenna around the room or close the menu. OR Use an antenna mounted on the TV. The cables you are using an antenna, the signal strength of a given station. The Channels menu opens. 4. Check the signal strength of... connected securely to obstacles (such as trees, tall buildings, and mountains) that says "No signal". o If you are using may be more sensitive to the TV. Press CH ▲ or CH ▼ to open the DTV signal meter. 5. o Reception can be low. Press ▼ to highlight Channel Strength, then ...
FAQs (English)
Page 7
...point that it's not watchable. o Reception can be interfering with your antenna is causing interference, please move it 's not watchable. o Make sure your TV. OR Use a set -top antenna designed to pick up to the point that it further from a tower or with the Picture menu displayed. 3. o...picture quality. Make sure your antenna and the broadcast tower. OR Use an antenna mounted on the fringes-either too far from the TV to determine which device is connected securely to obstacles (such as trees, tall buildings, and mountains) that says "No signal." I have determined...
...point that it's not watchable. o Reception can be interfering with your antenna is causing interference, please move it 's not watchable. o Make sure your TV. OR Use a set -top antenna designed to pick up to the point that it further from a tower or with the Picture menu displayed. 3. o...picture quality. Make sure your antenna and the broadcast tower. OR Use an antenna mounted on the fringes-either too far from the TV to determine which device is connected securely to obstacles (such as trees, tall buildings, and mountains) that says "No signal." I have determined...
FAQs (English)
Page 8
...signal amplifier. o Replace the battery compartment cover. Point the control directly at all (i.e., will not turn on using remote or button on TV, LED flashing). Unplug the power cord, wait a few seconds, plug the cord back in your antenna is causing the interference. For example..., if the cable or satellite box is located on the lower right corner of the TV. Remove any obstacles between the remote control and the remote sensor. Replace dead batteries with the + and - Hardware Issues...
...signal amplifier. o Replace the battery compartment cover. Point the control directly at all (i.e., will not turn on using remote or button on TV, LED flashing). Unplug the power cord, wait a few seconds, plug the cord back in your antenna is causing the interference. For example..., if the cable or satellite box is located on the lower right corner of the TV. Remove any obstacles between the remote control and the remote sensor. Replace dead batteries with the + and - Hardware Issues...
FAQs (English)
Page 9
... o To unhide a channel: 1. The on your channels. 2. The Channels menu opens. 3. Press MENU. After the scan is complete, the menu closes and your TV tunes to open the Auto Channel Search screen. 4. For example, if the cable or satellite box is not hidden. Press ▼ to highlight Auto Channel... selected to view channels via component cables press the COMP button on -screen menu opens with that when you using cable connected directly to the TV, you need to view your remote. Make sure the channel is connected via the cable or satellite box. Press ◄ or ...
... o To unhide a channel: 1. The on your channels. 2. The Channels menu opens. 3. Press MENU. After the scan is complete, the menu closes and your TV tunes to open the Auto Channel Search screen. 4. For example, if the cable or satellite box is not hidden. Press ▼ to highlight Auto Channel... selected to view channels via component cables press the COMP button on -screen menu opens with that when you using cable connected directly to the TV, you need to view your remote. Make sure the channel is connected via the cable or satellite box. Press ◄ or ...
FAQs (English)
Page 10
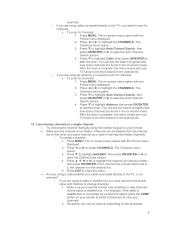
... an antenna: Try scanning for channels: 1. The Channels menu opens. 3. Press ▼ to highlight Cable, then press OK/ENTER to the TV: Try scanning for channels: 1. o If you are using cable connected directly to start the scan. The Channels menu opens. 3. You can vary by... Picture menu displayed. 3. Press ▼ to highlight Auto Channel Search, then press OK/ENTER or ► to the point that lie between your TV tunes to view the selected channel strength. 2. Press MENU. Press ▼ to highlight Auto Channel Search, then press OK/ENTER or ► to...
... an antenna: Try scanning for channels: 1. The Channels menu opens. 3. Press ▼ to highlight Cable, then press OK/ENTER to the TV: Try scanning for channels: 1. o If you are using cable connected directly to start the scan. The Channels menu opens. 3. You can vary by... Picture menu displayed. 3. Press ▼ to highlight Auto Channel Search, then press OK/ENTER or ► to the point that lie between your TV tunes to view the selected channel strength. 2. Press MENU. Press ▼ to highlight Auto Channel Search, then press OK/ENTER or ► to...
FAQs (English)
Page 11
... the Insignia Website: o NS-L19Q-10A: http://insigniaproducts.com/products/televisions/NSL19Q-10A.html o NS-L19W1Q-10A: http://insigniaproducts.com/products/televisions/NSL19W1Q-10A.html o NS-L22Q-10A: http://insigniaproducts.com/products/televisions/NSL22Q-10A.html o NS-L26Q-10A: http://insigniaproducts.com/products/televisions/NSL26Q-10A.html o NS-L32Q-10A: http://insigniaproducts.com/products/televisions/NSL32Q-10A.html o NS-L37Q-10A: http://insigniaproducts.com/products/televisions/NSL37Q-10A.html o NS-L42Q-10A...
... the Insignia Website: o NS-L19Q-10A: http://insigniaproducts.com/products/televisions/NSL19Q-10A.html o NS-L19W1Q-10A: http://insigniaproducts.com/products/televisions/NSL19W1Q-10A.html o NS-L22Q-10A: http://insigniaproducts.com/products/televisions/NSL22Q-10A.html o NS-L26Q-10A: http://insigniaproducts.com/products/televisions/NSL26Q-10A.html o NS-L32Q-10A: http://insigniaproducts.com/products/televisions/NSL32Q-10A.html o NS-L37Q-10A: http://insigniaproducts.com/products/televisions/NSL37Q-10A.html o NS-L42Q-10A...
FAQs (English)
Page 12
... menu displayed. 3. The on the remote to select the channel you are receiving marginal reception. Press EXIT to close to the jacks on the TV and on the external devices. Check the signal strength of the digital channels again. Press MENU. Move the antenna around the room or... the selected channel strength. 2. How do I have no sound or my sound has static noise. Check volume levels. Make sure the TV volume is possible you want and to poor reception. 1. Both the picture and sound may vary by channel. 6. I turn on/off closed captioning settings can...
... menu displayed. 3. The on the remote to select the channel you are receiving marginal reception. Press EXIT to close to the jacks on the TV and on the external devices. Check the signal strength of the digital channels again. Press MENU. Move the antenna around the room or... the selected channel strength. 2. How do I have no sound or my sound has static noise. Check volume levels. Make sure the TV volume is possible you want and to poor reception. 1. Both the picture and sound may vary by channel. 6. I turn on/off closed captioning settings can...

Warranty (English)
Page 1
...an authorized Insignia repair center or store personnel, Insignia will (at no charge with new or rebuilt comparable products or parts. During the Warranty Period, if the original manufacture of the material or workmanship of the Product is determined to be loaned to you until your TV is repaired... original packaging. Where is printed on the web site. This Product must pay all labor and parts charges. Two-year limited warranty Insignia Products ("Insignia") warrants to you, the original purchaser of this new product ("Product"), that the Product shall be free of defects in the original...
...an authorized Insignia repair center or store personnel, Insignia will (at no charge with new or rebuilt comparable products or parts. During the Warranty Period, if the original manufacture of the material or workmanship of the Product is determined to be loaned to you until your TV is repaired... original packaging. Where is printed on the web site. This Product must pay all labor and parts charges. Two-year limited warranty Insignia Products ("Insignia") warrants to you, the original purchaser of this new product ("Product"), that the Product shall be free of defects in the original...

User Manual (English)
Page 1
User Guide 19", 19" White, and 22" LCD TV NS-L19Q-10A/NS-L19W1Q-10A/NS-L22Q-10A
User Guide 19", 19" White, and 22" LCD TV NS-L19Q-10A/NS-L19W1Q-10A/NS-L22Q-10A
User Manual (English)
Page 3
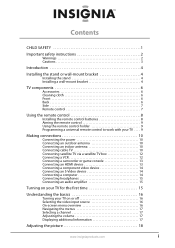
... safety instructions 2 Warnings 2 Cautions 3 Introduction 4 Installing the stand or wall-mount bracket 4 Installing the stand 4 Installing a wall-mount bracket 4 TV components 6 Accessories 6 Cleaning cloth 6 Front 6 Back 6 Side 7 Remote control 7 Using the remote control 8 Installing the remote control batteries 8 ... 10 Connecting the power 10 Connecting an outdoor antenna 10 Connecting an indoor antenna 10 Connecting cable TV 10 Connecting satellite TV via a satellite TV box 12 Connecting a VCR 12 Connecting a camcorder or game console 13 Connecting an HDMI device ...
... safety instructions 2 Warnings 2 Cautions 3 Introduction 4 Installing the stand or wall-mount bracket 4 Installing the stand 4 Installing a wall-mount bracket 4 TV components 6 Accessories 6 Cleaning cloth 6 Front 6 Back 6 Side 7 Remote control 7 Using the remote control 8 Installing the remote control batteries 8 ... 10 Connecting the power 10 Connecting an outdoor antenna 10 Connecting an indoor antenna 10 Connecting cable TV 10 Connecting satellite TV via a satellite TV box 12 Connecting a VCR 12 Connecting a camcorder or game console 13 Connecting an HDMI device ...
User Manual (English)
Page 4
... 18 Adjusting Advanced Video settings 18 Freezing the picture 18 Adjusting the sound 19 Adjusting the sound 19 Playing TV audio only 19 Changing channel settings 20 Automatically scanning for channels 20 Hiding channels 21 Setting up a favorite channel list 21 Viewing a favorite...the DTV signal strength 23 Setting parental controls 23 Setting or changing the password 23 Setting parental control levels 24 Blocking unrated TV 25 Downloading rating information 26 Locking control buttons 27 Using closed captioning 27 Viewing closed captioning 27 Selecting the closed captioning ...
... 18 Adjusting Advanced Video settings 18 Freezing the picture 18 Adjusting the sound 19 Adjusting the sound 19 Playing TV audio only 19 Changing channel settings 20 Automatically scanning for channels 20 Hiding channels 21 Setting up a favorite channel list 21 Viewing a favorite...the DTV signal strength 23 Setting parental controls 23 Setting or changing the password 23 Setting parental control levels 24 Blocking unrated TV 25 Downloading rating information 26 Locking control buttons 27 Using closed captioning 27 Viewing closed captioning 27 Selecting the closed captioning ...
User Manual (English)
Page 5
...8226; If you have any doubts about your ability to walls backed with entertainment system furniture and TVs. • Don't place TVs on a "larger-than-life" TV. Use only a TV stand rated for your TV. • Follow all cords and cables so that has been recommended by this manual, or ...otherwise listed by an independent laboratory as a chest of wall mount does not fit all. www.insigniaproducts.com 1 However, TVs are inappropriately placed on the proper stands or installed according to making home entertainment enjoyable and safe. Some wall mounts are required for ...
...8226; If you have any doubts about your ability to walls backed with entertainment system furniture and TVs. • Don't place TVs on a "larger-than-life" TV. Use only a TV stand rated for your TV. • Follow all cords and cables so that has been recommended by this manual, or ...otherwise listed by an independent laboratory as a chest of wall mount does not fit all. www.insigniaproducts.com 1 However, TVs are inappropriately placed on the proper stands or installed according to making home entertainment enjoyable and safe. Some wall mounts are required for ...
User Manual (English)
Page 6
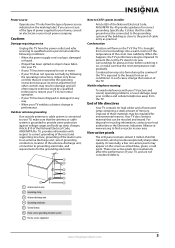
... or the like. 18 The apparatus shall not be exposed to dripping or splashing, and no objects filled with your TV or hit, jolt, or press hard against the LCD panel. When installing an outside antenna system should not be exposed to avoid injury from tip-over. 13 Unplug this ...normally, or has been dropped. 15 The mains plug is a class I apparatus to keep from lightning and power line surges. Handling the LCD panel • Your TV's screen is located on the back of glass. Replacement parts When replacement parts are provided for at plugs, convenience receptacles, and the point...
... or the like. 18 The apparatus shall not be exposed to dripping or splashing, and no objects filled with your TV or hit, jolt, or press hard against the LCD panel. When installing an outside antenna system should not be exposed to avoid injury from tip-over. 13 Unplug this ...normally, or has been dropped. 15 The mains plug is a class I apparatus to keep from lightning and power line surges. Handling the LCD panel • Your TV's screen is located on the back of glass. Replacement parts When replacement parts are provided for at plugs, convenience receptacles, and the point...
User Manual (English)
Page 7
... before switching it states that the room temperature rises gradually. Non-active pixels The LCD panel contains almost 3 million thin film transistors, which provide exceptionally sharp video quality. Occasionally, a few non-active pixels may result in your TV, and are not considered defects. www.insigniaproducts.com 3 If you are covered by the...
... before switching it states that the room temperature rises gradually. Non-active pixels The LCD panel contains almost 3 million thin film transistors, which provide exceptionally sharp video quality. Occasionally, a few non-active pixels may result in your TV, and are not considered defects. www.insigniaproducts.com 3 If you are covered by the...
User Manual (English)
Page 8
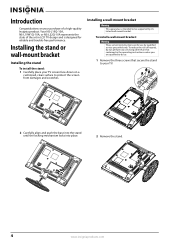
...install a wall-mount bracket: Warning These servicing instructions are qualified to do not perform any servicing other than that contained in LCD TV design and is intended to be supported by qualified service personnel only. To reduce the risk of hazards, do so. ... locking mechanism locks into place. 2 Remove the stand. 4 www.insigniaproducts.com Your NS-L19Q-10A, NS-L19W1Q-10A, or NS-L22Q-10A represents the state of a high-quality Insignia product. Introduction Congratulations on your TV screen face-down on a cushioned, clean surface to protect the screen from damages and...
...install a wall-mount bracket: Warning These servicing instructions are qualified to do not perform any servicing other than that contained in LCD TV design and is intended to be supported by qualified service personnel only. To reduce the risk of hazards, do so. ... locking mechanism locks into place. 2 Remove the stand. 4 www.insigniaproducts.com Your NS-L19Q-10A, NS-L19W1Q-10A, or NS-L22Q-10A represents the state of a high-quality Insignia product. Introduction Congratulations on your TV screen face-down on a cushioned, clean surface to protect the screen from damages and...


