
Owners Manual
Page 2
... the trimmer guard and trimmer head 13 FUEL HANDLING Fuel 15 Fueling 15 STARTING AND STOPPING Check before starting: Husqvarna AB has a policy of continuous product development and therefore reserves the right to meet Federal emissions requirements. For reference, please fill out the following before starting 16 Starting and stopping 16 MAINTENANCE Carburetor 18 Muffler 18 Spark plug 19 Two--piece shart 19 Air filter 19 Bevel gear 19 Maintenance schedule 20 Trimmer head line loading instructions...
... the trimmer guard and trimmer head 13 FUEL HANDLING Fuel 15 Fueling 15 STARTING AND STOPPING Check before starting: Husqvarna AB has a policy of continuous product development and therefore reserves the right to meet Federal emissions requirements. For reference, please fill out the following before starting 16 Starting and stopping 16 MAINTENANCE Carburetor 18 Muffler 18 Spark plug 19 Two--piece shart 19 Air filter 19 Bevel gear 19 Maintenance schedule 20 Trimmer head line loading instructions...

Owners Manual
Page 4
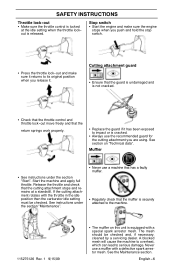
... if service and/or repairs are wearing hearing protection. B Stop switch Make sure the engine stops when you are not carried out professionally. Always wear heavy, long pants. when you release the handle the throttle control and the throttle lock--out both move back to locate where this section. When you grasp the handle) it can increase if machine maintenance is positioned on...
... if service and/or repairs are wearing hearing protection. B Stop switch Make sure the engine stops when you are not carried out professionally. Always wear heavy, long pants. when you release the handle the throttle control and the throttle lock--out both move back to locate where this section. When you grasp the handle) it can increase if machine maintenance is positioned on...

Owners Manual
Page 5
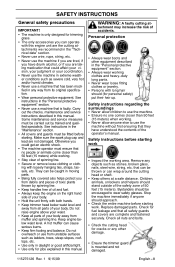
... get very hot during use a cutting attachment without an approved guard. Use of incorrectly wound trimmer line or an incorrect cutting attachment increases the level of fire! IMPORTANT! If your machine fails any of our products we guarantee the availability of the machine's safety equipment. SAFETY INSTRUCTIONS Cutting attachment guard This guard is intended to prevent loose objects from the operator. Checking, maintaining and servicing the machine's safety...
... get very hot during use a cutting attachment without an approved guard. Use of incorrectly wound trimmer line or an incorrect cutting attachment increases the level of fire! IMPORTANT! If your machine fails any of our products we guarantee the availability of the machine's safety equipment. SAFETY INSTRUCTIONS Cutting attachment guard This guard is intended to prevent loose objects from the operator. Checking, maintaining and servicing the machine's safety...
Owners Manual
Page 6
... apply full throttle. S Regularly check that the return springs work properly. S Replace the guard if it returns to serious damage. See section on this unit is not cracked. English--- 6 Never use a muffler with the throttle in the idle position then the carburetor idle setting must be checked and, if necessary. SAFETY INSTRUCTIONS Throttle lock--out S Make sure the throttle control is locked at a standstill. cleaned by a servicing dealer. Stop switch S Start the engine and make...
... apply full throttle. S Regularly check that the return springs work properly. S Replace the guard if it returns to serious damage. See section on this unit is not cracked. English--- 6 Never use a muffler with the throttle in the idle position then the carburetor idle setting must be checked and, if necessary. SAFETY INSTRUCTIONS Throttle lock--out S Make sure the throttle control is locked at a standstill. cleaned by a servicing dealer. Stop switch S Start the engine and make...
Owners Manual
Page 8
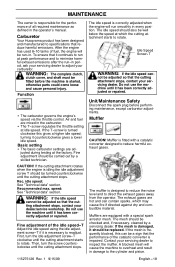
... cutting at a safe distance. tachment may increase the risk of oil and fuel. Safety instructions regarding the surroundings S Never allow anyone should be fitted before starting. Remove any objects such as ladders, trees, steep slopes, rooftops, etc. S Check the entire machine before starting work S Inspect the working clothes and heavy--duty long pants. S Never use wire, rope, string, etc. S Keep trimmer head below waist level...
... cutting at a safe distance. tachment may increase the risk of oil and fuel. Safety instructions regarding the surroundings S Never allow anyone should be fitted before starting. Remove any objects such as ladders, trees, steep slopes, rooftops, etc. S Check the entire machine before starting work S Inspect the working clothes and heavy--duty long pants. S Never use wire, rope, string, etc. S Keep trimmer head below waist level...

Owners Manual
Page 9
... start to rotate immediately. Fuel safety S Always use approved containers intended for example, from electrical machinery, electric motors, electrical relays/switches or boilers. S Move the machine at least 10 feet (3 meters) from the fuel cap and fuel lines. S If you consider to the specification. Wash any leakage or fumes coming into contact with the cutting attachment or loose objects that has parts missing or has been changed...
... start to rotate immediately. Fuel safety S Always use approved containers intended for example, from electrical machinery, electric motors, electrical relays/switches or boilers. S Move the machine at least 10 feet (3 meters) from the fuel cap and fuel lines. S If you consider to the specification. Wash any leakage or fumes coming into contact with the cutting attachment or loose objects that has parts missing or has been changed...

Owners Manual
Page 10
... difficult to idle speed after each working against walls, fences, trees and borders, however it . Never press the trimmer line into contact with the ground during normal cutting. Basic working techniques S Always slow the engine to reach using a trimmer head Trimming S The trimmer line wears quicker and must be cut. Avoid pressing the trimmer head against the ground as this type can easily remove grass and weeds up...
... difficult to idle speed after each working against walls, fences, trees and borders, however it . Never press the trimmer line into contact with the ground during normal cutting. Basic working techniques S Always slow the engine to reach using a trimmer head Trimming S The trimmer line wears quicker and must be cut. Avoid pressing the trimmer head against the ground as this type can easily remove grass and weeds up...

Owners Manual
Page 11
... the engine and trimmer head before you remove material that has wound around the drive shaft as this can result in serious injury. Always wear eye protection. Keep unauthorized persons at a dis- SAFETY INSTRUCTIONS Sweeping S The fan effect of the rotating line can be swept and move the tool to remove the cut material while the engine is running or the trimmer line is rotating...
... the engine and trimmer head before you remove material that has wound around the drive shaft as this can result in serious injury. Always wear eye protection. Keep unauthorized persons at a dis- SAFETY INSTRUCTIONS Sweeping S The fan effect of the rotating line can be swept and move the tool to remove the cut material while the engine is running or the trimmer line is rotating...

Owners Manual
Page 12
Cutting attachment guard 5. Cylinder cover 12. Starter handle 13. Handle adjustment 18. Loop handle 8. Fuel tank 14. Trimmer head 2. Stop switch 10.Throttle lock--out 11. Operator's manual (EPA) 115275126 Rev. 1 9/15/09 English--- 12 Throttle control 9. Choke control 15. Grease filler cap 3. Drive disc 19. Primer bulb 16. 12 4 1 KNOW YOUR TRIMMER 3 128LD 19 7 6 5 9 10 11 12 128CD 17 8 16 14 15 13 4 21 1 18 20 Know your trimmer 1. Lower shaft 7. Bevel gear 4. Upper shaft 6. Shaft coupling 20. 2--stroke engine oil 21. Air filter cover 17.
Cutting attachment guard 5. Cylinder cover 12. Starter handle 13. Handle adjustment 18. Loop handle 8. Fuel tank 14. Trimmer head 2. Stop switch 10.Throttle lock--out 11. Operator's manual (EPA) 115275126 Rev. 1 9/15/09 English--- 12 Throttle control 9. Choke control 15. Grease filler cap 3. Drive disc 19. Primer bulb 16. 12 4 1 KNOW YOUR TRIMMER 3 128LD 19 7 6 5 9 10 11 12 128CD 17 8 16 14 15 13 4 21 1 18 20 Know your trimmer 1. Lower shaft 7. Bevel gear 4. Upper shaft 6. Shaft coupling 20. 2--stroke engine oil 21. Air filter cover 17.

Owners Manual
Page 15
...- Mix (shake) the fuel mixture. If you may choose to an increased engine temperature, which is equipped with a two--stroke engine and must always be emptied and cleaned. S Never use HUSQVARNA two--stroke oil, which can drastically affect the ratio of oil to be mixed to be used for some time, the fuel tank should be run the engine on unleaded gasoline. gallon 1 2 1/2 5 U.S. fl. Tighten the fuel cap carefully after use high...
...- Mix (shake) the fuel mixture. If you may choose to an increased engine temperature, which is equipped with a two--stroke engine and must always be emptied and cleaned. S Never use HUSQVARNA two--stroke oil, which can drastically affect the ratio of oil to be mixed to be used for some time, the fuel tank should be run the engine on unleaded gasoline. gallon 1 2 1/2 5 U.S. fl. Tighten the fuel cap carefully after use high...

Owners Manual
Page 16
.... Never use . DO NOT squeeze throttle trigger. then quickly and powerfully pull the cord. Never wrap the starter cord around your foot!). Replace damaged parts. Repeat pulling the cord until fuel begins to fill the bulb. CAUTION! STARTING AND STOPPING Check before starting Cold engine Primer bulb: Press the primer bulb 10 times until the engine attempts to start. The primer bulb need not be fitted before the machine is started, otherwise parts could come into contact with a defective guard. S Inspect...
.... Never use . DO NOT squeeze throttle trigger. then quickly and powerfully pull the cord. Never wrap the starter cord around your foot!). Replace damaged parts. Repeat pulling the cord until fuel begins to fill the bulb. CAUTION! STARTING AND STOPPING Check before starting Cold engine Primer bulb: Press the primer bulb 10 times until the engine attempts to start. The primer bulb need not be fitted before the machine is started, otherwise parts could come into contact with a defective guard. S Inspect...

Owners Manual
Page 17
Stopping Stop the engine by pushing and holding the stop switch in the closed position the cutting attachment will start to the ½ position. Pull starter rope until the engine stops. WARNING: When the engine is started with the choke in the STOP position until engine runs. STARTING AND STOPPING Warm engine With a warm engine, move the blue engine choke lever to rotate immediately. 115275126 Rev. 1 9/15/09 English--- 17 Move the blue engine choke lever to the opened position.
Stopping Stop the engine by pushing and holding the stop switch in the closed position the cutting attachment will start to the ½ position. Pull starter rope until the engine stops. WARNING: When the engine is started with the choke in the STOP position until engine runs. STARTING AND STOPPING Warm engine With a warm engine, move the blue engine choke lever to rotate immediately. 115275126 Rev. 1 9/15/09 English--- 17 Move the blue engine choke lever to the opened position.
Owners Manual
Page 18
... to reduce the noise level and to inspect the muffler. Basic setting S The basic carburetor settings are mixed in . Muffler CAUTION! cleaned by a skilled technician. Mufflers are hot and can - Idle Speed Screw--T WARNING: If the idle speed can contain sparks, which the cutting attachment starts to readjust. not be carried out by a servicing dealer. Fine adjustment should be turned counterclockwise until it has been correctly adjusted or repaired. The muffler is necessary to...
... to reduce the noise level and to inspect the muffler. Basic setting S The basic carburetor settings are mixed in . Muffler CAUTION! cleaned by a skilled technician. Mufflers are hot and can - Idle Speed Screw--T WARNING: If the idle speed can contain sparks, which the cutting attachment starts to readjust. not be carried out by a servicing dealer. Fine adjustment should be turned counterclockwise until it has been correctly adjusted or repaired. The muffler is necessary to...

Owners Manual
Page 19
... carburetor adjustment. Rinse thoroughly. MAINTENANCE Muffler bolts Spark arrestor mesh 0.024″ (0.6 mm) CAUTION! Air filter The air filter must always be replaced with catalytic converters get very hot during use the recommended spark plug type! correct type of fire! Use of engine power S Unnecessary wear to the skin. An air filter that has been in use a machine that may result in burns to engine parts S Excessive fuel consumption The spark plug condition is low on the spark plug electrodes...
... carburetor adjustment. Rinse thoroughly. MAINTENANCE Muffler bolts Spark arrestor mesh 0.024″ (0.6 mm) CAUTION! Air filter The air filter must always be replaced with catalytic converters get very hot during use the recommended spark plug type! correct type of fire! Use of engine power S Unnecessary wear to the skin. An air filter that has been in use a machine that may result in burns to engine parts S Excessive fuel consumption The spark plug condition is low on the spark plug electrodes...
Owners Manual
Page 20
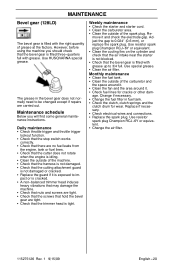
... maintenance S Check throttle trigger and throttle trigger lockout function. S Check that may damage the machine. S Clean the carburetor area. Use special grease. Monthly maintenance S Clean the fuel tank. S Check the clutch, clutch springs and the clutch drum for cracks or other dam- Replace if necessary. S Check electrical wires and connections. S Replace the spark plug. S Change the air filter. 115275126 Rev. 1 9/15/09 English--- 20 pact or is not damaged. S A non--balanced trimmer head induces heavy vibrations that nuts and screws are tight. Re- S Clean...
... maintenance S Check throttle trigger and throttle trigger lockout function. S Check that may damage the machine. S Clean the carburetor area. Use special grease. Monthly maintenance S Clean the fuel tank. S Check the clutch, clutch springs and the clutch drum for cracks or other dam- Replace if necessary. S Check electrical wires and connections. S Replace the spark plug. S Change the air filter. 115275126 Rev. 1 9/15/09 English--- 20 pact or is not damaged. S A non--balanced trimmer head induces heavy vibrations that nuts and screws are tight. Re- S Clean...

Owners Manual
Page 22
... Yes Ignition system Manufacturer/type of ignition system Spark plug Electrode gap, inch/mm Walbro/CD Champion RCJ--6Y 0.024/0.6 Walbro/CD Champion RCJ--6Y 0.024/0.6 Fuel and lubrication system Manufacturer/type of output shaft, rpm Max. NOTE! These attachments used in combination with the following time distribution: 1/2 idle and 1/2 max. Safety Requirements". no . engine output, acc. speed. Edger attachment with shaft 952 711 607 Cultivator attachment with shaft 952 711 608 Blower attachment with shaft...
... Yes Ignition system Manufacturer/type of ignition system Spark plug Electrode gap, inch/mm Walbro/CD Champion RCJ--6Y 0.024/0.6 Walbro/CD Champion RCJ--6Y 0.024/0.6 Fuel and lubrication system Manufacturer/type of output shaft, rpm Max. NOTE! These attachments used in combination with the following time distribution: 1/2 idle and 1/2 max. Safety Requirements". no . engine output, acc. speed. Edger attachment with shaft 952 711 607 Cultivator attachment with shaft 952 711 608 Blower attachment with shaft...
Owners Manual
Page 23
... the authorized Husqvarna dealer in order to obtain warranty service. Emission control system components necessary to comply with CARB and EPA regulations. 1 Year Warranty: All trimmers used , but not limited to, filters, lubricants, rewind springs, spark plugs, and starter ropes. (2) Natural discoloration of material due to ultraviolet light. SECTION 3: ITEMS NOT COVERED BY THIS WARRANTY The following : (1) Accident, abuse, misuse, negligence and neglect, including stale fuel, dirt...
... the authorized Husqvarna dealer in order to obtain warranty service. Emission control system components necessary to comply with CARB and EPA regulations. 1 Year Warranty: All trimmers used , but not limited to, filters, lubricants, rewind springs, spark plugs, and starter ropes. (2) Natural discoloration of material due to ultraviolet light. SECTION 3: ITEMS NOT COVERED BY THIS WARRANTY The following : (1) Accident, abuse, misuse, negligence and neglect, including stale fuel, dirt...

Owners Manual
Page 24
...--on your nearest authorized service center, call HUSQVARNA at an approved HUSQVARNA servicing center. husqvarna.com. WARRANTY COMMENCEMENT DATE: The warranty period begins on your engine (as the carburetor, the ignition system and the fuel tank. WHAT IS COVERED: REPAIR OR REPLACEMENT OF PARTS. EPA / CALIFORNIA / ENVIRONMENT CANADA EMISSION CONTROL WARRANTY STATEMENT YOUR WARRANTY RIGHTS AND OBLIGATIONS: The U.S. HUSQVARNA must be provided at all scheduled maintenance. DIAGNOSIS: The owner shall not be...
...--on your nearest authorized service center, call HUSQVARNA at an approved HUSQVARNA servicing center. husqvarna.com. WARRANTY COMMENCEMENT DATE: The warranty period begins on your engine (as the carburetor, the ignition system and the fuel tank. WHAT IS COVERED: REPAIR OR REPLACEMENT OF PARTS. EPA / CALIFORNIA / ENVIRONMENT CANADA EMISSION CONTROL WARRANTY STATEMENT YOUR WARRANTY RIGHTS AND OBLIGATIONS: The U.S. HUSQVARNA must be provided at all scheduled maintenance. DIAGNOSIS: The owner shall not be...

Parts List
Page 1
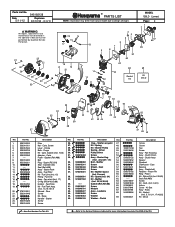
... 537234901 537338306 Description Screw Screw Screw Grease Plug - 9mm Screw Bracket-Shield Assy-Gearbox Driver Disc Assy-T25 Cutting Head Not Shown 115374327 530031159 Manual Wrench-Hex (5/32") = New Part Number For This IPL = Refer to design changes. Date 5/11/12 545192138 Replaces 545192138 - 8/24/10 R PAR TS LIST NOTE : Illustration may differ from actual model due to the Service Reference Indicated for more information.(Located at the END...
... 537234901 537338306 Description Screw Screw Screw Grease Plug - 9mm Screw Bracket-Shield Assy-Gearbox Driver Disc Assy-T25 Cutting Head Not Shown 115374327 530031159 Manual Wrench-Hex (5/32") = New Part Number For This IPL = Refer to design changes. Date 5/11/12 545192138 Replaces 545192138 - 8/24/10 R PAR TS LIST NOTE : Illustration may differ from actual model due to the Service Reference Indicated for more information.(Located at the END...
Parts List
Page 2
...,23,25 - 31) Bolt - Muffler (Incl. 33,34,38,40) Gasket (Ref.#39,68) Screw Module Assy - Fan Housing Assy - Piston Pin Ring - Decal = New Part Number For This IPL = Refer to design changes. Parts List No. Carb. Carb. Starter Pulley Spring - Heat Screw Kit - Clutch Ref. Cylinder (kit) 34. 530015241 Seal (Ref.#68) 35. 530150440 Assy - Fuel Line (Incl. 15) Fitting - Rear 43. 530039227 Screw 44. 530016456 Kit - Spark (Incl. 34) Kit - Part No. 47. 48...
...,23,25 - 31) Bolt - Muffler (Incl. 33,34,38,40) Gasket (Ref.#39,68) Screw Module Assy - Fan Housing Assy - Piston Pin Ring - Decal = New Part Number For This IPL = Refer to design changes. Parts List No. Carb. Carb. Starter Pulley Spring - Heat Screw Kit - Clutch Ref. Cylinder (kit) 34. 530015241 Seal (Ref.#68) 35. 530150440 Assy - Fuel Line (Incl. 15) Fitting - Rear 43. 530039227 Screw 44. 530016456 Kit - Spark (Incl. 34) Kit - Part No. 47. 48...


