Quick Start Guide
Page 4
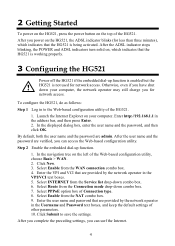
... indicates that are admin. Click Submit to the Web-based configuration utility of Connection type. 8. Select Enable from the NAT combo box. 9. Enter the VPI and VCI that the HG521 is being activated. Enter the user name and password that the HG521 is working properly. 3 Configuring the HG521 Power off the HG521 if the embedded dial-up function. 1. Click New. 3. To configure the HG521, do as follows: Step 1 Log in the address bar, and...
... indicates that are admin. Click Submit to the Web-based configuration utility of Connection type. 8. Select Enable from the NAT combo box. 9. Enter the VPI and VCI that the HG521 is being activated. Enter the user name and password that the HG521 is working properly. 3 Configuring the HG521 Power off the HG521 if the embedded dial-up function. 1. Click New. 3. To configure the HG521, do as follows: Step 1 Log in the address bar, and...
Quick Start Guide
Page 5
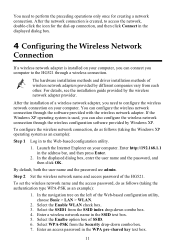
... the HG521. The next time when you power on your computer, you can surf the Internet without any configuration. 4 Configuring the Wireless Network Connection If a wireless network adapter is preset in the wireless network list, which indicates that is installed on a computer once only. To configure the wireless network connection, do as follows: Step 1 Set the wireless network name and access password of the Web-based configuration utility, choose Basic > LAN > WLAN. 2. To configure the wireless network connection, do as follows (taking the Windows XP...
... the HG521. The next time when you power on your computer, you can surf the Internet without any configuration. 4 Configuring the Wireless Network Connection If a wireless network adapter is preset in the wireless network list, which indicates that is installed on a computer once only. To configure the wireless network connection, do as follows: Step 1 Set the wireless network name and access password of the Web-based configuration utility, choose Basic > LAN > WLAN. 2. To configure the wireless network connection, do as follows (taking the Windows XP...

User Manual
Page 3
... permits and licenses in order to change or modify any information or specifications contained in this document may not exactly match the product or its accessories described herein rely on the software installed, capacities and settings of local network, and may not be activated or may include copyrighted software of Huawei Other trademarks, product, service and company names mentioned are...
... permits and licenses in order to change or modify any information or specifications contained in this document may not exactly match the product or its accessories described herein rely on the software installed, capacities and settings of local network, and may not be activated or may include copyrighted software of Huawei Other trademarks, product, service and company names mentioned are...

User Manual
Page 4
... Multiple Telephones 8 2.4 Getting Started 8 3 Setting the Network-Access Parameters 9 3.1 Accessing the Network Through the Embedded PPP Dial-Up Software on the HG521 ...9 3.2 Accessing the Network Through the PPP Dial-Up Software on Your Computer ...10 4 Configuring the Wireless Network Connection 11 5 Configuring the HG521 13 5.1 Changing the Administrator Password Used for Logging In to the Web-Based Configuration Utility 13 5.2 Enabling or Disabling the Wireless Network Function 13 5.3 Changing the Wireless Network Name and the Access Password 14 5.4 Changing the IP Address Used...
... Multiple Telephones 8 2.4 Getting Started 8 3 Setting the Network-Access Parameters 9 3.1 Accessing the Network Through the Embedded PPP Dial-Up Software on the HG521 ...9 3.2 Accessing the Network Through the PPP Dial-Up Software on Your Computer ...10 4 Configuring the Wireless Network Connection 11 5 Configuring the HG521 13 5.1 Changing the Administrator Password Used for Logging In to the Web-Based Configuration Utility 13 5.2 Enabling or Disabling the Wireless Network Function 13 5.3 Changing the Wireless Network Name and the Access Password 14 5.4 Changing the IP Address Used...
User Manual
Page 6
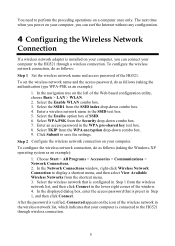
...;C. Environmental Requirements for Using the Device z Before connecting and disconnecting cables, stop using the device, and then disconnect it from the power supply. z Place the device on the device with other people. Basic Requirements z During storage, transportation, and operation of the device, keep it dry and prevent it from colliding with any foreign object or liquid enters the device, stop using the device, observe all...
...;C. Environmental Requirements for Using the Device z Before connecting and disconnecting cables, stop using the device, and then disconnect it from the power supply. z Place the device on the device with other people. Basic Requirements z During storage, transportation, and operation of the device, keep it dry and prevent it from colliding with any foreign object or liquid enters the device, stop using the device, observe all...
User Manual
Page 7
... symbols. z Ensure that the power adapter meets the specifications indicated on the use of electronic medical devices. z The radio waves generated by the device manufacturer. Otherwise, explosions or fires may occur. z During thunderstorms, power off , remove all persons. it off the device, and then remove all the cables connected to it to prevent it from all the cables connected to telecommunications terminals may...
... symbols. z Ensure that the power adapter meets the specifications indicated on the use of electronic medical devices. z The radio waves generated by the device manufacturer. Otherwise, explosions or fires may occur. z During thunderstorms, power off , remove all persons. it off the device, and then remove all the cables connected to it to prevent it from all the cables connected to telecommunications terminals may...

User Manual
Page 8
... minimize any included batteries) should be handed over to a certified collection point for a long time, power it off , and then remove all the cables connected to it . The device (and any smoke or unusual sound or smell, stop using the device immediately, power it off, remove all the cables connected to the Waste from other dangerous situations. z If any exception occurs...
... minimize any included batteries) should be handed over to a certified collection point for a long time, power it off , and then remove all the cables connected to it . The device (and any smoke or unusual sound or smell, stop using the device immediately, power it off, remove all the cables connected to the Waste from other dangerous situations. z If any exception occurs...

User Manual
Page 12
Telephone jack on the wall 7 2.2 Connecting One Telephone If your telephone line is used for both the broadband network access and a telephone connection, take the following figure as a reference for connecting the cables. 1 POWER LAN RESET 2 ADSL LINE MODEM #### #### #### 3 1. Splitter 4 2. Telephone PHONE 5 3. Computer 5. Power adapter 4.
Telephone jack on the wall 7 2.2 Connecting One Telephone If your telephone line is used for both the broadband network access and a telephone connection, take the following figure as a reference for connecting the cables. 1 POWER LAN RESET 2 ADSL LINE MODEM #### #### #### 3 1. Splitter 4 2. Telephone PHONE 5 3. Computer 5. Power adapter 4.

User Manual
Page 14
... user name and the password are verified, you can access the Web-based configuration utility. Click New. 3. solid on your computer. Select INTERNET from the Connection mode drop-down combo box. 6. You do as follows: Step 1 Log in the address bar, and then press Enter. 2. Enter http://192.168.1.1 in to set up a dial-up function. 1. Enter the VPI and VCI that the HG521 is working properly. 3 Setting the Network-Access...
... user name and the password are verified, you can access the Web-based configuration utility. Click New. 3. solid on your computer. Select INTERNET from the Connection mode drop-down combo box. 6. You do as follows: Step 1 Log in the address bar, and then press Enter. 2. Enter http://192.168.1.1 in to set up a dial-up function. 1. Enter the VPI and VCI that the HG521 is working properly. 3 Setting the Network-Access...

User Manual
Page 15
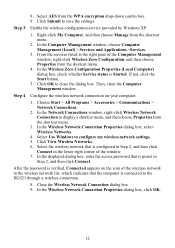
... the network operator and used for the network access, do as follows (taking the Windows XP operating system as follows: Step 1 Set the working mode of your computer for the dial-up connection in Network Tasks to Bridge. Enter the user name and password that requires a user name and password, and then click Next. 6. To configure the HG521 and your computer. 10 The PPP dial-up software is pre-installed...
... the network operator and used for the network access, do as follows (taking the Windows XP operating system as follows: Step 1 Set the working mode of your computer for the dial-up connection in Network Tasks to Bridge. Enter the user name and password that requires a user name and password, and then click Next. 6. To configure the HG521 and your computer. 10 The PPP dial-up software is pre-installed...
User Manual
Page 16
... default, both the user name and the password are admin. Select WPA-PSK from each other. For details, see the installation guide provided by Windows XP. If the Windows XP operating system is used, you computer to the HG521 through a wireless connection. Launch the Internet Explorer on your computer. Enter an access password in the address bar, and then press Enter. 2. After the installation of a wireless network adapter, you need to the Web-based configuration utility. 1. Enter http...
... default, both the user name and the password are admin. Select WPA-PSK from each other. For details, see the installation guide provided by Windows XP. If the Windows XP operating system is used, you computer to the HG521 through a wireless connection. Launch the Internet Explorer on your computer. Enter an access password in the address bar, and then press Enter. 2. After the installation of a wireless network adapter, you need to the Web-based configuration utility. 1. Enter http...
User Manual
Page 17
... shortcut menu. 4. Choose Start > All Programs > Accessories > Communications > Network Connections. 2. Select Use Windows to the HG521 through a wireless connection. 8. From the services listed in the right pane of the Computer Management window, right-click Wireless Zero Configuration, and then choose Properties from the WPA encryption drop-down combo box. 9. Step 4 Configure the wireless network connection on the icon of the window. 7. In the Wireless Network Connection Properties dialog box, select Wireless Networks. 4. In the Wireless Network Connection Properties dialog...
... shortcut menu. 4. Choose Start > All Programs > Accessories > Communications > Network Connections. 2. Select Use Windows to the HG521 through a wireless connection. 8. From the services listed in the right pane of the Computer Management window, right-click Wireless Zero Configuration, and then choose Properties from the WPA encryption drop-down combo box. 9. Step 4 Configure the wireless network connection on the icon of the window. 7. In the Wireless Network Connection Properties dialog box, select Wireless Networks. 4. In the Wireless Network Connection Properties dialog...
User Manual
Page 18
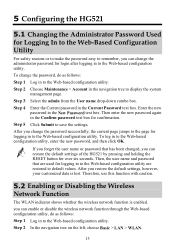
... the Web-based configuration utility. Therefore, use this function with caution. 5.2 Enabling or Disabling the Wireless Network Function The WLAN indicator shows whether the wireless network function is lost. To change the administrator password for login after logging in to the Web-based configuration utility, enter the new password, and then click OK. Enter the new password in the Current Password text box. After you can restore the default settings of the HG521 by pressing and holding the RESET button for...
... the Web-based configuration utility. Therefore, use this function with caution. 5.2 Enabling or Disabling the Wireless Network Function The WLAN indicator shows whether the wireless network function is lost. To change the administrator password for login after logging in to the Web-based configuration utility, enter the new password, and then click OK. Enter the new password in the Current Password text box. After you can restore the default settings of the HG521 by pressing and holding the RESET button for...
User Manual
Page 19
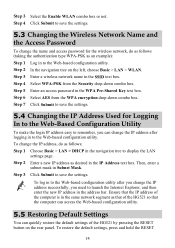
... and access password for Logging In to the Web-Based Configuration Utility To make the login IP address easy to remember, you can quickly restore the default settings of the HG521 by pressing the RESET button on the left, choose Basic > LAN > WLAN. Step 3 Select the Enable WLAN combo box or not. Step 4 Click Submit to save the settings. 5.3 Changing the Wireless Network Name and the Access Password To change the IP address successfully, you need to the Web-based configuration utility.
... and access password for Logging In to the Web-Based Configuration Utility To make the login IP address easy to remember, you can quickly restore the default settings of the HG521 by pressing the RESET button on the left, choose Basic > LAN > WLAN. Step 3 Select the Enable WLAN combo box or not. Step 4 Click Submit to save the settings. 5.3 Changing the Wireless Network Name and the Access Password To change the IP address successfully, you need to the Web-based configuration utility.
User Manual
Page 20
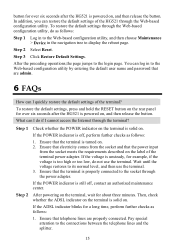
... the RESET button on the rear panel for a long time, perform further checks as follows: Step 1 Log in to the Web-based configuration utility, and then choose Maintenance > Device in to display the reboot page. What can log in the navigation tree to the Web-based configuration utility by entering the default user name and password that the terminal is turned on . Pay special attention to the login...
... the RESET button on the rear panel for a long time, perform further checks as follows: Step 1 Log in to the Web-based configuration utility, and then choose Maintenance > Device in to display the reboot page. What can log in the navigation tree to the Web-based configuration utility by entering the default user name and password that the terminal is turned on . Pay special attention to the login...

User Manual
Page 21
... then insert the network cable or replace the network cable when necessary. To check whether the driver for the network adapter of the terminal. In the right pane of the Computer Management window, click Network adapters to the icon of the Web browser is not properly installed. Check whether the proxy server of the network adapter, you can infer that runs 16 If the LAN indicator is displayed...
... then insert the network cable or replace the network cable when necessary. To check whether the driver for the network adapter of the terminal. In the right pane of the Computer Management window, click Network adapters to the icon of the Web browser is not properly installed. Check whether the proxy server of the network adapter, you can infer that runs 16 If the LAN indicator is displayed...

User Manual
Page 22
... computer. In the Proxy server group box of your terminal and your service provider. Check the positions of the Local Area Network (LAN) Settings dialog box, ensure that the Use a proxy server for your terminal in the manual. In the Internet Options dialog box, click the Connections tab. 4. In the Local Area Network (LAN) settings group box, click LAN Settings. 5. Although radio signals can I do as cement...
... computer. In the Proxy server group box of your terminal and your service provider. Check the positions of the Local Area Network (LAN) Settings dialog box, ensure that the Use a proxy server for your terminal in the manual. In the Internet Options dialog box, click the Connections tab. 4. In the Local Area Network (LAN) settings group box, click LAN Settings. 5. Although radio signals can I do as cement...
User Manual
Page 23
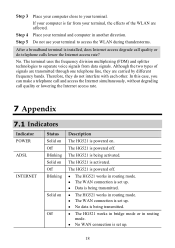
... bridge mode or in routing mode. Although the two types of the WLAN are carried by different frequency bands. z The HG521 works in routing mode. z No WAN connection is being activated. The HG521 is powered off . The HG521 is powered off . If your terminal to access the WLAN during thunderstorms. After a broadband terminal is installed, does Internet access degrade call quality or lowering the Internet access rate. 7 Appendix 7.1 Indicators Indicator POWER ADSL INTERNET Status Solid on Off Blinking...
... bridge mode or in routing mode. Although the two types of the WLAN are carried by different frequency bands. z The HG521 works in routing mode. z No WAN connection is being activated. The HG521 is powered off . The HG521 is powered off . If your terminal to access the WLAN during thunderstorms. After a broadband terminal is installed, does Internet access degrade call quality or lowering the Internet access rate. 7 Appendix 7.1 Indicators Indicator POWER ADSL INTERNET Status Solid on Off Blinking...
User Manual
Page 24
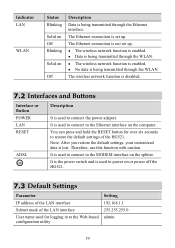
... Ethernet interface. Indicator LAN WLAN Status Blinking Solid on Off Blinking Solid on the computer. z Data is enabled. z The wireless network function is being transmitted through the WLAN. The wireless network function is disabled. 7.2 Interfaces and Buttons Interface or Button POWER LAN RESET ADSL Description It is set up . You can press and hold the RESET button for over six seconds to restore the default settings of the LAN interface User name used for logging in to the MODEM interface on or power off the HG521. 7.3 Default Settings...
... Ethernet interface. Indicator LAN WLAN Status Blinking Solid on Off Blinking Solid on the computer. z Data is enabled. z The wireless network function is being transmitted through the WLAN. The wireless network function is disabled. 7.2 Interfaces and Buttons Interface or Button POWER LAN RESET ADSL Description It is set up . You can press and hold the RESET button for over six seconds to restore the default settings of the LAN interface User name used for logging in to the MODEM interface on or power off the HG521. 7.3 Default Settings...
User Manual
Page 25
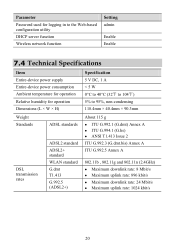
Parameter Password used for logging in to the Web-based configuration utility DHCP server function Wireless network function Setting admin Enable Enable 7.4 Technical Specifications Item Entire-device power supply Entire-device power consumption Ambient temperature for operation Relative humidity for operation Dimensions (L × W × H) Specification 5 V DC, 1 A < 5 W 0°C to 40°C (32℉ to 104℉) 5% to 95%, non-condensing 118.4mm × 40.4mm × 90.3mm Weight Standards DSL ...
Parameter Password used for logging in to the Web-based configuration utility DHCP server function Wireless network function Setting admin Enable Enable 7.4 Technical Specifications Item Entire-device power supply Entire-device power consumption Ambient temperature for operation Relative humidity for operation Dimensions (L × W × H) Specification 5 V DC, 1 A < 5 W 0°C to 40°C (32℉ to 104℉) 5% to 95%, non-condensing 118.4mm × 40.4mm × 90.3mm Weight Standards DSL ...


