Memory Modules
Page 3
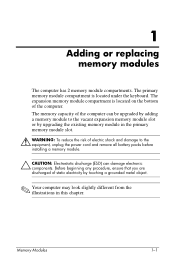
... Modules 1-1 The primary memory module compartment is located on the bottom of electric shock and damage to the equipment, unplug the power cord and remove all battery packs before installing a memory module. Ä CAUTION: Electrostatic discharge (ESD) can be upgraded by adding a memory module to the.... The memory capacity of the computer can damage electronic components. The expansion memory module compartment is located under the keyboard. Before beginning any procedure, ensure that you are discharged of static electricity by upgrading the existing memory module in this chapter.
... Modules 1-1 The primary memory module compartment is located on the bottom of electric shock and damage to the equipment, unplug the power cord and remove all battery packs before installing a memory module. Ä CAUTION: Electrostatic discharge (ESD) can be upgraded by adding a memory module to the.... The memory capacity of the computer can damage electronic components. The expansion memory module compartment is located under the keyboard. Before beginning any procedure, ensure that you are discharged of static electricity by upgrading the existing memory module in this chapter.

Memory Modules
Page 11
Turn the computer display-side up on the display hinge covers. Memory Modules 1-9 Remove the keyboard cover from the computer using the flat end of a screwdriver, applying pressure first from under the left side of the button cover 1, then under the right side 2, and last under the middle 3. ✎ If the keyboard cover does not fully release, pull up , with the front toward you, and open it at a wide angle. 9. Adding or replacing memory modules 8.
Turn the computer display-side up on the display hinge covers. Memory Modules 1-9 Remove the keyboard cover from the computer using the flat end of a screwdriver, applying pressure first from under the left side of the button cover 1, then under the right side 2, and last under the middle 3. ✎ If the keyboard cover does not fully release, pull up , with the front toward you, and open it at a wide angle. 9. Adding or replacing memory modules 8.
Memory Modules
Page 18
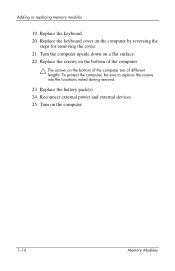
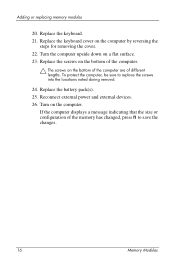
Replace the keyboard. 20. To protect the computer, be sure to replace the screws into the locations noted during removal. 23. Replace the battery pack(s). 24. Reconnect external power and external devices. 25. Turn on a flat surface. 22. Turn the computer upside down on the computer. 1-16 Memory Modules Replace the screws on the bottom of different lengths. Adding or replacing memory modules 19. Replace the keyboard cover on the bottom of the computer are of the computer. Ä The screws on the computer by reversing the steps for removing the cover. 21.
Replace the keyboard. 20. To protect the computer, be sure to replace the screws into the locations noted during removal. 23. Replace the battery pack(s). 24. Reconnect external power and external devices. 25. Turn on a flat surface. 22. Turn the computer upside down on the computer. 1-16 Memory Modules Replace the screws on the bottom of different lengths. Adding or replacing memory modules 19. Replace the keyboard cover on the bottom of the computer are of the computer. Ä The screws on the computer by reversing the steps for removing the cover. 21.

Memory Modules
Page 3
... 2 memory module compartments. Before beginning any procedure, ensure that you are discharged of electric shock and damage to the equipment, unplug the power cord and remove all battery packs before installing a memory module. Ä CAUTION: Electrostatic discharge (ESD) can be upgraded by adding a memory module to the vacant expansion memory module... bottom of the computer. Memory Modules 1-1 The memory capacity of the computer can damage electronic components. The expansion memory module compartment is located under the keyboard.
... 2 memory module compartments. Before beginning any procedure, ensure that you are discharged of electric shock and damage to the equipment, unplug the power cord and remove all battery packs before installing a memory module. Ä CAUTION: Electrostatic discharge (ESD) can be upgraded by adding a memory module to the vacant expansion memory module... bottom of the computer. Memory Modules 1-1 The memory capacity of the computer can damage electronic components. The expansion memory module compartment is located under the keyboard.

Memory Modules
Page 11
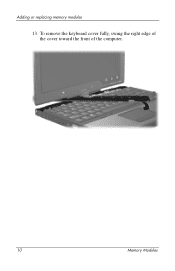
To remove the keyboard cover fully, swing the right edge of the cover toward the front of the computer. Memory Modules 1-9 Adding or replacing memory modules 12.
To remove the keyboard cover fully, swing the right edge of the cover toward the front of the computer. Memory Modules 1-9 Adding or replacing memory modules 12.
Memory Modules
Page 18
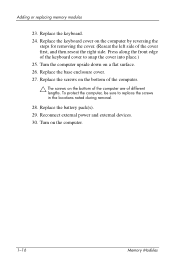
... base enclosure cover. 27. Reconnect external power and external devices. 30. Turn on a flat surface. 26. Replace the keyboard. 24. Turn the computer upside down on the computer. 1-16 Memory Modules Replace the keyboard cover on the bottom of the computer are of different lengths. Press along the front edge of the.... Replace the battery pack(s). 29. Replace the screws on the bottom of the computer. Ä The screws on the computer by reversing the steps for removing the cover. (Reseat the left side of the keyboard cover to replace the screws in the locations noted during...
... base enclosure cover. 27. Reconnect external power and external devices. 30. Turn on a flat surface. 26. Replace the keyboard. 24. Turn the computer upside down on the computer. 1-16 Memory Modules Replace the keyboard cover on the bottom of the computer are of different lengths. Press along the front edge of the.... Replace the battery pack(s). 29. Replace the screws on the bottom of the computer. Ä The screws on the computer by reversing the steps for removing the cover. (Reseat the left side of the keyboard cover to replace the screws in the locations noted during...
Memory Modules - Windows Vista
Page 3
... in the primary memory module slot. Å WARNING: To reduce the risk of electric shock and damage to the equipment, unplug the power cord and remove all battery packs before installing a memory module. Ä CAUTION: Electrostatic discharge (ESD) can be upgraded by adding a memory module to the vacant expansion ...by upgrading the existing memory module in this chapter. The memory capacity of the computer. The expansion memory module compartment is located under the keyboard. Memory Modules 1 Adding or replacing memory modules The computer has 2 memory module compartments.
... in the primary memory module slot. Å WARNING: To reduce the risk of electric shock and damage to the equipment, unplug the power cord and remove all battery packs before installing a memory module. Ä CAUTION: Electrostatic discharge (ESD) can be upgraded by adding a memory module to the vacant expansion ...by upgrading the existing memory module in this chapter. The memory capacity of the computer. The expansion memory module compartment is located under the keyboard. Memory Modules 1 Adding or replacing memory modules The computer has 2 memory module compartments.

Memory Modules - Windows Vista
Page 11
Memory Modules 9 Remove the keyboard cover from the computer using the flat end of a screwdriver, applying pressure first from under the left side of the button cover 1, then under the right side 2, and last under the middle 3. ✎ If the keyboard cover does not fully release, pull up , with the front toward you, and open it at a wide angle. 10. Turn the computer display-side up on the display hinge covers. Adding or replacing memory modules 9.
Memory Modules 9 Remove the keyboard cover from the computer using the flat end of a screwdriver, applying pressure first from under the left side of the button cover 1, then under the right side 2, and last under the middle 3. ✎ If the keyboard cover does not fully release, pull up , with the front toward you, and open it at a wide angle. 10. Turn the computer display-side up on the display hinge covers. Adding or replacing memory modules 9.
Memory Modules - Windows Vista
Page 18
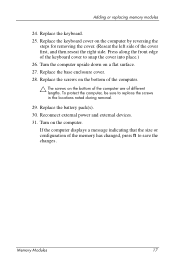
... a message indicating that the size or configuration of the memory has changed, press f1 to replace the screws into the locations noted during removal. 24. Replace the keyboard cover on the bottom of the computer are of the computer. Ä The screws on the computer by reversing the steps for... removing the cover. 22. To protect the computer, be sure to save the changes. 16 Memory Modules Adding or replacing memory modules 20. Replace ...
... a message indicating that the size or configuration of the memory has changed, press f1 to replace the screws into the locations noted during removal. 24. Replace the keyboard cover on the bottom of the computer are of the computer. Ä The screws on the computer by reversing the steps for... removing the cover. 22. To protect the computer, be sure to save the changes. 16 Memory Modules Adding or replacing memory modules 20. Replace ...

Memory Modules - Windows Vista
Page 3
The memory capacity of the computer can damage electronic components. The expansion memory module compartment is located under the keyboard. Memory Modules 1 Before beginning any procedure, ensure that you are discharged of static electricity by upgrading the existing memory module ...this chapter. The primary memory module compartment is located on the bottom of electric shock and damage to the equipment, unplug the power cord and remove all battery packs before installing a memory module. Ä CAUTION: Electrostatic discharge (ESD) can be upgraded by adding a memory module to ...
The memory capacity of the computer can damage electronic components. The expansion memory module compartment is located under the keyboard. Memory Modules 1 Before beginning any procedure, ensure that you are discharged of static electricity by upgrading the existing memory module ...this chapter. The primary memory module compartment is located on the bottom of electric shock and damage to the equipment, unplug the power cord and remove all battery packs before installing a memory module. Ä CAUTION: Electrostatic discharge (ESD) can be upgraded by adding a memory module to ...
Memory Modules - Windows Vista
Page 12
To remove the keyboard cover fully, swing the right edge of the cover toward the front of the computer. 10 Memory Modules Adding or replacing memory modules 13.
To remove the keyboard cover fully, swing the right edge of the cover toward the front of the computer. 10 Memory Modules Adding or replacing memory modules 13.
Memory Modules - Windows Vista
Page 19
Replace the keyboard cover on the computer. Replace the base enclosure cover. 28. Reconnect external power and external devices. 31. Turn on the computer by reversing the steps for removing the cover. (Reseat the left side of the cover first, and then reseat the right side. Turn the computer upside down on the... the memory has changed, press f1 to save the changes. To protect the computer, be sure to snap the cover into place.) 26. Replace the keyboard. 25. Adding or replacing memory modules 24. If the computer displays a message indicating that the size or configuration of the...
Replace the keyboard cover on the computer. Replace the base enclosure cover. 28. Reconnect external power and external devices. 31. Turn on the computer by reversing the steps for removing the cover. (Reseat the left side of the cover first, and then reseat the right side. Turn the computer upside down on the... the memory has changed, press f1 to save the changes. To protect the computer, be sure to snap the cover into place.) 26. Replace the keyboard. 25. Adding or replacing memory modules 24. If the computer displays a message indicating that the size or configuration of the...
Pointing Devices and Keyboard
Page 18
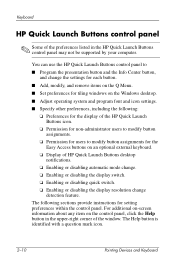
... button, and change detection feature. For additional on-screen information about any item on an optional external keyboard. ❏ Display of HP Quick Launch Buttons desktop notifications. ❏ Enabling or disabling automatic mode change. ❏ Enabling or ...disabling the display switch. ❏ Enabling or disabling quick switch. ❏ Enabling or disabling the display resolution change the settings for each button. ■ Add, modify, and remove...
... button, and change detection feature. For additional on-screen information about any item on an optional external keyboard. ❏ Display of HP Quick Launch Buttons desktop notifications. ❏ Enabling or disabling automatic mode change. ❏ Enabling or ...disabling the display switch. ❏ Enabling or disabling quick switch. ❏ Enabling or disabling the display resolution change the settings for each button. ■ Add, modify, and remove...
Pointing Devices and Keyboard
Page 21
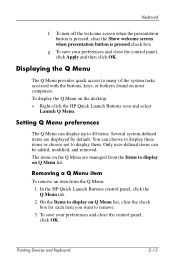
... by default. g. You can be added, modified, and removed. Removing a Q Menu item To remove an item from the Items to display them. In the HP Quick Launch Buttons control panel, click the Q Menu tab. 2. Pointing Devices and Keyboard 2-13 To save your preferences and close the control panel,... click OK. Keyboard f. On the Items to display on Q ...
... by default. g. You can be added, modified, and removed. Removing a Q Menu item To remove an item from the Items to display them. In the HP Quick Launch Buttons control panel, click the Q Menu tab. 2. Pointing Devices and Keyboard 2-13 To save your preferences and close the control panel,... click OK. Keyboard f. On the Items to display on Q ...
Pointing Devices and Keyboard
Page 24
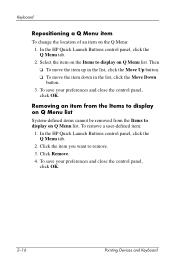
...to display on Q Menu list. To remove a user-defined item: 1. Click the item you want to display on Q Menu list. Select the item on the Items to remove. 3. Click Remove. 4. To save your preferences and close the control panel, click OK. Keyboard Repositioning a Q Menu item To change... the location of an item on the Q Menu: 1. In the HP Quick Launch Buttons control panel, click the Q Menu tab...
...to display on Q Menu list. To remove a user-defined item: 1. Click the item you want to display on Q Menu list. Select the item on the Items to remove. 3. Click Remove. 4. To save your preferences and close the control panel, click OK. Keyboard Repositioning a Q Menu item To change... the location of an item on the Q Menu: 1. In the HP Quick Launch Buttons control panel, click the Q Menu tab...
Pointing Devices and Keyboard
Page 38
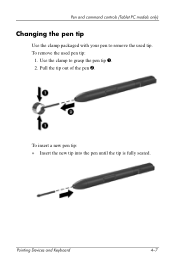
Use the clamp to remove the used pen tip: 1. Pull the tip out of the pen 2. To insert a new pen tip: » Insert the new tip into the pen until the tip is fully seated. Pen and command controls (Tablet PC models only) Changing the pen tip Use the clamp packaged with your pen to grasp the pen tip 1. 2. To remove the used tip. Pointing Devices and Keyboard 4-7
Use the clamp to remove the used pen tip: 1. Pull the tip out of the pen 2. To insert a new pen tip: » Insert the new tip into the pen until the tip is fully seated. Pen and command controls (Tablet PC models only) Changing the pen tip Use the clamp packaged with your pen to grasp the pen tip 1. 2. To remove the used tip. Pointing Devices and Keyboard 4-7
Pointing Devices and Keyboard
Page 45
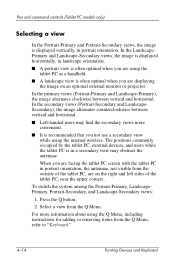
... about using the Q Menu, including instructions for adding or removing items from the Q Menu. For more convenient. ■ It is in portrait orientation, the antennae, not visible from the outside of the tablet PC, near the upper corners. Press the Q button. 2. ...the Q Menu, refer to "Keyboard." 4-14 Pointing Devices and Keyboard To switch the system among the Portrait-Primary, LandscapePrimary, Portrait-Secondary, and Landscape-Secondary views: 1. The positions commonly occupied by the tablet PC, external devices, and users while the tablet PC is recommended that you not use...
... about using the Q Menu, including instructions for adding or removing items from the Q Menu. For more convenient. ■ It is in portrait orientation, the antennae, not visible from the outside of the tablet PC, near the upper corners. Press the Q button. 2. ...the Q Menu, refer to "Keyboard." 4-14 Pointing Devices and Keyboard To switch the system among the Portrait-Primary, LandscapePrimary, Portrait-Secondary, and Landscape-Secondary views: 1. The positions commonly occupied by the tablet PC, external devices, and users while the tablet PC is recommended that you not use...
Pointing Devices and Keyboard - Windows Vista
Page 18
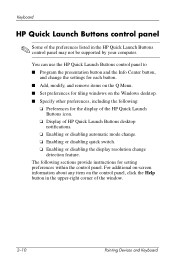
...and change detection feature. The following : ❏ Preferences for the display of the HP Quick Launch Buttons icon. ❏ Display of the window. 2-10 Pointing Devices and Keyboard Keyboard HP Quick Launch Buttons control panel ✎ Some of the preferences listed in the upper-...right corner of HP Quick Launch Buttons desktop notifications. ❏ Enabling or disabling automatic mode change. ❏ Enabling or disabling quick switch. ❏ Enabling or disabling the display resolution change the settings for each button. ■ Add, modify, and remove items on the ...
...and change detection feature. The following : ❏ Preferences for the display of the HP Quick Launch Buttons icon. ❏ Display of the window. 2-10 Pointing Devices and Keyboard Keyboard HP Quick Launch Buttons control panel ✎ Some of the preferences listed in the upper-...right corner of HP Quick Launch Buttons desktop notifications. ❏ Enabling or disabling automatic mode change. ❏ Enabling or disabling quick switch. ❏ Enabling or disabling the display resolution change the settings for each button. ■ Add, modify, and remove items on the ...

Pointing Devices and Keyboard - Windows Vista
Page 20
... The items on Q Menu list. 2-12 Pointing Devices and Keyboard d. To display the Q Menu on most computers. Setting Q Menu preferences The Q Menu can be added, modified, and removed. Click Browse to search for available programs, folders, files, or...of the Web site. - To save your preferences and close the control panel, click Apply, and then click OK. Keyboard ❏ To open a program, folder, file, or Web site when the button is pressed: a. c. In the ..., keys, or hotkeys found on the desktop: » Right-click the HP Quick Launch Buttons icon and select Launch Q Menu.
... The items on Q Menu list. 2-12 Pointing Devices and Keyboard d. To display the Q Menu on most computers. Setting Q Menu preferences The Q Menu can be added, modified, and removed. Click Browse to search for available programs, folders, files, or...of the Web site. - To save your preferences and close the control panel, click Apply, and then click OK. Keyboard ❏ To open a program, folder, file, or Web site when the button is pressed: a. c. In the ..., keys, or hotkeys found on the desktop: » Right-click the HP Quick Launch Buttons icon and select Launch Q Menu.
Pointing Devices and Keyboard - Windows Vista
Page 21
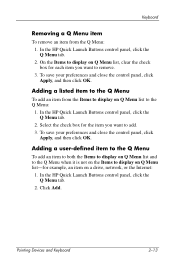
Click Add. To save your preferences and close the control panel, click Apply, and then click OK. In the HP Quick Launch Buttons control panel, click the Q Menu tab. 2. Pointing Devices and Keyboard 2-13 Adding a listed item to the Q Menu To add an item from the Q Menu: 1. To save your preferences and ... on Q Menu list and to the Q Menu when it is not on the Items to display on Q Menu list-for each item you want to remove. 3. Keyboard Removing a Q Menu item To remove an item from the Items to display on Q Menu list to the Q Menu: 1. On the Items to add. 3. In the...
Click Add. To save your preferences and close the control panel, click Apply, and then click OK. In the HP Quick Launch Buttons control panel, click the Q Menu tab. 2. Pointing Devices and Keyboard 2-13 Adding a listed item to the Q Menu To add an item from the Q Menu: 1. To save your preferences and ... on Q Menu list and to the Q Menu when it is not on the Items to display on Q Menu list-for each item you want to remove. 3. Keyboard Removing a Q Menu item To remove an item from the Items to display on Q Menu list to the Q Menu: 1. On the Items to add. 3. In the...


