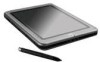
HP Compaq tc1100 Tablet PC - Maintenance and Service Guide
Page 1
Maintenance and Service Guide HP Compaq tc1100 Tablet PC Document Part Number: 335572-004 October 2005 This guide is a troubleshooting reference used for maintaining and servicing the tablet PC. It provides comprehensive information on identifying tablet PC features, components, and spare parts, troubleshooting tablet PC problems, and performing tablet PC disassembly procedures.
HP Compaq tc1100 Tablet PC - Maintenance and Service Guide
Page 5
Contents 5 Removal and Replacement Procedures 5.1 Serial Number 5-2 5.2 Disassembly Sequence Chart 5-3 5.3 Preparing the Tablet PC for Disassembly 5-4 Before You Begin 5-4 5.4 Real-Time Clock Battery 5-13 5.5 Hard Drive 5-14 5.6 Display Panel Assembly 5-17 5.7 System Board 5-26 5.8 Fan and Heat Sink 5-36 5.9 Optional HP Tablet PC Docking Station 5-38 Maintenance and Service Guide v
HP Compaq tc1100 Tablet PC - Maintenance and Service Guide
Page 11
... Battery"). 3. Remove the RTC battery (refer to the tablet PC. 6. All setup and power-on the tablet PC. Replace the RTC battery and reassemble the tablet PC. Product Description 1.2 Clearing a Password If the tablet PC has an unknown setup or power-on password, follow these steps to Section 5.3, "Preparing the Tablet PC for Disassembly," for more information. 2. Turn on passwords have...
HP Compaq tc1100 Tablet PC - Maintenance and Service Guide
Page 34
...tablet PC uses an electric fan for disassembly instructions. The fan is controlled by high external temperatures, system power consumption, power management, battery conservation configurations, battery fast charging, and software applications. These conditions are affected by a temperature sensor and is expelled through the air vent located on the left side of the tablet PC... 1.7 Design Overview This section presents a design overview of key parts and features of the tablet PC. Refer to Chapter 3, "Illustrated Parts Catalog," to block airflow. The system board provides ...
HP Compaq tc1100 Tablet PC - Maintenance and Service Guide
Page 84
... cases, avoid bending, twisting, or pulling cables. Apply only the tension required to unseat or seat the cables during disassembly and reassembly can damage the tablet PC. Ensure that you should keep in mind during disassembly and assembly procedures. ✎ As you remove each subassembly from the work area to avoid damage. Handle flex...
HP Compaq tc1100 Tablet PC - Maintenance and Service Guide
Page 91
... note of each screw size and location during the disassembly of the tablet PC and the docking station. Maintenance and Service Guide 5-1 Torx T8 and Phillips P0 screws are 20 screws, in 4 different sizes, that must be removed, replaced, and loosened when servicing the tablet PC. There are 38 screws, in 4 different sizes, that may...
HP Compaq tc1100 Tablet PC - Maintenance and Service Guide
Page 93
Section 5.3 5.4 5.5 5.6 5.7 5.8 5.9 Table 5-1 Disassembly Sequence Chart Description Preparing the tablet PC for disassembly SD Card and PC Card Digitizer pen Battery pack Memory module and PCI device Real time clock (RTC) battery Hard drive Display panel assembly Bridge ... Modem board Fan and heat sink Docking station Number of screws removed 0 0 1 2 0 2 8 0 5 8 0 0 0 3 17 Maintenance and Service Guide 5-3 Removal and Replacement Procedures 5.2 Disassembly Sequence Chart Use the following table to determine the section number to be referenced when removing tablet PC components.
HP Compaq tc1100 Tablet PC - Maintenance and Service Guide
Page 94
Before You Begin 1. If you . 5-4 Maintenance and Service Guide Position the tablet PC so that the SD Card and PC Card slots are toward you are unsure whether the tablet PC is off or in hibernation, turn the tablet PC on and then shut it down the tablet PC. Disconnect all applications, and shut down through the operating system. 2. Disconnect the power cord. 4. Removal and Replacement Procedures 5.3 Preparing the Tablet PC for Disassembly Perform the following steps before disassembling the tablet PC. Save your work, exit all external devices connected to the tablet PC. 3.
HP Compaq tc1100 Tablet PC - Maintenance and Service Guide
Page 103
... the power switch and jog dial toward you. 3. Removing the RTC Battery Reverse the preceding procedures to Section 5.3, "Preparing the Tablet PC for Disassembly"). 2. Disconnect the RTC battery cable 1 from the tablet PC. Prepare the tablet PC for disassembly (refer to install the RTC battery. Remove the RTC battery 2 from the system board. 4. Maintenance and Service Guide 5-13...
HP Compaq tc1100 Tablet PC - Maintenance and Service Guide
Page 104
Remove the RTC battery (refer to Section 5.3, "Preparing the Tablet PC for Disassembly"). 2. Prepare the tablet PC for disassembly (refer to Section 5.4, "Real-Time Clock Battery"). 3. Removal and Replacement Procedures 5.5 Hard Drive Hard Drive Spare Part Number Information 80-GB, 5400 rpm 60-GB, 5400 rpm 40-GB, 5400 rpm 40-GB, 4200 rpm 30-GB, 4200 rpm 366786-001 348341-001 374025-001 348340-001 348339-001 Remove the hard drive as follows: 1. Turn the tablet PC upside down with the power switch and jog dial toward you. 5-14 Maintenance and Service Guide
HP Compaq tc1100 Tablet PC - Maintenance and Service Guide
Page 107
... with inverter Bridge battery Digitizer Wireless antenna 348348-001 348358-001 348336-001 348328-001 348337-001 348357-001 To remove and disassemble the display panel assembly: 1. Prepare the tablet PC for Disassembly"). 2. Remove the RTC battery (refer to Section 5.4, "Real-Time Clock Battery"). 3. Removal and Replacement Procedures 5.6 Display Panel Assembly Display Panel Assembly...
HP Compaq tc1100 Tablet PC - Maintenance and Service Guide
Page 116
Remove the display panel assembly (refer to Section 5.3, "Preparing the Tablet PC for disassembly (refer to Section 5.6, "Display Panel Assembly"). 5-26 Maintenance and Service Guide Prepare the tablet PC for Disassembly"). 2. Removal and Replacement Procedures 5.7 System Board System Board Spare Part Number Information System board with fan and heat sink Intel Pentium M 753, 1.2-GHz Intel Pentium M, 1.1-...
HP Compaq tc1100 Tablet PC - Maintenance and Service Guide
Page 126
... with the system board; however, the fan and heat sink can also be ordered separately. Perform the following steps to Section 5.3, "Preparing the Tablet PC for Disassembly"). 2. Prepare the tablet PC for disassembly (refer to remove the fan and heat sink: 1. Remove the system board (refer to Section 5.6, "Display Panel Assembly"). 3. Remove the display panel assembly...
HP Compaq tc1100 Tablet PC - Maintenance and Service Guide
Page 128
Removal and Replacement Procedures 5.9 Optional HP Tablet PC Docking Station Optional HP Tablet PC Docking Station Components Spare Part Number Information Optional HP Tablet PC Docking Station Docking stand and pivot arm Top case Board assembly Bottom case 348338-001 349090-001 349091-001 349093-001 349092-001 Perform the following steps to disassemble the docking station: 1. Position the docking station upside down, resting on the docking stand, with the bottom case toward you. 5-38 Maintenance and Service Guide
HP Compaq tc1100 Tablet PC - Maintenance and Service Guide
Page 175
... one computer model to another . Display Component Recycling This appendix provides disassembly instructions for display assembly disassembly steps. D-2 Maintenance and Service Guide Refer to another . The display assembly must be disassembled to gain access to the backlight 1 and the LCD panel 2. ✎ Disassembly procedures differ from one display assembly to Section 5.6, "Display Panel Assembly...
HP Compaq tc1100 Tablet PC - Maintenance and Service Guide
Page 176
Removing the Display Bezel Screw Covers and Screws Maintenance and Service Guide D-3 Display Component Recycling Perform the following steps to the display assembly. Remove all screw covers 1 and screws 2 that secure the display bezel to disassemble the display assembly: 1.
HP Compaq tc1100 Tablet PC - Maintenance and Service Guide
Page 187
... 1-24 rear 1-26 right-side 1-26 components, keyboard front 1-22 rear panel 1-23 top 1-20 components, tablet PC bottom 1-15, 1-16 front 1-6 left side 1-10 right side 1-12 top 1-8 connector pin assignments audio-in...disassembly sequence chart 5-3 diskette drive OS loading problems 2-23 specifications 6-6 display bezel, spare part number 3-3, 5-17 display panel assembly illustrated 3-2 removal 5-17 spare part number 3-3, 3-17, 5-17 display panel cable 3-2 display, specifications 6-3 DMA specifications 6-11 docking alignment notches docking stand 1-25 keyboard 1-21 docking alignment slots (tablet PC...