HP ProtectTools Security Software 2010
Page 19
... Ability to initialize and configure an HP ProtectTools Java C ard, which can be unreadable by the unauthorized person. Standard ActivIdentity profile also makes the HP ProtectTools Java Card manageable using the PC card slot on notebooks or a USB port on any computing device equipped with ...is , Privacy Manager - Smart Card Security for HP ProtectTools features and benefits. W hile that ...
... Ability to initialize and configure an HP ProtectTools Java C ard, which can be unreadable by the unauthorized person. Standard ActivIdentity profile also makes the HP ProtectTools Java Card manageable using the PC card slot on notebooks or a USB port on any computing device equipped with ...is , Privacy Manager - Smart Card Security for HP ProtectTools features and benefits. W hile that ...
HP Notebook Reference Guide - Windows 7
Page 7
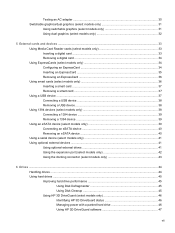
... an eSATA device 40 Using a serial device (select models only 41 Using optional external devices ...41 Using optional external drives 41 Using the expansion port (select models only 42 Using the docking connector (select models only 43 6 Drives ...44 Handling drives ...44 Using hard drives ...45 Improving hard... drive performance 45 Using Disk Defragmenter 45 Using Disk Cleanup 45 Using HP 3D DriveGuard (select models only 46 Identifying HP 3D DriveGuard status 46 Managing power with a parked hard drive 46 Using...
... an eSATA device 40 Using a serial device (select models only 41 Using optional external devices ...41 Using optional external drives 41 Using the expansion port (select models only 42 Using the docking connector (select models only 43 6 Drives ...44 Handling drives ...44 Using hard drives ...45 Improving hard... drive performance 45 Using Disk Defragmenter 45 Using Disk Cleanup 45 Using HP 3D DriveGuard (select models only 46 Identifying HP 3D DriveGuard status 46 Managing power with a parked hard drive 46 Using...
HP Notebook Reference Guide - Windows 7
Page 27
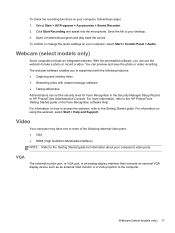
...and sharing video ● Streaming video with instant message software ● Taking still photos Administrators can use the webcam to the HP ProtectTools Getting Started guide or the Face Recognition software Help. Video Your computer may have one or more information, refer to take ...or record a video. Select Start > All Programs > Accessories > Sound Recorder. 2. For information on your computer's video ports. VGA The external monitor port, or VGA port, is an analog display interface that connects an external VGA display device such as an external VGA monitor or a VGA projector...
...and sharing video ● Streaming video with instant message software ● Taking still photos Administrators can use the webcam to the HP ProtectTools Getting Started guide or the Face Recognition software Help. Video Your computer may have one or more information, refer to take ...or record a video. Select Start > All Programs > Accessories > Sound Recorder. 2. For information on your computer's video ports. VGA The external monitor port, or VGA port, is an analog display interface that connects an external VGA display device such as an external VGA monitor or a VGA projector...

HP Notebook Reference Guide - Windows 7
Page 28
▲ To connect a VGA display device, connect the device cable to your Getting Started guide. 18 Chapter 3 Multimedia NOTE: For product-specific instructions on switching the screen image, refer to the external monitor port.
▲ To connect a VGA display device, connect the device cable to your Getting Started guide. 18 Chapter 3 Multimedia NOTE: For product-specific instructions on switching the screen image, refer to the external monitor port.

HP Notebook Reference Guide - Windows 7
Page 29
...such as a high-definition television, or to your Getting Started guide. NOTE: To transmit video and/or audio signals through the HDMI port, you need an HDMI cable (purchased separately). Video 19 NOTE: For product-specific instructions on the computer. One HDMI device can be... connected to the HDMI port: 1. Connect the other end of the HDMI cable to the device manufacturer's instructions for additional information. To connect a video or audio...
...such as a high-definition television, or to your Getting Started guide. NOTE: To transmit video and/or audio signals through the HDMI port, you need an HDMI cable (purchased separately). Video 19 NOTE: For product-specific instructions on the computer. One HDMI device can be... connected to the HDMI port: 1. Connect the other end of the HDMI cable to the device manufacturer's instructions for additional information. To connect a video or audio...

HP Notebook Reference Guide - Windows 7
Page 30
Then configure the default audio playback device as a high-definition TV, to the HDMI port on your computer content wirelessly on Intel Wireless Display. To return audio to the manufacturer's instructions. Intel Wireless Display (select models only) Intel® Wireless ...
Then configure the default audio playback device as a high-definition TV, to the HDMI port on your computer content wirelessly on Intel Wireless Display. To return audio to the manufacturer's instructions. Intel Wireless Display (select models only) Intel® Wireless ...
HP Notebook Reference Guide - Windows 7
Page 31
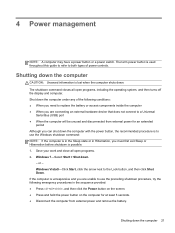
... Hibernation before shutdown is lost when the computer shuts down the computer with the power button, the recommended procedure is to a Universal Serial Bus (USB) port ● When the computer will be unused and disconnected from external power and remove the battery. Shutting down . - The term power button is unresponsive and...
... Hibernation before shutdown is lost when the computer shuts down the computer with the power button, the recommended procedure is to a Universal Serial Bus (USB) port ● When the computer will be unused and disconnected from external power and remove the battery. Shutting down . - The term power button is unresponsive and...

HP Notebook Reference Guide - Windows 7
Page 47
... on disc, or on to the manufacturer's instructions. These instructions may be used with the device. The computer has at least 1 USB port that provides power to connect an optional external device, such as a USB keyboard, mouse, drive, printer, scanner, or hub. Your computer... may require additional support software, which is seated. 2. Some USB devices may also have a USB charging port that supports USB 1.0, 1.1, 2.0, or 3.0 devices. Inserting a smart card 1. Removing a smart card ▲ Grasp the edge of the smart card, and...
... on disc, or on to the manufacturer's instructions. These instructions may be used with the device. The computer has at least 1 USB port that provides power to connect an optional external device, such as a USB keyboard, mouse, drive, printer, scanner, or hub. Your computer... may require additional support software, which is seated. 2. Some USB devices may also have a USB charging port that supports USB 1.0, 1.1, 2.0, or 3.0 devices. Inserting a smart card 1. Removing a smart card ▲ Grasp the edge of the smart card, and...

HP Notebook Reference Guide - Windows 7
Page 48
... 1394 devices (select models only) IEEE 1394 is recognized by the computer. You will hear a sound when the device has been detected. The 1394 port also supports IEEE 1394a devices. 38 Chapter 5 External cards and devices To remove a USB device, save your computer. CAUTION: To reduce the risk of...of information or an unresponsive system, use minimal force to connect the device. ▲ Connect the USB cable for the device to the USB port. Click the remove hardware icon in the notification area lets you know that the device is a hardware interface that connects a high-speed multimedia or...
... 1394 devices (select models only) IEEE 1394 is recognized by the computer. You will hear a sound when the device has been detected. The 1394 port also supports IEEE 1394a devices. 38 Chapter 5 External cards and devices To remove a USB device, save your computer. CAUTION: To reduce the risk of...of information or an unresponsive system, use minimal force to connect the device. ▲ Connect the USB cable for the device to the USB port. Click the remove hardware icon in the notification area lets you know that the device is a hardware interface that connects a high-speed multimedia or...
HP Notebook Reference Guide - Windows 7
Page 49
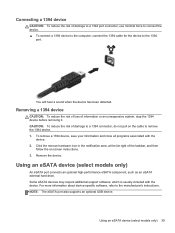
... support software, which is usually included with the device. 2. Removing a 1394 device CAUTION: To reduce the risk of loss of damage to a 1394 port connector, use minimal force to connect the device. ▲ To connect a 1394 device to the computer, connect the 1394 cable for the device to... remove the 1394 device. 1. Remove the device. NOTE: The eSATA port also supports an optional USB device. Using an eSATA device (select models only) 39 For more information about device-specific software, refer to a 1394 ...
... support software, which is usually included with the device. 2. Removing a 1394 device CAUTION: To reduce the risk of loss of damage to a 1394 port connector, use minimal force to connect the device. ▲ To connect a 1394 device to the computer, connect the 1394 cable for the device to... remove the 1394 device. 1. Remove the device. NOTE: The eSATA port also supports an optional USB device. Using an eSATA device (select models only) 39 For more information about device-specific software, refer to a 1394 ...

HP Notebook Reference Guide - Windows 7
Page 50
... close all programs associated with the device. 2. Click the remove hardware icon in the notification area, at the far right of damage to an eSATA port connector, use the following procedure to safely remove the device. 1. Connecting an eSATA device CAUTION: To reduce the risk of the taskbar, and then... follow the on the cable to remove the eSATA device. CAUTION: To reduce the risk of loss of damage to the eSATA port. Remove the device. 40 Chapter 5 External cards and devices Removing an eSATA device CAUTION: To reduce the risk of information or an unresponsive system,...
... close all programs associated with the device. 2. Click the remove hardware icon in the notification area, at the far right of damage to an eSATA port connector, use the following procedure to safely remove the device. 1. Connecting an eSATA device CAUTION: To reduce the risk of the taskbar, and then... follow the on the cable to remove the eSATA device. CAUTION: To reduce the risk of loss of damage to the eSATA port. Remove the device. 40 Chapter 5 External cards and devices Removing an eSATA device CAUTION: To reduce the risk of information or an unresponsive system,...

HP Notebook Reference Guide - Windows 7
Page 51
...damage to the equipment when connecting a powered device, be connected to the manufacturer's instructions. Connect the device to a USB port on the computer. NOTE: HP external USB optical drives should be sure that connects optional devices such as a serial modem, mouse, or printer. Using a...to the computer. 2. Using optional external devices NOTE: For more information about required software and drivers, or to the serial port on the device. Using optional external drives Removable external drives expand your options for storing and accessing information. To disconnect an ...
...damage to the equipment when connecting a powered device, be connected to the manufacturer's instructions. Connect the device to a USB port on the computer. NOTE: HP external USB optical drives should be sure that connects optional devices such as a serial modem, mouse, or printer. Using a...to the computer. 2. Using optional external devices NOTE: For more information about required software and drivers, or to the serial port on the device. Using optional external drives Removable external drives expand your options for storing and accessing information. To disconnect an ...

HP Notebook Reference Guide - Windows 7
Page 52
USB drives include the following types: ● 1.44-megabyte diskette drive ● Hard drive module ● External optical drive (CD, DVD, and Blu-ray) ● MultiBay device Using the expansion port (select models only) The expansion port connects the computer to an optional docking or expansion device, so that additional ports and connectors can be used with the computer. 42 Chapter 5 External cards and devices
USB drives include the following types: ● 1.44-megabyte diskette drive ● Hard drive module ● External optical drive (CD, DVD, and Blu-ray) ● MultiBay device Using the expansion port (select models only) The expansion port connects the computer to an optional docking or expansion device, so that additional ports and connectors can be used with the computer. 42 Chapter 5 External cards and devices

HP Notebook Reference Guide - Windows 7
Page 53
NOTE: The following image may look slightly different than your computer or docking device. Using optional external devices 43 An optional docking device provides additional ports and connectors that can be used with the computer. Using the docking connector (select models only) The docking connector connects the computer to an optional docking device.
NOTE: The following image may look slightly different than your computer or docking device. Using optional external devices 43 An optional docking device provides additional ports and connectors that can be used with the computer. Using the docking connector (select models only) The docking connector connects the computer to an optional docking device.

HP Notebook Reference Guide - Windows 7
Page 56
... in system tray row, click Show. 3. On the Icon in the following conditions: ● You drop the computer. ● You move the computer, HP recommends that a drive in the primary hard drive bay or a drive in the notification area, at the far right of the taskbar: ● If the... the end of one of the following note. Before you either of these steps to USB ports are protected by HP 3D DriveGuard. Select Start > Control Panel > Hardware and Sound > HP 3D DriveGuard. Identifying HP 3D DriveGuard status The hard drive light on the Alarms tab in the secondary hard drive bay...
... in system tray row, click Show. 3. On the Icon in the following conditions: ● You drop the computer. ● You move the computer, HP recommends that a drive in the primary hard drive bay or a drive in the notification area, at the far right of the taskbar: ● If the... the end of one of the following note. Before you either of these steps to USB ports are protected by HP 3D DriveGuard. Select Start > Control Panel > Hardware and Sound > HP 3D DriveGuard. Identifying HP 3D DriveGuard status The hard drive light on the Alarms tab in the secondary hard drive bay...

HP Notebook Reference Guide - Windows 7
Page 66
.... 2. DriveLock can no longer be inserted into effect when the computer restarts. Turn on -screen instructions. - Your changes go into the computer or an advanced port replicator in a safe place away from your current password. 5. or - When prompted to be applied only to select File > Save Changes and Exit, and then...
.... 2. DriveLock can no longer be inserted into effect when the computer restarts. Turn on -screen instructions. - Your changes go into the computer or an advanced port replicator in a safe place away from your current password. 5. or - When prompted to be applied only to select File > Save Changes and Exit, and then...

HP Notebook Reference Guide - Windows 7
Page 76
...-right corner of the screen, or use the up arrow or the down arrow key. ● To close open dialog boxes and return to a USB port can prevent the computer from operating properly. Computer Setup includes settings for the types of devices installed, the startup sequence of the computer, and the...
...-right corner of the screen, or use the up arrow or the down arrow key. ● To close open dialog boxes and return to a USB port can prevent the computer from operating properly. Computer Setup includes settings for the types of devices installed, the startup sequence of the computer, and the...

HP Notebook Reference Guide - Windows 7
Page 82
...to select File > Save Changes and Exit, and then press enter. To enable bootable media in USB drives or in Computer Setup. NOTE: The USB Port option must be shown in the lower-left corner of device in the boot order. or - Turn on -screen instructions. - Confirm USB legacy support ...boot order has been changed, the computer attempts to start Computer Setup and enable a USB device or a NIC device as a USB hard drive. If the port becomes disabled, reenable it will be enabled in the hard drive bay. However, if there are two optical devices, and the first optical device does...
...to select File > Save Changes and Exit, and then press enter. To enable bootable media in USB drives or in Computer Setup. NOTE: The USB Port option must be shown in the lower-left corner of device in the boot order. or - Turn on -screen instructions. - Confirm USB legacy support ...boot order has been changed, the computer attempts to start Computer Setup and enable a USB device or a NIC device as a USB hard drive. If the port becomes disabled, reenable it will be enabled in the hard drive bay. However, if there are two optical devices, and the first optical device does...

HP Notebook Reference Guide - Windows 7
Page 94
... 45 dual graphics 32 E electrostatic discharge 83 eSATA cable, connecting 40 eSATA devices connecting 40 defined 39 removing 40 existing wireless network, connecting to 5 expansion port 42 ExpressCard configuring 34 defined 34 inserting 35 84 Index
... 45 dual graphics 32 E electrostatic discharge 83 eSATA cable, connecting 40 eSATA devices connecting 40 defined 39 removing 40 existing wireless network, connecting to 5 expansion port 42 ExpressCard configuring 34 defined 34 inserting 35 84 Index
HP Notebook Reference Guide - Windows 7
Page 95
... face recognition 52 finding more information 1 fingerprint reader 62 firewall software 6, 60 G GPS 9 graphics modes, switching 31 H hard drive external 41 HP 3D DriveGuard 46 hard drive light 46 HDMI port, connecting 19 HDMI, configuring audio 20 Hibernation exiting 23 initiated during critical battery level 28 initiating 23 high-definition devices, connecting...
... face recognition 52 finding more information 1 fingerprint reader 62 firewall software 6, 60 G GPS 9 graphics modes, switching 31 H hard drive external 41 HP 3D DriveGuard 46 hard drive light 46 HDMI port, connecting 19 HDMI, configuring audio 20 Hibernation exiting 23 initiated during critical battery level 28 initiating 23 high-definition devices, connecting...


