HP Notebook Hard Drives & Solid State Drives Identifying, Preventing, Diagnosing and Recovering from Drive Failures Care and Mai
Page 3
...www2.hp.com/bizsupport/TechSupport/SoftwareDescription.jsp?lang=en&cc=us&pro dTypeId=321957&prodSeriesId=4138624&prodNameId=4138625&swEnvOID=4054&swLang=13& mode=2&taskId=135&swItem=ob-86982-1 Other software issues may include viruses, application, and operating system (OS) bugs. In this area as blue screens, ... contiguously on the hard drive. Over time, the hard drive file structure becomes fragmented due to read of that ultimately result in blue screens and/or continuous reboots. A write splice is written to a sector of files. New data is an incomplete write to the hard ...
...www2.hp.com/bizsupport/TechSupport/SoftwareDescription.jsp?lang=en&cc=us&pro dTypeId=321957&prodSeriesId=4138624&prodNameId=4138625&swEnvOID=4054&swLang=13& mode=2&taskId=135&swItem=ob-86982-1 Other software issues may include viruses, application, and operating system (OS) bugs. In this area as blue screens, ... contiguously on the hard drive. Over time, the hard drive file structure becomes fragmented due to read of that ultimately result in blue screens and/or continuous reboots. A write splice is written to a sector of files. New data is an incomplete write to the hard ...
HP Notebook Hard Drives & Solid State Drives Identifying, Preventing, Diagnosing and Recovering from Drive Failures Care and Mai
Page 4
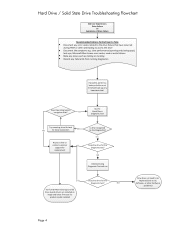
... does not need to be Replaced (look to OS, Software, or other hardware problems) Page 4 slow performance (opening and closing apps), lock-ups, Microsoft Blue Screen error codes, read or write failures Note any noises such as clicking or clunking Record any Failure IDs from running diagnostics If possible, perform a backup...
... does not need to be Replaced (look to OS, Software, or other hardware problems) Page 4 slow performance (opening and closing apps), lock-ups, Microsoft Blue Screen error codes, read or write failures Note any noises such as clicking or clunking Record any Failure IDs from running diagnostics If possible, perform a backup...
HP Notebook Reference Guide
Page 26
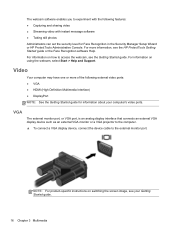
...information on how to access the webcam, see the Getting Started guide. NOTE: For product-specific instructions on switching the screen image, see the HP ProtectTools Getting Started guide or the Face Recognition software Help. Video Your computer may have one or more information, see... Definition Multimedia Interface) ● DisplayPort NOTE: See the Getting Started guide for Face Recognition in the Security Manager Setup Wizard or HP ProtectTools Administrative Console. VGA The external monitor port, or VGA port, is an analog display interface that connects an external VGA display...
...information on how to access the webcam, see the Getting Started guide. NOTE: For product-specific instructions on switching the screen image, see the HP ProtectTools Getting Started guide or the Face Recognition software Help. Video Your computer may have one or more information, see... Definition Multimedia Interface) ● DisplayPort NOTE: See the Getting Started guide for Face Recognition in the Security Manager Setup Wizard or HP ProtectTools Administrative Console. VGA The external monitor port, or VGA port, is an analog display interface that connects an external VGA display...
HP Notebook Reference Guide
Page 27
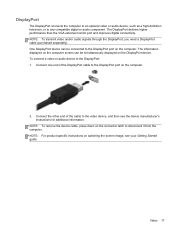
...video or audio device, such as a high-definition television, or to disconnect it from the computer. The information displayed on the computer screen can be simultaneously displayed on the computer. Video 17 NOTE: To transmit video and/or audio signals through the DisplayPort, you need a...of the DisplayPort cable to the DisplayPort port on the DisplayPort device. NOTE: To remove the device cable, press down on switching the screen image, see the device manufacturer's instructions for additional information. Connect one end of the cable to the DisplayPort: 1. To connect a ...
...video or audio device, such as a high-definition television, or to disconnect it from the computer. The information displayed on the computer screen can be simultaneously displayed on the computer. Video 17 NOTE: To transmit video and/or audio signals through the DisplayPort, you need a...of the DisplayPort cable to the DisplayPort port on the DisplayPort device. NOTE: To remove the device cable, press down on switching the screen image, see the device manufacturer's instructions for additional information. Connect one end of the cable to the DisplayPort: 1. To connect a ...
HP Notebook Reference Guide
Page 28
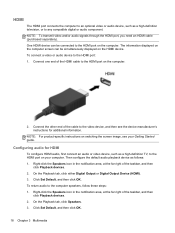
The information displayed on the computer screen can be simultaneously displayed on the computer. Connect the other end of the taskbar, and then click Playback devices. 2. One HDMI device can be connected ... signals through the HDMI port, you need an HDMI cable (purchased separately). To connect a video or audio device to the HDMI port on switching the screen image, see the device manufacturer's instructions for HDMI To configure HDMI audio, first connect an audio or video device, such as follows: 1. Click Set Default...
The information displayed on the computer screen can be simultaneously displayed on the computer. Connect the other end of the taskbar, and then click Playback devices. 2. One HDMI device can be connected ... signals through the HDMI port, you need an HDMI cable (purchased separately). To connect a video or audio device to the HDMI port on switching the screen image, see the device manufacturer's instructions for HDMI To configure HDMI audio, first connect an audio or video device, such as follows: 1. Click Set Default...
HP Notebook Reference Guide
Page 30
... the computer is in the Sleep state or in the sequence provided: ● Press ctrl+alt+delete, and then click the Power button on the screen. ● Press and hold the power button on the computer for at least 5 seconds. ● Disconnect the computer from external power for an extended period...
... the computer is in the Sleep state or in the sequence provided: ● Press ctrl+alt+delete, and then click the Power button on the screen. ● Press and hold the power button on the computer for at least 5 seconds. ● Disconnect the computer from external power for an extended period...
HP Notebook Reference Guide
Page 31
...exit Sleep faster than exiting Hibernation. With the computer on wakeup, you must enter your Windows password before your work returns to the screen as it was before you have set a password to be changed in Windows Control Panel. Initiating and exiting Hibernation The system is closed... saved to a disc or an external media card. Initiating and exiting Sleep The system is initiated, the power lights blink and the screen clears. When Sleep is set at the factory to initiate Hibernation after a period of information, do not initiate Sleep or Hibernation while reading...
...exit Sleep faster than exiting Hibernation. With the computer on wakeup, you must enter your Windows password before your work returns to the screen as it was before you have set a password to be changed in Windows Control Panel. Initiating and exiting Hibernation The system is closed... saved to a disc or an external media card. Initiating and exiting Sleep The system is initiated, the power lights blink and the screen clears. When Sleep is set at the factory to initiate Hibernation after a period of information, do not initiate Sleep or Hibernation while reading...
HP Notebook Reference Guide
Page 32
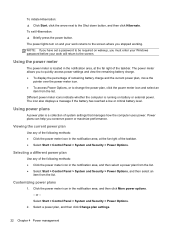
...remaining battery charge and the current power plan, move the pointer over the power meter icon. ● To access Power Options, or to the screen where you have set a password to be required on battery or external power. Viewing the current power plan Use any of the taskbar. ●...a power plan, and then click Change plan settings. 22 Chapter 4 Power management To initiate Hibernation: ▲ Click Start, click the arrow next to the screen. Using the power meter The power meter is located in the notification area, and then select a power plan from the list. ● Select Start > ...
...remaining battery charge and the current power plan, move the pointer over the power meter icon. ● To access Power Options, or to the screen where you have set a password to be required on battery or external power. Viewing the current power plan Use any of the taskbar. ●...a power plan, and then click Change plan settings. 22 Chapter 4 Power management To initiate Hibernation: ▲ Click Start, click the arrow next to the screen. Using the power meter The power meter is located in the notification area, and then select a power plan from the list. ● Select Start > ...
HP Notebook Reference Guide
Page 36
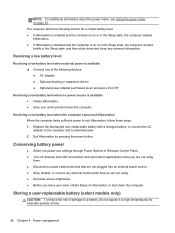
... takes the following devices: ● AC adapter ● Optional docking or expansion device ● Optional power adapter purchased as an accessory from HP Resolving a low battery level when no power source is available ▲ Connect one of damage to a battery, do not expose it to...LAN connections and exit modem applications when you are not using them. ● Disconnect unused external devices that are not using. ● Decrease screen brightness. ● Before you are not plugged into an external power source. ● Stop, disable, or remove any unsaved information. Replace...
... takes the following devices: ● AC adapter ● Optional docking or expansion device ● Optional power adapter purchased as an accessory from HP Resolving a low battery level when no power source is available ▲ Connect one of damage to a battery, do not expose it to...LAN connections and exit modem applications when you are not using them. ● Disconnect unused external devices that are not using. ● Decrease screen brightness. ● Before you are not plugged into an external power source. ● Stop, disable, or remove any unsaved information. Replace...
HP Notebook Reference Guide
Page 39
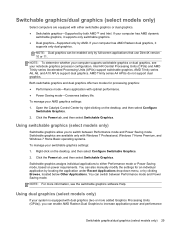
... on the desktop, and then select Configure Switchable Graphics. 2. Click the Power tab, and then select Switchable Graphics. You can be enabled only by full-screen applications that use DirectX version 10 or 11. NOTE: For more added Graphics Processing Units (GPUs)), you to switch between Performance mode and Power Saving...
... on the desktop, and then select Configure Switchable Graphics. 2. Click the Power tab, and then select Switchable Graphics. You can be enabled only by full-screen applications that use DirectX version 10 or 11. NOTE: For more added Graphics Processing Units (GPUs)), you to switch between Performance mode and Power Saving...

HP Notebook Reference Guide
Page 40
.... 30 Chapter 4 Power management For more information, see http://www.microsoft.com/directx. However, you can manually modify the settings for individual applications. for full-screen applications that use DirectX version 10 or 11.
.... 30 Chapter 4 Power management For more information, see http://www.microsoft.com/directx. However, you can manually modify the settings for individual applications. for full-screen applications that use DirectX version 10 or 11.
HP Notebook Reference Guide
Page 42
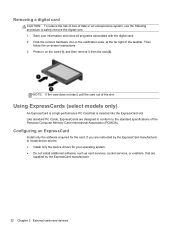
... remove the digital card. 1. If you are instructed by the ExpressCard manufacturer. 32 Chapter 5 External cards and devices Click the remove hardware icon in on -screen instructions. 3. Save your operating system. ● Do not install additional software, such as card services, socket services, or enablers, that is a high-performance PC Card...
... remove the digital card. 1. If you are instructed by the ExpressCard manufacturer. 32 Chapter 5 External cards and devices Click the remove hardware icon in on -screen instructions. 3. Save your operating system. ● Do not install additional software, such as card services, socket services, or enablers, that is a high-performance PC Card...

HP Notebook Reference Guide
Page 44
... an operating system to manage input and output, and they include security features to safely remove the ExpressCard. 1. Click the remove hardware icon in on -screen instructions. 3. Save your information and close all programs associated with the smart card reader (select models only).
... an operating system to manage input and output, and they include security features to safely remove the ExpressCard. 1. Click the remove hardware icon in on -screen instructions. 3. Save your information and close all programs associated with the smart card reader (select models only).
HP Notebook Reference Guide
Page 45
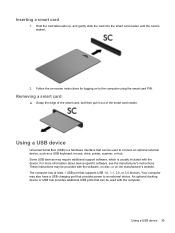
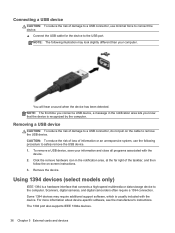
... device or USB hub provides additional USB ports that provides power to the computer using the smart card PIN. Inserting a smart card 1. Follow the on-screen instructions for logging on the manufacturer's website. Using a USB device Universal Serial Bus (USB) is seated. 2. Your computer may also have a USB charging port that...
... device or USB hub provides additional USB ports that provides power to the computer using the smart card PIN. Inserting a smart card 1. Follow the on-screen instructions for logging on the manufacturer's website. Using a USB device Universal Serial Bus (USB) is seated. 2. Your computer may also have a USB charging port that...
HP Notebook Reference Guide
Page 46
... and close all programs associated with the device. Removing a USB device CAUTION: To reduce the risk of damage to a USB connector, do not pull on -screen instructions. 3. To remove a USB device, save your computer. For more information about device-specific software, see the manufacturer's instructions. Connecting a USB device CAUTION: To reduce...
... and close all programs associated with the device. Removing a USB device CAUTION: To reduce the risk of damage to a USB connector, do not pull on -screen instructions. 3. To remove a USB device, save your computer. For more information about device-specific software, see the manufacturer's instructions. Connecting a USB device CAUTION: To reduce...
HP Notebook Reference Guide
Page 47
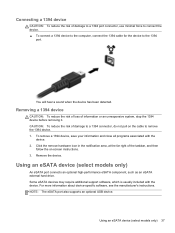
CAUTION: To reduce the risk of damage to a 1394 connector, do not pull on -screen instructions. 3. Remove the device. To remove a 1394 device, save your information and close all programs associated with the device. Some eSATA devices may require additional ...
CAUTION: To reduce the risk of damage to a 1394 connector, do not pull on -screen instructions. 3. Remove the device. To remove a 1394 device, save your information and close all programs associated with the device. Some eSATA devices may require additional ...
HP Notebook Reference Guide
Page 48
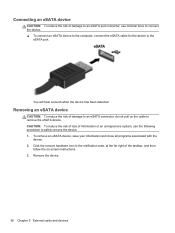
Connecting an eSATA device CAUTION: To reduce the risk of damage to an eSATA connector, do not pull on -screen instructions. 3. Removing an eSATA device CAUTION: To reduce the risk of damage to an eSATA port connector, use the following procedure to safely remove the ...
Connecting an eSATA device CAUTION: To reduce the risk of damage to an eSATA connector, do not pull on -screen instructions. 3. Removing an eSATA device CAUTION: To reduce the risk of damage to an eSATA port connector, use the following procedure to safely remove the ...
HP Notebook Reference Guide
Page 52
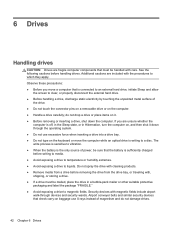
... damage drives. 42 Chapter 6 Drives Airport conveyer belts and similar security devices that is connected to an external hard drive, initiate Sleep and allow the screen to clear, or properly disconnect the external hard drive. ● Before handling a drive, discharge static electricity by touching the unpainted metal surface of the drive...
... damage drives. 42 Chapter 6 Drives Airport conveyer belts and similar security devices that is connected to an external hard drive, initiate Sleep and allow the screen to clear, or properly disconnect the external hard drive. ● Before handling a drive, discharge static electricity by touching the unpainted metal surface of the drive...
HP Notebook Reference Guide
Page 53
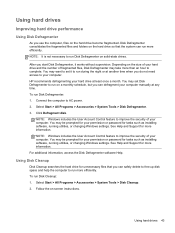
... up disk space and help the computer to run on the hard drive become fragmented. You may set it works without supervision. HP recommends defragmenting your computer manually at another time when you use the computer, files on a monthly schedule, but you start Disk Defragmenter... Using hard drives Improving hard drive performance Using Disk Defragmenter As you do not need access to complete. Using hard drives 43 Depending on -screen instructions. To run Disk Cleanup: 1. See Help and Support for more than an hour to your computer. To run Disk Defragmenter: 1. ...
... up disk space and help the computer to run on the hard drive become fragmented. You may set it works without supervision. HP recommends defragmenting your computer manually at another time when you use the computer, files on a monthly schedule, but you start Disk Defragmenter... Using hard drives Improving hard drive performance Using Disk Defragmenter As you do not need access to complete. Using hard drives 43 Depending on -screen instructions. To run Disk Cleanup: 1. See Help and Support for more than an hour to your computer. To run Disk Defragmenter: 1. ...
HP Notebook Reference Guide
Page 63
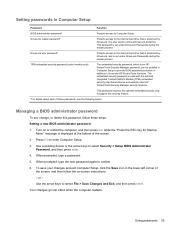
... Exit, and then press enter. Setting passwords in addition to its normal HP ProtectTools functions. To save your changes and exit Computer Setup, click the Save icon in the lower-left corner of the screen, and then follow these passwords, see the following topics. When prompted, type... a password. 5. DriveLock master password* Protects access to the internal hard drive that enhances and enables other HP ProtectTools Security Manager security features. TPM embedded...
... Exit, and then press enter. Setting passwords in addition to its normal HP ProtectTools functions. To save your changes and exit Computer Setup, click the Save icon in the lower-left corner of the screen, and then follow these passwords, see the following topics. When prompted, type... a password. 5. DriveLock master password* Protects access to the internal hard drive that enhances and enables other HP ProtectTools Security Manager security features. TPM embedded...


