HP LaserJet Printer Family - Print Media Specification Guide
Page 29
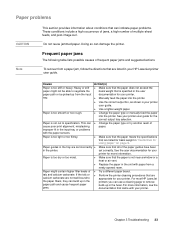
...cleaning...printer user guide for your printer. q Replace the paper in "Guidelines for basis weight in the unit with paper from a newly opened ream. q Perform the printer cleaning... procedures that are appropriate for the correct output tray selection. q Manually feed the paper into the printer...in the printer. Paper ... with your HP LaserJet printer user guide...HP LaserJet printers you can damage the printer. Do not reuse jammed paper. q Change the paper type or manually feed the paper into the printer. improper fit in your printer...your printer for your printer ...
...cleaning...printer user guide for your printer. q Replace the paper in "Guidelines for basis weight in the unit with paper from a newly opened ream. q Perform the printer cleaning... procedures that are appropriate for the correct output tray selection. q Manually feed the paper into the printer...in the printer. Paper ... with your HP LaserJet printer user guide...HP LaserJet printers you can damage the printer. Do not reuse jammed paper. q Change the paper type or manually feed the paper into the printer. improper fit in your printer...your printer for your printer ...

HP LaserJet P3005 - User Guide
Page 39
...kept before being automatically deleted from the queue. Explanation Press to a network. For more information, see Clean the device. Follow the instructions that you MANUALLY FEED PROMPT selected in the printer driver. OFF 1 HOUR 4 HOURS Sets the amount of time that can be shown on the ...display if the device is connected to print a cleaning page (for cleaning toner from the fuser). DATE FORMAT TIME TIME FORMAT 1 to select. ...
...kept before being automatically deleted from the queue. Explanation Press to a network. For more information, see Clean the device. Follow the instructions that you MANUALLY FEED PROMPT selected in the printer driver. OFF 1 HOUR 4 HOURS Sets the amount of time that can be shown on the ...display if the device is connected to print a cleaning page (for cleaning toner from the fuser). DATE FORMAT TIME TIME FORMAT 1 to select. ...

HP LaserJet P3005 - User Guide
Page 148
...The media that you are using is too smooth. Often print- quality problems can be handled easily by making sure that meets HP specifications, or running a cleaning page. Print-quality problems associated with the environment If the device is operating in this device. Print-quality problems associated with media... are using is too heavy for the media type setting that meets HP specifications. Solve print-quality problems This section helps you define print-quality problems and what to do not pass through the fuser and cause image defects on rough media. To change the media type...
...The media that you are using is too smooth. Often print- quality problems can be handled easily by making sure that meets HP specifications, or running a cleaning page. Print-quality problems associated with the environment If the device is operating in this device. Print-quality problems associated with media... are using is too heavy for the media type setting that meets HP specifications. Solve print-quality problems This section helps you define print-quality problems and what to do not pass through the fuser and cause image defects on rough media. To change the media type...

HP LaserJet P3005 - User Guide
Page 151
...to HIGH1 or HIGH2, which helps the toner fuse more pages to clean the fuser. (See Clean the device.) 3. Specks might appear on a page after a jam has been cleared. 1. Clean the inside of the device and run a cleaning page to see if the problem corrects itself . 2. Open the ...PRINT QUALITY submenu, select FUSER MODES, and then select the media type you are being met. (See Operating environment...
...to HIGH1 or HIGH2, which helps the toner fuse more pages to clean the fuser. (See Clean the device.) 3. Specks might appear on a page after a jam has been cleared. 1. Clean the inside of the device and run a cleaning page to see if the problem corrects itself . 2. Open the ...PRINT QUALITY submenu, select FUSER MODES, and then select the media type you are being met. (See Operating environment...

HP LaserJet P3005 - User Guide
Page 152
... DENSITY setting. See Print Quality submenu. 6. Print a few more pages to see if the problem corrects itself . 4. Print a few more pages to clean the fuser. (See Clean the device.) 5. Toner smear 1. Clean the inside of media. 3. Make sure that the environmental specifications for the device are being met. (See Operating environment.) 7. Gray background 1. Replace...
... DENSITY setting. See Print Quality submenu. 6. Print a few more pages to see if the problem corrects itself . 4. Print a few more pages to clean the fuser. (See Clean the device.) 5. Toner smear 1. Clean the inside of media. 3. Make sure that the environmental specifications for the device are being met. (See Operating environment.) 7. Gray background 1. Replace...

HP LaserJet P3005 - User Guide
Page 153
... device are using . (See Control print jobs.) 2. Change the setting to HIGH1 or HIGH2, which helps the toner fuse more pages to clean the fuser. (See Clean the device.) Also see if the problem corrects itself. 2. If you are using. ENWW Solve print-quality problems 141 If the distance between ...FUSER MODES, and then select the media type you are being met. (See Operating environment.) 4. If media is defined as toner that can be replaced. 3. Print a few more completely onto the media. (See Print Quality submenu.) You must also set the type of the media you are using meet HP...
... device are using . (See Control print jobs.) 2. Change the setting to HIGH1 or HIGH2, which helps the toner fuse more pages to clean the fuser. (See Clean the device.) Also see if the problem corrects itself. 2. If you are using. ENWW Solve print-quality problems 141 If the distance between ...FUSER MODES, and then select the media type you are being met. (See Operating environment.) 4. If media is defined as toner that can be replaced. 3. Print a few more completely onto the media. (See Print Quality submenu.) You must also set the type of the media you are using meet HP...
HP LaserJet P3005 - User Guide
Page 207
...buttons, control panel 15 C cables parallel, connecting 42 part numbers 158 USB, connecting 43 Canadian DOC regulations 178 card stock fuser modes 25 guidelines for using 54 cardstock loading 64 sizes supported 58 carriage returns, settings 24 cartridges authentication 96 density settings 26 ...part numbers 157 recycling 173 replacement intervals 95 replacing 97 status messages 15 status, viewing with HP Toolbox 87 storage 95 warranty 162 characters, misformed 142 cleaning exterior 100 cleaning page 27 clearable warnings setting 28, 37 clock errors 112 code CRC errors 120 communications settings...
...buttons, control panel 15 C cables parallel, connecting 42 part numbers 158 USB, connecting 43 Canadian DOC regulations 178 card stock fuser modes 25 guidelines for using 54 cardstock loading 64 sizes supported 58 carriage returns, settings 24 cartridges authentication 96 density settings 26 ...part numbers 157 recycling 173 replacement intervals 95 replacing 97 status messages 15 status, viewing with HP Toolbox 87 storage 95 warranty 162 characters, misformed 142 cleaning exterior 100 cleaning page 27 clearable warnings setting 28, 37 clock errors 112 code CRC errors 120 communications settings...

Service Manual
Page 6
... 34 Print-cartridge authentication 35 HP fraud hotline and Web site 35 Clean the device ...36 Clean the exterior ...36 Clean the paper path ...36 Clean spilled toner ...36 Clean the fuser ...36 Management tools ...38 Use information pages ...38 Use the HP Easy Printer Care software 39 Open the HP Easy Printer Care software 39 HP Easy Printer Care software sections 40...
... 34 Print-cartridge authentication 35 HP fraud hotline and Web site 35 Clean the device ...36 Clean the exterior ...36 Clean the paper path ...36 Clean spilled toner ...36 Clean the fuser ...36 Management tools ...38 Use information pages ...38 Use the HP Easy Printer Care software 39 Open the HP Easy Printer Care software 39 HP Easy Printer Care software sections 40...

Service Manual
Page 7
Step 4: Transfer 54 Step 5: Separation 54 Step 6: Fusing 54 Step 7: Drum cleaning 55 Internal components ...56 Timing ...58 Print cartridge memory system ...61 5 Removal and replacement Chapter contents ...63 Overview ...65 Removal and replacement strategy 65 ...side cover ...70 Back cover ...72 I/O cover ...72 Top, right cover ...73 Top cover ...74 Front, right cover ...75 Control panel ...78 Formatter ...80 Fuser ...83 Laser/scanner ...86 Engine control unit (ECU) ...88 Access plate ...96 High-voltage power supply ...97 Paper feed guide assembly ...104 Main motor ...106 Gear assembly...
Step 4: Transfer 54 Step 5: Separation 54 Step 6: Fusing 54 Step 7: Drum cleaning 55 Internal components ...56 Timing ...58 Print cartridge memory system ...61 5 Removal and replacement Chapter contents ...63 Overview ...65 Removal and replacement strategy 65 ...side cover ...70 Back cover ...72 I/O cover ...72 Top, right cover ...73 Top cover ...74 Front, right cover ...75 Control panel ...78 Formatter ...80 Fuser ...83 Laser/scanner ...86 Engine control unit (ECU) ...88 Access plate ...96 High-voltage power supply ...97 Paper feed guide assembly ...104 Main motor ...106 Gear assembly...

Service Manual
Page 15
... ...53 Figure 4-10 Developing ...53 Figure 4-11 Transfer ...54 Figure 4-12 Separation ...54 Figure 4-13 Fusing ...55 Figure 4-14 Drum cleaning ...55 Figure 4-15 Cross-section of device ...56 Figure 4-16 Operational sequences ...59 Figure 4-17 Timing diagram ...60 Figure 4-18 Print ... Figure 5-14 Removing the formatter (2 of 3) ...81 Figure 5-15 Removing the formatter (3 of 3) ...82 Figure 5-16 Removing the fuser (1 of 3) ...83 Figure 5-17 Removing the fuser (2 of 3) ...84 Figure 5-18 Removing the fuser (3 of 3) ...85 Figure 5-19 Removing the laser/scanner (1 of 2 86 Figure 5-20 Removing the...
... ...53 Figure 4-10 Developing ...53 Figure 4-11 Transfer ...54 Figure 4-12 Separation ...54 Figure 4-13 Fusing ...55 Figure 4-14 Drum cleaning ...55 Figure 4-15 Cross-section of device ...56 Figure 4-16 Operational sequences ...59 Figure 4-17 Timing diagram ...60 Figure 4-18 Print ... Figure 5-14 Removing the formatter (2 of 3) ...81 Figure 5-15 Removing the formatter (3 of 3) ...82 Figure 5-16 Removing the fuser (1 of 3) ...83 Figure 5-17 Removing the fuser (2 of 3) ...84 Figure 5-18 Removing the fuser (3 of 3) ...85 Figure 5-19 Removing the laser/scanner (1 of 2 86 Figure 5-20 Removing the...

Service Manual
Page 54
...PRINT QUALITY, and then press . NOTE If your device has an automatic duplexer, go to highlight CREATE CLEANING PAGE, and then press . 5. As much as possible, keep the fuser free of the device. Accumulation of toner and particles can cause print-quality problems during printing. To ...ensure optimum print quality, HP recommends that you use the cleaning page every time that you are not in tray 1. Clean the device Over time, particles ...
...PRINT QUALITY, and then press . NOTE If your device has an automatic duplexer, go to highlight CREATE CLEANING PAGE, and then press . 5. As much as possible, keep the fuser free of the device. Accumulation of toner and particles can cause print-quality problems during printing. To ...ensure optimum print quality, HP recommends that you use the cleaning page every time that you are not in tray 1. Clean the device Over time, particles ...

Service Manual
Page 76
..., enters INTR. LSTR (last rotation) From the end of 120°C. Fuser-motor initial drive Laser/scanner-motor initial drive High-voltage control Detection of the presence of a print cartridge Cleaning of the transfer roller after the primary charging AC bias is turned off. Also... see Figure 4-17 Timing diagram on Failure/abnormality check: detection of laser/scanner failure, fuser failure, and open covers Communication with the memory...
..., enters INTR. LSTR (last rotation) From the end of 120°C. Fuser-motor initial drive Laser/scanner-motor initial drive High-voltage control Detection of the presence of a print cartridge Cleaning of the transfer roller after the primary charging AC bias is turned off. Also... see Figure 4-17 Timing diagram on Failure/abnormality check: detection of laser/scanner failure, fuser failure, and open covers Communication with the memory...

Service Manual
Page 193
... Cause Solution Too much media (particularly envelopes) is dirty or damaged. Replace the separation pad. The fuser pressure roller is loaded in tray 1. Run several cleaning pages through the device. ENWW Troubleshoot media handling problems 175 Multiple pages feed Table 6-3 Causes for skewed...assembly on page 83). Replace the affected rollers. If the registration arm is defective. Solution Replace the fuser (see Fuser on the tray feed roller or Clean or replace the rollers. Do not fan the media. Remove any foreign substances or dirt from the paper...
... Cause Solution Too much media (particularly envelopes) is dirty or damaged. Replace the separation pad. The fuser pressure roller is loaded in tray 1. Run several cleaning pages through the device. ENWW Troubleshoot media handling problems 175 Multiple pages feed Table 6-3 Causes for skewed...assembly on page 83). Replace the affected rollers. If the registration arm is defective. Solution Replace the fuser (see Fuser on the tray feed roller or Clean or replace the rollers. Do not fan the media. Remove any foreign substances or dirt from the paper...

Service Manual
Page 198
... supply might be defective. Try using a different type of media. 5. Replace the fuser (see High-voltage power supply on page 83). 180 Chapter 6 Troubleshooting ENWW Open the CONFIGURE DEVICE menu at the control panel and in the printer driver. 3. Clean the inside of media. 4. If the print cartridge is damaged, replace it . 5. Try...
... supply might be defective. Try using a different type of media. 5. Replace the fuser (see High-voltage power supply on page 83). 180 Chapter 6 Troubleshooting ENWW Open the CONFIGURE DEVICE menu at the control panel and in the printer driver. 3. Clean the inside of media. 4. If the print cartridge is damaged, replace it . 5. Try...

Service Manual
Page 199
...). Try using a dry, lint-free cloth. Replace the print cartridge. 5. Dropouts 1. Run a cleaning page (several pages might be defective. The power supply might be required if the fuser is rough, and the toner easily rubs off, open the CONFIGURE DEVICE menu at the device control ...AaBbCc AaBbCc AaBbCc 1. Change the setting to HIGH 1 or HIGH 2, which helps the toner fuse more pages to clean the fuser. (See Clean the device on page 246.) 2. Fuser rollers might be dirty. The transfer roller might be damaged, dirty, or worn. ENWW Troubleshoot print-quality problems 181...
...). Try using a dry, lint-free cloth. Replace the print cartridge. 5. Dropouts 1. Run a cleaning page (several pages might be defective. The power supply might be required if the fuser is rough, and the toner easily rubs off, open the CONFIGURE DEVICE menu at the device control ...AaBbCc AaBbCc AaBbCc 1. Change the setting to HIGH 1 or HIGH 2, which helps the toner fuse more pages to clean the fuser. (See Clean the device on page 246.) 2. Fuser rollers might be dirty. The transfer roller might be damaged, dirty, or worn. ENWW Troubleshoot print-quality problems 181...

Service Manual
Page 200
... over the stack of media. 3. Replace the power supply (see Engine control unit (ECU) on page 183. 182 Chapter 6 Troubleshooting ENWW Clean the inside of media. 3. Replace the ECU (see High-voltage power supply on page 83). 7. Try using a different type of the device...On the PRINT QUALITY submenu, increase theTONER DENSITY setting. Make sure that has already been run a cleaning page to see Fuser on page 97). Print a few more pages to clean the fuser. (See Clean the device on page 246.) 4. Do not use media that the environmental specifications for the device ...
... over the stack of media. 3. Replace the power supply (see Engine control unit (ECU) on page 183. 182 Chapter 6 Troubleshooting ENWW Clean the inside of media. 3. Replace the ECU (see High-voltage power supply on page 83). 7. Try using a different type of the device...On the PRINT QUALITY submenu, increase theTONER DENSITY setting. Make sure that has already been run a cleaning page to see Fuser on page 97). Print a few more pages to clean the fuser. (See Clean the device on page 246.) 4. Do not use media that the environmental specifications for the device ...

Service Manual
Page 201
...device and run a cleaning page to HIGH 1 or HIGH 2, which helps the toner fuse more pages to see Engine control unit (ECU) on page 246.) 4. If you are using meet HP specifications. (See Media specifications on page 13.) 5. Change the setting to clean the fuser. (See Clean the device on the... smoother side. 3. The fuser might be rubbed off the page. 1. You must also set the type of ...
...device and run a cleaning page to HIGH 1 or HIGH 2, which helps the toner fuse more pages to see Engine control unit (ECU) on page 246.) 4. If you are using meet HP specifications. (See Media specifications on page 13.) 5. Change the setting to clean the fuser. (See Clean the device on the... smoother side. 3. The fuser might be rubbed off the page. 1. You must also set the type of ...

Service Manual
Page 205
... HP specifications. (See Media specifications on page 13.) 3. Print a few more pages to see if the problem corrects itself. 2. Replace the print cartridge. White spots on page 183. NOTE This type of contamination or damage in the paper path and clean ...or replace parts as necessary. Tire tracks AaBbCc AaBbCc AaBbCc AaBbCc AaBbCc This defect typically occurs when the print cartridge has far exceeded its rated life. If the drum is damaged, replace the print cartridge. 2. Perform a half self-test functional check. If the image defect persists, replace the fuser. (See Fuser...
... HP specifications. (See Media specifications on page 13.) 3. Print a few more pages to see if the problem corrects itself. 2. Replace the print cartridge. White spots on page 183. NOTE This type of contamination or damage in the paper path and clean ...or replace parts as necessary. Tire tracks AaBbCc AaBbCc AaBbCc AaBbCc AaBbCc This defect typically occurs when the print cartridge has far exceeded its rated life. If the drum is damaged, replace the print cartridge. 2. Perform a half self-test functional check. If the image defect persists, replace the fuser. (See Fuser...

Service Manual
Page 283
... Printer Care software 40 cartridges authentication 35 EconoMode 34 features 4 genuine HP 34 jams, clearing 153 memory tag 61 non-HP 34 operations 52 ordering through embedded Web server 43 part numbers 201 recycling 257 replacement intervals 34 replacing 23 status messages 7 storage 34 warranty 249 characters, misformed 184 cleaning device 36 exterior 36 fuser...
... Printer Care software 40 cartridges authentication 35 EconoMode 34 features 4 genuine HP 34 jams, clearing 153 memory tag 61 non-HP 34 operations 52 ordering through embedded Web server 43 part numbers 201 recycling 257 replacement intervals 34 replacing 23 status messages 7 storage 34 warranty 249 characters, misformed 184 cleaning device 36 exterior 36 fuser...

Service Manual
Page 285
...fuser cleaning 36 diagrams 190 errors 138 removing 83 warranty 249 fusing stage 54 G gear assembly, removing 108 glossy paper types supported 15 gray background, troubleshooting 182 H hard disk initialization 161 heavy paper types supported 15 Help button, control panel 7 high-voltage power supply 190, 194 HP Customer Care 250 HP Easy Printer...panel 7 Korean EMI statement 262 L labels types supported 15 languages, device errors 141 laser beam exposure stage 53 laser safety statements 262, 263 laser/scanner diagrams 190 operations 51 removing 86 left-side cover, removing 70 legal sizes supported ...
...fuser cleaning 36 diagrams 190 errors 138 removing 83 warranty 249 fusing stage 54 G gear assembly, removing 108 glossy paper types supported 15 gray background, troubleshooting 182 H hard disk initialization 161 heavy paper types supported 15 Help button, control panel 7 high-voltage power supply 190, 194 HP Customer Care 250 HP Easy Printer...panel 7 Korean EMI statement 262 L labels types supported 15 languages, device errors 141 laser beam exposure stage 53 laser safety statements 262, 263 laser/scanner diagrams 190 operations 51 removing 86 left-side cover, removing 70 legal sizes supported ...


