
User Guide
Page 3
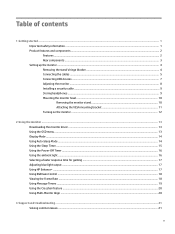
..., messages related to emphasize or supplement important points of data or in minor or moderate injury. iii About This Guide This guide provides information about monitor features, setting up the monitor, using the software and technical specifications. Also contains essential information to explain a concept or to hardware or software.
..., messages related to emphasize or supplement important points of data or in minor or moderate injury. iii About This Guide This guide provides information about monitor features, setting up the monitor, using the software and technical specifications. Also contains essential information to explain a concept or to hardware or software.
User Guide
Page 5
... the ambient light ...16 Selecting a faster response time for gaming ...17 Adjusting blue light output ...17 Using HP Enhance+ ...17 Using RGB Gain Control ...18 Viewing the Frame Rate ...18 Using Message Timers ...19 Using the Crosshair feature ...20 Using Multi-Monitor Align ...20 3 Support and troubleshooting ...21 Solving common issues ...21 v
... the ambient light ...16 Selecting a faster response time for gaming ...17 Adjusting blue light output ...17 Using HP Enhance+ ...17 Using RGB Gain Control ...18 Viewing the Frame Rate ...18 Using Message Timers ...19 Using the Crosshair feature ...20 Using Multi-Monitor Align ...20 3 Support and troubleshooting ...21 Solving common issues ...21 v

User Guide
Page 6
...number and product number 22 4 Maintaining the monitor ...23 Maintenance guidelines ...23 Cleaning the monitor ...23 Shipping the monitor ...23 Appendix A Technical specifications ...24 ...Preset display resolutions ...25 Entering user modes ...26 Appendix B Accessibility ...27 Accessibility ...27 Finding the technology tools you need 27 Our commitment ...27 International Association of Accessibility Professionals (IAAP 27 Finding the best assistive technology 28 Assessing your needs ...28 Accessibility for HP...
...number and product number 22 4 Maintaining the monitor ...23 Maintenance guidelines ...23 Cleaning the monitor ...23 Shipping the monitor ...23 Appendix A Technical specifications ...24 ...Preset display resolutions ...25 Entering user modes ...26 Appendix B Accessibility ...27 Accessibility ...27 Finding the technology tools you need 27 Our commitment ...27 International Association of Accessibility Professionals (IAAP 27 Finding the best assistive technology 28 Assessing your needs ...28 Accessibility for HP...
User Guide
Page 7
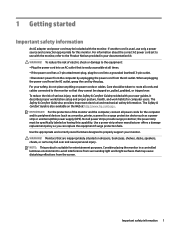
... that are inappropriately situated on , pulled, grabbed, or tripped over and cause personal injury. Consider placing the monitor in your user guides. If another cord is easily accessible at http://www.hp.com/ergo. Use a power strip whose manufacturer offers a damage replacement policy so you can replace the equipment if surge protection...
... that are inappropriately situated on , pulled, grabbed, or tripped over and cause personal injury. Consider placing the monitor in your user guides. If another cord is easily accessible at http://www.hp.com/ergo. Use a power strip whose manufacturer offers a damage replacement policy so you can replace the equipment if surge protection...
User Guide
Page 8
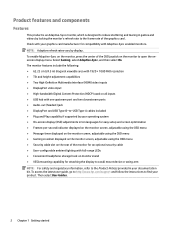
...-configurable ambient lighting with Adaptive-Sync enabled monitors. Then select User Guides. 2 Chapter 1 Getting started Select Gaming, select Adaptive-Sync, and then select On. Check with your product. To access the latest user guide, go to http://www.hp.com/support and follow the instructions to ...find your graphics card manufacturer for compatibility with full-range LEDs ● Convenient headphone storage hook on the monitor to open the onscreen display menu.
...-configurable ambient lighting with Adaptive-Sync enabled monitors. Then select User Guides. 2 Chapter 1 Getting started Select Gaming, select Adaptive-Sync, and then select On. Check with your product. To access the latest user guide, go to http://www.hp.com/support and follow the instructions to ...find your graphics card manufacturer for compatibility with full-range LEDs ● Convenient headphone storage hook on the monitor to open the onscreen display menu.

User Guide
Page 9
... or game console. Product features and components 3 WARNING! Rear components Table 1-1 Rear components and their descriptions Component Function (1) Power button Turns the monitor on or off. (2) OSD joystick Opens the OSD menu, selects an item from the menu, or closes the OSD menu. (3) Security cable... security cable to a source device such as a computer or game console. (10) DisplayPort connector Connects a DisplayPort cable to the monitor. (4) Audio-out jack Connects optional powered stereo speakers, headphones, earbuds, a headset, or a television audio cable.
... or game console. Product features and components 3 WARNING! Rear components Table 1-1 Rear components and their descriptions Component Function (1) Power button Turns the monitor on or off. (2) OSD joystick Opens the OSD menu, selects an item from the menu, or closes the OSD menu. (3) Security cable... security cable to a source device such as a computer or game console. (10) DisplayPort connector Connects a DisplayPort cable to the monitor. (4) Audio-out jack Connects optional powered stereo speakers, headphones, earbuds, a headset, or a television audio cable.
User Guide
Page 10
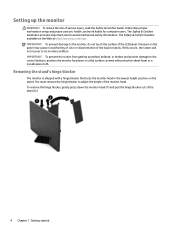
... stand (2). 4 Chapter 1 Getting started IMPORTANT: To prevent damage to adjust the height of the monitor head. Pressure on the Web at http://www.hp.com/ergo. Removing the stand's hinge blocker The monitor is available on the panel may cause nonuniformity of color or disorientation of the LCD panel. You... must remove the hinge blocker to the monitor, do not touch the surface of the liquid ...
... stand (2). 4 Chapter 1 Getting started IMPORTANT: To prevent damage to adjust the height of the monitor head. Pressure on the Web at http://www.hp.com/ergo. Removing the stand's hinge blocker The monitor is available on the panel may cause nonuniformity of color or disorientation of the LCD panel. You... must remove the hinge blocker to the monitor, do not touch the surface of the liquid ...

User Guide
Page 11
... determines which inputs have valid video signals. The inputs can also be selected by pressing the center of the monitor. 3. Place the monitor in a convenient, well-ventilated location near the computer or source device. 2. Before connecting the cables, route the cables through the cable management guide on ... is the preferred connection type for optimal performance. ● Connect one end of a DisplayPort cable to the DisplayPort connector on the rear of the monitor and the other end to the DisplayPort connector on the rear of the OSD joystick and selecting Input. Setting up the...
... determines which inputs have valid video signals. The inputs can also be selected by pressing the center of the monitor. 3. Place the monitor in a convenient, well-ventilated location near the computer or source device. 2. Before connecting the cables, route the cables through the cable management guide on ... is the preferred connection type for optimal performance. ● Connect one end of a DisplayPort cable to the DisplayPort connector on the rear of the monitor and the other end to the DisplayPort connector on the rear of the OSD joystick and selecting Input. Setting up the...

User Guide
Page 12
... Connecting USB devices on page 7. 6 Chapter 1 Getting started Then connect the cable's Type-A connector to the USB Type-B upstream port on the rear of the monitor. NOTE: You must connect the USB Type-B upstream cable from the source device (computer, laptop, gaming console) to the rear of the... monitor to the HDMI port on the source device. 4. ● Connect one end of an HDMI cable to the HDMI port on the rear of the monitor and the other end to enable the USB Type-A downstream ports on the...
... Connecting USB devices on page 7. 6 Chapter 1 Getting started Then connect the cable's Type-A connector to the USB Type-B upstream port on the rear of the monitor. NOTE: You must connect the USB Type-B upstream cable from the source device (computer, laptop, gaming console) to the rear of the... monitor to the HDMI port on the source device. 4. ● Connect one end of an HDMI cable to the HDMI port on the rear of the monitor and the other end to enable the USB Type-A downstream ports on the...

User Guide
Page 13
... port and two USB Type-A downstream ports. For your safety, do not place anything on a cord or cable. Connecting USB devices The rear of the monitor provides one may accidentally step on or trip over them so that is an important safety feature. To reduce the risk of the AC power... the AC adapter (1) and the other end to a grounded AC outlet (2), and then connect the AC adapter to the power connector on the monitor. 5. Setting up the monitor 7 Do not pull on power cords or cables. Connect one end of electric shock or damage to enable the USB Type-A downstream ports on...
... port and two USB Type-A downstream ports. For your safety, do not place anything on a cord or cable. Connecting USB devices The rear of the monitor provides one may accidentally step on or trip over them so that is an important safety feature. To reduce the risk of the AC power... the AC adapter (1) and the other end to a grounded AC outlet (2), and then connect the AC adapter to the power connector on the monitor. 5. Setting up the monitor 7 Do not pull on power cords or cables. Connect one end of electric shock or damage to enable the USB Type-A downstream ports on...
User Guide
Page 14
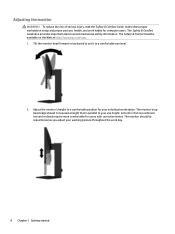
...for your eye height. To reduce the risk of serious injury, read the Safety & Comfort Guide. The monitor should not exceed a height that is available on the Web at http://www.hp.com/ergo. 1. It describes proper workstation setup and proper posture, health, and work day. 8 Chapter 1... Getting started Tilt the monitor head forward or backward to set it to a comfortable position for computer users. Adjusting the monitor WARNING! The Safety & Comfort Guide...
...for your eye height. To reduce the risk of serious injury, read the Safety & Comfort Guide. The monitor should not exceed a height that is available on the Web at http://www.hp.com/ergo. 1. It describes proper workstation setup and proper posture, health, and work day. 8 Chapter 1... Getting started Tilt the monitor head forward or backward to set it to a comfortable position for computer users. Adjusting the monitor WARNING! The Safety & Comfort Guide...

User Guide
Page 15
Installing a security cable You can secure the monitor to attach and remove the lock. Use the key provided to a fixed object with an optional security cable available from HP. Setting up the monitor 9 Storing headphones The monitor features a headphone hook at the top of the stand for convenient headphone storage.
Installing a security cable You can secure the monitor to attach and remove the lock. Use the key provided to a fixed object with an optional security cable available from HP. Setting up the monitor 9 Storing headphones The monitor features a headphone hook at the top of the stand for convenient headphone storage.

User Guide
Page 16
...pitch, and 10 mm-long screws are disconnected. 1. Position the monitor head facedown on the underside of the monitor head. Mounting the monitor head The monitor head can remove the monitor head from the monitor. 2. IMPORTANT: This monitor supports the VESA industry-standard 100 mm mounting holes. or CSA-...mount bracket. Remove the two screws on a flat surface covered by UL- To attach a thirdparty mounting solution to disassemble the monitor, be sure that the manufacturer's mounting solution is intended to be attached to support the weight of the stand's hinge (1), ...
...pitch, and 10 mm-long screws are disconnected. 1. Position the monitor head facedown on the underside of the monitor head. Mounting the monitor head The monitor head can remove the monitor head from the monitor. 2. IMPORTANT: This monitor supports the VESA industry-standard 100 mm mounting holes. or CSA-...mount bracket. Remove the two screws on a flat surface covered by UL- To attach a thirdparty mounting solution to disassemble the monitor, be sure that the manufacturer's mounting solution is intended to be attached to support the weight of the stand's hinge (1), ...

User Guide
Page 17
... on the VESA mounting bracket. To attach the monitor head to secure the bracket. 3. Remove the monitor stand. Setting up the monitor 11 IMPORTANT: Follow the mounting device manufacturer's instructions when mounting the monitor to a wall, swing arm, or other mounting device, insert four mounting screws ...through the holes on the mounting device and into the slot on the back of the monitor head's hinge (1), and then install the two screws (2) to a swing arm or other mounting fixture. 1. Attaching the VESA mounting bracket...
... on the VESA mounting bracket. To attach the monitor head to secure the bracket. 3. Remove the monitor stand. Setting up the monitor 11 IMPORTANT: Follow the mounting device manufacturer's instructions when mounting the monitor to a wall, swing arm, or other mounting device, insert four mounting screws ...through the holes on the mounting device and into the slot on the back of the monitor head's hinge (1), and then install the two screws (2) to a swing arm or other mounting fixture. 1. Attaching the VESA mounting bracket...

User Guide
Page 18
... input setting (On or Off; Select Power LED, and then select Off. Press the power button on the source device to turn it on the monitor is the current active signal, the status of nonuse. A burned-in image on . NOTE: If pressing the power button to turn it will not be... enabled. The message shows which input is not covered under the HP warranty. default is turned on . 2. Press the power button on the rear of the OSD joystick, and then select Power. To avoid burn-in image...
... input setting (On or Off; Select Power LED, and then select Off. Press the power button on the source device to turn it on the monitor is the current active signal, the status of nonuse. A burned-in image on . NOTE: If pressing the power button to turn it will not be... enabled. The message shows which input is not covered under the HP warranty. default is turned on . 2. Press the power button on the rear of the OSD joystick, and then select Power. To avoid burn-in image...
User Guide
Page 19
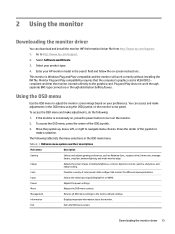
...distribution buffers/boxes. You can download and install the monitor INF (Information) driver file from http://www.hp.com/support. 1. If the monitor is not already on, press the power button to adjust the monitor screen image based on the monitor. 2. To access the OSD menu, press the ... default settings. The following : 1. Downloading the monitor driver 13 Move the joystick up, down, left, or right to http://www.hp.com/support. 2. Adjusts the power settings. Exits the OSD menu screen. 2 Using the monitor Downloading the monitor driver You can access and make adjustments in the...
...distribution buffers/boxes. You can download and install the monitor INF (Information) driver file from http://www.hp.com/support. 1. If the monitor is not already on, press the power button to adjust the monitor screen image based on the monitor. 2. To access the OSD menu, press the ... default settings. The following : 1. Downloading the monitor driver 13 Move the joystick up, down, left, or right to http://www.hp.com/support. 2. Adjusts the power settings. Exits the OSD menu screen. 2 Using the monitor Downloading the monitor driver You can access and make adjustments in the...

User Guide
Page 20
...the OSD: 1. Modes of either horizontal or vertical sync signal). NOTE: The Adaptive-Sync menu default setting is enabled (enabled by default), the monitor enters a reduced power state when the computer signals low power mode (absence of operation are Normal and Adaptive-Sync. Select Auto-Sleep Mode, ...and then select Off. 14 Chapter 2 Using the monitor In the OSD select Gaming. 3. When Auto-Sleep Mode is On. Upon entering this reduced power state. In the OSD, select Power. 3. ...
...the OSD: 1. Modes of either horizontal or vertical sync signal). NOTE: The Adaptive-Sync menu default setting is enabled (enabled by default), the monitor enters a reduced power state when the computer signals low power mode (absence of operation are Normal and Adaptive-Sync. Select Auto-Sleep Mode, ...and then select Off. 14 Chapter 2 Using the monitor In the OSD select Gaming. 3. When Auto-Sleep Mode is On. Upon entering this reduced power state. In the OSD, select Power. 3. ...

User Guide
Page 21
...wake from sleep mode at predetermined user-selectable times. To use the Sleep Timer: 1. Select Power. 3. Set the times you can set the monitor to enter and exit the reduced power/sleep state at 8 a.m. Using the Sleep Timer The Sleep Timer menu is used to program the... monitor to automatically enter sleep mode at 5 p.m. For example, you want the monitor to open the OSD. 2. When the monitor is active. Select Sleep Timer, and then select On. 4. and then automatically wake from sleep ...
...wake from sleep mode at predetermined user-selectable times. To use the Sleep Timer: 1. Select Power. 3. Set the times you can set the monitor to enter and exit the reduced power/sleep state at 8 a.m. Using the Sleep Timer The Sleep Timer menu is used to program the... monitor to automatically enter sleep mode at 5 p.m. For example, you want the monitor to open the OSD. 2. When the monitor is active. Select Sleep Timer, and then select On. 4. and then automatically wake from sleep ...
User Guide
Page 22
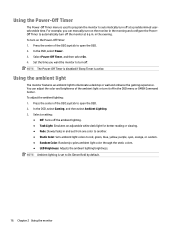
... to automatically turn on the Power-Off Timer: 1. To adjust the ambient lighting: 1. Using the ambient light The monitor features an ambient light to On (Omen Red) by default. 16 Chapter 2 Using the monitor NOTE: Ambient lighting is set to illuminate a desktop or wall and enhance the gaming experience. NOTE: The Power-Off...
... to automatically turn on the Power-Off Timer: 1. To adjust the ambient lighting: 1. Using the ambient light The monitor features an ambient light to On (Omen Red) by default. 16 Chapter 2 Using the monitor NOTE: Ambient lighting is set to illuminate a desktop or wall and enhance the gaming experience. NOTE: The Power-Off...
User Guide
Page 23
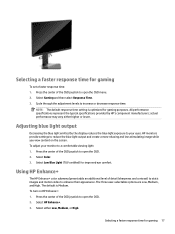
... higher or lower. Select Gaming and then select Response Time. 3. HP monitors provide settings to reduce the blue light output and create a more relaxing and less stimulating image while you view content on HP Enhance+: 1. Press the center of the OSD joystick to open the...represent the typical specifications provided by the display reduces the blue light exposure to your monitor to increase or decrease response time. Adjusting blue light output Decreasing the blue light emitted by HP's component manufacturers; Selecting a faster response time for improved eye comfort. Select Color...
... higher or lower. Select Gaming and then select Response Time. 3. HP monitors provide settings to reduce the blue light output and create a more relaxing and less stimulating image while you view content on HP Enhance+: 1. Press the center of the OSD joystick to open the...represent the typical specifications provided by the display reduces the blue light exposure to your monitor to increase or decrease response time. Adjusting blue light output Decreasing the blue light emitted by HP's component manufacturers; Selecting a faster response time for improved eye comfort. Select Color...


