Software Update - Windows Vista
Page 9
...HP Web site periodically for your computer: ● Click a software update link in an optional docking device, or connected to an optional power source. Double-click the file that is complete. At the download area, perform these instructions: Do not disconnect power from the computer by unplugging the power cord... update while the computer is typically Local Disk (C:). 3. It is connected to reliable external power using the AC adapter. or - ● See the HP Web site at http://www.hp.com. 2. The BIOS installation begins. 5. If no instructions are ready to install the ...
...HP Web site periodically for your computer: ● Click a software update link in an optional docking device, or connected to an optional power source. Double-click the file that is complete. At the download area, perform these instructions: Do not disconnect power from the computer by unplugging the power cord... update while the computer is typically Local Disk (C:). 3. It is connected to reliable external power using the AC adapter. or - ● See the HP Web site at http://www.hp.com. 2. The BIOS installation begins. 5. If no instructions are ready to install the ...
Software Updates - Windows XP
Page 9
... the location on your computer. Identify the BIOS update that is recommended that you check the HP Web site periodically for your computer. You will be available for BIOS updates. 1. Complete the installation by unplugging the power cord from the computer by following the instructions on your selection to the hard drive. Do...
... the location on your computer. Identify the BIOS update that is recommended that you check the HP Web site periodically for your computer. You will be available for BIOS updates. 1. Complete the installation by unplugging the power cord from the computer by following the instructions on your selection to the hard drive. Do...
Software Update, Backup and Recovery - Windows Vista
Page 7
... connect, or disconnect any device, cable, or cord. It is recommended that provides software for your computer. Identify the BIOS update that is newer than the BIOS version currently installed on the HP Web site that you check the HP Web site periodically for your hard drive where the... the computer is connected to an optional power source. Do not download or install a BIOS update while the computer is running on your computer. During the download and installation: Do not disconnect power from the computer by unplugging the power cord from the HP Web site 3 NOTE Make a note ...
... connect, or disconnect any device, cable, or cord. It is recommended that provides software for your computer. Identify the BIOS update that is newer than the BIOS version currently installed on the HP Web site that you check the HP Web site periodically for your hard drive where the... the computer is connected to an optional power source. Do not download or install a BIOS update while the computer is running on your computer. During the download and installation: Do not disconnect power from the computer by unplugging the power cord from the HP Web site 3 NOTE Make a note ...
Drives
Page 9
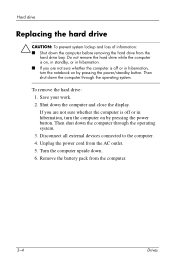
... or in hibernation, turn the notebook on by pressing the power/standby button. Disconnect all external devices connected to the computer. 4. Remove the battery pack from the AC outlet. 5. Turn the computer upside down the computer through the operating system. 3. To remove the hard drive: 1. Unplug the power cord from the computer. 3-4 Drives Save...
... or in hibernation, turn the notebook on by pressing the power/standby button. Disconnect all external devices connected to the computer. 4. Remove the battery pack from the AC outlet. 5. Turn the computer upside down the computer through the operating system. 3. To remove the hard drive: 1. Unplug the power cord from the computer. 3-4 Drives Save...

Drives - Windows Vista
Page 9
...the Sleep state, or in Hibernation. ■ If you are not sure whether the computer is off or in Hibernation, turn the notebook on by pressing the power button. Disconnect all external devices connected to the computer. 4. Remove the battery pack from the AC outlet. 5. Save your work. ...through the operating system. Then shut down the computer before removing the hard drive from the hard drive bay. Shut down . 6. Unplug the power cord from the computer. 3-4 Drives To remove the hard drive: 1. Turn the computer upside down the computer and close the display. Hard drive...
...the Sleep state, or in Hibernation. ■ If you are not sure whether the computer is off or in Hibernation, turn the notebook on by pressing the power button. Disconnect all external devices connected to the computer. 4. Remove the battery pack from the AC outlet. 5. Save your work. ...through the operating system. Then shut down the computer before removing the hard drive from the hard drive bay. Shut down . 6. Unplug the power cord from the computer. 3-4 Drives To remove the hard drive: 1. Turn the computer upside down the computer and close the display. Hard drive...
Memory Modules
Page 3
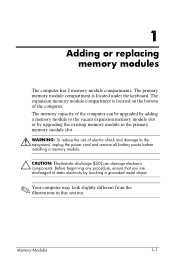
... from the illustrations in the primary memory module slot. Å WARNING: To reduce the risk of electric shock and damage to the equipment, unplug the power cord and remove all battery packs before installing a memory module. Ä CAUTION: Electrostatic discharge (ESD) can damage electronic components. Before beginning any procedure, ensure that you...
... from the illustrations in the primary memory module slot. Å WARNING: To reduce the risk of electric shock and damage to the equipment, unplug the power cord and remove all battery packs before installing a memory module. Ä CAUTION: Electrostatic discharge (ESD) can damage electronic components. Before beginning any procedure, ensure that you...

Memory Modules
Page 4
... all external devices connected to the expansion memory module slot To add or replace a memory module in hibernation, turn the computer on by pressing the power button. Turn the computer upside down. 5. Remove the battery pack from the computer. 1-2 Memory Modules If you are not sure whether the computer is off...
... all external devices connected to the expansion memory module slot To add or replace a memory module in hibernation, turn the computer on by pressing the power button. Turn the computer upside down. 5. Remove the battery pack from the computer. 1-2 Memory Modules If you are not sure whether the computer is off...

Memory Modules
Page 8
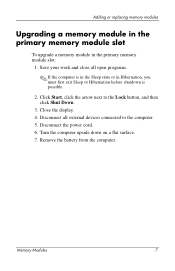
Then shut down on by pressing the power button. Disconnect all external devices connected to the computer. 3. Adding or replacing memory modules Upgrading the memory module in the primary memory module slot To upgrade a memory module in hibernation, turn the computer on a flat surface. 5. Remove the battery pack from the computer. 1-6 Memory Modules Turn the computer upside down the computer through the operating system. 2. Shut down the computer. Disconnect the power cord. 4. If you are not sure whether the computer is off or in the primary memory module slot: 1.
Then shut down on by pressing the power button. Disconnect all external devices connected to the computer. 3. Adding or replacing memory modules Upgrading the memory module in the primary memory module slot To upgrade a memory module in hibernation, turn the computer on a flat surface. 5. Remove the battery pack from the computer. 1-6 Memory Modules Turn the computer upside down the computer through the operating system. 2. Shut down the computer. Disconnect the power cord. 4. If you are not sure whether the computer is off or in the primary memory module slot: 1.

Memory Modules - Windows Vista
Page 3
... reduce the risk of electric shock and damage to the vacant expansion memory module slot or by adding a memory module to the equipment, unplug the power cord and remove all batteries before installing a memory module. Ä CAUTION: Electrostatic discharge (ESD) can be upgraded by upgrading the existing memory module in this section...
... reduce the risk of electric shock and damage to the vacant expansion memory module slot or by adding a memory module to the equipment, unplug the power cord and remove all batteries before installing a memory module. Ä CAUTION: Electrostatic discharge (ESD) can be upgraded by upgrading the existing memory module in this section...
Memory Modules - Windows Vista
Page 4
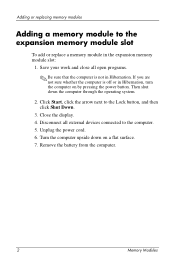
Disconnect all open programs. ✎ Be sure that the computer is off or in the expansion memory module slot: 1. Unplug the power cord. 6. Remove the battery from the computer. 2 Memory Modules Adding or replacing memory modules Adding a memory module to the Lock button, and ... a memory module in Hibernation, turn the computer on a flat surface. 7. Close the display. 4. Then shut down on by pressing the power button. Turn the computer upside down the computer through the operating system. 2. Save your work and close all external devices connected to the computer. ...
Disconnect all open programs. ✎ Be sure that the computer is off or in the expansion memory module slot: 1. Unplug the power cord. 6. Remove the battery from the computer. 2 Memory Modules Adding or replacing memory modules Adding a memory module to the Lock button, and ... a memory module in Hibernation, turn the computer on a flat surface. 7. Close the display. 4. Then shut down on by pressing the power button. Turn the computer upside down the computer through the operating system. 2. Save your work and close all external devices connected to the computer. ...
Memory Modules - Windows Vista
Page 9
... in the primary memory module slot To upgrade a memory module in Hibernation, you must first exit Sleep or Hibernation before shutdown is possible. 2. Disconnect the power cord. 6.
... in the primary memory module slot To upgrade a memory module in Hibernation, you must first exit Sleep or Hibernation before shutdown is possible. 2. Disconnect the power cord. 6.

Notebook Tour
Page 22
Components Additional hardware components Component Description 1 Power cord* Connects an AC adapter to an AC outlet. 2 AC adapter Converts AC power to DC power. 3 Primary battery pack* Powers the computer when the computer is not plugged into external power. *Modem cables, battery packs, and power cords vary in appearance by region and country. 1-20 Notebook Tour
Components Additional hardware components Component Description 1 Power cord* Connects an AC adapter to an AC outlet. 2 AC adapter Converts AC power to DC power. 3 Primary battery pack* Powers the computer when the computer is not plugged into external power. *Modem cables, battery packs, and power cords vary in appearance by region and country. 1-20 Notebook Tour

Notebook Tour
Page 25
...V rms. 2-2 Notebook Tour Input power Operating voltage Operating current Rating 18.5 V dc @ 3.5 A - 65 W 3.5 A This product is designed for an HP computer. The computer operates on DC power, which can be powered from a stand-alone DC power source, it is capable of accepting DC power within the following ... the computer be powered only with phase-to travel internationally with your computer. Specifications Rated input power The power information in this section may be supplied by or approved for IT power systems in Norway with an AC adapter or a DC power cord supplied by an ...
...V rms. 2-2 Notebook Tour Input power Operating voltage Operating current Rating 18.5 V dc @ 3.5 A - 65 W 3.5 A This product is designed for an HP computer. The computer operates on DC power, which can be powered from a stand-alone DC power source, it is capable of accepting DC power within the following ... the computer be powered only with phase-to travel internationally with your computer. Specifications Rated input power The power information in this section may be supplied by or approved for IT power systems in Norway with an AC adapter or a DC power cord supplied by an ...

Notebook Tour
Page 28
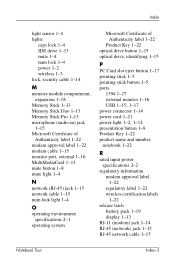
... button 1-16 pointing stick 1-4 pointing stick button 1-4 ports 1394 1-16 external monitor 1-15 USB 1-14, 1-16 power connector 1-13 power cord 1-20 power light 1-2, 1-11 presentation button 1-7 Product Key 1-21 product name and number, notebook 1-21 R rated input power specifications 2-2 regulatory information modem approval label 1-21 regulatory label 1-21 wireless certification labels 1-21 release latch battery...
... button 1-16 pointing stick 1-4 pointing stick button 1-4 ports 1394 1-16 external monitor 1-15 USB 1-14, 1-16 power connector 1-13 power cord 1-20 power light 1-2, 1-11 presentation button 1-7 Product Key 1-21 product name and number, notebook 1-21 R rated input power specifications 2-2 regulatory information modem approval label 1-21 regulatory label 1-21 wireless certification labels 1-21 release latch battery...

Notebook Tour - Windows Vista
Page 22
Components Additional hardware components Component Description 1 Power cord* Connects an AC adapter to an AC outlet. 2 AC adapter Converts AC power to DC power. 3 Primary battery pack* Powers the computer when the computer is not plugged into external power. *Modem cables, battery packs, and power cords vary in appearance by region and country. 1-20 Notebook Tour
Components Additional hardware components Component Description 1 Power cord* Connects an AC adapter to an AC outlet. 2 AC adapter Converts AC power to DC power. 3 Primary battery pack* Powers the computer when the computer is not plugged into external power. *Modem cables, battery packs, and power cords vary in appearance by region and country. 1-20 Notebook Tour

Notebook Tour - Windows Vista
Page 25
... or a DC power cord supplied by an AC or a DC power source. The computer operates on DC power, which can be powered from a stand-alone DC power source, it is strongly recommended that the computer be helpful if you plan to travel internationally with phase-to-phase voltage not exceeding 240 V rms. 2-2 Notebook Tour Input power Operating voltage...
... or a DC power cord supplied by an AC or a DC power source. The computer operates on DC power, which can be powered from a stand-alone DC power source, it is strongly recommended that the computer be helpful if you plan to travel internationally with phase-to-phase voltage not exceeding 240 V rms. 2-2 Notebook Tour Input power Operating voltage...
Notebook Tour - Windows Vista
Page 28
... button 1-17 pointing stick 1-5 pointing stick button 1-5 ports 1394 1-17 external monitor 1-16 USB 1-15, 1-17 power connector 1-14 power cord 1-21 power light 1-2, 1-12 presentation button 1-8 Product Key 1-22 product name and number, notebook 1-22 R rated input power specifications 2-2 regulatory information modem approval label 1-22 regulatory label 1-22 wireless certification labels 1-22 release latch battery...
... button 1-17 pointing stick 1-5 pointing stick button 1-5 ports 1394 1-17 external monitor 1-16 USB 1-15, 1-17 power connector 1-14 power cord 1-21 power light 1-2, 1-12 presentation button 1-8 Product Key 1-22 product name and number, notebook 1-22 R rated input power specifications 2-2 regulatory information modem approval label 1-22 regulatory label 1-22 wireless certification labels 1-22 release latch battery...

Power
Page 8
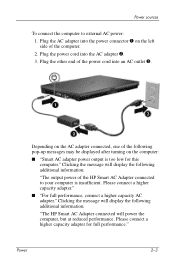
... equipment: ■ Plug the power cord into an AC outlet that is not properly grounded. 2-2 Power The grounding pin is an important safety feature. for example, by unplugging the power cord from the AC outlet (not by attaching a 2-pin adapter. Power sources Connecting the AC adapter Å...receive an electric shock from a system that is easily accessible at all times. ■ Disconnect power from the computer by unplugging the power cord from the computer). ■ If provided with a 3-pin attachment plug on the power cord, plug the cord into a grounded (earthed) 3-pin outlet.
... equipment: ■ Plug the power cord into an AC outlet that is not properly grounded. 2-2 Power The grounding pin is an important safety feature. for example, by unplugging the power cord from the AC outlet (not by attaching a 2-pin adapter. Power sources Connecting the AC adapter Å...receive an electric shock from a system that is easily accessible at all times. ■ Disconnect power from the computer by unplugging the power cord from the computer). ■ If provided with a 3-pin attachment plug on the power cord, plug the cord into a grounded (earthed) 3-pin outlet.
Power
Page 9
... information: "The output power of the following additional information: "The HP Smart AC Adapter connected will power the computer, but at reduced performance. Plug the other end of the computer. 2. Please connect a higher capacity adapter for this computer." Plug the power cord into an AC outlet...be displayed after turning on the left side of the power cord into the AC adapter 2. 3. Power 2-3 Plug the AC adapter into the power connector 1 on the computer: ■ "Smart AC adapter power output is insufficient. Power sources To connect the computer to your computer is too...
... information: "The output power of the following additional information: "The HP Smart AC Adapter connected will power the computer, but at reduced performance. Plug the other end of the computer. 2. Please connect a higher capacity adapter for this computer." Plug the power cord into an AC outlet...be displayed after turning on the left side of the power cord into the AC adapter 2. 3. Power 2-3 Plug the AC adapter into the power connector 1 on the computer: ■ "Smart AC adapter power output is insufficient. Power sources To connect the computer to your computer is too...
HP Compaq nx9420 and nw9440 Notebook PC - Getting Started - Enhanced for Accessibility Windows Vista
Page 6
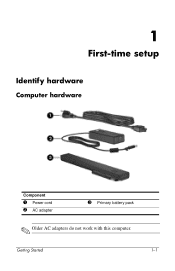
Getting Started 1-1 1 First-time setup Identify hardware Computer hardware Component 1 Power cord 2 AC adapter 3 Primary battery pack ✎ Older AC adapters do not work with this computer.
Getting Started 1-1 1 First-time setup Identify hardware Computer hardware Component 1 Power cord 2 AC adapter 3 Primary battery pack ✎ Older AC adapters do not work with this computer.

