
ProtectTools (Select Models Only) - Windows Vista
Page 23
3 Java Card Security for HP ProtectTools Java Card Security for HP ProtectTools manages the Java Card setup and configuration for computers equipped with the Computer Setup utility to enable Java Card authentication in a power-on environment, ...and to authenticate users of the Java Card. ● Back up and restore power-on authentication data on the Java Card. ENWW 17 This...
3 Java Card Security for HP ProtectTools Java Card Security for HP ProtectTools manages the Java Card setup and configuration for computers equipped with the Computer Setup utility to enable Java Card authentication in a power-on environment, ...and to authenticate users of the Java Card. ● Back up and restore power-on authentication data on the Java Card. ENWW 17 This...

Memory Modules - Windows Vista
Page 8
Close the memory module compartment cover 2. 14. Adding or replacing memory modules 12. Tighten the 3 memory module compartment cover screws 3. 15. Turn on the computer. 13. Replace the battery. 16. If the computer displays a message indicating that the size or configuration of the memory has changed, press f1 to save the changes. 6 Memory Modules Reconnect external power and external devices. 17. Align the tabs 1 on the memory module compartment cover with the notches on the computer.
Close the memory module compartment cover 2. 14. Adding or replacing memory modules 12. Tighten the 3 memory module compartment cover screws 3. 15. Turn on the computer. 13. Replace the battery. 16. If the computer displays a message indicating that the size or configuration of the memory has changed, press f1 to save the changes. 6 Memory Modules Reconnect external power and external devices. 17. Align the tabs 1 on the memory module compartment cover with the notches on the computer.

Memory Modules - Windows Vista
Page 14
Replace the battery. 17. Turn on the computer. Reconnect external power and external devices. 18. If the computer displays a message indicating that the size or configuration of the memory has changed, press f1 to save the changes. 12 Memory Modules Adding or replacing memory modules 16.
Replace the battery. 17. Turn on the computer. Reconnect external power and external devices. 18. If the computer displays a message indicating that the size or configuration of the memory has changed, press f1 to save the changes. 12 Memory Modules Adding or replacing memory modules 16.

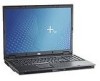
Notebook Tour
Page 2
Contents 1 Components Top components 1-2 Lights 1-2 Pointing devices 1-4 Buttons and switches 1-6 Keys 1-8 Hotkey quick reference 1-10 Front components 1-11 Rear components 1-13 Right-side components 1-14 Left-side components 1-15 Bottom components 1-17 Wireless antennae 1-19 Additional hardware components 1-20 Labels 1-21 2 Specifications Operating environment 2-1 Rated input power 2-2 Index Notebook Tour ii
Contents 1 Components Top components 1-2 Lights 1-2 Pointing devices 1-4 Buttons and switches 1-6 Keys 1-8 Hotkey quick reference 1-10 Front components 1-11 Rear components 1-13 Right-side components 1-14 Left-side components 1-15 Bottom components 1-17 Wireless antennae 1-19 Additional hardware components 1-20 Labels 1-21 2 Specifications Operating environment 2-1 Rated input power 2-2 Index Notebook Tour ii

Notebook Tour
Page 19
... a Mini Card device authorized for use in the computer by the governmental agency that regulates wireless devices in your country. Then contact Customer Care. (Continued) Notebook Tour 1-17 Contains the expansion memory module slot.
... a Mini Card device authorized for use in the computer by the governmental agency that regulates wireless devices in your country. Then contact Customer Care. (Continued) Notebook Tour 1-17 Contains the expansion memory module slot.

Notebook Tour
Page 26
...B battery bay 1-18 battery light, identifying 1-3, 1-12 battery pack release latch 1-18 battery pack, identifying 1-20 bays battery 1-18 hard drive 1-17 Bluetooth label 1-21 buttons calculator 1-7 Info Center 1-7 mute 1-7 optical drive 1-14 PC Card slot eject 1-16 power 1-6 presentation 1-7 TouchPad 1-5 ...network 1-14 USB 1-14, 1-16 calculator button 1-7 caps lock light 1-3 Certificate of Authenticity label 1-21 compartments, expansion memory module 1-17 components bottom 1-17 front 1-11 left-side 1-15 rear 1-13 right-side 1-14 top 1-2 connectors docking 1-18 power 1-15 travel battery 1-18 cord...
...B battery bay 1-18 battery light, identifying 1-3, 1-12 battery pack release latch 1-18 battery pack, identifying 1-20 bays battery 1-18 hard drive 1-17 Bluetooth label 1-21 buttons calculator 1-7 Info Center 1-7 mute 1-7 optical drive 1-14 PC Card slot eject 1-16 power 1-6 presentation 1-7 TouchPad 1-5 ...network 1-14 USB 1-14, 1-16 calculator button 1-7 caps lock light 1-3 Certificate of Authenticity label 1-21 compartments, expansion memory module 1-17 components bottom 1-17 front 1-11 left-side 1-15 rear 1-13 right-side 1-14 top 1-2 connectors docking 1-18 power 1-15 travel battery 1-18 cord...

Notebook Tour
Page 27
..., PC Card slot 1-16 environmental specifications 2-1 exhaust vents 1-13, 1-15, 1-18 external monitor port 1-15 F fingerprint reader 1-4 fn key 1-8 function keys 1-9 H hard drive bay, identifying 1-17 headphone (audio-out) jack 1-14 hotkeys, Quick Reference 1-10 humidity specifications 2-1 I IDE drive light 1-12 IEEE 1394 port 1-16 Info Center button 1-7 J jacks audio-in... regulatory 1-21 service tag 1-21 wireless certification 1-21 latches battery pack release 1-18 display release 1-12 light sensor 1-3 lights caps lock 1-3 IDE drive 1-12 Index-2 Notebook Tour
..., PC Card slot 1-16 environmental specifications 2-1 exhaust vents 1-13, 1-15, 1-18 external monitor port 1-15 F fingerprint reader 1-4 fn key 1-8 function keys 1-9 H hard drive bay, identifying 1-17 headphone (audio-out) jack 1-14 hotkeys, Quick Reference 1-10 humidity specifications 2-1 I IDE drive light 1-12 IEEE 1394 port 1-16 Info Center button 1-7 J jacks audio-in... regulatory 1-21 service tag 1-21 wireless certification 1-21 latches battery pack release 1-18 display release 1-12 light sensor 1-3 lights caps lock 1-3 IDE drive 1-12 Index-2 Notebook Tour

Notebook Tour
Page 28
Index mute 1-3 num lock 1-3 power 1-2 wireless 1-2 lock, security cable 1-13 M memory module compartment, expansion 1-17 Memory Stick 1-12 Memory Stick Duo 1-12 Memory Stick Pro 1-12 microphone (audio-in) jack 1-14 Microsoft Certificate of Authenticity ...1-15 USB 1-14, 1-16 power connector 1-13 power cord 1-20 power light 1-2, 1-11 presentation button 1-7 Product Key 1-21 product name and number, notebook 1-21 R rated input power specifications 2-2 regulatory information modem approval label 1-21 regulatory label 1-21 wireless certification labels 1-21 release latch battery pack 1-18 display...
Index mute 1-3 num lock 1-3 power 1-2 wireless 1-2 lock, security cable 1-13 M memory module compartment, expansion 1-17 Memory Stick 1-12 Memory Stick Duo 1-12 Memory Stick Pro 1-12 microphone (audio-in) jack 1-14 Microsoft Certificate of Authenticity ...1-15 USB 1-14, 1-16 power connector 1-13 power cord 1-20 power light 1-2, 1-11 presentation button 1-7 Product Key 1-21 product name and number, notebook 1-21 R rated input power specifications 2-2 regulatory information modem approval label 1-21 regulatory label 1-21 wireless certification labels 1-21 release latch battery pack 1-18 display...

Notebook Tour
Page 29
Index serial number, notebook 1-21 service tag 1-21 slots 6-in-1 Digital Media 1-12 memory 1-17 PC Card 1-16 security cable 1-13 smart card 1-16 Smart AC Adapter, identifying 1-20 smart card slot 1-16 SmartMedia (SM) card... 1-12 speakers 1-12 specifications operating environment 2-1 rated input power 2-2 S-Video-out jack 1-16 T temperature specifications 2-1 TouchPad, described 1-5 travel battery connector 1-18 traveling with notebook environmental ...
Index serial number, notebook 1-21 service tag 1-21 slots 6-in-1 Digital Media 1-12 memory 1-17 PC Card 1-16 security cable 1-13 smart card 1-16 Smart AC Adapter, identifying 1-20 smart card slot 1-16 SmartMedia (SM) card... 1-12 speakers 1-12 specifications operating environment 2-1 rated input power 2-2 S-Video-out jack 1-16 T temperature specifications 2-1 TouchPad, described 1-5 travel battery connector 1-18 traveling with notebook environmental ...

Notebook Tour - Windows Vista
Page 19
Then contact Customer Care through Help and Support. (Continued) Notebook Tour 1-17 Bottom components Components Component 1 Hard drive bay 2 Expansion memory module and Mini Card compartment Description Holds the hard drive. If you replace a device and then ...
Then contact Customer Care through Help and Support. (Continued) Notebook Tour 1-17 Bottom components Components Component 1 Hard drive bay 2 Expansion memory module and Mini Card compartment Description Holds the hard drive. If you replace a device and then ...

Notebook Tour - Windows Vista
Page 26
... 1-8 Info Center 1-8 mute 1-8 optical drive 1-15 PC Card slot eject 1-17 power 1-7 presentation 1-8 TouchPad 1-6 volume 1-8 wireless 1-8 C cables modem 1-14, 1-15 network 1-15 USB 1-15, 1-17 calculator button 1-8 caps lock light 1-4 Certificate of Authenticity label 1-22 compartments, ...expansion memory module 1-18 components bottom 1-18 front 1-12 left-side 1-16 rear 1-14 right-side 1-15 top 1-2 connectors docking 1-19 power 1-16 travel battery 1-19 cord, power, identifying 1-21 Notebook...
... 1-8 Info Center 1-8 mute 1-8 optical drive 1-15 PC Card slot eject 1-17 power 1-7 presentation 1-8 TouchPad 1-6 volume 1-8 wireless 1-8 C cables modem 1-14, 1-15 network 1-15 USB 1-15, 1-17 calculator button 1-8 caps lock light 1-4 Certificate of Authenticity label 1-22 compartments, ...expansion memory module 1-18 components bottom 1-18 front 1-12 left-side 1-16 rear 1-14 right-side 1-15 top 1-2 connectors docking 1-19 power 1-16 travel battery 1-19 cord, power, identifying 1-21 Notebook...

Notebook Tour - Windows Vista
Page 27
...release latch 1-13 docking connector 1-19 drives hard 1-18 optical 1-15 E eject button, PC Card slot 1-17 environmental specifications 2-1 exhaust vents 1-14, 1-16, 1-19 external monitor port 1-16 F fingerprint reader 1-5 ..., Quick Reference 1-11 humidity specifications 2-1 I IDE drive light 1-13 IEEE 1394 port 1-17 Info Center button 1-8 J jacks audio-in (microphone) 1-15 audio-out (headphone) 1-15 RJ-11 (...modem) 1-14 RJ-45 (network) 1-15 S-Video-out 1-17 K keypad keys 1-10 keys esc 1-9 fn 1-9 function 1-10 keypad 1-10 Windows applications 1-10 Windows ...
...release latch 1-13 docking connector 1-19 drives hard 1-18 optical 1-15 E eject button, PC Card slot 1-17 environmental specifications 2-1 exhaust vents 1-14, 1-16, 1-19 external monitor port 1-16 F fingerprint reader 1-5 ..., Quick Reference 1-11 humidity specifications 2-1 I IDE drive light 1-13 IEEE 1394 port 1-17 Info Center button 1-8 J jacks audio-in (microphone) 1-15 audio-out (headphone) 1-15 RJ-11 (...modem) 1-14 RJ-45 (network) 1-15 S-Video-out 1-17 K keypad keys 1-10 keys esc 1-9 fn 1-9 function 1-10 keypad 1-10 Windows applications 1-10 Windows ...
Notebook Tour - Windows Vista
Page 28
... 1-15 optical drive, identifying 1-15 P PC Card slot eject button 1-17 pointing stick 1-5 pointing stick button 1-5 ports 1394 1-17 external monitor 1-16 USB 1-15, 1-17 power connector 1-14 power cord 1-21 power light 1-2, 1-12 presentation button 1-8 Product Key 1-22 product name and number, notebook 1-22 R rated input power specifications 2-2 regulatory information modem approval label...
... 1-15 optical drive, identifying 1-15 P PC Card slot eject button 1-17 pointing stick 1-5 pointing stick button 1-5 ports 1394 1-17 external monitor 1-16 USB 1-15, 1-17 power connector 1-14 power cord 1-21 power light 1-2, 1-12 presentation button 1-8 Product Key 1-22 product name and number, notebook 1-22 R rated input power specifications 2-2 regulatory information modem approval label...

Notebook Tour - Windows Vista
Page 29
... 1-13 speakers 1-13 specifications operating environment 2-1 rated input power 2-2 S-Video-out jack 1-17 T temperature specifications 2-1 TouchPad, described 1-6 travel battery connector 1-19 traveling with notebook environmental specifications 2-2 modem approval label 1-22 wireless certification labels 1-22 U USB cable 1-15, 1-17 USB ports, identifying 1-15, 1-17 V vents 1-14, 1-16, 1-19 volume buttons 1-8 W Windows applications key 1-10 Windows...
... 1-13 speakers 1-13 specifications operating environment 2-1 rated input power 2-2 S-Video-out jack 1-17 T temperature specifications 2-1 TouchPad, described 1-6 travel battery connector 1-19 traveling with notebook environmental specifications 2-2 modem approval label 1-22 wireless certification labels 1-22 U USB cable 1-15, 1-17 USB ports, identifying 1-15, 1-17 V vents 1-14, 1-16, 1-19 volume buttons 1-8 W Windows applications key 1-10 Windows...

Pointing Devices and Keyboard
Page 28
... to the Q Menu To add an item from the Q Menu: 1. To save your preferences and close the control panel, click OK. Pointing Devices and Keyboard 2-17 Keyboard Removing a Q Menu item To remove an item from the Items to display on Q Menu list, clear the check box for the item you want.... 3. Select the check box for each item you want to the Q Menu: 1. To save your preferences and close the control panel, click OK. In the HP Quick Launch Buttons control panel, click the Q Menu tab. 2. In the...
... to the Q Menu To add an item from the Q Menu: 1. To save your preferences and close the control panel, click OK. Pointing Devices and Keyboard 2-17 Keyboard Removing a Q Menu item To remove an item from the Items to display on Q Menu list, clear the check box for the item you want.... 3. Select the check box for each item you want to the Q Menu: 1. To save your preferences and close the control panel, click OK. In the HP Quick Launch Buttons control panel, click the Q Menu tab. 2. In the...

Pointing Devices and Keyboard - Windows Vista
Page 2
... 1-5 2 Keyboard Hotkeys 2-1 Hotkey quick reference 2-2 Hotkey procedures 2-3 HP Quick Launch buttons (select models only 2-5 Presentation button 2-8 Info Center button 2-9 HP Quick Launch Buttons control panel 2-10 Opening the HP Quick Launch Buttons control panel 2-11 Setting button preferences 2-11 Displaying ...the Q Menu 2-12 Setting tiling preferences 2-16 Setting the ambient light sensor 2-17 Setting other preferences 2-17 Index...
... 1-5 2 Keyboard Hotkeys 2-1 Hotkey quick reference 2-2 Hotkey procedures 2-3 HP Quick Launch buttons (select models only 2-5 Presentation button 2-8 Info Center button 2-9 HP Quick Launch Buttons control panel 2-10 Opening the HP Quick Launch Buttons control panel 2-11 Setting button preferences 2-11 Displaying ...the Q Menu 2-12 Setting tiling preferences 2-16 Setting the ambient light sensor 2-17 Setting other preferences 2-17 Index...

Pointing Devices and Keyboard - Windows Vista
Page 24
Pointing Devices and Keyboard 2-17 To display or enable a preference, click the check box next to the item. To set other preferences from the HP Quick Launch Buttons Preferences tab. ✎ Some of the taskbar, and clicking Turn Ambient light sensor on/off. Setting other preferences You can turn the ... in the notification area, at the far right of the preferences listed on the Preferences tab may not be supported by your environment. In the HP Quick Launch Buttons control panel, click the Preferences tab. 2.
Pointing Devices and Keyboard 2-17 To display or enable a preference, click the check box next to the item. To set other preferences from the HP Quick Launch Buttons Preferences tab. ✎ Some of the taskbar, and clicking Turn Ambient light sensor on/off. Setting other preferences You can turn the ... in the notification area, at the far right of the preferences listed on the Preferences tab may not be supported by your environment. In the HP Quick Launch Buttons control panel, click the Preferences tab. 2.

Power
Page 43
... the battery pack is recharged, the battery light on the computer is off . Click OK. Ä CAUTION: After calibrating the battery pack, reenable hibernation. Power 7-17 Failure to reenable hibernation may result in column and the Running on when the battery pack is fully charged and the battery light is fully...
... the battery pack is recharged, the battery light on the computer is off . Click OK. Ä CAUTION: After calibrating the battery pack, reenable hibernation. Power 7-17 Failure to reenable hibernation may result in column and the Running on when the battery pack is fully charged and the battery light is fully...

Power
Page 48
AC power 7-1 calibrating 7-13 charging 7-6, 7-14 conserving power 7-18 disposing of 7-21 identifying 7-2 inserting 7-3 low-battery conditions 7-10 monitoring charge 7-8 recharging 7-17 removing 7-3 storing 7-20 using 7-1 battery pack release latch 7-4 button, power/standby 1-3 C calibration, battery 7-13 charging battery packs 7-6 conservation, power 7-18 critical low-battery condition 7-10 D ...
AC power 7-1 calibrating 7-13 charging 7-6, 7-14 conserving power 7-18 disposing of 7-21 identifying 7-2 inserting 7-3 low-battery conditions 7-10 monitoring charge 7-8 recharging 7-17 removing 7-3 storing 7-20 using 7-1 battery pack release latch 7-4 button, power/standby 1-3 C calibration, battery 7-13 charging battery packs 7-6 conservation, power 7-18 critical low-battery condition 7-10 D ...

HP Compaq nx9420 and nw9440 Notebook PC - Getting Started - Enhanced for Accessibility Windows Vista
Page 22
Click Next. 3. Getting Started 1-17 Click Next. 6. First-time setup To create a set of discs needed before disc creation begins. Click Create factory software recovery CDs or DVDs to create the recovery discs. ✎ The wizard will specify the number of recovery discs: 1. Follow the on-screen instructions to recover the system (highly recommended). 4. The Recovery CD/DVD Creator Wizard opens. 5. Click Next. Select Start > All Programs > HP Backup & Recovery > HP Backup and Recovery Manager. 2.
Click Next. 3. Getting Started 1-17 Click Next. 6. First-time setup To create a set of discs needed before disc creation begins. Click Create factory software recovery CDs or DVDs to create the recovery discs. ✎ The wizard will specify the number of recovery discs: 1. Follow the on-screen instructions to recover the system (highly recommended). 4. The Recovery CD/DVD Creator Wizard opens. 5. Click Next. Select Start > All Programs > HP Backup & Recovery > HP Backup and Recovery Manager. 2.


