
HP Notebook Hard Drives & Solid State Drives Identifying, Preventing, Diagnosing and Recovering from Drive Failures Care and Mai
Page 6
... Matrix Storage Manager driver are configured with Intel® Application Accelerator drivers. Procedures for adding SATA drivers to RIS (Remote Installation Service) installation points include: Adding SATA drivers to installation CDs, building an image, and switching to address known issues. The latest device driver versions address multiple known issues that could affect hard disk drive performance and reliability. Intel Matrix Storage Manager Driver provides support for lower power consumption...
... Matrix Storage Manager driver are configured with Intel® Application Accelerator drivers. Procedures for adding SATA drivers to RIS (Remote Installation Service) installation points include: Adding SATA drivers to installation CDs, building an image, and switching to address known issues. The latest device driver versions address multiple known issues that could affect hard disk drive performance and reliability. Intel Matrix Storage Manager Driver provides support for lower power consumption...
User Guide
Page 7
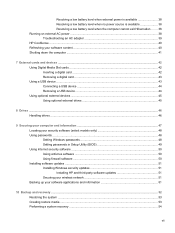
... drives ...46 9 Securing your computer and information 47 Locating your security software (select models only 48 Using passwords ...48 Setting Windows passwords 48 Setting passwords in Setup Utility (BIOS 49 Using Internet security software ...50 Using antivirus software ...50 Using firewall software ...50 Installing software updates ...51 Installing Windows security updates 51 Installing HP and third-party software updates 51 Securing your wireless network 51 Backing up your software applications and information 51 10 Backup and recovery ...52 Restoring the system ...53 Creating...
... drives ...46 9 Securing your computer and information 47 Locating your security software (select models only 48 Using passwords ...48 Setting Windows passwords 48 Setting passwords in Setup Utility (BIOS 49 Using Internet security software ...50 Using antivirus software ...50 Using firewall software ...50 Installing software updates ...51 Installing Windows security updates 51 Installing HP and third-party software updates 51 Securing your wireless network 51 Backing up your software applications and information 51 10 Backup and recovery ...52 Restoring the system ...53 Creating...
User Guide
Page 32
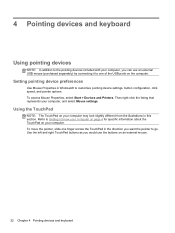
To access Mouse Properties, select Start > Devices and Printers. Refer to Getting to know your computer on page 4 for specific information about the TouchPad on an external mouse. 22 Chapter 4 Pointing devices and keyboard Use the left and right TouchPad buttons as you would use an external USB mouse (purchased separately) by connecting it to one finger across the TouchPad in Windows® to customize pointing device settings, button configuration, click speed, and pointer options. To...
To access Mouse Properties, select Start > Devices and Printers. Refer to Getting to know your computer on page 4 for specific information about the TouchPad on an external mouse. 22 Chapter 4 Pointing devices and keyboard Use the left and right TouchPad buttons as you would use an external USB mouse (purchased separately) by connecting it to one finger across the TouchPad in Windows® to customize pointing device settings, button configuration, click speed, and pointer options. To...

User Guide
Page 37
... instructions, refer to customer support. Help and Support also provides automated troubleshooting tools and access to Using Setup Utility (BIOS) on page 58. To extend battery life, turn off . f8 Plays the next track of an audio CD or the next section of a DVD or a BD. Using the keyboard Using the action keys An action key performs an assigned function. For example, if a monitor is connected to the computer, pressing this key...
... instructions, refer to customer support. Help and Support also provides automated troubleshooting tools and access to Using Setup Utility (BIOS) on page 58. To extend battery life, turn off . f8 Plays the next track of an audio CD or the next section of a DVD or a BD. Using the keyboard Using the action keys An action key performs an assigned function. For example, if a monitor is connected to the computer, pressing this key...
User Guide
Page 44
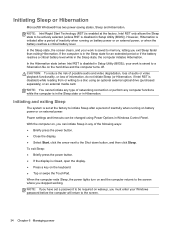
... only allows the Sleep state to the screen where you stopped working. Power settings and timeouts can initiate Sleep in any computer functions while the computer is in the Sleep state or in Setup Utility (BIOS)). When the computer exits Sleep, the power lights turn on and the computer returns to be changed using an optional external optical drive (purchased separately) or an external media card. NOTE: If you must enter your Windows password before the...
... only allows the Sleep state to the screen where you stopped working. Power settings and timeouts can initiate Sleep in any computer functions while the computer is in the Sleep state or in Setup Utility (BIOS)). When the computer exits Sleep, the power lights turn on and the computer returns to be changed using an optional external optical drive (purchased separately) or an external media card. NOTE: If you must enter your Windows password before the...
User Guide
Page 55
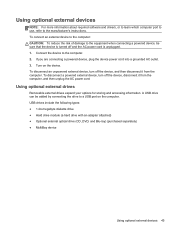
.... 1. USB drives include the following types: ● 1.44-megabyte diskette drive ● Hard drive module (a hard drive with an adapter attached) ● Optional external optical drive (CD, DVD, and Blu-ray) (purchased separately) ● MultiBay device Using optional external devices 45 Turn on the computer. Connect the device to the manufacturer's instructions. To disconnect a powered external device, turn off the device, disconnect it from the computer, and then unplug the AC power cord. Using optional external drives Removable external drives expand your options for storing...
.... 1. USB drives include the following types: ● 1.44-megabyte diskette drive ● Hard drive module (a hard drive with an adapter attached) ● Optional external optical drive (CD, DVD, and Blu-ray) (purchased separately) ● MultiBay device Using optional external devices 45 Turn on the computer. Connect the device to the manufacturer's instructions. To disconnect a powered external device, turn off the device, disconnect it from the computer, and then unplug the AC power cord. Using optional external drives Removable external drives expand your options for storing...
User Guide
Page 58
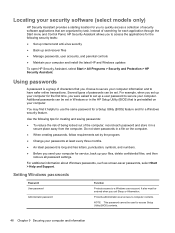
... used to a Windows user account. Setting Windows passwords Password User password Administrator password Function Protects access to access Setup Utility (BIOS) contents. 48 Chapter 9 Securing your computer and information Do not store passwords in a secure place away from the computer. Locating your security software (select models only) HP Security Assistant provides a starting location for creating and saving passwords: ● To reduce the risk of being locked out of the computer, record each application through the Start menu and Control Panel, HP...
... used to a Windows user account. Setting Windows passwords Password User password Administrator password Function Protects access to access Setup Utility (BIOS) contents. 48 Chapter 9 Securing your computer and information Do not store passwords in a secure place away from the computer. Locating your security software (select models only) HP Security Assistant provides a starting location for creating and saving passwords: ● To reduce the risk of being locked out of the computer, record each application through the Start menu and Control Panel, HP...
User Guide
Page 61
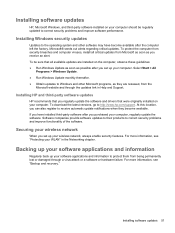
... information, see "Backup and recovery." Installing Windows security updates Updates to correct security problems and improve functionality of the software. Installing HP and third-party software updates HP recommends that you regularly update the software and drivers that all critical updates from the Microsoft website and through a virus attack or a software or hardware failure. For more information, see "Protecting your wireless network, always enable security features. Installing software updates HP, Microsoft Windows, and third-party software installed on your computer...
... information, see "Backup and recovery." Installing Windows security updates Updates to correct security problems and improve functionality of the software. Installing HP and third-party software updates HP recommends that you regularly update the software and drivers that all critical updates from the Microsoft website and through a virus attack or a software or hardware failure. For more information, see "Protecting your wireless network, always enable security features. Installing software updates HP, Microsoft Windows, and third-party software installed on your computer...
User Guide
Page 63
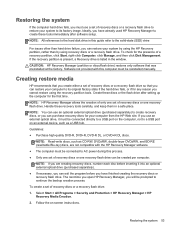
...hard disk drive in a safe place. NOTE: All references to restore your system by using the HP Recovery partition, rather than hard drive failure, you create either a set of recovery discs or one set of a recovery partition, click Start, right-click Computer, click Manage, and then click Disk Management. Handle these discs or the flash drive after software setup. If the recovery partition is present, a Recovery drive is listed in the window. CAUTION: HP Recovery Manager (partition or discs/flash drive) restores only software that you can restore your system to its original factory...
...hard disk drive in a safe place. NOTE: All references to restore your system by using the HP Recovery partition, rather than hard drive failure, you create either a set of recovery discs or one set of a recovery partition, click Start, right-click Computer, click Manage, and then click Disk Management. Handle these discs or the flash drive after software setup. If the recovery partition is present, a Recovery drive is listed in the window. CAUTION: HP Recovery Manager (partition or discs/flash drive) restores only software that you can restore your system to its original factory...
User Guide
Page 69
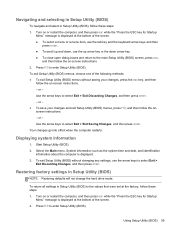
... key for Startup Menu" message is displayed. 3. Your changes go into effect when the computer restarts. Restoring factory settings in Setup Utility (BIOS) NOTE: Restoring defaults will not change the hard drive mode. or - ● To save your changes, press the esc key, and then follow the onscreen instructions. - To exit Setup Utility (BIOS) without saving your changes and exit Setup Utility (BIOS) menus, press f10, and then follow the on-screen instructions. - Use the arrow keys to enter Setup Utility (BIOS). Use the arrow keys to enter Setup Utility (BIOS...
... key for Startup Menu" message is displayed. 3. Your changes go into effect when the computer restarts. Restoring factory settings in Setup Utility (BIOS) NOTE: Restoring defaults will not change the hard drive mode. or - ● To save your changes, press the esc key, and then follow the onscreen instructions. - To exit Setup Utility (BIOS) without saving your changes and exit Setup Utility (BIOS) menus, press f10, and then follow the on-screen instructions. - Use the arrow keys to enter Setup Utility (BIOS). Use the arrow keys to enter Setup Utility (BIOS...

User Guide
Page 71
... initiate Sleep or Hibernation. b. BIOS installation procedures vary. Click Refresh. 3. Follow any device, cable, or cord. 1. If no instructions are displayed, follow these instructions: Do not disconnect power from the computer by unplugging the power cord from your computer. Using Setup Utility (BIOS) 61 The hard drive designation is complete. During the download and installation, follow these steps: a. NOTE: If you connect your computer and access the BIOS update you are displayed on -screen instructions...
... initiate Sleep or Hibernation. b. BIOS installation procedures vary. Click Refresh. 3. Follow any device, cable, or cord. 1. If no instructions are displayed, follow these instructions: Do not disconnect power from the computer by unplugging the power cord from your computer. Using Setup Utility (BIOS) 61 The hard drive designation is complete. During the download and installation, follow these steps: a. NOTE: If you connect your computer and access the BIOS update you are displayed on -screen instructions...
User Guide
Page 83
... 13 checking audio functions 30 cleaning your computer 66 components bottom 12 display 10 left side 9 rear 11 right side 8 top 4 computer, traveling 67 configuring audio for HDMI 32 connecting to a wired network 20 connecting to an existing wireless network 17 Connection Manager 16 connector, power 9 creating a wireless connection 15 critical battery level 37 D DC plug of external HP power supply 71 digital card inserting 42 removing 43 supported formats 42 Digital Media Slot, identifying 9 drive light 9 drives external 45 handling 46 hard...
... 13 checking audio functions 30 cleaning your computer 66 components bottom 12 display 10 left side 9 rear 11 right side 8 top 4 computer, traveling 67 configuring audio for HDMI 32 connecting to a wired network 20 connecting to an existing wireless network 17 Connection Manager 16 connector, power 9 creating a wireless connection 15 critical battery level 37 D DC plug of external HP power supply 71 digital card inserting 42 removing 43 supported formats 42 Digital Media Slot, identifying 9 drive light 9 drives external 45 handling 46 hard...
User Guide
Page 84
... power 71 installing software updates 51 integrated webcam light, identifying 10 internal display switch 10 Internet connection setup 18 Internet security software 50 ISP, using 14 J jacks audio-in (microphone) 8 audio-out (headphone) 8 network 9 RJ-45 (network) 9 K keyboard hotkeys, identifying 28 keys action 7 esc 7 fn 7 media 29 volume 30 Windows applications 7 Windows logo 7 L labels Bluetooth 13 Microsoft Certificate of Authenticity 13 regulatory 13 serial number 13 wireless certification 13 WLAN 13 lights battery/AC 9 caps lock 5 hard drive 9 mute 5 power 5 TouchPad 4 webcam 10 wireless...
... power 71 installing software updates 51 integrated webcam light, identifying 10 internal display switch 10 Internet connection setup 18 Internet security software 50 ISP, using 14 J jacks audio-in (microphone) 8 audio-out (headphone) 8 network 9 RJ-45 (network) 9 K keyboard hotkeys, identifying 28 keys action 7 esc 7 fn 7 media 29 volume 30 Windows applications 7 Windows logo 7 L labels Bluetooth 13 Microsoft Certificate of Authenticity 13 regulatory 13 serial number 13 wireless certification 13 WLAN 13 lights battery/AC 9 caps lock 5 hard drive 9 mute 5 power 5 TouchPad 4 webcam 10 wireless...
User Guide
Page 85
... software functioning abnormally 63 wireless network connection 65 troubleshooting and support 63 turning off the computer 41 turning wireless devices on or off 16 U unresponsive system 41 USB cable, connecting 44 USB devices connecting 44 description 43 removing 44 USB hubs 43 USB ports, identifying 8, 9 using external AC power 38 using passwords 48 W webcam 31 webcam light, identifying 5 webcam, identifying 5 Windows applications key, identifying 7 Windows logo key, identifying 7 Windows, passwords set in 48 wireless icons 15 protecting 19 wireless certification label 13 wireless connection...
... software functioning abnormally 63 wireless network connection 65 troubleshooting and support 63 turning off the computer 41 turning wireless devices on or off 16 U unresponsive system 41 USB cable, connecting 44 USB devices connecting 44 description 43 removing 44 USB hubs 43 USB ports, identifying 8, 9 using external AC power 38 using passwords 48 W webcam 31 webcam light, identifying 5 webcam, identifying 5 Windows applications key, identifying 7 Windows logo key, identifying 7 Windows, passwords set in 48 wireless icons 15 protecting 19 wireless certification label 13 wireless connection...

HP Folio 13 - Maintenance and Service Guide
Page 60
... the ESC key for the types of peripherals installed, the startup sequence of the computer, and the amount of the screen. 2. Press f10 to select a language, and then press enter. 4. When a confirmation prompt with Setup Utility only if USB legacy support is enabled. To start Setup Utility, follow these steps: 1. Turn on the system (such as disk drives, display, keyboard, mouse, and printer). Your change and exit Setup Utility, use the arrow keys to select...
... the ESC key for the types of peripherals installed, the startup sequence of the computer, and the amount of the screen. 2. Press f10 to select a language, and then press enter. 4. When a confirmation prompt with Setup Utility only if USB legacy support is enabled. To start Setup Utility, follow these steps: 1. Turn on the system (such as disk drives, display, keyboard, mouse, and printer). Your change and exit Setup Utility, use the arrow keys to select...

HP Folio 13 - Maintenance and Service Guide
Page 63
... enter. At the download area, follow these steps: a. b. Using Setup Utility 55 To exit Setup Utility (BIOS) without saving your computer and access the BIOS update you connect your selection to the hard drive. Downloading a BIOS update CAUTION: To reduce the risk of the system BIOS currently installed. Windows XP-Select Start > Help and Support, and then select the software and drivers update. 2. Follow the on-screen instructions to download your computer to a network, consult the network administrator before installing any device, cable...
... enter. At the download area, follow these steps: a. b. Using Setup Utility 55 To exit Setup Utility (BIOS) without saving your computer and access the BIOS update you connect your selection to the hard drive. Downloading a BIOS update CAUTION: To reduce the risk of the system BIOS currently installed. Windows XP-Select Start > Help and Support, and then select the software and drivers update. 2. Follow the on-screen instructions to download your computer to a network, consult the network administrator before installing any device, cable...

HP Folio 13 - Maintenance and Service Guide
Page 64
... the hard drive. NOTE: If you recorded earlier, open the folder on the screen after the download is running, press esc. 56 Chapter 5 Setup Utility (BIOS) and System Diagnostics The BIOS installation begins. 5. If the test detects a damaged sector, it is complete. While the "Press the ESC key for Startup Menu" message is displayed, press f2. 2. Windows XP-Open Windows Explorer by selecting Start > Computer. If the battery fails...
... the hard drive. NOTE: If you recorded earlier, open the folder on the screen after the download is running, press esc. 56 Chapter 5 Setup Utility (BIOS) and System Diagnostics The BIOS installation begins. 5. If the test detects a damaged sector, it is complete. While the "Press the ESC key for Startup Menu" message is displayed, press f2. 2. Windows XP-Open Windows Explorer by selecting Start > Computer. If the battery fails...

HP Folio 13 - Maintenance and Service Guide
Page 76
... this memory write protected? is available updated when on the HP the system BIOS website. Yes Stores Management The Intel chipset Management Engine Code is is this memory? firmware access to 5 MBytes Does this memory store customer data? Non Volatile Memory Type Amount (Size) System BIOS 4 to this update utility. How is configured to configuration the factory. area. hardware Provisioning Code is removed? Only factory or by an firmware administrator updates using the digitally signed Management by...
... this memory write protected? is available updated when on the HP the system BIOS website. Yes Stores Management The Intel chipset Management Engine Code is is this memory? firmware access to 5 MBytes Does this memory store customer data? Non Volatile Memory Type Amount (Size) System BIOS 4 to this update utility. How is configured to configuration the factory. area. hardware Provisioning Code is removed? Only factory or by an firmware administrator updates using the digitally signed Management by...

HP Folio 13 - Maintenance and Service Guide
Page 83
... description 1 components bottom 12 buttons 6 display 4 keys 7 left-side 10 lights 8 rear 9 right-side 11 TouchPad 9 computer feet locations 27 removal 27 spare part number 27 computer major components 14 computer part number 26 computer specifications 57 connectors, service considerations 21 D Digital Media Slot, identifying 10 display components 4 specifications 58 display assembly spare part numbers 36 display assembly, spare part numbers 19 display panel removal 36 display panel, product description 1 display switch 5 drive light 10 drives, preventing damage 22 DVD±RW and CD...
... description 1 components bottom 12 buttons 6 display 4 keys 7 left-side 10 lights 8 rear 9 right-side 11 TouchPad 9 computer feet locations 27 removal 27 spare part number 27 computer major components 14 computer part number 26 computer specifications 57 connectors, service considerations 21 D Digital Media Slot, identifying 10 display components 4 specifications 58 display assembly spare part numbers 36 display assembly, spare part numbers 19 display panel removal 36 display panel, product description 1 display switch 5 drive light 10 drives, preventing damage 22 DVD±RW and CD...
HP Folio 13 - Maintenance and Service Guide
Page 84
...media cards 2 graphics 1 hard drives 1 keyboard 2 memory module 1 microphone 1 operating system 3 optical drive 1 pointing device 2 ports 2 power requirements 2 processors 1 product name 1 serviceability 3 video 1 wireless 2 product name 1, 26 product number 26 R rear components 9 rear corner covers spare part number 20 recovering from the dedicated recovery partition 61 recovering from the recovery discs 62 recovery discs 60 recovery, system 61 removal/replacement preliminaries 21 procedures 26 restore points 64 right-side components 11 RJ-45 (network) jack, identifying 10 RTC battery removal...
...media cards 2 graphics 1 hard drives 1 keyboard 2 memory module 1 microphone 1 operating system 3 optical drive 1 pointing device 2 ports 2 power requirements 2 processors 1 product name 1 serviceability 3 video 1 wireless 2 product name 1, 26 product number 26 R rear components 9 rear corner covers spare part number 20 recovering from the dedicated recovery partition 61 recovering from the recovery discs 62 recovery discs 60 recovery, system 61 removal/replacement preliminaries 21 procedures 26 restore points 64 right-side components 11 RJ-45 (network) jack, identifying 10 RTC battery removal...


