
HP ProtectTools Getting Started
Page 13
...9679; Supports third-party applications (such as hardware and software changes. ● Remains active even if the hard drive is useful in order to make recovery of users. Device Access Manager for HP ProtectTools (select ● Allows IT managers to control access to devices based on a computer. ● ..., as well as Microsoft Outlook and Internet Explorer) for specific individuals or groups of the data more difficult). Computrace for HP ProtectTools (purchased separately) ● Requires separate purchase of a personal secure drive (PSD), which is reformatted or replaced.
...9679; Supports third-party applications (such as hardware and software changes. ● Remains active even if the hard drive is useful in order to make recovery of users. Device Access Manager for HP ProtectTools (select ● Allows IT managers to control access to devices based on a computer. ● ..., as well as Microsoft Outlook and Internet Explorer) for specific individuals or groups of the data more difficult). Computrace for HP ProtectTools (purchased separately) ● Requires separate purchase of a personal secure drive (PSD), which is reformatted or replaced.
HP ProtectTools Getting Started
Page 78
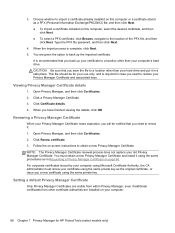
... Manager Certificate details 1. When you will be for HP ProtectTools (select models only) You are installed on... the option to a location other than your computer. 68 Chapter 7 Privacy Manager for your hard drive and put it using Microsoft Certificate Authority, the CA administrator must obtain a new Privacy Manager Certificate...certificate. Click a Privacy Manager Certificate. 3. NOTE: The Privacy Manager Certificate renewal process does not replace your certificate using the same private key. Renewing a Privacy Manager Certificate When your Privacy Manager ...
... Manager Certificate details 1. When you will be for HP ProtectTools (select models only) You are installed on... the option to a location other than your computer. 68 Chapter 7 Privacy Manager for your hard drive and put it using Microsoft Certificate Authority, the CA administrator must obtain a new Privacy Manager Certificate...certificate. Click a Privacy Manager Certificate. 3. NOTE: The Privacy Manager Certificate renewal process does not replace your certificate using the same private key. Renewing a Privacy Manager Certificate When your Privacy Manager ...
HP ProtectTools Getting Started
Page 111
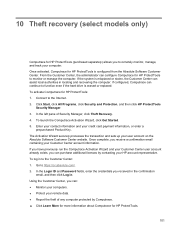
.... Click Start, click All Programs, click Security and Protection, and then click HP ProtectTools Security Manager. 3. Once activated, Computrace for HP ProtectTools (purchased separately) allows you can configure Computrace for HP ProtectTools to function even if the hard drive is erased or replaced. The Activation Wizard securely processes the transaction and sets up your credit card...
.... Click Start, click All Programs, click Security and Protection, and then click HP ProtectTools Security Manager. 3. Once activated, Computrace for HP ProtectTools (purchased separately) allows you can configure Computrace for HP ProtectTools to function even if the hard drive is erased or replaced. The Activation Wizard securely processes the transaction and sets up your credit card...
RAID User Guide
Page 15
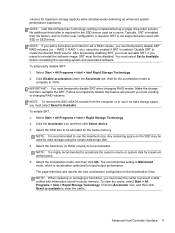
... must temporarily disable SRT when changing RAID modes. Click the Accelerate icon and then click Select device. 3. NOTE: When replacing or reimaging a hard drive, you intend to use the maximum size. Typically, SRT is enabled from creating or changing RAID volumes. Disable SRT to...no further user configuration is implemented as a cache. RAID 0, RAID 1, etc.) cannot be accelerated. To enable SRT: 1. Select the hard drive (or RAID volume) to clear the cache. Advanced Host Controller Interface 11 volume) for the cache memory. SRT is highly recommended to temporarily...
... must temporarily disable SRT when changing RAID modes. Click the Accelerate icon and then click Select device. 3. NOTE: When replacing or reimaging a hard drive, you intend to use the maximum size. Typically, SRT is enabled from creating or changing RAID volumes. Disable SRT to...no further user configuration is implemented as a cache. RAID 0, RAID 1, etc.) cannot be accelerated. To enable SRT: 1. Select the hard drive (or RAID volume) to clear the cache. Advanced Host Controller Interface 11 volume) for the cache memory. SRT is highly recommended to temporarily...
RAID User Guide
Page 31
...be reserved for restoring the HP directories. 12. The amount of unallocated capacity (in MB (for example, 476929 MB), or press the down menu. For example, 494098 MB - 17169 MB = 476929 MB. Replace the Select the amount of space in MB) available to extend the (C:) drive is displayed next to ...the HP_TOOLS size by 1024, and then round up the result. For example, if the size of the hard drive, and then add these three values together (ex 12043MB + 5120MB + 6MB = 17169MB). Calculate the hard drive's metadata space (6 MB) at the end of HP_TOOLS is 5GB, the result is displayed. 15. ...
...be reserved for restoring the HP directories. 12. The amount of unallocated capacity (in MB (for example, 476929 MB), or press the down menu. For example, 494098 MB - 17169 MB = 476929 MB. Replace the Select the amount of space in MB) available to extend the (C:) drive is displayed next to ...the HP_TOOLS size by 1024, and then round up the result. For example, if the size of the hard drive, and then add these three values together (ex 12043MB + 5120MB + 6MB = 17169MB). Calculate the hard drive's metadata space (6 MB) at the end of HP_TOOLS is 5GB, the result is displayed. 15. ...
Getting Started HP Notebook
Page 6
...Replacing the service door 27 Replacing or upgrading the hard drive 28 Intel Smart Response Technology (select models only 28 Removing the hard drive ...29 Installing a hard drive ...31 Replacing a drive in the upgrade bay 33 Replacing a hard drive ...33 Replacing an optical drive 34 Adding or replacing memory modules 35 Adding or replacing... sides and cover 43 Cleaning the TouchPad and keyboard 43 6 Backup and recovery ...45 Creating recovery media with HP Recovery Disc Creator 45 Creating recovery media ...46 Backing up your information ...46 Performing a system recovery ...47 Using...
...Replacing the service door 27 Replacing or upgrading the hard drive 28 Intel Smart Response Technology (select models only 28 Removing the hard drive ...29 Installing a hard drive ...31 Replacing a drive in the upgrade bay 33 Replacing a hard drive ...33 Replacing an optical drive 34 Adding or replacing memory modules 35 Adding or replacing... sides and cover 43 Cleaning the TouchPad and keyboard 43 6 Backup and recovery ...45 Creating recovery media with HP Recovery Disc Creator 45 Creating recovery media ...46 Backing up your information ...46 Performing a system recovery ...47 Using...

Getting Started HP Notebook
Page 23
... a warning message, remove the module to the hard drive, the wireless LAN (WLAN) module slot, the WWAN module slot, and the memory module slots. Bottom 15 Component (8) (9) Bluetooth compartment Service door Description Contains a Bluetooth device (select models only). CAUTION: To prevent an unresponsive system, replace the wireless module only with a wireless module authorized...
... a warning message, remove the module to the hard drive, the wireless LAN (WLAN) module slot, the WWAN module slot, and the memory module slots. Bottom 15 Component (8) (9) Bluetooth compartment Service door Description Contains a Bluetooth device (select models only). CAUTION: To prevent an unresponsive system, replace the wireless module only with a wireless module authorized...
Getting Started HP Notebook
Page 35
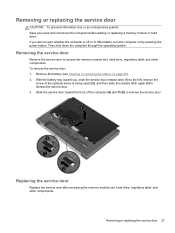
...screw is off or in Hibernation, turn the computer on page 26). 2. Replacing the service door Replace the service door after accessing the memory module slot, hard drive, regulatory label, and other components. Removing or replacing the service door 27 If you , slide the service door release latch (1) ...to remove the service door. Then shut down the computer before adding or replacing a memory module or hard drive. Slide the service door toward you are not sure whether the computer is being used) (2), and then slide the release latch...
...screw is off or in Hibernation, turn the computer on page 26). 2. Replacing the service door Replace the service door after accessing the memory module slot, hard drive, regulatory label, and other components. Removing or replacing the service door 27 If you , slide the service door release latch (1) ...to remove the service door. Then shut down the computer before adding or replacing a memory module or hard drive. Slide the service door toward you are not sure whether the computer is being used) (2), and then slide the release latch...

Getting Started HP Notebook
Page 36
...the front edge of the service door with an SSD mSATA module to use the optional screw, it is off or in place. Replacing or upgrading the hard drive CAUTION: To prevent information loss or an unresponsive system: Shut down the computer through the operating system. Slide the release latch to... the battery (see Inserting or removing the battery on the inside of the service door. 5. Then shut down the computer before removing the hard drive from the hard drive bay. NOTE: If you choose to, insert and tighten the optional screw (4) to lock the service door (5). Do not remove the...
...the front edge of the service door with an SSD mSATA module to use the optional screw, it is off or in place. Replacing or upgrading the hard drive CAUTION: To prevent information loss or an unresponsive system: Shut down the computer through the operating system. Slide the release latch to... the battery (see Inserting or removing the battery on the inside of the service door. 5. Then shut down the computer before removing the hard drive from the hard drive bay. NOTE: If you choose to, insert and tighten the optional screw (4) to lock the service door (5). Do not remove the...

Getting Started HP Notebook
Page 37
...HP does not support SRT with self-encrypting drives (SEDs). Remove the battery (see Intel Smart Response Technology (select models only) on page 27). 6. Loosen the two smart card holder screws (2). Replacing or upgrading the hard drive 29 This provides the advantage of the hard drive... SSD enhanced system performance experience. To remove a hard drive: 1. Loosen the two hard drive cover screws on the Accelerate tab. 3. Make the change and then re-enable SRT. Removing the hard drive NOTE: Before replacing a hard drive or changing the RAID volume see Inserting or removing...
...HP does not support SRT with self-encrypting drives (SEDs). Remove the battery (see Intel Smart Response Technology (select models only) on page 27). 6. Loosen the two smart card holder screws (2). Replacing or upgrading the hard drive 29 This provides the advantage of the hard drive... SSD enhanced system performance experience. To remove a hard drive: 1. Loosen the two hard drive cover screws on the Accelerate tab. 3. Make the change and then re-enable SRT. Removing the hard drive NOTE: Before replacing a hard drive or changing the RAID volume see Inserting or removing...

Getting Started HP Notebook
Page 39
Installing a hard drive To install the hard drive: 1. Lower the hard drive (1) into the hard drive bay. 2. Remove the four screws (1) on the hard drive bracket and remove the hard drive bracket (2). Pull the hard drive tab (2) to the left until the hard drive is not included, reverse this procedure to place the bracket onto the new hard drive. If a bracket is fully seated Replacing or upgrading the hard drive 31 11. NOTE: The new hard drive may have a bracket attached.
Installing a hard drive To install the hard drive: 1. Lower the hard drive (1) into the hard drive bay. 2. Remove the four screws (1) on the hard drive bracket and remove the hard drive bracket (2). Pull the hard drive tab (2) to the left until the hard drive is not included, reverse this procedure to place the bracket onto the new hard drive. If a bracket is fully seated Replacing or upgrading the hard drive 31 11. NOTE: The new hard drive may have a bracket attached.

Getting Started HP Notebook
Page 40
Replace the service door (see Inserting or removing the battery on page 26). 9. Tighten the hard drive cover screws (3). 7. Turn on page 27). 8. 3. Replace the battery (see Removing or replacing the service door on the computer. 32 Chapter 5 Maintenance Turn the computer right-side up, and then reconnect AC power and external devices to secure the hard drive. 4. Tighten the screw (3) to the computer. 10. Tighten the smart card holder screws (2). 6. Close the smart card holder (1). 5.
Replace the service door (see Inserting or removing the battery on page 26). 9. Tighten the hard drive cover screws (3). 7. Turn on page 27). 8. 3. Replace the battery (see Removing or replacing the service door on the computer. 32 Chapter 5 Maintenance Turn the computer right-side up, and then reconnect AC power and external devices to secure the hard drive. 4. Tighten the screw (3) to the computer. 10. Tighten the smart card holder screws (2). 6. Close the smart card holder (1). 5.

Getting Started HP Notebook
Page 41
... the computer is off or in the upgrade bay The upgrade bay can hold either a hard drive or an optical drive. Replacing a drive in the upgrade bay: 1. Replacing a hard drive CAUTION: To prevent information loss or an unresponsive system: Shut down on by pressing the power button. Remove the service door (see Inserting or removing ...
... the computer is off or in the upgrade bay The upgrade bay can hold either a hard drive or an optical drive. Replacing a drive in the upgrade bay: 1. Replacing a hard drive CAUTION: To prevent information loss or an unresponsive system: Shut down on by pressing the power button. Remove the service door (see Inserting or removing ...

Getting Started HP Notebook
Page 42
... Insert the hard drive (1) into the upgrade bay, and then tighten the upgrade bay screw (2). 3. Turn on page 27). 4. Remove the battery (see Inserting or removing the battery on page 26). 7. Remove the optical drive from the upgrade bay: 1. Do not remove the optical drive while the computer...Turn the computer right-side up, and then reconnect AC power and external devices to release the optical drive(2). 10. If you . 6. Replace the service door (see Removing or replacing the service door on by pressing the power button. Turn the computer upside down the computer through the...
... Insert the hard drive (1) into the upgrade bay, and then tighten the upgrade bay screw (2). 3. Turn on page 27). 4. Remove the battery (see Inserting or removing the battery on page 26). 7. Remove the optical drive from the upgrade bay: 1. Do not remove the optical drive while the computer...Turn the computer right-side up, and then reconnect AC power and external devices to release the optical drive(2). 10. If you . 6. Replace the service door (see Removing or replacing the service door on by pressing the power button. Turn the computer upside down the computer through the...

Getting Started HP Notebook
Page 50
Replace the hard drive or optical drive in the upgrade bay. (See Replacing a drive in the notification area, at the far right of the taskbar, or select Start > All Programs > Productivity and Tools > Mobile Display Assistant. Turn on page ... Assistant icon in the upgrade bay on page 26.) 13. Updating programs and drivers HP recommends that you update your programs and drivers on a regular basis with the HP DreamColor display include the preinstalled HP Mobile Display Assistant software. Replace the service door (see Inserting or removing the battery on page 33.) 14. Using...
Replace the hard drive or optical drive in the upgrade bay. (See Replacing a drive in the notification area, at the far right of the taskbar, or select Start > All Programs > Productivity and Tools > Mobile Display Assistant. Turn on page ... Assistant icon in the upgrade bay on page 26.) 13. Updating programs and drivers HP recommends that you update your programs and drivers on a regular basis with the HP DreamColor display include the preinstalled HP Mobile Display Assistant software. Replace the service door (see Inserting or removing the battery on page 33.) 14. Using...
Getting Started HP Notebook
Page 60
... identifying 14 battery light 9 battery release latch 14 battery, replacing 26 Bluetooth compartment, identifying 15 Bluetooth label 50 buttons calculator 7 center pointing stick 4 center...fn key, identifying 8, 19 function keys, identifying 8 H hard drive bracket removal 0 , 0 installing 31 removing 29 hard drive light 9 hard drive recovery 48 hard drive, identifying 15 headphone (audio-out) jack 10 hot keys ... 8 fn 8 function 8 Windows applications 8 Windows logo 8 L labels Bluetooth 50 HP Mobile Broadband Module 50 Microsoft Certificate of Authenticity 50 regulatory 50 service 50 SIM 50 ...
... identifying 14 battery light 9 battery release latch 14 battery, replacing 26 Bluetooth compartment, identifying 15 Bluetooth label 50 buttons calculator 7 center pointing stick 4 center...fn key, identifying 8, 19 function keys, identifying 8 H hard drive bracket removal 0 , 0 installing 31 removing 29 hard drive light 9 hard drive recovery 48 hard drive, identifying 15 headphone (audio-out) jack 10 hot keys ... 8 fn 8 function 8 Windows applications 8 Windows logo 8 L labels Bluetooth 50 HP Mobile Broadband Module 50 Microsoft Certificate of Authenticity 50 regulatory 50 service 50 SIM 50 ...
Getting Started HP Notebook
Page 61
lights battery 9 calculator 5 caps lock 5 hard drive 9 num lk 5 power 5, 9 TouchPad 5 webcam 13 wireless 5 M Media Card Reader, identifying 9 memory module identifying 15 inserting 37 removing 36 replacing 35 microphone (audio-in) jack, identifying 10 Microsoft Certificate of Authenticity label 50 mouse, external setting preferences 21 N network jack, identifying 11 num lk key, ...
lights battery 9 calculator 5 caps lock 5 hard drive 9 num lk 5 power 5, 9 TouchPad 5 webcam 13 wireless 5 M Media Card Reader, identifying 9 memory module identifying 15 inserting 37 removing 36 replacing 35 microphone (audio-in) jack, identifying 10 Microsoft Certificate of Authenticity label 50 mouse, external setting preferences 21 N network jack, identifying 11 num lk key, ...

HP EliteBook 8570w Mobile Workstation Maintenance and Service Guide
Page 6
Equipment guidelines 44 Component replacement procedures 45 Service tag ...45 Battery ...46 Display panel (non-DreamColor 47 SIM ...51 Service door ...52 Memory Modules (under service door 53 RTC battery ...55 WLAN module ...56 WWAN module ...59 Bluetooth module ...61 Hard drive ...63 Smart card reader 66 Upgrade bay device 68 Keyboard ...72 Memory...
Equipment guidelines 44 Component replacement procedures 45 Service tag ...45 Battery ...46 Display panel (non-DreamColor 47 SIM ...51 Service door ...52 Memory Modules (under service door 53 RTC battery ...55 WLAN module ...56 WWAN module ...59 Bluetooth module ...61 Hard drive ...63 Smart card reader 66 Upgrade bay device 68 Keyboard ...72 Memory...

HP EliteBook 8570w Mobile Workstation Maintenance and Service Guide
Page 14
... Windows 7 Ultimate 32 Windows 7 Ultimate 64 Certified: Microsoft WHQL SuSE Linux Enterprise (SLED) SP2 64 bit Red Hat Enterprise Linux (RHEL) 6.x 64 bit End-user replaceable parts: AC adapter Battery (system) Hard drive/SSD Memory module Optical drive Mini-PCI components (WLAN, WWAN, SIM) Keyboard 6 Chapter 1 Product description
... Windows 7 Ultimate 32 Windows 7 Ultimate 64 Certified: Microsoft WHQL SuSE Linux Enterprise (SLED) SP2 64 bit Red Hat Enterprise Linux (RHEL) 6.x 64 bit End-user replaceable parts: AC adapter Battery (system) Hard drive/SSD Memory module Optical drive Mini-PCI components (WLAN, WWAN, SIM) Keyboard 6 Chapter 1 Product description

HP EliteBook 8570w Mobile Workstation Maintenance and Service Guide
Page 27
Provides access to restore computer functionality, and then contact technical support through Help and Support. If you replace the module and then receive a warning message, remove the module to the hard drive, the wireless LAN (WLAN) module slot, the WWAN module slot, and the memory module slots. Component (8) (9) Bluetooth compartment Service door Description Contains...
Provides access to restore computer functionality, and then contact technical support through Help and Support. If you replace the module and then receive a warning message, remove the module to the hard drive, the wireless LAN (WLAN) module slot, the WWAN module slot, and the memory module slots. Component (8) (9) Bluetooth compartment Service door Description Contains...


