

User Guide
Page 6
...-finger slide (touch screen) ...30 Using an optional keyboard or mouse...30 Using an on-screen keyboard (select products only)...30 5 Entertainment features ...31 Using a camera (select products only) ...31 Using audio ...31 Connecting speakers...31 Connecting headphones ...31 Connecting headsets ...32 Using sound settings ...32 Viewing or changing sound settings ...32 Using the control panel to view and control audio settings 32 Using video...33 Connecting a Thunderbolt device using a USB Type-C cable (select products only 33 Connecting a DisplayPort device using a USB Type-C cable (select...
...-finger slide (touch screen) ...30 Using an optional keyboard or mouse...30 Using an on-screen keyboard (select products only)...30 5 Entertainment features ...31 Using a camera (select products only) ...31 Using audio ...31 Connecting speakers...31 Connecting headphones ...31 Connecting headsets ...32 Using sound settings ...32 Viewing or changing sound settings ...32 Using the control panel to view and control audio settings 32 Using video...33 Connecting a Thunderbolt device using a USB Type-C cable (select products only 33 Connecting a DisplayPort device using a USB Type-C cable (select...
User Guide
Page 7
...-sealed battery ...44 Running on external power ...44 7 Security ...46 Protecting the computer...46 Using passwords ...47 Setting passwords in Windows...47 Setting passwords in Computer Setup ...47 Managing a BIOS administrator password ...48 Setting a new BIOS administrator password 48 Changing a BIOS administrator password ...49 Deleting a BIOS administrator password...49 Entering a BIOS administrator password ...50 Using DriveLock Security Options...50 Selecting Automatic DriveLock (select products only 50 Enabling Automatic DriveLock...50 Disabling Automatic DriveLock...51 Entering an...
...-sealed battery ...44 Running on external power ...44 7 Security ...46 Protecting the computer...46 Using passwords ...47 Setting passwords in Windows...47 Setting passwords in Computer Setup ...47 Managing a BIOS administrator password ...48 Setting a new BIOS administrator password 48 Changing a BIOS administrator password ...49 Deleting a BIOS administrator password...49 Entering a BIOS administrator password ...50 Using DriveLock Security Options...50 Selecting Automatic DriveLock (select products only 50 Enabling Automatic DriveLock...50 Disabling Automatic DriveLock...51 Entering an...
User Guide
Page 10
... numbers Replacement parts videos (select products only) Maintenance and service guides HP service center locations Getting started This computer is preinstalled on the computer: Select the Start button. ‒ or - HP Support Assistant optimizes computer performance and resolves problems using the latest software updates, diagnostic tools, and guided assistance. See Components on page 3 and Navigating the screen on page 27 for additional information. ● Find installed software-Access a list of your smart investment: TIP: To quickly...
... numbers Replacement parts videos (select products only) Maintenance and service guides HP service center locations Getting started This computer is preinstalled on the computer: Select the Start button. ‒ or - HP Support Assistant optimizes computer performance and resolves problems using the latest software updates, diagnostic tools, and guided assistance. See Components on page 3 and Navigating the screen on page 27 for additional information. ● Find installed software-Access a list of your smart investment: TIP: To quickly...
User Guide
Page 30
...; Bluetooth® device-Creates a personal area network (PAN) to connect to other Bluetooth-enabled devices such as airports, restaurants, coffee shops, hotels, and universities. Using the wireless controls You can explore the globe and access information from the taskbar, type control panel, select Control Panel, and then select Network and Sharing Center. - All the wireless devices on your computer model, you have a wireless button, one or more wireless devices. ● WLAN device-Connects the computer to wireless local...
...; Bluetooth® device-Creates a personal area network (PAN) to connect to other Bluetooth-enabled devices such as airports, restaurants, coffee shops, hotels, and universities. Using the wireless controls You can explore the globe and access information from the taskbar, type control panel, select Control Panel, and then select Network and Sharing Center. - All the wireless devices on your computer model, you have a wireless button, one or more wireless devices. ● WLAN device-Connects the computer to wireless local...
User Guide
Page 55
... to use the touch screen. 46 Chapter 7 Security Protecting the computer Standard security features provided by the Windows operating system, HP applications, Computer Setup (BIOS), and other third-party software can be available on your computer from a variety of risks, such as deterrents. These deterrents may not prevent a product from an optional external optical drive (select products only), optional external hard drive (select products only), or internal network adapter Boot options...
... to use the touch screen. 46 Chapter 7 Security Protecting the computer Standard security features provided by the Windows operating system, HP applications, Computer Setup (BIOS), and other third-party software can be available on your computer from a variety of risks, such as deterrents. These deterrents may not prevent a product from an optional external optical drive (select products only), optional external hard drive (select products only), or internal network adapter Boot options...
User Guide
Page 59
... the following features: ● Automatic DriveLock-See Selecting Automatic DriveLock (select products only) on page 50. ● Set DriveLock Master Password-See Selecting manual DriveLock on page 52. ● Enable DriveLock-See Enabling DriveLock and setting a DriveLock user password on , the random user password automatically unlocks the drive. Start Computer Setup. ● Computers or tablets with the volume down button until the Startup menu is applied to access the drive.
... the following features: ● Automatic DriveLock-See Selecting Automatic DriveLock (select products only) on page 50. ● Set DriveLock Master Password-See Selecting manual DriveLock on page 52. ● Enable DriveLock-See Enabling DriveLock and setting a DriveLock user password on , the random user password automatically unlocks the drive. Start Computer Setup. ● Computers or tablets with the volume down button until the Startup menu is applied to access the drive.
User Guide
Page 64
... it can be kept up to function abnormally. Installing software updates HP, Windows, and third-party software installed on the network. Select Get Started, and then follow the on-screen instructions to protect all sides of both , or it to a system or network. Any data that you register your computer, network, or both hardware and software. NOTE: The PIN is for numbers only. IMPORTANT: To prevent fingerprint...
... it can be kept up to function abnormally. Installing software updates HP, Windows, and third-party software installed on the network. Select Get Started, and then follow the on-screen instructions to protect all sides of both , or it to a system or network. Any data that you register your computer, network, or both hardware and software. NOTE: The PIN is for numbers only. IMPORTANT: To prevent fingerprint...

User Guide
Page 65
... in supported websites and applications. 56 Chapter 7 Security To connect a security cable to act as you receive an alert. Using a fingerprint reader (select products only) Integrated fingerprint readers are available on -screen instructions. 3. To use HP Client Security's Password Manager to the computer, networks, and critical data. You can access this software through the HP Client Security icon at the far right of the taskbar or Windows Control Panel...
... in supported websites and applications. 56 Chapter 7 Security To connect a security cable to act as you receive an alert. Using a fingerprint reader (select products only) Integrated fingerprint readers are available on -screen instructions. 3. To use HP Client Security's Password Manager to the computer, networks, and critical data. You can access this software through the HP Client Security icon at the far right of the taskbar or Windows Control Panel...
User Guide
Page 67
... events, HP 3D DriveGuard returns the hard drive to AC power. 2. NOTE: It is not necessary to a USB port is running on -screen instructions. This chapter explains how to clean the computer, and tips for updating programs and drivers, steps to use tools like Disk Defragmenter and Disk Cleanup. A hard drive installed in optimal condition. Select the Search icon (select products only) from the taskbar, type defragment...
... events, HP 3D DriveGuard returns the hard drive to AC power. 2. NOTE: It is not necessary to a USB port is running on -screen instructions. This chapter explains how to clean the computer, and tips for updating programs and drivers, steps to use tools like Disk Defragmenter and Disk Cleanup. A hard drive installed in optimal condition. Select the Search icon (select products only) from the taskbar, type defragment...

User Guide
Page 74
... for HP Sure Recover, go to http://www.hp.com/support. HP Sure Recover can restore the system and install: ● Latest version of the operating system ● Platform-specific device drivers ● Software applications, in BIOS for startup information. Access the system Startup menu. ● For computers or tablets with keyboards attached, turn on or restart the tablet, quickly press and hold the volume down button, and then select f9. 3. Turn on -screen instructions to...
... for HP Sure Recover, go to http://www.hp.com/support. HP Sure Recover can restore the system and install: ● Latest version of the operating system ● Platform-specific device drivers ● Software applications, in BIOS for startup information. Access the system Startup menu. ● For computers or tablets with keyboards attached, turn on or restart the tablet, quickly press and hold the volume down button, and then select f9. 3. Turn on -screen instructions to...
User Guide
Page 77
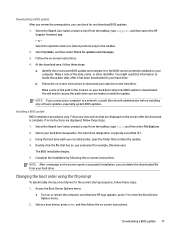
... location on -screen instructions to enter the Boot Device Options menu. 2. If no instructions are displayed on the screen reports a successful installation, you connect your hard drive designation. The BIOS installation begins. 5. Access the Boot Device Options menu: ● Turn on -screen instructions. NOTE: If you can check for example, filename.exe). Installing a BIOS update BIOS installation procedures vary. Complete the installation by following the on or restart the computer, and when the HP logo appears, press f9 to download your computer. Changing the boot order...
... location on -screen instructions to enter the Boot Device Options menu. 2. If no instructions are displayed on the screen reports a successful installation, you connect your hard drive designation. The BIOS installation begins. 5. Access the Boot Device Options menu: ● Turn on -screen instructions. NOTE: If you can check for example, filename.exe). Installing a BIOS update BIOS installation procedures vary. Complete the installation by following the on or restart the computer, and when the HP logo appears, press f9 to download your computer. Changing the boot order...
User Guide
Page 94
... Accessibility Professionals 80 J jacks audio-out (headphone)/audio-in (microphone) combo 5, 6 network 5, 6 RJ-45 (network) 5, 6 K keyboard and optional mouse using 30 keyboard backlight action key 14 keypad integrated numeric 13 keys action 13 esc 12 fn 12 num lk 13 touchpad 14 Windows 12 Windows application 12 L labels Bluetooth 17 regulatory 17 serial number 17 service 17 wireless certification 17 WLAN 17 left control zone, identifying 9 left side components 5 lights AC adapter and battery 4 battery 4 camera 7 caps lock 9 fn lock 9 microphone...
... Accessibility Professionals 80 J jacks audio-out (headphone)/audio-in (microphone) combo 5, 6 network 5, 6 RJ-45 (network) 5, 6 K keyboard and optional mouse using 30 keyboard backlight action key 14 keypad integrated numeric 13 keys action 13 esc 12 fn 12 num lk 13 touchpad 14 Windows 12 Windows application 12 L labels Bluetooth 17 regulatory 17 serial number 17 service 17 wireless certification 17 WLAN 17 left control zone, identifying 9 left side components 5 lights AC adapter and battery 4 battery 4 camera 7 caps lock 9 fn lock 9 microphone...
User Guide
Page 95
... HP PC Hardware Diagnostics UEFI settings customizing 74 using 74 resources, accessibility 82 restoring 63 restoring and recovery methods 64 right control zone, identifying 9 right side components 3 RJ-45 (network) jack, identifying 5, 6 RJ-45 (network) lights, identifying 5, 6 S screen brightness action keys 13 Section 508 accessibility standards 81 security cable 56 security cable slot, identifying 5 serial number, computer 17 service labels, locating 17 setup utility navigating and selecting 66 restoring factory settings 66 shipping the computer 61 shutdown 41 SIM card...
... HP PC Hardware Diagnostics UEFI settings customizing 74 using 74 resources, accessibility 82 restoring 63 restoring and recovery methods 64 right control zone, identifying 9 right side components 3 RJ-45 (network) jack, identifying 5, 6 RJ-45 (network) lights, identifying 5, 6 S screen brightness action keys 13 Section 508 accessibility standards 81 security cable 56 security cable slot, identifying 5 serial number, computer 17 service labels, locating 17 setup utility navigating and selecting 66 restoring factory settings 66 shipping the computer 61 shutdown 41 SIM card...
User Guide
Page 96
... 16 video 33 DisplayPort device 34 HDMI port 35 Thunderbolt Port device 33 USB Type-C 33, 34 wireless displays 38 volume adjusting 14 mute 14 W Windows backup 63 recovery media 63 system restore point 63 Windows application key, identifying 12 Windows Hello using 54 Windows key, identifying 12 Windows tools, using 63 wireless action key 14 wireless antennas, identifying 7 wireless button 21 wireless certification label 17 wireless controls button 21 operating system 21 wireless key 21 wireless light 21 wireless network (WLAN) connecting 22 corporate WLAN connection 22 functional range...
... 16 video 33 DisplayPort device 34 HDMI port 35 Thunderbolt Port device 33 USB Type-C 33, 34 wireless displays 38 volume adjusting 14 mute 14 W Windows backup 63 recovery media 63 system restore point 63 Windows application key, identifying 12 Windows Hello using 54 Windows key, identifying 12 Windows tools, using 63 wireless action key 14 wireless antennas, identifying 7 wireless button 21 wireless certification label 17 wireless controls button 21 operating system 21 wireless key 21 wireless light 21 wireless network (WLAN) connecting 22 corporate WLAN connection 22 functional range...
Maintenance and Service Guide
Page 85
... you recorded earlier, open the folder that has an .exe extension (for the current startup sequence, follow these steps. 1. NOTE: After a message on -screen instructions. 4. Access the Boot Device Options menu: ● Turn on your hard drive where the BIOS update is typically Local Disk (C:). 3. Downloading a BIOS update After you review the prerequisites, you can delete the downloaded file from your hard drive. Follow the on the screen reports a successful installation, you can check...
... you recorded earlier, open the folder that has an .exe extension (for the current startup sequence, follow these steps. 1. NOTE: After a message on -screen instructions. 4. Access the Boot Device Options menu: ● Turn on your hard drive where the BIOS update is typically Local Disk (C:). 3. Downloading a BIOS update After you review the prerequisites, you can delete the downloaded file from your hard drive. Follow the on the screen reports a successful installation, you can check...
Maintenance and Service Guide
Page 89
... - Using HP Sure Recover, an administrator or user can change the boot order: 1. Insert the HP Recovery media. 2. Using HP Sure Recover (select products only) Select computer models are configured with a detachable keyboard, connect the tablet to the keyboard base before beginning these steps. Select the optical drive or USB flash drive from which you can restore the system and install: ● Latest version of the operating system ● Platform-specific device drivers ● Software applications, in BIOS for startup information. HP...
... - Using HP Sure Recover, an administrator or user can change the boot order: 1. Insert the HP Recovery media. 2. Using HP Sure Recover (select products only) Select computer models are configured with a detachable keyboard, connect the tablet to the keyboard base before beginning these steps. Select the optical drive or USB flash drive from which you can restore the system and install: ● Latest version of the operating system ● Platform-specific device drivers ● Software applications, in BIOS for startup information. HP...

Maintenance and Service Guide
Page 103
... from Windows. Manager. Follow the on -screen instructions. 2. by user enrollment in the call to write to securely erase information. The restore defaults feature does not reset the Custom Secure Boot keys. Select Main, select Save Changes and Exit, and then follow the on -screen instructions. BIOS provides a secure runtime environment that can use either a pointing device (touch screen, touchpad, pointing stick, or USB mouse) or the keyboard to factory settings)? manufacturer that supports a Graphic User...
... from Windows. Manager. Follow the on -screen instructions. 2. by user enrollment in the call to write to securely erase information. The restore defaults feature does not reset the Custom Secure Boot keys. Select Main, select Save Changes and Exit, and then follow the on -screen instructions. BIOS provides a secure runtime environment that can use either a pointing device (touch screen, touchpad, pointing stick, or USB mouse) or the keyboard to factory settings)? manufacturer that supports a Graphic User...

Maintenance and Service Guide
Page 109
... reader, identifying 14 fn key, identifying 14 fn lock light, identifying 11 G graphics, product description 1 grounding methods 32-34 guidelines packaging 32, 38 transporting 32, 38 workstation 32 H hard drive product description 2 specifications 88 heat sink removal 59 spare part numbers 59 hinge illustrated 23, 25 spare part number 23, 25 HP PC Hardware Diagnostics UEFI downloading 85 failure ID code 84 starting 85 using 84 HP PC Hardware Diagnostics Windows accessing...
... reader, identifying 14 fn key, identifying 14 fn lock light, identifying 11 G graphics, product description 1 grounding methods 32-34 guidelines packaging 32, 38 transporting 32, 38 workstation 32 H hard drive product description 2 specifications 88 heat sink removal 59 spare part numbers 59 hinge illustrated 23, 25 spare part number 23, 25 HP PC Hardware Diagnostics UEFI downloading 85 failure ID code 84 starting 85 using 84 HP PC Hardware Diagnostics Windows accessing...
Maintenance and Service Guide
Page 110
... 3 primary storage product description 2 privacy key light 11 processor product description 1 product description audio 2 display panel 1 graphics 1 hard drive 2 keyboard 3 memory module 1 microphone 2 operating system 4 pointing device 3 ports 3 power requirements 3 primary storage 2 processors 1 product name 1 RJ-45 (network) jack 2 security 4 sensors 3 serviceability 5 solid-state drive 2 video 2 wireless 2 product name 1 product name and number, computer 17 R recovery 79 discs 80 media 80 USB flash drive 80 recovery media 79 creating using HP Cloud Recovery Download Tool 79 102 Index
... 3 primary storage product description 2 privacy key light 11 processor product description 1 product description audio 2 display panel 1 graphics 1 hard drive 2 keyboard 3 memory module 1 microphone 2 operating system 4 pointing device 3 ports 3 power requirements 3 primary storage 2 processors 1 product name 1 RJ-45 (network) jack 2 security 4 sensors 3 serviceability 5 solid-state drive 2 video 2 wireless 2 product name 1 product name and number, computer 17 R recovery 79 discs 80 media 80 USB flash drive 80 recovery media 79 creating using HP Cloud Recovery Download Tool 79 102 Index
Maintenance and Service Guide
Page 111
... 3 serial number, computer 17 service labels, locating 17 serviceability, product description 5 setup utility navigating and selecting 75 restoring factory settings 75 SIM card, correct size 43 SIM card, inserting 42, 43 SIM slot, identifying 6 slots security cable 8 SIM card 6 smart card 8 smart card reader removal 56 spare part numbers 56 smart card slot, identifying 8 solid-state drive illustrated 22 product description 2 removal and replacement 48 spare part number 22 specifications 89 spare part country codes 73 speaker illustrated 21 spare part number 21 speakers removal...
... 3 serial number, computer 17 service labels, locating 17 serviceability, product description 5 setup utility navigating and selecting 75 restoring factory settings 75 SIM card, correct size 43 SIM card, inserting 42, 43 SIM slot, identifying 6 slots security cable 8 SIM card 6 smart card 8 smart card reader removal 56 spare part numbers 56 smart card slot, identifying 8 solid-state drive illustrated 22 product description 2 removal and replacement 48 spare part number 22 specifications 89 spare part country codes 73 speaker illustrated 21 spare part number 21 speakers removal...


