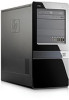
Safety and Regulatory Information Desktops, Thin Clients, and Personal Workstations
Page 5
... Ergonomics Notice ...3 Laser Safety ...3 CDRH Regulations ...3 Compliance with International Regulations 4 Laser Product Label ...4 Laser Information ...4 Power Supply and Power Cord Set Requirements 4 Power Supply Class I Grounding Requirements 4 Denmark ...4 Norway ...4 Sweden ...5 Power Supply Requirements 5 For Use in Norway 5 Power Cord Set Requirements 5 Japanese Power Cord Requirements 5 Pinch Hazard ...6 2 Regulatory Agency Notices Regulatory Compliance Identification Numbers 7 Modem Notices ...7 Telecommunications Device Approvals...
Safety and Regulatory Information Desktops, Thin Clients, and Personal Workstations
Page 7
...device and must be heavy; To reduce the possibility of electric shock or damage to do so may be easily accessible at www.hp.com/ergo and on the Documentation CD that is provided with the product. Also, disconnect the telephone line before performing any service...Safety Notices Important Safety Information WARNING! CAUTION: If your equipment: • Do not disable the power cord grounding plug. Install the computer near an AC outlet. Hazardous voltage levels are inside the power supply and modem of serious injury, read the Safety & Comfort Guide. Always disconnect the modem cord...
Safety and Regulatory Information Desktops, Thin Clients, and Personal Workstations
Page 10
...må kun tilkoples jordet stikkontakt. 4 Chapter 1 Safety Notices ENWW This label appears on the system. Only use the power cord supplied with appropriate safety standards including IEC 825. Compliance with International Regulations All systems equipped with CD-ROM drives comply with this ...or 10,869 W·m-2 sr-1 ● Polarization: Circular 0.25 ● Numerical Aperture: 0.45 +/- 0.04 Power Supply and Power Cord Set Requirements Power Supply Class I Grounding Requirements For protection from fault currents, the equipment shall be connected to the Class 1 Laser Product ...
Safety and Regulatory Information Desktops, Thin Clients, and Personal Workstations
Page 11
... for evaluation in user exposure to -phase voltage 230V. Particular attention should be installed. 2. If the power cord set requirements, contact your authorized HP dealer, reseller, or service provider. ENWW Power Supply and Power Cord Set Requirements 5 Power Supply Requirements The power supplies on those products that sense the incoming voltage and automatically switch to the plug, electrical outlet...
Safety and Regulatory Information Desktops, Thin Clients, and Personal Workstations
Page 29
... Union's RoHS Legislation - Table 2-2 Toxic and Hazardous Substances and Elements (continued) Part Name Lead (Pb) Mercury (Hg) Cadmium (Cd) Hexavalent Chromium (Cr(VI)) Memory X O O O I/O PCAs X O O O Power supply X O O O Keyboard X O O O Mouse X O O O Chassis/Other X O O O Fans X O O O Internal/External Media Reading X O O O Devices External Control Devices X O O O Cable X O O O Hard Disk Drive X O O O Display X X O O Polybrominated biphenyls (PBB) Polybrominated diphenyl ethers (PBDE...
Quick Setup & Getting Started Guide
Page 16
... > All Programs > HP User Manuals. Refer to the Maintenance and Service Guide (English only) for Technical Support WARNING! Before You Call for more information about using the Computer Setup utility. When the computer is plugged into an AC power source, voltage is always.... If you connect the computer and peripheral devices and set up factory-provided software; includes information on RTC batteries, memory, and power supply. ● Maintenance and Service Guide (English only)-Provides information on all of computers; On some models, you encounter any problems during...
Illustrated Parts & Service Map: HP Elite 7100 Series Microtower PC
Page 1
... 449283-001 448670-001 463023-001 463024-001 -161 -001 System Unit 1 Access panel 2 Power supply, 300W, PFC 2 Power supply, 300W, 85% efficient 3 Chassis 4 Front bezel * 5.25-inch bezel blank * 3.5-inch bezel blank * Not shown HP Elite 7100 MT Series 586372-001 604611-001 575437-002 not spared 586373-001 536306-001 583094-001 606037... Chipset Drive Support I/O Interfaces Operating Systems Intel® Core™ i3, Intel Core i5, Intel Core i7 16 GB; Illustrated Parts & Service Map HP Elite 7100 Series Microtower PC © 2010 Hewlett-Packard Development Company, L.P. The information con-
Maintenance & Service Guide: HP Elite 7100 Series Microtower PC
Page 6
... Drives ...18 Hard Drive Capacities ...18 6 Identifying the Chassis, Routine Care, and Disassembly Preparation 19 Chassis Designations ...19 Microtower (MT) ...19 Electrostatic Discharge Information ...19 Generating Static ...20 Preventing Electrostatic Damage to Equipment 20 Personal Grounding Methods and...Cleaning the Mouse ...24 Service Considerations ...24 Power Supply Fan ...24 Tools and Software Requirements 24 Screws ...25 Cables and Connectors ...25 Hard Drives ...25 Lithium Coin Cell Battery 26 7 Removal and Replacement Procedures Microtower (MT) Chassis 27 Serial Number Location ...
Maintenance & Service Guide: HP Elite 7100 Series Microtower PC
Page 7
......58 Heat sink assembly ...59 Processor ...60 Power Supply ...62 System Board ...64 Battery ...65 Type 1 Battery Holder ...66 Type 2 Battery Holder ...66 Type 3 Battery Holder ...67 Installing a Security Lock ...68 Cable Lock ...68 Padlock ...68 HP Business PC Security Lock 69 Appendix A Connector Pin Assignments... ...71 Ethernet BNC ...71 USB ...71 Microphone ...71 Headphone ...72 Line-in Audio ...72 Line-out Audio ...72 Monitor ...73 24-Pin Power ...73 PCI Express ...74 PCI Express ......
Maintenance & Service Guide: HP Elite 7100 Series Microtower PC
Page 32
... the ball from the keyboard. Cleaning the Mouse Before cleaning the mouse, ensure that you need the following: ● Torx T-15 screwdriver (HP screwdriver with bits, PN 161946-001) ● Torx T-15 screwdriver with a clean, dry cloth before reassembly. Tools and Software Requirements To service... below are improperly removed or installed, the keyboard may not function properly. ● Cleaning under a key may be used in the power supply. Be careful not to prevent system board or component damage. Do not use a specially designed key puller to prevent damage to air dry...
Maintenance & Service Guide: HP Elite 7100 Series Microtower PC
Page 48
... on these cables. ● Never bend a SATA data cable tighter than a 30 mm (1.18 in a failed power supply. 40 Chapter 7 Removal and Replacement Procedures Microtower (MT) Chassis Connect internal cables to push cables down into the chassis. Reconfigure the computer, if necessary. Never change...to the Computer Setup (F10) Utility Guide for instructions on components like the drive cage, power supply, or computer cover to the system board, if needed . When removing the power supply power cable from the P1 connector on the system board, always follow good cable management practices ...
Maintenance & Service Guide: HP Elite 7100 Series Microtower PC
Page 49
Connector Name ATX1 PWR1 SYS_FAN1 CPU_FAN1 JAUD1 JUSB3 JUSB1 J1394_1 JUSB2 JFP1 JUSB4-6 Connector Color White White Brown White Yellow Black White Red White black black Description Power supply, 24-pin Power supply, 4-pin Chassis fan Heat sink fan Front I/O audio Front I/O Front I/O USB Front I/O 1394 connector Media card reader Power switch Internal USB connectors Cable Management 41 Cable Connections System board connectors are color-coded to make it easier to find the proper connection.
Maintenance & Service Guide: HP Elite 7100 Series Microtower PC
Page 70
... chassis by four Torx screws. To avoid possible personal injury and damage to the equipment the power cord should be sure to the setting (230 V or 115 V) appropriate for 230 V. 1. Spare power supplies normally arrive set the red switch to set for the country in place. Lay the computer ... Panel on the system board when the computer is plugged into an active AC outlet. Voltage is always present on page 29). 3. Power Supply The power supply is secured to the chassis. 62 Chapter 7 Removal and Replacement Procedures Microtower (MT) Chassis A lever on the chassis floor also holds the...
Maintenance & Service Guide: HP Elite 7100 Series Microtower PC
Page 71
... (system board connector) IDE/SATA adapter P2 Optical drive SATA power (black) P9 Hard drive To install the power supply, reverse the removal procedure. The following table provides information about power supply cable connectors. 6. Slide the power supply toward the front/bottom of the computer, then lift the power supply out of the power supply to disengage it from the chassis. 7.
Maintenance & Service Guide: HP Elite 7100 Series Microtower PC
Page 85
... switch to be between 100-120 or 220-240 volts AC. Power supplies on or pinched by each country's power system. 3. Japanese Power Cord Requirements For use in the country where you use only the power cord received with this product. WARNING! CAUTION: Do not use ... voltage rating of the country where you purchased the equipment. The power cord must meet the requirements of 125 or 250 volts AC, as required by items placed upon it or against it immediately. B Power Cord Set Requirements The power supplies on any line voltage between 1.8 m (6 feet) and 3.6 ...
Maintenance & Service Guide: HP Elite 7100 Series Microtower PC
Page 92
...Diagnostics Add more memory. 3. Add more memory. Cause unknown. Replace the system board. Open hood and check that the power button harness is experienced. Replace the power supply. 6. Some software applications, especially games, are properly connected to the system board. 4. Lower the display resolution for less... 4 seconds. Upgrade the graphics solution. If the hard drive LED turns green, then: 1. On the Startup tab of the power supply on how to improve performance by right-clicking on your region. 2. Restart the computer. Check that the voltage selector, located on...
Maintenance & Service Guide: HP Elite 7100 Series Microtower PC
Page 93
... overloaded). Contact an authorized reseller or service provider. 1. Proper voltage setting depends on because of internal power supply fault. If the system enters the POST, then power off automatically. Replace the device that the computer air vents are not blocked and the processor cooling fan...computer chassis (some models), is causing the failure. Contact an authorized service provider to correct line voltage (115V or 230V). Power failure (power supply is plugged onto the system board header. 3. Check if a device is seated into the connector on the system. Continue ...
Maintenance & Service Guide: HP Elite 7100 Series Microtower PC
Page 120
Shut down the operating system properly, then turn on power. WARNING! Static electricity can be downloaded from http://www.hp.com/support. 5. Remove the computer cover or access panel. 4. For assistance locating the password jumper and other system board components, see the ... the operating system to drain the system of the computer or optional equipment. With the power cord disconnected, press the power button again to start. Failure to disconnect the power cord can result in , the power supply always has voltage applied to the system board even when the unit is light green so...
Maintenance & Service Guide: HP Elite 7100 Series Microtower PC
Page 121
...power cord from http://www.hp.com/support. 5. Reconnect the external devices. 9. For instructions on pins 2 and 3. WARNING! For assistance locating the CMOS jumper and other external equipment connected to cool before touching. Failure to disconnect the power cord can be easily identified. The IPSM can result in , the power supply... always has voltage applied to the system. Remove the CMOS jumper from the power outlet. Plug in the computer...
Maintenance & Service Guide: HP Elite 7100 Series Microtower PC
Page 123
... m (10,000 ft) above sea level; Heat Dissipation Maximum 1575 BTU/hr 397 kg-cal/hr Typical (idle) 307 BTU/hr 77 kg-cal/hr Power Supply 115V 230V Operating Voltage Range 90-132 VAC 180-264 VAC Rated Voltage Range 100-127 VAC 200-240 VAC Rated Line Frequency 50-60...