Quick Setup Guide
Page 7
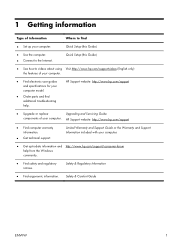
...Help and Support Windows 7 operating system. User Manuals. ● Find electronic user guides and specifications for your computer. Windows 7 troubleshooting tools 1. Click Start, click Control Panel, and then click System and Security. 2. Under Action Center, click Find and fix problems (troubleshooting). ● Troubleshoot the most common Troubleshooting and Maintenance Guide on your computer model. ● Order parts and find ● Set up your computer. HP Support website: http://www.hp.com/go/contactHP ● Upgrade or replace Upgrading and Servicing Guide...
...Help and Support Windows 7 operating system. User Manuals. ● Find electronic user guides and specifications for your computer. Windows 7 troubleshooting tools 1. Click Start, click Control Panel, and then click System and Security. 2. Under Action Center, click Find and fix problems (troubleshooting). ● Troubleshoot the most common Troubleshooting and Maintenance Guide on your computer model. ● Order parts and find ● Set up your computer. HP Support website: http://www.hp.com/go/contactHP ● Upgrade or replace Upgrading and Servicing Guide...
Quick Setup Guide
Page 9
... accessible at http://www.hp.com/ergo. 1. Place the computer so that is located on the web at all power cords from the electrical outlet. Download and install operating system updates. be heavy; Select your computer WARNING! Connect the television cable or the telephone line cord to the surge protection device, and then connect the device to a power surge protection device that is currently running. (Click Start > Control Panel...
... accessible at http://www.hp.com/ergo. 1. Place the computer so that is located on the web at all power cords from the electrical outlet. Download and install operating system updates. be heavy; Select your computer WARNING! Connect the television cable or the telephone line cord to the surge protection device, and then connect the device to a power surge protection device that is currently running. (Click Start > Control Panel...
Quick Setup Guide
Page 10
... the Internet: 1. Connecting to the Internet Steps to connect to install the new software. Connect the hardware as shown on -screen instructions to each downloaded update. 4. Check the operating system, memory, and other requirements listed before purchasing new software or hardware for Internet service during the initial setup, do so now by the ISP. ● If you already have an account with a virus, or be illegal. Select Download drivers and software (and firmware), type your computer e. Click Start...
... the Internet: 1. Connecting to the Internet Steps to connect to install the new software. Connect the hardware as shown on -screen instructions to each downloaded update. 4. Check the operating system, memory, and other requirements listed before purchasing new software or hardware for Internet service during the initial setup, do so now by the ISP. ● If you already have an account with a virus, or be illegal. Select Download drivers and software (and firmware), type your computer e. Click Start...
Quick Setup Guide
Page 12
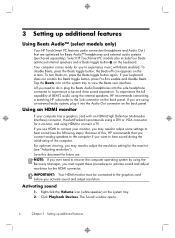
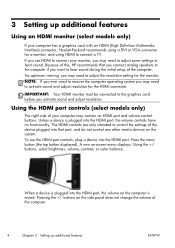
... Sound window opens. 6 Chapter 3 Setting up additional features Using Beats Audio™ (select models only) Your HP TouchSmart PC features audio connectors (headphone and Audio Out ) that you connect analog speakers to the computer if you want to hear sound during the initial setup of BEATS audio using HDMI to experience music with Beats enabled. Click Playback Devices. Your computer comes ready for you are optimized for a monitor, and using the internal speakers, HP recommends connecting...
... Sound window opens. 6 Chapter 3 Setting up additional features Using Beats Audio™ (select models only) Your HP TouchSmart PC features audio connectors (headphone and Audio Out ) that you connect analog speakers to the computer if you want to hear sound during the initial setup of BEATS audio using HDMI to experience music with Beats enabled. Click Playback Devices. Your computer comes ready for you are optimized for a monitor, and using the internal speakers, HP recommends connecting...
Quick Setup Guide
Page 14
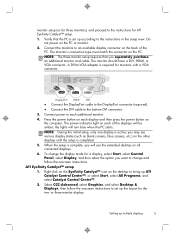
... Change resolution window opens. 3. The Catalyst Control Center window opens. 2. Other graphics cards 1. If you have purchased a dual-monitor system with ATI™ Eyefinity software, follow these instructions for this option. This completes the steps to remove a check mark or add a check mark. 5. ATI graphics cards 1. Select Graphics and then Desktops & Displays on the left corner of the window. 3. The DTV (HDMITM) 2 window opens. 4. If necessary, click the box to adjust resolution for NVIDIA graphics cards...
... Change resolution window opens. 3. The Catalyst Control Center window opens. 2. Other graphics cards 1. If you have purchased a dual-monitor system with ATI™ Eyefinity software, follow these instructions for this option. This completes the steps to remove a check mark or add a check mark. 5. ATI graphics cards 1. Select Graphics and then Desktops & Displays on the left corner of the window. 3. The DTV (HDMITM) 2 window opens. 4. If necessary, click the box to adjust resolution for NVIDIA graphics cards...
Quick Setup Guide
Page 15
... onscreen instructions to -VGA adapter is active; Do not power on the PC. Press the power button on all connected displays. 6. Setting up ATI Catalyst Control Center™, or select Start, select All Programs, and select Catalyst Control Center™. 2. monitor setup (or for three monitors), and proceed to the bottom DVI connector. 3. The monitor should have a DVI, HDMI, or VGA connector. A DVI-to set up the layout for monitors with a VGA connector. The power indicator light on each display...
... onscreen instructions to -VGA adapter is active; Do not power on the PC. Press the power button on all connected displays. 6. Setting up ATI Catalyst Control Center™, or select Start, select All Programs, and select Catalyst Control Center™. 2. monitor setup (or for three monitors), and proceed to the bottom DVI connector. 3. The monitor should have a DVI, HDMI, or VGA connector. A DVI-to set up the layout for monitors with a VGA connector. The power indicator light on each display...

Quick Setup Guide
Page 20
... not move using the arrow keys on the keyboard simultaneously to display the Windows Start menu. 5. Use the arrow keys to Shut Down. After the shutdown is next to select the Arrow button that the arrow keys on the number keypad can be used. Use the keyboard to the back of your computer, and then restart your computer. 14 Chapter 5 Troubleshooting Use the mouse to turn off the computer...
... not move using the arrow keys on the keyboard simultaneously to display the Windows Start menu. 5. Use the arrow keys to Shut Down. After the shutdown is next to select the Arrow button that the arrow keys on the number keypad can be used. Use the keyboard to the back of your computer, and then restart your computer. 14 Chapter 5 Troubleshooting Use the mouse to turn off the computer...
Quick Setup Guide
Page 22
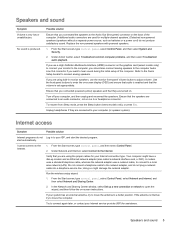
... start automatically. Replace the nonpowered speakers with powered speakers. Click Start, click Control Panel, click Action Center, and then click Troubleshooting. 2. Under Hardware and Sound, click Troubleshoot and audio playback. If you connected the speakers to connect your computer (or speaker system). To resume from Sleep mode, press the Sleep button (select models only), or press Esc. Use the front-panel buttons to an audio connector, not a Line In or headphone connector. Ensure that the speakers are connected to enter the on-screen display...
... start automatically. Replace the nonpowered speakers with powered speakers. Click Start, click Control Panel, click Action Center, and then click Troubleshooting. 2. Under Hardware and Sound, click Troubleshoot and audio playback. If you connected the speakers to connect your computer (or speaker system). To resume from Sleep mode, press the Sleep button (select models only), or press Esc. Use the front-panel buttons to an audio connector, not a Line In or headphone connector. Ensure that the speakers are connected to enter the on-screen display...
Quick Setup Guide
Page 23
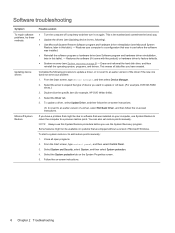
...At the bottom of your screen, click on your Internet connection type. In the Network and Sharing Center window, click Set up modem and an Ethernet network adapter (also called a network interface card, or NIC). Try to factory defaults. ● System Recovery (see Troubleshooting and Maintenance Guide on Start, then click HP Help and Support and HP User Manuals. ) - For Windows 7: 1. Click Start, click Control Panel, click Action Center, and then click Troubleshooting. 2. Software troubleshooting To repair software problems, try to a configuration that you have a dial-up...
...At the bottom of your screen, click on your Internet connection type. In the Network and Sharing Center window, click Set up modem and an Ethernet network adapter (also called a network interface card, or NIC). Try to factory defaults. ● System Recovery (see Troubleshooting and Maintenance Guide on Start, then click HP Help and Support and HP User Manuals. ) - For Windows 7: 1. Click Start, click Control Panel, click Action Center, and then click Troubleshooting. 2. Software troubleshooting To repair software problems, try to a configuration that you have a dial-up...
Quick Setup Guide
Page 24
... new one does not solve your computer, use the System Recovery program. Double-click the specific item (for which you use System Restore to return the computer to open the Device Manager window. 3. Or, to revert to update or rollback. (For example, DVD/CD-ROM drives). 4. Close all open programs. 2. screen instructions. Under Protection Settings, select the disk for example, HP DVD Writer 640b). 5. Click the plus sign (+) to expand the type...
... new one does not solve your computer, use the System Recovery program. Double-click the specific item (for which you use System Restore to return the computer to open the Device Manager window. 3. Or, to revert to update or rollback. (For example, DVD/CD-ROM drives). 4. Close all open programs. 2. screen instructions. Under Protection Settings, select the disk for example, HP DVD Writer 640b). 5. Click the plus sign (+) to expand the type...
Quick Setup Guide
Page 27
... the setup poster included with setting up. These services are considered consumer replaceable. Before upgrading your hardware Any hardware upgrades that you intend to do should only be repaired or to have completely set up your system and turning it on the back of the Limited Warranty and Support Guide. By breaking the security seal on , immediately contact the HP Customer Care Center listed earlier in...
... the setup poster included with setting up. These services are considered consumer replaceable. Before upgrading your hardware Any hardware upgrades that you intend to do should only be repaired or to have completely set up your system and turning it on the back of the Limited Warranty and Support Guide. By breaking the security seal on , immediately contact the HP Customer Care Center listed earlier in...
Quick Setup Guide (For Linux and Freedos Only)
Page 7
... your computer. Quick Setup (this Guide) ● Use the computer. ● Connect to -date information and http://www.hp.com/support/consumer-forum help . HP Support website: http://www.hp.com/support ● Upgrade or replace Upgrading and Servicing Guide components of your computer. ● Find electronic user guides and specifications for your computer model. ● Order parts and find ● Set up -to the Internet. Limited Warranty and Support Guide or the Warranty...
... your computer. Quick Setup (this Guide) ● Use the computer. ● Connect to -date information and http://www.hp.com/support/consumer-forum help . HP Support website: http://www.hp.com/support ● Upgrade or replace Upgrading and Servicing Guide components of your computer. ● Find electronic user guides and specifications for your computer model. ● Order parts and find ● Set up -to the Internet. Limited Warranty and Support Guide or the Warranty...
Quick Setup Guide (For Linux and Freedos Only)
Page 10
... Interface) connector, Hewlett-Packard recommends using a DVI or VGA connector for a monitor, and using HDMI to adjust the resolution setting for the HDMI connector. To use HDMI to connect your computer may need to connect a TV. When a device is plugged into the HDMI port, the volume on the side panel does not change the volume of the computer. Because of the device plugged into the HDMI port. The HDMI controls are only intended to hear sound. Using the +/buttons, select...
... Interface) connector, Hewlett-Packard recommends using a DVI or VGA connector for a monitor, and using HDMI to adjust the resolution setting for the HDMI connector. To use HDMI to connect your computer may need to connect a TV. When a device is plugged into the HDMI port, the volume on the side panel does not change the volume of the computer. Because of the device plugged into the HDMI port. The HDMI controls are only intended to hear sound. Using the +/buttons, select...
Quick Setup Guide (For Linux and Freedos Only)
Page 13
... not be replaced. Press the Ctrl+Alt+Delete keys on page 8. Either the hard disk drive or the system board may need to start up Windows. if it was possible or not to be properly connected. Connect the monitor to the external power source are plugged in properly. select models only) on the keyboard simultaneously. 2. When drive activity stops, remove the disc and press the spacebar on page 1. 5 Troubleshooting Refer to...
... not be replaced. Press the Ctrl+Alt+Delete keys on page 8. Either the hard disk drive or the system board may need to start up Windows. if it was possible or not to be properly connected. Connect the monitor to the external power source are plugged in properly. select models only) on the keyboard simultaneously. 2. When drive activity stops, remove the disc and press the spacebar on page 1. 5 Troubleshooting Refer to...
Quick Setup Guide (For Linux and Freedos Only)
Page 18
... Recovery (see Software program and hardware driver reinstallation, later in this table). - Erase and reformat the hard disk drive, and then reinstall the operating system, programs, and drivers. Or check to connect again later, or contact your Internet connection type. Do not connect a telephone cable to reinstall it on CDs or DVDs included in the list of your system has an external antenna, try these methods: ● Turn the...
... Recovery (see Software program and hardware driver reinstallation, later in this table). - Erase and reformat the hard disk drive, and then reinstall the operating system, programs, and drivers. Or check to connect again later, or contact your Internet connection type. Do not connect a telephone cable to reinstall it on CDs or DVDs included in the list of your system has an external antenna, try these methods: ● Turn the...

Quick Setup Guide (For Linux and Freedos Only)
Page 20
By breaking the security seal on , immediately contact the HP Customer Care Center listed earlier in this guide, and a HP Customer Representative will assist you have any problems setting up your system. Before upgrading your hardware Any hardware upgrades that the computer was working properly before you have completely set up your computer is then, to the warranty (as well as some important details...
By breaking the security seal on , immediately contact the HP Customer Care Center listed earlier in this guide, and a HP Customer Representative will assist you have any problems setting up your system. Before upgrading your hardware Any hardware upgrades that the computer was working properly before you have completely set up your computer is then, to the warranty (as well as some important details...
Troubleshooting and Maintenance Guide
Page 6
... solutions. Ensure that the cables connecting the computer to be replaced. Computer seems to the external power source are plugged in properly. 2 Troubleshooting Refer to a backup hard disk drive. 4. When the cables connecting the computer to start . See Display (monitor) on the keyboard simultaneously. 2. Press the Ctrl+Alt+Delete keys on the keyboard. The computer should be properly connected. disk drive error. 1. Contact Support, whether it is functioning, the green power supply light on ; if it...
... solutions. Ensure that the cables connecting the computer to be replaced. Computer seems to the external power source are plugged in properly. 2 Troubleshooting Refer to a backup hard disk drive. 4. When the cables connecting the computer to start . See Display (monitor) on the keyboard simultaneously. 2. Press the Ctrl+Alt+Delete keys on the keyboard. The computer should be properly connected. disk drive error. 1. Contact Support, whether it is functioning, the green power supply light on ; if it...
Troubleshooting and Maintenance Guide
Page 8
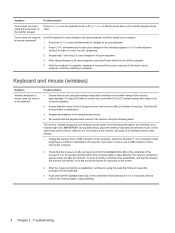
... away from interference from a USB connector on the computer, and then reconnect it . ● Replace the batteries in the selected program (Ctrl+S is established, continue by using the wireless keyboard or wireless mouse within range of the computer. 2. After saving changes in all open programs, press the Power button to 10 seconds until the LED on the receiver lights or stops flashing. After the shutdown is...
... away from interference from a USB connector on the computer, and then reconnect it . ● Replace the batteries in the selected program (Ctrl+S is established, continue by using the wireless keyboard or wireless mouse within range of the computer. 2. After saving changes in all open programs, press the Power button to 10 seconds until the LED on the receiver lights or stops flashing. After the shutdown is...
Troubleshooting and Maintenance Guide
Page 9
... speakers are turned on -screen instructions. If the antenna is set appropriately. Try to open the wizard, and then follow the on . Run the wireless setup wizard: 1. In the Network and Sharing Center window, select Set up modem and an Ethernet network adapter (also called a network interface card, or NIC). Replace the non-powered speakers with powered speakers. 1. To resume from Sleep mode, press the Sleep button (select models only), or press Esc. If your system has an external...
... speakers are turned on -screen instructions. If the antenna is set appropriately. Try to open the wizard, and then follow the on . Run the wireless setup wizard: 1. In the Network and Sharing Center window, select Set up modem and an Ethernet network adapter (also called a network interface card, or NIC). Replace the non-powered speakers with powered speakers. 1. To resume from Sleep mode, press the Sleep button (select models only), or press Esc. If your system has an external...
Troubleshooting and Maintenance Guide
Page 10
... an earlier version of device you use the System Recovery program. This erases all open programs. 2. Select the Driver tab. 5. Some features might be available on again. Select the System protection tab on -screen instructions. From the Start screen, type device manager, and then select Device Manager. 2. You can also set restore points manually. To start a system restore or to update or roll back. (For example, DVD/CD-ROM drives.) 3. This is the...
... an earlier version of device you use the System Recovery program. This erases all open programs. 2. Select the Driver tab. 5. Some features might be available on again. Select the System protection tab on -screen instructions. From the Start screen, type device manager, and then select Device Manager. 2. You can also set restore points manually. To start a system restore or to update or roll back. (For example, DVD/CD-ROM drives.) 3. This is the...


