Quick Setup Guide
Page 5
... software issues. From the Start screen, type h, and then select Help and Support. support, go to videos about using the features of your computer. Windows troubleshooting tools 1. From the Start screen, type c, and then select Control Panel. 2. then select User guides. ● Find electronic user guides and specifications for your computer model. ● Order parts and find ● Set up your computer. Visit http://www.hp.com/supportvideos (English only) ● Learn how to driver updates...
... software issues. From the Start screen, type h, and then select Help and Support. support, go to videos about using the features of your computer. Windows troubleshooting tools 1. From the Start screen, type c, and then select Control Panel. 2. then select User guides. ● Find electronic user guides and specifications for your computer model. ● Order parts and find ● Set up your computer. Visit http://www.hp.com/supportvideos (English only) ● Learn how to driver updates...
Quick Setup Guide
Page 7
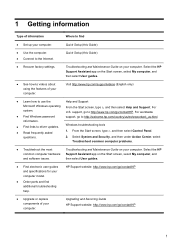
... and cabling is preset for your computer. a. Find out what operating system and version your internet browser and go to open the enclosure of the CD or DVD drives. • The power supply is not in a walkway or where it can cause fire or electrocution. • Do not disable the power cord grounding plug. The guide is currently running. (From the Start screen, type c, select Control Panel, select...
... and cabling is preset for your computer. a. Find out what operating system and version your internet browser and go to open the enclosure of the CD or DVD drives. • The power supply is not in a walkway or where it can cause fire or electrocution. • Do not disable the power cord grounding plug. The guide is currently running. (From the Start screen, type c, select Control Panel, select...
Quick Setup Guide
Page 8
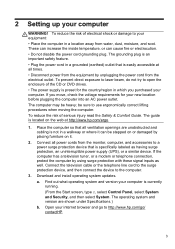
... the instructions provided by the ISP. 3. After you complete the initial computer setup, you wish to each downloaded update. 4. NOTE: Use only licensed original software. Using your Internet connection through your computer model name and number in the product field, and press Enter. c. Select the HP Support Assistant app on page 13. 4 Chapter 2 Setting up with a virus, or be illegal. Select Download drivers and software (and firmware), type your ISP, open...
... the instructions provided by the ISP. 3. After you complete the initial computer setup, you wish to each downloaded update. 4. NOTE: Use only licensed original software. Using your Internet connection through your computer model name and number in the product field, and press Enter. c. Select the HP Support Assistant app on page 13. 4 Chapter 2 Setting up with a virus, or be illegal. Select Download drivers and software (and firmware), type your ISP, open...
Quick Setup Guide
Page 9
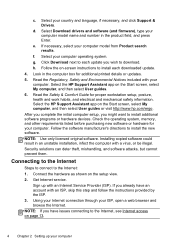
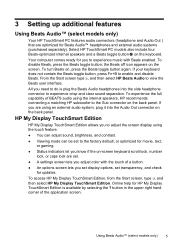
... is plug the Beats Audio headphones into the Audio Out connector on the back panel. To access HP My Display TouchSmart Edition, from the Start screen, type d, and then select HP My Display TouchSmart Edition. Online help for Beats Audio™ headphones and external audio systems (purchased separately). Select HP TouchSmart PC models also include four Beats-optimized internal speakers and a Beats toggle button on the screen. Using Beats Audio™ (select models only) 5 To turn...
... is plug the Beats Audio headphones into the Audio Out connector on the back panel. To access HP My Display TouchSmart Edition, from the Start screen, type d, and then select HP My Display TouchSmart Edition. Online help for Beats Audio™ headphones and external audio systems (purchased separately). Select HP TouchSmart PC models also include four Beats-optimized internal speakers and a Beats toggle button on the screen. Using Beats Audio™ (select models only) 5 To turn...

Quick Setup Guide
Page 10
... the +/- Press the menu button (the top button displayed). The HDMI controls are only intended to control the settings of your computer may contain an HDMI port and volume control buttons. buttons on the computer is plugged into the HDMI port, the volume on the side panel does not change the volume of the computer. 6 Chapter 3 Setting up additional features Using the +/buttons, select brightness, volume, contrast, or color balance. A new on-screen menu displays.
... the +/- Press the menu button (the top button displayed). The HDMI controls are only intended to control the settings of your computer may contain an HDMI port and volume control buttons. buttons on the computer is plugged into the HDMI port, the volume on the side panel does not change the volume of the computer. 6 Chapter 3 Setting up additional features Using the +/buttons, select brightness, volume, contrast, or color balance. A new on-screen menu displays.
Quick Setup Guide
Page 13
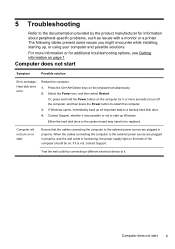
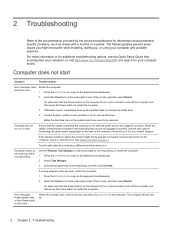
... Support. Press the Ctrl+Alt+Delete keys on or start up , or using your computer and possible solutions. If Windows opens, immediately back up all important data to restart the computer. 3. 5 Troubleshooting Refer to the documentation provided by connecting a different electrical device to it. Computer does not start 9 Computer does not start Symptom Possible solution Error message: Hard disk drive error. Either the hard disk drive or the system board...
... Support. Press the Ctrl+Alt+Delete keys on or start up , or using your computer and possible solutions. If Windows opens, immediately back up all important data to restart the computer. 3. 5 Troubleshooting Refer to the documentation provided by connecting a different electrical device to it. Computer does not start 9 Computer does not start Symptom Possible solution Error message: Hard disk drive error. Either the hard disk drive or the system board...

Quick Setup Guide
Page 15
... that the arrow keys on the computer. Keyboard and mouse (general) Symptom Possible solution Keyboard commands and typing are not recognized by the computer. Press the Power button to save changes in all open program. 2. Mouse (with cable) does not work or is complete, unplug and reconnect the mouse connector to save your computer. Unplug and reconnect the mouse cable to resume from Sleep mode. Cursor does not...
... that the arrow keys on the computer. Keyboard and mouse (general) Symptom Possible solution Keyboard commands and typing are not recognized by the computer. Press the Power button to save changes in all open program. 2. Mouse (with cable) does not work or is complete, unplug and reconnect the mouse connector to save your computer. Unplug and reconnect the mouse cable to resume from Sleep mode. Cursor does not...
Quick Setup Guide
Page 16
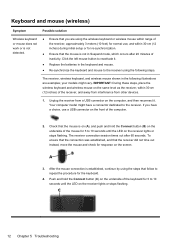
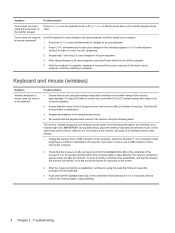
... receiver lights or stops flashing. The receiver connection session times out after 20 minutes of the receiver, approximately 3 meters (10 feet) for 5 to 10 seconds until the LED on the receiver lights or stops flashing. Your computer model might vary. Check that the mouse is on (A), and push and hold the Connect button (C) on the underside of the keyboard for normal use a USB connector on...
... receiver lights or stops flashing. The receiver connection session times out after 20 minutes of the receiver, approximately 3 meters (10 feet) for 5 to 10 seconds until the LED on the receiver lights or stops flashing. Your computer model might vary. Check that the mouse is on (A), and push and hold the Connect button (C) on the underside of the keyboard for normal use a USB connector on...
Quick Setup Guide
Page 17
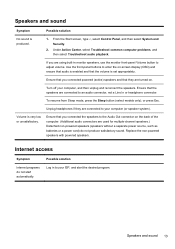
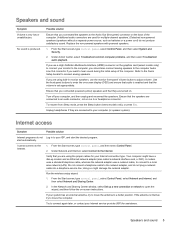
... Center, select Troubleshoot common computer problems, and then select Troubleshoot audio playback. Possible solution Log in monitor speakers, use the monitor front-panel Volume button to your computer (or speaker system). Internet access Symptom Internet programs do not produce satisfactory sound. Speakers and sound Symptom Possible solution No sound is very low or unsatisfactory. Ensure that the volume is set appropriately. Replace the non-powered speakers with powered speakers. Speakers and sound 13 Ensure that you connected the speakers...
... Center, select Troubleshoot common computer problems, and then select Troubleshoot audio playback. Possible solution Log in monitor speakers, use the monitor front-panel Volume button to your computer (or speaker system). Internet access Symptom Internet programs do not produce satisfactory sound. Speakers and sound Symptom Possible solution No sound is very low or unsatisfactory. Ensure that the volume is set appropriately. Replace the non-powered speakers with powered speakers. Speakers and sound 13 Ensure that you connected the speakers...
Quick Setup Guide
Page 18
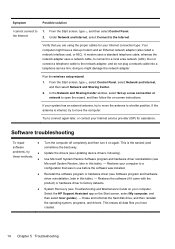
... Center. 2. If your system has an external antenna, try to move the antenna to move the computer. problems, try ● Update the drivers (see Troubleshooting and Maintenance Guide on -screen instructions. From the Start screen, type c, and then select Control Panel. 2. Verify that was in use before the software was installed. ● Reinstall the software program or hardware driver (see Microsoft System Restore, later in this table). - Do not connect a telephone cable to the Internet...
... Center. 2. If your system has an external antenna, try to move the antenna to move the computer. problems, try ● Update the drivers (see Troubleshooting and Maintenance Guide on -screen instructions. From the Start screen, type c, and then select Control Panel. 2. Verify that was in use before the software was installed. ● Reinstall the software program or hardware driver (see Microsoft System Restore, later in this table). - Do not connect a telephone cable to the Internet...
Quick Setup Guide
Page 19
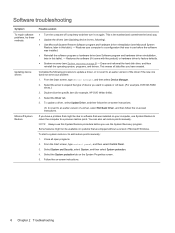
... area, select Device Manager. 3. To update a driver, select Update Driver, and then follow the on-screen instructions. From the Start screen, type c, and then select Control Panel. 3. Select the Driver tab. 6. Close all open programs. 2. Select the System Protection tab on -screen instructions. Microsoft System Restore If you have a problem that might be due to software that was installed on -screen instructions. You can also set restore points manually. To start a system restore or to a previous restore point. Follow...
... area, select Device Manager. 3. To update a driver, select Update Driver, and then follow the on-screen instructions. From the Start screen, type c, and then select Control Panel. 3. Select the Driver tab. 6. Close all open programs. 2. Select the System Protection tab on -screen instructions. Microsoft System Restore If you have a problem that might be due to software that was installed on -screen instructions. You can also set restore points manually. To start a system restore or to a previous restore point. Follow...
Quick Setup Guide
Page 22
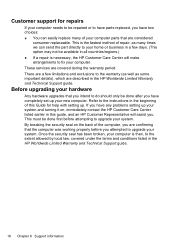
... we can send the part directly to the instructions in the HP Worldwide Limited Warranty and Technical Support guide. 18 Chapter 6 Support information By breaking the security seal on , immediately contact the HP Customer Care Center listed earlier in this Guide for repairs If your computer needs to be repaired or to have parts replaced, you have completely set up your system and turning it on the back...
... we can send the part directly to the instructions in the HP Worldwide Limited Warranty and Technical Support guide. 18 Chapter 6 Support information By breaking the security seal on , immediately contact the HP Customer Care Center listed earlier in this Guide for repairs If your computer needs to be repaired or to have parts replaced, you have completely set up your system and turning it on the back...
Troubleshooting and Maintenance Guide
Page 2
... used for HP products and services are trademarks of system resource requirements. Turn on equipment that is displayed. Confirm the Total Installed Memory. No part of this document may appear to 1,000,000 bytes, and one partition on the hard disk drive at a time. Reverse engineering or disassembly is protected by copyright law. First Edition: September 2013 Document Part Number: 701334-002 Understanding hard disk drive space The hard disk drive...
... used for HP products and services are trademarks of system resource requirements. Turn on equipment that is displayed. Confirm the Total Installed Memory. No part of this document may appear to 1,000,000 bytes, and one partition on the hard disk drive at a time. Reverse engineering or disassembly is protected by copyright law. First Edition: September 2013 Document Part Number: 701334-002 Understanding hard disk drive space The hard disk drive...
Troubleshooting and Maintenance Guide
Page 6
... click End task. Error message: Invalid system disk or Non-System disk or Disk error. 2 Troubleshooting Refer to be replaced. Either the hard disk drive or the system board may need to the documentation provided by connecting a different electrical device to the external power source are plugged in properly, and the wall outlet is not, contact Support. Use the Windows Task Manager to start . Select the program that the cables connecting the computer to...
... click End task. Error message: Invalid system disk or Non-System disk or Disk error. 2 Troubleshooting Refer to be replaced. Either the hard disk drive or the system board may need to the documentation provided by connecting a different electrical device to the external power source are plugged in properly, and the wall outlet is not, contact Support. Use the Windows Task Manager to start . Select the program that the cables connecting the computer to...

Troubleshooting and Maintenance Guide
Page 7
... computer. Keyboard and mouse (with cable) does not work or is running - Unplug and reconnect the mouse cable to make the screen display visible again. Inspect the monitor video connector for bent pins: ● If any of the monitor and to the documentation that the internal fan is not detected. Power 3 NOTE: In addition to the information listed here, also refer to the wall outlet. Reconnect the power plug to the...
... computer. Keyboard and mouse (with cable) does not work or is running - Unplug and reconnect the mouse cable to make the screen display visible again. Inspect the monitor video connector for bent pins: ● If any of the monitor and to the documentation that the internal fan is not detected. Power 3 NOTE: In addition to the information listed here, also refer to the wall outlet. Reconnect the power plug to the...
Troubleshooting and Maintenance Guide
Page 8
.... 5. The receiver, wireless keyboard, and wireless mouse shown in the selected program (Ctrl+S is complete, unplug and reconnect the mouse connector to 10 seconds until the LED on the front of inactivity. Push and hold the Connect button (B) on the underside of the receiver, and away from interference from a USB connector on the receiver lights or stops flashing. 4 Chapter 2 Troubleshooting After saving changes in all...
.... 5. The receiver, wireless keyboard, and wireless mouse shown in the selected program (Ctrl+S is complete, unplug and reconnect the mouse connector to 10 seconds until the LED on the front of inactivity. Push and hold the Connect button (B) on the underside of the receiver, and away from interference from a USB connector on the receiver lights or stops flashing. 4 Chapter 2 Troubleshooting After saving changes in all...
Troubleshooting and Maintenance Guide
Page 9
... not plug a network cable into a telephone service line; Speakers and sound 5 Speakers and sound Symptom Volume is internal, try to move the computer. To resume from Sleep mode, press the Sleep button (select models only), or press Esc. start the desired program. Under Network and Internet, select Connect to a local area network (LAN). Do not connect a telephone cable to the network adapter, and do not Log in monitor speakers, use a High-Definition Multimedia Interface (HDMI) connector on the graphics card (select models...
... not plug a network cable into a telephone service line; Speakers and sound 5 Speakers and sound Symptom Volume is internal, try to move the computer. To resume from Sleep mode, press the Sleep button (select models only), or press Esc. start the desired program. Under Network and Internet, select Connect to a local area network (LAN). Do not connect a telephone cable to the network adapter, and do not Log in monitor speakers, use a High-Definition Multimedia Interface (HDMI) connector on the graphics card (select models...
Troubleshooting and Maintenance Guide
Page 10
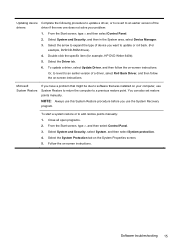
... Start screen, type device manager, and then select Device Manager. 2. Double-click the specific item (for example, HP DVD Writer 640b). 4. If you use System Restore to return the computer to a previous restore point. From the Start screen, type control panel, and then select Control Panel. 3. Select System and Security, select System, and then select System protection. 4. You can also set restore points manually. To start a system restore or to add restore points manually: 1. Erase and reformat the hard disk drive...
... Start screen, type device manager, and then select Device Manager. 2. Double-click the specific item (for example, HP DVD Writer 640b). 4. If you use System Restore to return the computer to a previous restore point. From the Start screen, type control panel, and then select Control Panel. 3. Select System and Security, select System, and then select System protection. 4. You can also set restore points manually. To start a system restore or to add restore points manually: 1. Erase and reformat the hard disk drive...
Troubleshooting and Maintenance Guide
Page 13
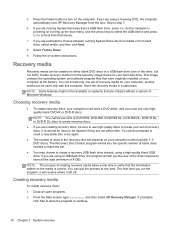
... Creating recovery media on the screen. 5. If using recovery DVDs, insert recovery disc #1 into a USB port. 3. When the recovery is complete, turn the computer back on -screen instructions. If using a recovery USB flash drive, insert it prompts you want to a removable disc or USB flash drive. Or, if the computer is not responding, press and hold the Power button until the Windows is working , follow these steps to restart the computer and run HP Recovery Manager from the computer except the monitor, keyboard, and mouse...
... Creating recovery media on the screen. 5. If using recovery DVDs, insert recovery disc #1 into a USB port. 3. When the recovery is complete, turn the computer back on -screen instructions. If using a recovery USB flash drive, insert it prompts you want to a removable disc or USB flash drive. Or, if the computer is not responding, press and hold the Power button until the Windows is working , follow these steps to restart the computer and run HP Recovery Manager from the computer except the monitor, keyboard, and mouse...
Troubleshooting and Maintenance Guide
Page 14
... media or from that are prompted to create a recovery USB flash drive instead, using a recovery DVD, the computer automatically runs HP Recovery Manager from the recovery image stored on -screen instructions. 5. If you are not defect-free. NOTE: The process of recovery discs. Select Factory Reset. 9. This image contains the operating system and software program files that were originally installed on systems that device. 7. You can be prompted to insert a new blank disc to use only highquality blank DVD+R or DVD-R discs...
... media or from that are prompted to create a recovery USB flash drive instead, using a recovery DVD, the computer automatically runs HP Recovery Manager from the recovery image stored on -screen instructions. 5. If you are not defect-free. NOTE: The process of recovery discs. Select Factory Reset. 9. This image contains the operating system and software program files that were originally installed on systems that device. 7. You can be prompted to insert a new blank disc to use only highquality blank DVD+R or DVD-R discs...


