HP Notebook Reference Guide - Windows 7
Page 27
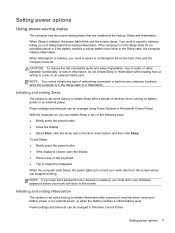
... Hibernation while reading from or writing to a disc or an external media card. With the computer on external power. When the computer exits Sleep, the power lights turn on the hard drive and the computer turns off. When Hibernation is initiated, your work will return to a hibernation file on and your work is initiated, the power lights blink and the screen clears. Power settings and timeouts can be required on wakeup, you...
... Hibernation while reading from or writing to a disc or an external media card. With the computer on external power. When the computer exits Sleep, the power lights turn on the hard drive and the computer turns off. When Hibernation is initiated, your work will return to a hibernation file on and your work is initiated, the power lights blink and the screen clears. Power settings and timeouts can be required on wakeup, you...
HP Notebook Reference Guide - Windows 7
Page 32
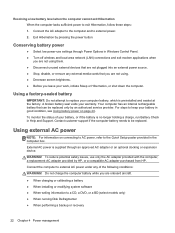
... the factory. External AC power is no longer holding a charge, run Battery Check in Windows Control Panel. ● Turn off wireless and local area network (LAN) connections and exit modem applications when you are not using . ● Decrease screen brightness. ● Before you are onboard aircraft. ● When charging or calibrating a battery ● When installing or modifying system software ● When writing information to external AC power under any external media cards that can be replaced. Connect...
... the factory. External AC power is no longer holding a charge, run Battery Check in Windows Control Panel. ● Turn off wireless and local area network (LAN) connections and exit modem applications when you are not using . ● Decrease screen brightness. ● Before you are onboard aircraft. ● When charging or calibrating a battery ● When installing or modifying system software ● When writing information to external AC power under any external media cards that can be replaced. Connect...
HP Notebook Reference Guide - Windows 7
Page 41
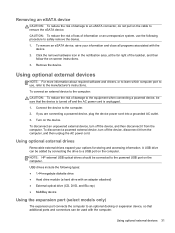
... connecting a powered device, plug the device power cord into a grounded AC outlet. 3. NOTE: HP external USB optical drives should be sure that additional ports and connectors can be used with the computer. Removing an eSATA device CAUTION: To reduce the risk of the taskbar, and then follow the on-screen instructions. 3. Connect the device to safely remove the device. 1. Turn on the device. To remove an eSATA device, save your options for storing and accessing information. Using optional external drives Removable external drives...
... connecting a powered device, plug the device power cord into a grounded AC outlet. 3. NOTE: HP external USB optical drives should be sure that additional ports and connectors can be used with the computer. Removing an eSATA device CAUTION: To reduce the risk of the taskbar, and then follow the on-screen instructions. 3. Connect the device to safely remove the device. 1. Turn on the device. To remove an eSATA device, save your options for storing and accessing information. Using optional external drives Removable external drives...
HP Notebook Reference Guide - Windows 7
Page 44
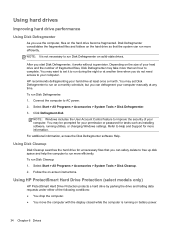
... running utilities, or changing Windows settings. Connect the computer to run more efficiently. Using Disk Cleanup Disk Cleanup searches the hard drive for more than an hour to complete. Follow the on the hard drive become fragmented. You may be prompted for your permission or password for tasks such as installing software, running on solid-state drives. HP recommends defragmenting your computer. Click Defragment disk. You may set it works...
... running utilities, or changing Windows settings. Connect the computer to run more efficiently. Using Disk Cleanup Disk Cleanup searches the hard drive for more than an hour to complete. Follow the on the hard drive become fragmented. You may be prompted for your permission or password for tasks such as installing software, running on solid-state drives. HP recommends defragmenting your computer. Click Defragment disk. You may set it works...

HP Notebook Reference Guide - Windows 7
Page 51
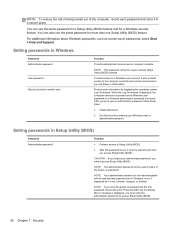
... want to control access to secure your computer for service, back up and delete confidential files, and remove all password settings. NOTE: Some features listed in the non-Windows Setup Utility (BIOS) that you choose to your information. Passwords can be set , depending on password ● Fingerprint reader Antivirus software ● Firewall software ● Windows updates ● File encryption Administrator password Critical security updates from Microsoft User password Security cable slot (used with an optional security cable) Using passwords A password is...
... want to control access to secure your computer for service, back up and delete confidential files, and remove all password settings. NOTE: Some features listed in the non-Windows Setup Utility (BIOS) that you choose to your information. Passwords can be set , depending on password ● Fingerprint reader Antivirus software ● Firewall software ● Windows updates ● File encryption Administrator password Critical security updates from Microsoft User password Security cable slot (used with an optional security cable) Using passwords A password is...
HP Notebook Reference Guide - Windows 7
Page 52
... administrator password set , entered, changed, or deleted. You can be entered each password and store it displayed as screen-saver passwords, select Start > Help and Support. It also protects access to access Setup Utility (BIOS) contents. NOTE: To reduce the risk of being locked out of the power-on password at the first password check before the "Press the ESC key for a Windows security feature. After you access Setup Utility (BIOS). NOTE: This password cannot be used to...
... administrator password set , entered, changed, or deleted. You can be entered each password and store it displayed as screen-saver passwords, select Start > Help and Support. It also protects access to access Setup Utility (BIOS) contents. NOTE: To reduce the risk of being locked out of the power-on password at the first password check before the "Press the ESC key for a Windows security feature. After you access Setup Utility (BIOS). NOTE: This password cannot be used to...
HP Notebook Reference Guide - Windows 7
Page 58
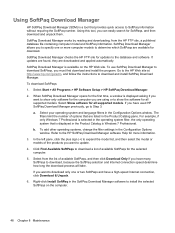
... take. To use SoftPaq Download Manager to download SoftPaqs, you want to download only one or more information. 3. Select Start > All Programs > HP Software Setup > HP SoftPaq Download Manager. 2. When SoftPaq Download Manager opens for the first time, a window is displayed asking if you want to show the software for all supported models. Select Show software for all supported models. To add other operating systems, change the filter settings in the Configuration Options window. Right-click Install SoftPaq in the...
... take. To use SoftPaq Download Manager to download SoftPaqs, you want to download only one or more information. 3. Select Start > All Programs > HP Software Setup > HP SoftPaq Download Manager. 2. When SoftPaq Download Manager opens for the first time, a window is displayed asking if you want to show the software for all supported models. Select Show software for all supported models. To add other operating systems, change the filter settings in the Configuration Options window. Right-click Install SoftPaq in the...
HP Notebook Reference Guide - Windows 7
Page 60
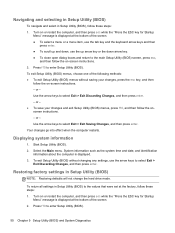
...; To close open dialog boxes and return to select Exit > Exit Discarding Changes, and then press enter. Restoring factory settings in Setup Utility (BIOS) NOTE: Restoring defaults will not change the hard drive mode. Use the arrow keys to enter Setup Utility (BIOS). Select the Main menu. Turn on -screen instructions. 2. Press f10 to select Exit > Exit Saving Changes, and then press enter. Press f10 to select Exit > Exit Discarding Changes, and then press enter. - Start Setup Utility (BIOS). 2. To exit Setup Utility (BIOS) menus, choose...
...; To close open dialog boxes and return to select Exit > Exit Discarding Changes, and then press enter. Restoring factory settings in Setup Utility (BIOS) NOTE: Restoring defaults will not change the hard drive mode. Use the arrow keys to enter Setup Utility (BIOS). Select the Main menu. Turn on -screen instructions. 2. Press f10 to select Exit > Exit Saving Changes, and then press enter. Press f10 to select Exit > Exit Discarding Changes, and then press enter. - Start Setup Utility (BIOS). 2. To exit Setup Utility (BIOS) menus, choose...
HP Notebook Reference Guide - Windows 7
Page 62
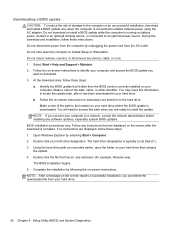
... the screen reports a successful installation, you recorded earlier, open the folder on -screen instructions. Do not download or install a BIOS update while the computer is running on battery power, docked in an optional docking device, or connected to the location on your hard drive designation. b. Make a note of the path to an optional power source. NOTE: If you want to reliable external power using the AC adapter. Identify the BIOS update that are displayed, follow these instructions: Do...
... the screen reports a successful installation, you recorded earlier, open the folder on -screen instructions. Do not download or install a BIOS update while the computer is running on battery power, docked in an optional docking device, or connected to the location on your hard drive designation. b. Make a note of the path to an optional power source. NOTE: If you want to reliable external power using the AC adapter. Identify the BIOS update that are displayed, follow these instructions: Do...
HP Notebook Reference Guide - Windows 7
Page 68
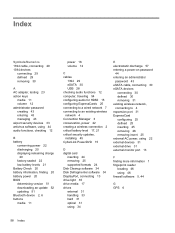
... keys media 11 volume 12 administrator password creating 43 entering 43 managing 43 airport security devices 33 antivirus software, using 44 audio functions, checking 12 B battery conserving power 22 discharging 20 displaying remaining charge 20 factory-sealed 22 low battery levels 21 Battery Check 20 battery information, finding 20 battery power 20 BIOS determining version 51 downloading an update 52 updating 51 Bluetooth device 2, 6 buttons media 11 power 16 volume 12 C cables 1394 29 eSATA 30 USB 28 checking audio functions 12 computer, traveling 54 configuring audio for HDMI...
... keys media 11 volume 12 administrator password creating 43 entering 43 managing 43 airport security devices 33 antivirus software, using 44 audio functions, checking 12 B battery conserving power 22 discharging 20 displaying remaining charge 20 factory-sealed 22 low battery levels 21 Battery Check 20 battery information, finding 20 battery power 20 BIOS determining version 51 downloading an update 52 updating 51 Bluetooth device 2, 6 buttons media 11 power 16 volume 12 C cables 1394 29 eSATA 30 USB 28 checking audio functions 12 computer, traveling 54 configuring audio for HDMI...

HP Notebook Reference Guide - Windows 7
Page 69
...modem cable adapter 8 selecting a location setting 8 N network cable, connecting 9 network icon 2 O operating system controls 4 optical disc inserting 36 removing 37 optical drive 31 optional external devices, using 31 P passwords set in Setup Utility (BIOS) 42 set in Windows 42 ports DisplayPort 13 expansion 31 external monitor 13 HDMI 14 Intel Wireless Display 15 VGA 13 power battery 20 conserving 22 options 17 power button 16 power meter 18 power plans customizing 19 selecting 18 viewing current 18 power switch 16 power-on password creating 44 entering 44 managing 44 power-saving states 17...
...modem cable adapter 8 selecting a location setting 8 N network cable, connecting 9 network icon 2 O operating system controls 4 optical disc inserting 36 removing 37 optical drive 31 optional external devices, using 31 P passwords set in Setup Utility (BIOS) 42 set in Windows 42 ports DisplayPort 13 expansion 31 external monitor 13 HDMI 14 Intel Wireless Display 15 VGA 13 power battery 20 conserving 22 options 17 power button 16 power meter 18 power plans customizing 19 selecting 18 viewing current 18 power switch 16 power-on password creating 44 entering 44 managing 44 power-saving states 17...
Getting Started (2D Models Only)
Page 39
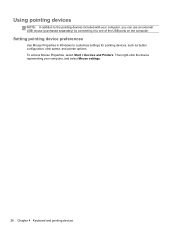
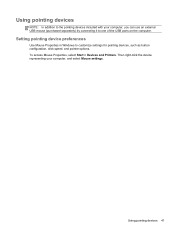
Then right-click the device representing your computer, you can use an external USB mouse (purchased separately) by connecting it to customize settings for pointing devices, such as button configuration, click speed, and pointer options. Setting pointing device preferences Use Mouse Properties in Windows to one of the USB ports on the computer. Using pointing devices NOTE: In addition to the pointing devices included with your computer, and select Mouse settings. 28 Chapter 4 Keyboard and pointing devices To access Mouse Properties, select Start > Devices and Printers.
Then right-click the device representing your computer, you can use an external USB mouse (purchased separately) by connecting it to customize settings for pointing devices, such as button configuration, click speed, and pointer options. Setting pointing device preferences Use Mouse Properties in Windows to one of the USB ports on the computer. Using pointing devices NOTE: In addition to the pointing devices included with your computer, and select Mouse settings. 28 Chapter 4 Keyboard and pointing devices To access Mouse Properties, select Start > Devices and Printers.

Getting Started (2D Models Only)
Page 71
... adapter light 17 action keys Help and Support 25 identifying 14 optical drive eject 26 radiance backlight keyboard 26 screen brightness 25 switching screen image 26 using 25 wireless 26 AMD Catalyst Control Center 9 AMD Eyefinity 8 audio-in (microphone) jack 18 audio-out (headpone) jack 18 B backing up customized window, toolbar, and menu bar settings 53 personal files 53 battery, replacing 33 bays, hard drive 20, 57 Beats Audio 3, 13 Beats Audio button 3 Beats Audio Control Panel 3 Beats Audio hot key 4 Bluetooth label 57 buttons 13 Beats Audio...
... adapter light 17 action keys Help and Support 25 identifying 14 optical drive eject 26 radiance backlight keyboard 26 screen brightness 25 switching screen image 26 using 25 wireless 26 AMD Catalyst Control Center 9 AMD Eyefinity 8 audio-in (microphone) jack 18 audio-out (headpone) jack 18 B backing up customized window, toolbar, and menu bar settings 53 personal files 53 battery, replacing 33 bays, hard drive 20, 57 Beats Audio 3, 13 Beats Audio button 3 Beats Audio Control Panel 3 Beats Audio hot key 4 Bluetooth label 57 buttons 13 Beats Audio...
Getting Started (2D Models Only)
Page 72
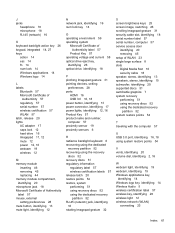
... 57 serial number 57 wireless certification 57 WLAN 57 latch, release 20 lights AC adapter 17 caps lock 12 hard drive 16 Imagepad 11, 12 mute 12 power 12, 16 webcam 19 wireless 12 M memory module inserting 46 removing 45 replacing 44 memory module compartment, identifying 20 microphone jack 18 Microsoft Certificate of Authenticity label 57 mouse, external setting preferences 28 mute button, identifying 13 mute light, identifying 12 N network jack, identifying 16 num lock key 14 O operating environment 59 operating...
... 57 serial number 57 wireless certification 57 WLAN 57 latch, release 20 lights AC adapter 17 caps lock 12 hard drive 16 Imagepad 11, 12 mute 12 power 12, 16 webcam 19 wireless 12 M memory module inserting 46 removing 45 replacing 44 memory module compartment, identifying 20 microphone jack 18 Microsoft Certificate of Authenticity label 57 mouse, external setting preferences 28 mute button, identifying 13 mute light, identifying 12 N network jack, identifying 16 num lock key 14 O operating environment 59 operating...
Getting Started (3D Models Only)
Page 52
Then right-click the device representing your computer, you can use an external USB mouse (purchased separately) by connecting it to one of the USB ports on the computer. Using pointing devices 41 To access Mouse Properties, select Start > Devices and Printers. Using pointing devices NOTE: In addition to the pointing devices included with your computer, and select Mouse settings. Setting pointing device preferences Use Mouse Properties in Windows to customize settings for pointing devices, such as button configuration, click speed, and pointer options.
Then right-click the device representing your computer, you can use an external USB mouse (purchased separately) by connecting it to one of the USB ports on the computer. Using pointing devices 41 To access Mouse Properties, select Start > Devices and Printers. Using pointing devices NOTE: In addition to the pointing devices included with your computer, and select Mouse settings. Setting pointing device preferences Use Mouse Properties in Windows to customize settings for pointing devices, such as button configuration, click speed, and pointer options.

Getting Started (3D Models Only)
Page 85
... 33 lights AC adapter 30 caps lock 25 hard drive 29 Imagepad 24, 25 mute 25 power 25, 29 webcam 32 wireless 25 M memory module inserting 59 removing 58 replacing 57 memory module compartment, identifying 33 microphone jack 31 Microsoft Certificate of Authenticity label 70 mouse, external setting preferences 41 mute button, identifying 26 mute light, identifying 25 N network jack, identifying 29 nose pieces identifying 15 using 19 num lock key 27 O operating environment 72 operating system Microsoft...
... 33 lights AC adapter 30 caps lock 25 hard drive 29 Imagepad 24, 25 mute 25 power 25, 29 webcam 32 wireless 25 M memory module inserting 59 removing 58 replacing 57 memory module compartment, identifying 33 microphone jack 31 Microsoft Certificate of Authenticity label 70 mouse, external setting preferences 41 mute button, identifying 26 mute light, identifying 25 N network jack, identifying 29 nose pieces identifying 15 using 19 num lock key 27 O operating environment 72 operating system Microsoft...
HP ENVY 17 - Maintenance and Service Guide
Page 94
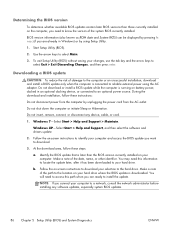
... BIOS) can be displayed by pressing fn +esc (if you connect your hard drive where the BIOS update is connected to reliable external power using Setup Utility. 1. Use the arrow keys to an optional power source. Determining the BIOS version To determine whether available BIOS updates contain later BIOS versions than the BIOS version currently installed on your changes, use the tab key and the arrow keys to select Exit > Exit Discarding Changes, and then press enter. Start Setup Utility (BIOS). 2. Identify the BIOS update...
... BIOS) can be displayed by pressing fn +esc (if you connect your hard drive where the BIOS update is connected to reliable external power using Setup Utility. 1. Use the arrow keys to an optional power source. Determining the BIOS version To determine whether available BIOS updates contain later BIOS versions than the BIOS version currently installed on your changes, use the tab key and the arrow keys to select Exit > Exit Discarding Changes, and then press enter. Start Setup Utility (BIOS). 2. Identify the BIOS update...
HP ENVY 17 - Maintenance and Service Guide
Page 115
... battery removal 39 spare part number 22, 27, 39 battery/hard drive cover illustrated 24 location 16 removal 39 spare part number 39 Beats Audio button 9 Blu-ray ROM DVD±RW Super Multi Double-Layer FX Drive precautions 34 removal 42 spare part number 22, 25, 29, 42 Bluetooth module, spare part number 26, 27 bottom components 16 button components 9 buttons Beats Audio 9 Imagepad 12 Imagepad on/off 12 mute 9 power 9 C cables, service considerations 33 caps lock light 11 Card Reader board removal 64 spare part numbers...
... battery removal 39 spare part number 22, 27, 39 battery/hard drive cover illustrated 24 location 16 removal 39 spare part number 39 Beats Audio button 9 Blu-ray ROM DVD±RW Super Multi Double-Layer FX Drive precautions 34 removal 42 spare part number 22, 25, 29, 42 Bluetooth module, spare part number 26, 27 bottom components 16 button components 9 buttons Beats Audio 9 Imagepad 12 Imagepad on/off 12 mute 9 power 9 C cables, service considerations 33 caps lock light 11 Card Reader board removal 64 spare part numbers...
HP ENVY 17 - Maintenance and Service Guide
Page 116
... model name 1 mSATA drive removal 47 spare part numbers 29, 47 mute light 11 mute location 9 23, 26, N network jack 14 num lock key 10 numeric keypad 10 O operating system, product description 6 optical drive location 13 precautions 34 product description 3 removal 42 spare part numbers 22, 25, 29, 42 P packaging guidelines 36 plastic parts, service considerations 33 pointing device, product description 5 ports DisplayPort 14 HDMI 14 product description 5 USB 13, 14 power button 9 power button board removal 68 spare part number...
... model name 1 mSATA drive removal 47 spare part numbers 29, 47 mute light 11 mute location 9 23, 26, N network jack 14 num lock key 10 numeric keypad 10 O operating system, product description 6 optical drive location 13 precautions 34 product description 3 removal 42 spare part numbers 22, 25, 29, 42 P packaging guidelines 36 plastic parts, service considerations 33 pointing device, product description 5 ports DisplayPort 14 HDMI 14 product description 5 USB 13, 14 power button 9 power button board removal 68 spare part number...
HP ENVY 17 - Maintenance and Service Guide
Page 117
... description audio 4 chipset 1 display panel 2 Ethernet 4 external media cards 4 graphics 1 hard drives 2 keyboard 5 memory module 2 microphone 4 operating system 6 optical drive 3 pointing device 5 ports 5 power requirements 5 processors 1 product name 1 security 5 serviceability 6 video 4 wireless 4 product name 1, 38 protective cover, spare part number 26, 27 R release latch 16 removal/replacement preliminaries 33 procedures 38 right-side components RJ-45 jack 14 RTC battery removal 46 spare part number 14 22, 27, 46 S Screw Kit, spare part number 26, 29 security cable slot 13 security...
... description audio 4 chipset 1 display panel 2 Ethernet 4 external media cards 4 graphics 1 hard drives 2 keyboard 5 memory module 2 microphone 4 operating system 6 optical drive 3 pointing device 5 ports 5 power requirements 5 processors 1 product name 1 security 5 serviceability 6 video 4 wireless 4 product name 1, 38 protective cover, spare part number 26, 27 R release latch 16 removal/replacement preliminaries 33 procedures 38 right-side components RJ-45 jack 14 RTC battery removal 46 spare part number 14 22, 27, 46 S Screw Kit, spare part number 26, 29 security cable slot 13 security...


