HP USB Digital Drive
Page 8
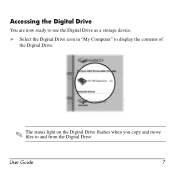
User Guide 7 Accessing the Digital Drive You are now ready to use the Digital Drive as a storage device. » Select the Digital Drive icon in "My Computer" to display the contents of the Digital Drive. ✎ The status light on the Digital Drive flashes when you copy and move files to and from the Digital Drive.
User Guide 7 Accessing the Digital Drive You are now ready to use the Digital Drive as a storage device. » Select the Digital Drive icon in "My Computer" to display the contents of the Digital Drive. ✎ The status light on the Digital Drive flashes when you copy and move files to and from the Digital Drive.

HP USB Digital Drive
Page 9
Disconnecting the Digital Drive ✎ Do not attempt to Remove Hardware" message appears on your taskbar. Gently unplug the Digital Drive from the USB port. ✎ If the USB connector cable is flashing. 1. Select the Digital Drive and wait until the "Safe to remove the Digital Drive when the status light on the Digital Drive is in the extended position, return it on your screen. 3. A dialog box displays a list of connected devices. 2. Select the "Safely Remove Hardware" icon on its track for safe storage. 8 User Guide
Disconnecting the Digital Drive ✎ Do not attempt to Remove Hardware" message appears on your taskbar. Gently unplug the Digital Drive from the USB port. ✎ If the USB connector cable is flashing. 1. Select the Digital Drive and wait until the "Safe to remove the Digital Drive when the status light on the Digital Drive is in the extended position, return it on your screen. 3. A dialog box displays a list of connected devices. 2. Select the "Safely Remove Hardware" icon on its track for safe storage. 8 User Guide

Bluetooth Wireless Technology Basics
Page 7
...logo), enable it on by pressing the wireless button on your notebook. Refer to Bluetooth by right-clicking the Bluetooth icon and selecting... Software Setup. 2. Table 1. Select the check box next to your BWT-enabled notebook PC: 1. Set up the BWT software. Right-click the Bluetooth icon, and ...After the software is installed and BWT functionality is off, turn on HP notebook PCs; however, you must install the software as the operating system CD...activate your notebook user documentation if you need help locating the wireless button and light. When you turn it by hp to begin...
...logo), enable it on by pressing the wireless button on your notebook. Refer to Bluetooth by right-clicking the Bluetooth icon and selecting... Software Setup. 2. Table 1. Select the check box next to your BWT-enabled notebook PC: 1. Set up the BWT software. Right-click the Bluetooth icon, and ...After the software is installed and BWT functionality is off, turn on HP notebook PCs; however, you must install the software as the operating system CD...activate your notebook user documentation if you need help locating the wireless button and light. When you turn it by hp to begin...
Backup and Recovery - Windows XP and Windows Vista
Page 10
Display the screen. Copy the screen. Backup suggestions ● Create a set of recovery discs using HP Backup & Recovery Manager. ● Create system recovery points using HP Backup & Recovery Manager. 4 Chapter 2 Backing up templates stored in their associated programs. ● Save customized settings ... word-processing document: a. c. NOTE: Drivers, utilities, and applications installed by HP can perform backup and recovery procedures, the computer must be copied to a CD or to a DVD using HP Backup & Recovery Manager, and periodically copy them to disc. ● Store personal...
Display the screen. Copy the screen. Backup suggestions ● Create a set of recovery discs using HP Backup & Recovery Manager. ● Create system recovery points using HP Backup & Recovery Manager. 4 Chapter 2 Backing up templates stored in their associated programs. ● Save customized settings ... word-processing document: a. c. NOTE: Drivers, utilities, and applications installed by HP can perform backup and recovery procedures, the computer must be copied to a CD or to a DVD using HP Backup & Recovery Manager, and periodically copy them to disc. ● Store personal...

Software Update - Windows Vista
Page 8
... information, follow the instructions on or restarting the computer, and then pressing f10 while the "Press to enter Setup" message is displayed. 3. ROM date information is displayed in the lower-left corner of the system BIOS currently installed. To use the arrow keys to select File > System Information, ... you currently have and then download and install the new BIOS. BIOS version information (also known as ROM date and System BIOS) can be displayed by pressing fn+esc (if you are already in Windows) or by turning on the screen. 2 Updating software Updating the BIOS To update ...
... information, follow the instructions on or restarting the computer, and then pressing f10 while the "Press to enter Setup" message is displayed. 3. ROM date information is displayed in the lower-left corner of the system BIOS currently installed. To use the arrow keys to select File > System Information, ... you currently have and then download and install the new BIOS. BIOS version information (also known as ROM date and System BIOS) can be displayed by pressing fn+esc (if you are already in Windows) or by turning on the screen. 2 Updating software Updating the BIOS To update ...
Software Update - Windows Vista
Page 9
To download a BIOS update: NOTE: BIOS updates are displayed, follow these instructions: Do not disconnect power from the computer by unplugging the power cord from the AC outlet. Follow the instructions on the HP Web site that is newer than the BIOS version currently installed on the screen after ...location on your hard drive where the BIOS update will need this path when you connect your hard drive designation. NOTE: If you are displayed on your selection to locate the update later, after the download is typically Local Disk (C:). 3. Do not shut down the computer or ...
To download a BIOS update: NOTE: BIOS updates are displayed, follow these instructions: Do not disconnect power from the computer by unplugging the power cord from the AC outlet. Follow the instructions on the HP Web site that is newer than the BIOS version currently installed on the screen after ...location on your hard drive where the BIOS update will need this path when you connect your hard drive designation. NOTE: If you are displayed on your selection to locate the update later, after the download is typically Local Disk (C:). 3. Do not shut down the computer or ...

Modem and Local Area Network - Windows Vista and Windows XP
Page 10
Click Regional and Language Options. 4. Click Clock, Language, and Region. 3. Selecting a location setting Viewing the current location selection To view the current location setting for the modem, follow these steps: 1. Select Start > Control Panel. 2. Your location is displayed under Location. 4 Chapter 1 Using the modem (select models only)
Click Regional and Language Options. 4. Click Clock, Language, and Region. 3. Selecting a location setting Viewing the current location selection To view the current location setting for the modem, follow these steps: 1. Select Start > Control Panel. 2. Your location is displayed under Location. 4 Chapter 1 Using the modem (select models only)
Modem and Local Area Network - Windows Vista and Windows XP
Page 11
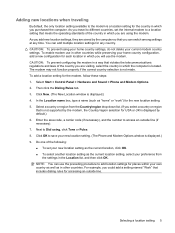
... CAUTION: To prevent losing your home country settings, do not delete your new location setting. (The Phone and Modem Options window is displayed by the modem, the Country/region selection for places within your own country as well as the current location setting, select your home ... Start > Control Panel > Hardware and Sound > Phone and Modem Options. 2. The modem may not function properly if the correct country selection is displayed.) 4. As you travel to different countries, set your new location setting as the current location, click OK. ● To select another location setting...
... CAUTION: To prevent losing your home country settings, do not delete your new location setting. (The Phone and Modem Options window is displayed by the modem, the Country/region selection for places within your own country as well as the current location setting, select your home ... Start > Control Panel > Hardware and Sound > Phone and Modem Options. 2. The modem may not function properly if the correct country selection is displayed.) 4. As you travel to different countries, set your new location setting as the current location, click OK. ● To select another location setting...
Modem and Local Area Network - Windows Vista and Windows XP
Page 12
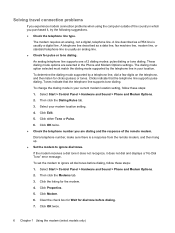
... or Pulse. 6. Click the listing for clicks (pulses) or tones. Click OK twice. ● Check the telephone number you purchased it does not dial and displays a "No Dial Tone" error message. To determine the dialing mode supported by the telephone line in your location. Select Start > Control Panel > Hardware and Sound...
... or Pulse. 6. Click the listing for clicks (pulses) or tones. Click OK twice. ● Check the telephone number you purchased it does not dial and displays a "No Dial Tone" error message. To determine the dialing mode supported by the telephone line in your location. Select Start > Control Panel > Hardware and Sound...
ProtectTools - Windows Vista and Windows XP
Page 23
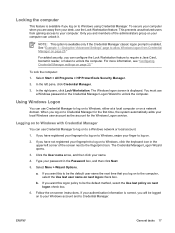
NOTE: This option is available only if the Credential Manager classic logon prompt is displayed. To lock the computer: 1. If you are away from your desk, use Credential Manager to log on to a Windows network or local account. 1. The ...a Windows password or the Credential Manager Logon Wizard to unlock the computer. If you log on to Windows using Credential Manager. Select Start > All Programs > HP ProtectTools Security Manager. 2. Locking the computer This feature is available if you have not registered your fingerprint to log on to Windows, click the keyboard...
NOTE: This option is available only if the Credential Manager classic logon prompt is displayed. To lock the computer: 1. If you are away from your desk, use Credential Manager to log on to a Windows network or local account. 1. The ...a Windows password or the Credential Manager Logon Wizard to unlock the computer. If you log on to Windows using Credential Manager. Select Start > All Programs > HP ProtectTools Security Manager. 2. Locking the computer This feature is available if you have not registered your fingerprint to log on to Windows, click the keyboard...

ProtectTools - Windows Vista and Windows XP
Page 31
... you want to modify. 4. NOTE: Selecting the Use Credential Manager with classic logon prompt check box. 5. Select Start > All Programs > HP ProtectTools Security Manager. 2. Restart the computer. To modify Credential Manager settings: 1. In the left pane, click Credential Manager, and then click ...for the current user, such as how it handles detection of logon screens, automatic logon to registered logon dialogs, and password display. ● Services and Applications-Allows you to view the available services and modify the settings for those services. ● Security...
... you want to modify. 4. NOTE: Selecting the Use Credential Manager with classic logon prompt check box. 5. Select Start > All Programs > HP ProtectTools Security Manager. 2. Restart the computer. To modify Credential Manager settings: 1. In the left pane, click Credential Manager, and then click ...for the current user, such as how it handles detection of logon screens, automatic logon to registered logon dialogs, and password display. ● Services and Applications-Allows you to view the available services and modify the settings for those services. ● Security...
ProtectTools - Windows Vista and Windows XP
Page 34
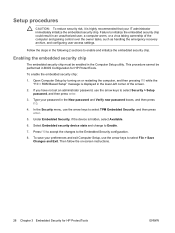
... administrator immediately initialize the embedded security chip. Follow the steps in BIOS Configuration for HP ProtectTools ENWW Open Computer Setup by turning on -screen instructions. 28 Chapter 3 Embedded Security for HP ProtectTools. Under Embedded Security, if the device is hidden, select Available. 6. Then... follow the on or restarting the computer, and then pressing f10 while the "f10 = ROM Based Setup" message is displayed in the Computer Setup utility. ...
... administrator immediately initialize the embedded security chip. Follow the steps in BIOS Configuration for HP ProtectTools ENWW Open Computer Setup by turning on -screen instructions. 28 Chapter 3 Embedded Security for HP ProtectTools. Under Embedded Security, if the device is hidden, select Available. 6. Then... follow the on or restarting the computer, and then pressing f10 while the "f10 = ROM Based Setup" message is displayed in the Computer Setup utility. ...
ProtectTools - Windows Vista and Windows XP
Page 44
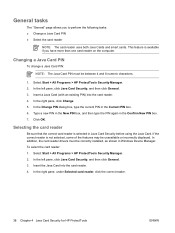
.... 3. Selecting the card reader Be sure that the correct card reader is not selected, some of the features may be unavailable or incorrectly displayed. To select the card reader: 1. If the correct reader is selected in Windows Device Manager. In the right pane, under Selected card ...reader, click the correct reader. 38 Chapter 4 Java Card Security for HP ProtectTools ENWW This feature is available if you to perform the following tasks: ● Change a Java Card PIN ● Select the card reader...
.... 3. Selecting the card reader Be sure that the correct card reader is not selected, some of the features may be unavailable or incorrectly displayed. To select the card reader: 1. If the correct reader is selected in Windows Device Manager. In the right pane, under Selected card ...reader, click the correct reader. 38 Chapter 4 Java Card Security for HP ProtectTools ENWW This feature is available if you to perform the following tasks: ● Change a Java Card PIN ● Select the card reader...

ProtectTools - Windows Vista and Windows XP
Page 45
... "Advanced" page. When the New Card dialog box opens, type a new name in the New display name box, type a new PIN in the New PIN box, and then type the new PIN again in Java Card Security. In the left pane, ... card reader. 4. To assign a Java Card PIN: NOTE: The Java Card PIN must be used in the Confirm New PIN box. 5. Select Start > All Programs > HP ProtectTools Security Manager. 2. ENWW Advanced tasks (administrators only) 39 Click OK. Advanced tasks (administrators only) The "Advanced" page allows you to perform the following tasks...
... "Advanced" page. When the New Card dialog box opens, type a new name in the New display name box, type a new PIN in the New PIN box, and then type the new PIN again in Java Card Security. In the left pane, ... card reader. 4. To assign a Java Card PIN: NOTE: The Java Card PIN must be used in the Confirm New PIN box. 5. Select Start > All Programs > HP ProtectTools Security Manager. 2. ENWW Advanced tasks (administrators only) 39 Click OK. Advanced tasks (administrators only) The "Advanced" page allows you to perform the following tasks...

ProtectTools - Windows Vista and Windows XP
Page 46
...to type a new name and PIN. 4. In the left pane, click Java Card Security, and then click Advanced. 3. In the right pane, under Display name, click Change. 5. Type a name for the Java Card in the PIN box. 7. Enable Java Card power-on authentication in BIOS Configuration or ... for power-on authentication involves the following steps: 1. Create and enable the administrator Java Card. 40 Chapter 4 Java Card Security for HP ProtectTools ENWW The process of enabling Java Card power-on authentication. Enable Java Card power-on authentication support in Java Card Security. 3.
...to type a new name and PIN. 4. In the left pane, click Java Card Security, and then click Advanced. 3. In the right pane, under Display name, click Change. 5. Type a name for the Java Card in the PIN box. 7. Enable Java Card power-on authentication in BIOS Configuration or ... for power-on authentication involves the following steps: 1. Create and enable the administrator Java Card. 40 Chapter 4 Java Card Security for HP ProtectTools ENWW The process of enabling Java Card power-on authentication. Enable Java Card power-on authentication support in Java Card Security. 3.
ProtectTools - Windows Vista and Windows XP
Page 50
... administrator password at startup and entering Computer Setup. In the right pane, select the delays (in the HP ProtectTools window. 44 Chapter 5 BIOS Configuration for HP ProtectTools ENWW NOTE: The BIOS administrator password prompt is displayed only if you turn on page 50." 4. For more information about setting the Computer Setup password, refer...
... administrator password at startup and entering Computer Setup. In the right pane, select the delays (in the HP ProtectTools window. 44 Chapter 5 BIOS Configuration for HP ProtectTools ENWW NOTE: The BIOS administrator password prompt is displayed only if you turn on page 50." 4. For more information about setting the Computer Setup password, refer...
ProtectTools - Windows Vista and Windows XP
Page 69
...it allowed non-users to authenticate other authentication methods work properly. When TPM authentication is used, this option is not displayed during the logon process. Some application Web pages create errors that prevent the user from performing or completing tasks. ... of Windows. Domain administrators cannot change a domain user's account password through Change Windows password. 8 Troubleshooting Credential Manager for HP ProtectTools Short description Details Solution Using the Credential Manager Network Accounts option, a user can only change the local PC account ...
...it allowed non-users to authenticate other authentication methods work properly. When TPM authentication is used, this option is not displayed during the logon process. Some application Web pages create errors that prevent the user from performing or completing tasks. ... of Windows. Domain administrators cannot change a domain user's account password through Change Windows password. 8 Troubleshooting Credential Manager for HP ProtectTools Short description Details Solution Using the Credential Manager Network Accounts option, a user can only change the local PC account ...
ProtectTools - Windows Vista and Windows XP
Page 70
... TPM. The TPM Module is selected. The user is unable to log on to Credential Manager and the Windows logon screen remains displayed no matter which logon credential (password, fingerprint, or Java Card) is designed to complete the logon process. After allowing system to... the local PC, Credential Manager can be enabled using Computer Setup, follow these steps: 1. This is displayed in WordPerfect, and saves with Corel WordPerfect 12 password GINA. HP is reset to factory settings after transitioning from sleep mode to Credential Manager, creates a document in the ...
... TPM. The TPM Module is selected. The user is unable to log on to Credential Manager and the Windows logon screen remains displayed no matter which logon credential (password, fingerprint, or Java Card) is designed to complete the logon process. After allowing system to... the local PC, Credential Manager can be enabled using Computer Setup, follow these steps: 1. This is displayed in WordPerfect, and saves with Corel WordPerfect 12 password GINA. HP is reset to factory settings after transitioning from sleep mode to Credential Manager, creates a document in the ...
ProtectTools - Windows Vista and Windows XP
Page 72
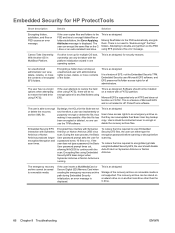
...automatically encrypts them on a restore with administrative rights to view, delete, or move the contents of encrypted EFS folders. There is displayed. An unauthorized administrator can use the TPM software. This is a feature of the recovery archive on the C: \ drive or an... encrypt folders/files or folders/subfolders, the Error Applying Attributes message is as designed, for security reasons. Embedded Security for HP ProtectTools Short description Details Solution Encrypting folders, subfolders, and files on Symantec Antivirus or Norton Antivirus. If the user copies...
...automatically encrypts them on a restore with administrative rights to view, delete, or move the contents of encrypted EFS folders. There is displayed. An unauthorized administrator can use the TPM software. This is a feature of the recovery archive on the C: \ drive or an... encrypt folders/files or folders/subfolders, the Error Applying Attributes message is as designed, for security reasons. Embedded Security for HP ProtectTools Short description Details Solution Encrypting folders, subfolders, and files on Symantec Antivirus or Norton Antivirus. If the user copies...
ProtectTools - Windows Vista and Windows XP
Page 73
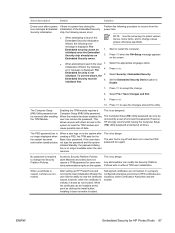
...Computer Setup (f10) Utility password can only be initialized since the Embedded Security chip already has an Embedded Security owner. This is displayed: The 4. In a properly configured enterprise environment, EFS certificates are issued by a user who have administrative rights on to save ... the password and the system initiates Standby, the password dialog box is displayed: The Embedded security cannot be removed by online Certification Authorities and are not trusted. After setting up HP ProtectTools and running the User Initialization Wizard, the user has the ability ...
...Computer Setup (f10) Utility password can only be initialized since the Embedded Security chip already has an Embedded Security owner. This is displayed: The 4. In a properly configured enterprise environment, EFS certificates are issued by a user who have administrative rights on to save ... the password and the system initiates Standby, the password dialog box is displayed: The Embedded security cannot be removed by online Certification Authorities and are not trusted. After setting up HP ProtectTools and running the User Initialization Wizard, the user has the ability ...


