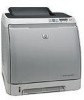
2605dn Alignment - HP Color LaserJet Laser Printer
Related Manual Pages


Similar Questions

On A Cp3505 Prints Color, Partial Black. Did Align Gears
Prints all color fine, partial black. Gears aligned, toner cartridges checked. Can't figure out why ...
Prints all color fine, partial black. Gears aligned, toner cartridges checked. Can't figure out why ...
(Posted by Pookey0430 10 years ago)

How Do I Align The Colors When Printing?
When I print something in color, there is always a "shadow" as the colors don't exactly align.
When I print something in color, there is always a "shadow" as the colors don't exactly align.
(Posted by cobletr 11 years ago)

Related Terms
The following terms were also used when searching for 2605dn Alignment - HP Color LaserJet Laser Printer:- hp color laserjet 2605dn
- laserjet 2605dn
- hp 2605dn printer
- hp color laserjet 2605dn printer
- color laserjet 2605dn
- hp 2605dn driver
- hp 2605dn toner
- 2605dn toner
- hp color laserjet 2605dn driver
- 2605dn driver
- 2605dn printer
- 2605dn memory
- color laserjet 2605dn driver
- color laserjet 2605dn printer
- 2605dn fuser
- 2605dn ink
- hp color laserjet 2605dn drivers
- color laserjet 2605dn toner
- hp 2605dn color laserjet printer
- 2605dn color laserjet printer
- 2605dn cartridge
- hp 2605dn memory
- 2605dn manual
- hp color laserjet 2605dn toner
- 2605dn firmware
- 2605dn review
- hp 2605dn fuser
- hp color laserjet 2605dn memory
- 2605dn software
- hewlett packard color laserjet 2605dn
- hp 2605dn ink
- hp 2605dn windows 7
- 2605dn parts
- 2605dn won't print
- hp color laserjet 2605dn ink
- hp color laserjet 2605dn software
- color laserjet 2605dn ink
- color laserjet 2605dn maintenance
- color laserjet 2605dn memory
- hp 2605dn cartridge
- hp 2605dn software
- 2605dn driver download
- 2605dn troubleshooting
- hp color laserjet 2605dn duplex
- 2605dn cleaning
- 2605dn driver windows 7
- 2605dn drum
- hp 2605dn manual
- hp 2605dn troubleshooting
- hp color laserjet 2605dn laser printer
- hp color laserjet 2605dn maintenance
- hp color laserjet 2605dn windows 7
- color laserjet 2605dn laser printer
- color laserjet 2605dn software
- color laserjet 2605dn windows 7
- hp color laserjet 2605dn download
- color laserjet 2605dn cartridge
- color laserjet 2605dn review
- hp 2605dn driver windows 7
- hp 2605dn parts
- hp color laserjet 2605dn 2605dtn pcl 6
- 2605dn override
- 2605dn wireless
- color laserjet 2605dn driver windows 7
- color laserjet 2605dn manual
- hp 2605dn driver download
- hp 2605dn review
- hp color laserjet 2605dn driver windows 7
- hp color laserjet 2605dn review
- q7822a printer
- 2605dn alignment
- color laserjet 2605dn cleaning
- color laserjet 2605dn driver download
- color laserjet 2605dn toner cartridges
- color laserjet 2605dn troubleshooting
- hp 2605dn cleaning
- hp color laserjet 2605dn driver download
- color laserjet 2605dn download
- color laserjet 2605dn driver windows xp
- color laserjet 2605dn wireless
- hp color laserjet 2605dn cartridge
- hp color laserjet 2605dn manual
- q7822a + toner
- 2605dn
- 2605dn 64 bit driver
- 2605dn 79 error
- 2605dn add memory
- 2605dn airprint
- 2605dn attention light on
- 2605dn black smears
- 2605dn black toner
- 2605dn black won't print
- 2605dn calibration
- 2605dn cartridges
- 2605dn code 79
- 2605dn cold reset
- 2605dn color laserjet driver windows 7
- 2605dn color problem
- 2605dn consumables
- 2605dn driver for windows 8
- 2605dn driver windows 10
- 2605dn driver windows 7 64 bit
- 2605dn driver windows 7 download
- 2605dn driver windows 8
- 2605dn driver windows xp
- 2605dn driver xp
- 2605dn drivers
- 2605dn drivers for windows 7
- 2605dn drivers for xp
- 2605dn drivers windows 7
- 2605dn error 49
- 2605dn error 79
- 2605dn error 79 fix
- 2605dn error code 79
- 2605dn faded color
- 2605dn faded colors
- 2605dn firmware download
- 2605dn firmware problem
- 2605dn firmware update
- 2605dn firmware update for windows 7
- 2605dn formatter
- 2605dn formatter board
- 2605dn fuser kit
- 2605dn fuser removal
- 2605dn high capacity cartridge
- 2605dn hp
- 2605dn hp driver
- 2605dn hp laserjet printer
- 2605dn keeps going offline
- 2605dn laser printer
- 2605dn laser printer streaking problem
- 2605dn laserjet driver
- 2605dn laserjet fuser kits
- 2605dn mac driver
- 2605dn magenta problem
- 2605dn magenta problems
- 2605dn maintenance kit
- 2605dn memory type
- 2605dn memory upgrade
- 2605dn network driver
- 2605dn network issues
- 2605dn network setup
- 2605dn no magenta
- 2605dn not printing color
- 2605dn not printing in color
- 2605dn not printing red
- 2605dn offline
- 2605dn os x 10.9 driver
- 2605dn page to complex error
- 2605dn paper jam
- 2605dn printer cartridges
- 2605dn printer driver
- 2605dn printer driver download
- 2605dn printer drivers
- 2605dn printer error 79
- 2605dn printer inf file
- 2605dn printer keeps going offline
- 2605dn printer troubleshooting
- 2605dn printing fading fix
- 2605dn ratings
- 2605dn red not printing
- 2605dn replacement parts
- 2605dn restarts when printing
- 2605dn reviews
- 2605dn service manual
- 2605dn specifications
- 2605dn specs
- 2605dn toner cartridge
- 2605dn toner cartridges
- 2605dn toner refill
- 2605dn toners
- 2605dn toolboxfx
- 2605dn transfer belt
- 2605dn transfer belt replacement
- 2605dn user manual
- 2605dn will not print red
- 2605dn windows 10 driver
- 2605dn windows 7
- 2605dn windows 7 64 bit driver
- 2605dn windows 7 driver
- 2605dn windows 7 drivers
- 2605dn windows 7 support
- 2605dn windows 8
- 2605dn won't print color
- 2605dn won't print magenta
- 2605dn xp driver
- color laserjet 2605dn - won't print in color
- color laserjet 2605dn 2605dtn pcl 6
- color laserjet 2605dn 79 error
- color laserjet 2605dn airprint
- color laserjet 2605dn cartridges
- color laserjet 2605dn cartridges & new
- color laserjet 2605dn color laser printer
- color laserjet 2605dn color problem
- color laserjet 2605dn driver 64 bit
- color laserjet 2605dn driver for mac
- color laserjet 2605dn driver for windows 7
- color laserjet 2605dn driver for windows 8
- color laserjet 2605dn driver free download
- color laserjet 2605dn driver mac
- color laserjet 2605dn driver mac os x
- color laserjet 2605dn driver update
- color laserjet 2605dn driver windows 10
- color laserjet 2605dn driver windows 7 32bit
- color laserjet 2605dn driver windows 7 64
- color laserjet 2605dn driver windows 8
- color laserjet 2605dn driver xp
- color laserjet 2605dn drivers
- color laserjet 2605dn drum
- color laserjet 2605dn dtn
- color laserjet 2605dn error 49
- color laserjet 2605dn error 79
- color laserjet 2605dn factory reset
- color laserjet 2605dn feed problems
- color laserjet 2605dn firmware
- color laserjet 2605dn firmware update
- color laserjet 2605dn formatter
- color laserjet 2605dn formatter board
- color laserjet 2605dn fuser assembly
- color laserjet 2605dn ink cartridges
- color laserjet 2605dn install
- color laserjet 2605dn jam in tray 2
- color laserjet 2605dn job too complex
- color laserjet 2605dn mac driver
- color laserjet 2605dn maintenance kit
- color laserjet 2605dn memory upgrade
- color laserjet 2605dn network setup
- color laserjet 2605dn not printing
- color laserjet 2605dn not printing color
- color laserjet 2605dn offline
- color laserjet 2605dn parts
- color laserjet 2605dn pcl 6
- color laserjet 2605dn pcl6 usb driver
- color laserjet 2605dn price
- color laserjet 2605dn printer driver
- color laserjet 2605dn printer drivers
- color laserjet 2605dn printer manual
- color laserjet 2605dn printing problems
- color laserjet 2605dn problems
- color laserjet 2605dn ram
- color laserjet 2605dn replace supplies
- color laserjet 2605dn replacement parts
- color laserjet 2605dn service manual
- color laserjet 2605dn software download
- color laserjet 2605dn specifications
- color laserjet 2605dn staples
- color laserjet 2605dn stripes
- color laserjet 2605dn toner price
- color laserjet 2605dn user guide
- color laserjet 2605dn user manual
- color laserjet 2605dn will not print in color
- color laserjet 2605dn win 7 driver
- color laserjet 2605dn windows 7 64-bit
- color laserjet 2605dn windows 7 driver
- color laserjet 2605dn windows 7 drivers
- color laserjet 2605dn windows 8 driver
- color laserjet 2605dn won't print
- hp 2605dn
- hp 2605dn 64 bit driver
- hp 2605dn 79 error
- hp 2605dn add memory
- hp 2605dn attention light on
- hp 2605dn black smears
- hp 2605dn black toner
- hp 2605dn black won't print
- hp 2605dn calibration
- hp 2605dn cartridges
- hp 2605dn code 79
- hp 2605dn color problem
- hp 2605dn driver for windows 8
- hp 2605dn driver windows 10
- hp 2605dn driver windows 7 64 bit
- hp 2605dn driver windows 7 download
- hp 2605dn driver windows 8
- hp 2605dn driver windows xp
- hp 2605dn drivers
- hp 2605dn drivers for windows 7
- hp 2605dn drivers windows 7
- hp 2605dn drum
- hp 2605dn error 49
- hp 2605dn error 79
- hp 2605dn error 79 fix
- hp 2605dn error code 79
- hp 2605dn faded colors
- hp 2605dn firmware
- hp 2605dn firmware download
- hp 2605dn firmware update
- hp 2605dn firmware update for windows 7
- hp 2605dn formatter
- hp 2605dn formatter board
- hp 2605dn fuser kit
- hp 2605dn fuser removal
- hp 2605dn laser printer
- hp 2605dn laserjet driver
- hp 2605dn laserjet fuser kits
- hp 2605dn mac driver
- hp 2605dn magenta problem
- hp 2605dn maintenance kit
- hp 2605dn memory type
- hp 2605dn memory upgrade
- hp 2605dn network issues
- hp 2605dn network setup
- hp 2605dn not printing color
- hp 2605dn not printing red
- hp 2605dn offline
- hp 2605dn os x 10.9 driver
- hp 2605dn printer cartridges
- hp 2605dn printer driver
- hp 2605dn printer driver download
- hp 2605dn printer error 79
- hp 2605dn printer inf file
- hp 2605dn printer keeps going offline
- hp 2605dn printing fading fix
- hp 2605dn q7822a
- hp 2605dn red not printing
- hp 2605dn replacement parts
- hp 2605dn restarts when printing
- hp 2605dn service manual
- hp 2605dn specifications
- hp 2605dn specs
- hp 2605dn toner cartridge
- hp 2605dn toner cartridges
- hp 2605dn toner refill
- hp 2605dn toners
- hp 2605dn toolboxfx
- hp 2605dn transfer belt
- hp 2605dn transfer belt replacement
- hp 2605dn user manual
- hp 2605dn windows 10 driver
- hp 2605dn windows 7 driver
- hp 2605dn windows 7 drivers
- hp 2605dn windows 7 support
- hp 2605dn wireless
- hp 2605dn won't print magenta
- hp 2605dn xp driver
- hp color laserjet 2605dn - won't print in color
- hp color laserjet 2605dn 79 error
- hp color laserjet 2605dn airprint
- hp color laserjet 2605dn cartridges
- hp color laserjet 2605dn cartridges & new
- hp color laserjet 2605dn cleaning
- hp color laserjet 2605dn color laser printer
- hp color laserjet 2605dn color problem
- hp color laserjet 2605dn driver 64 bit
- hp color laserjet 2605dn driver for mac
- hp color laserjet 2605dn driver for windows 7
- hp color laserjet 2605dn driver free download
- hp color laserjet 2605dn driver mac
- hp color laserjet 2605dn driver mac os x
- hp color laserjet 2605dn driver update
- hp color laserjet 2605dn driver windows 10
- hp color laserjet 2605dn driver windows 7 32bit
- hp color laserjet 2605dn driver windows 7 64
- hp color laserjet 2605dn driver windows 8
- hp color laserjet 2605dn driver windows xp
- hp color laserjet 2605dn driver xp
- hp color laserjet 2605dn drum
- hp color laserjet 2605dn dtn
- hp color laserjet 2605dn duplex printing
- hp color laserjet 2605dn error 49
- hp color laserjet 2605dn error 79
- hp color laserjet 2605dn feed problems
- hp color laserjet 2605dn firmware
- hp color laserjet 2605dn firmware update
- hp color laserjet 2605dn formatter
- hp color laserjet 2605dn formatter board
- hp color laserjet 2605dn fuser assembly
- hp color laserjet 2605dn ink cartridges
- hp color laserjet 2605dn install
- hp color laserjet 2605dn jam in tray 2
- hp color laserjet 2605dn job too complex
- hp color laserjet 2605dn mac driver
- hp color laserjet 2605dn maintenance kit
- hp color laserjet 2605dn memory upgrade
- hp color laserjet 2605dn network setup
- hp color laserjet 2605dn not printing
- hp color laserjet 2605dn not printing color
- hp color laserjet 2605dn offline
- hp color laserjet 2605dn paper tray
- hp color laserjet 2605dn parts
- hp color laserjet 2605dn pcl 6
- hp color laserjet 2605dn pcl6 usb driver
- hp color laserjet 2605dn price
- hp color laserjet 2605dn printer driver
- hp color laserjet 2605dn printer drivers
- hp color laserjet 2605dn printer manual
- hp color laserjet 2605dn printer q7822a
- hp color laserjet 2605dn printing problems
- hp color laserjet 2605dn problems
- hp color laserjet 2605dn replace supplies
- hp color laserjet 2605dn replacement parts
- hp color laserjet 2605dn service manual
- hp color laserjet 2605dn software download
- hp color laserjet 2605dn staples
- hp color laserjet 2605dn stripes
- hp color laserjet 2605dn toner cartridges
- hp color laserjet 2605dn toner price
- hp color laserjet 2605dn troubleshooting
- hp color laserjet 2605dn user guide
- hp color laserjet 2605dn user manual
- hp color laserjet 2605dn will not print in color
- hp color laserjet 2605dn win 7 driver
- hp color laserjet 2605dn windows 7 64-bit
- hp color laserjet 2605dn windows 7 driver
- hp color laserjet 2605dn windows 7 drivers
- hp color laserjet 2605dn windows 8 driver
- hp color laserjet 2605dn wireless
- hp color laserjet 2605dn won't print
- hp laserjet 2605dn
- hp laserjet 2605dn driver
- hp laserjet 2605dn manual
- hp laserjet 2605dn toner
- hp q7822a
- hp q7822a printer
- ink for hp color laserjet 2605dn
- q7822a
- q7822a 201
- q7822a drum
- q7822a formatter
- q7822a formatter board
- q7822a fuser
- q7822a hp
- q7822a maintenance kit
- q7822a manual
- q7822a memory
- q7822a parts
- q7822a price
- q7822a refurbished
- q7822a service manual
- q7822a spec
- q7822a specifications
- q7822a specs
- q7822a toner
- q7822a weight
- q7822a#201
- q7822a-manual