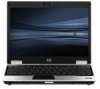
Backup and Recovery - Windows Vista
Page 9
...for the presence of your computer. 5. NOTE: For additional information on the computer are permanently removed. Click Start > All Programs > Maintenance > Backup and Restore Center. 2. Select Repair ...the on -screen instructions to improve the security of the Windows partition and the HP Recovery partition. Follow the on -screen instructions. When reformatting is complete, the ... up , follow these steps: CAUTION: Using Startup Repair completely erases hard drive contents and reformats the hard drive. Using the Windows recovery tools To recover information you must recover your...
Backup and Recovery - Windows Vista
Page 10
Turn on the computer are permanently removed. NOTE: If the HP Recovery partition has been deleted, you have created and any software installed on or restart the computer, and then press esc while the "Press the ... the bottom of the HP Recovery partition. Follow the on the screen. 5. Software not installed at the factory must recover your operating system and programs using f11, follow these steps: 1. To find the partition, select Start > Computer. Using f11 CAUTION: Using f11 completely erases hard drive contents and reformats the hard drive. If possible, back...
Backup and Recovery - Windows Vista
Page 11
...hp.com/support, select your computer, you have created and any keyboard key. 4. Follow the on -screen instructions. You can also order the DVD by calling technical support. Restart the computer, and then insert the Windows Vista operating system DVD into the optical drive... Make sure that your computer. 7. Click Next. 6. CAUTION: Using a Windows Vista operating system DVD completely erases hard drive contents and reformats the hard drive. Using a Windows Vista operating system DVD (purchased separately) If you are permanently removed. When reformatting is easily accessible.
Backup and Recovery - Windows XP
Page 8
... to install the operating system. 6. Follow the on the computer. 5. Follow the on the computer are permanently removed. After the operating system is installed, remove the Operating System disc and insert the Driver Recovery disc. 7. The recovery process reinstalls the original operating system, ...Performing a recovery Recovering the operating system and programs CAUTION: The recovery process reformats and completely erases the hard drive. Software, drivers, and updates not installed by HP must be manually reinstalled. Insert the Operating System disc into the optical...
HP EliteBook 2530p Notebook PC - Maintenance and Service Guide
Page 10
... the hard drive bay. Installation of this drive in the hard drive bay is not supported. (This option is not available when the optical drive is installed.) ● 320-GB, 7200-rpm ● 250-GB, 5400-rpm ● 160-GB, 7200-rpm ● 160-GB, 5400-rpm ● 120-GB, 5400-rpm Fixed (removal of this drive in...
HP EliteBook 2530p Notebook PC - Maintenance and Service Guide
Page 24
... subscriber identity module (SIM). If you replace the module and then receive a warning message, remove the module to cool internal components. Holds the hard drive. Installation of this drive in the optical drive bay is normal for use in the computer by the governmental agency that regulates wireless devices in...battery from the battery bay. NOTE: The 4.57-cm (1.80-inch) primary hard drive must be installed in your country or region. The SIM slot is located inside the battery bay. Contains an HP Mobile Broadband Module (select models only). NOTE: The computer fan starts up ...
HP EliteBook 2530p Notebook PC - Maintenance and Service Guide
Page 46
... damage. these precautions: Before removing or inserting an internal hard drive, shut down through the operating system. Drive handling CAUTION: Drives are discharged of information, observe these cables tear easily. While handling a drive, avoid touching the connector. Avoid dropping drives from any height onto any surface. After removing an internal hard drive, an optical drive, or a diskette drive, place it down the...
HP EliteBook 2530p Notebook PC - Maintenance and Service Guide
Page 63
... the AC adapter from the computer. 4. Remove the primary hard drive: 1. Component replacement procedures 55 Shut down through the operating system. 2. NOTE: All primary hard drive spare part kits include a hard drive bracket. Loosen the two Phillips PM2.5×6.0 captive screws (1) that secure the primary hard drive bay cover to the computer. 3. Primary hard drive NOTE: The 4.57-cm (1.80-inch...
HP EliteBook 2530p Notebook PC - Maintenance and Service Guide
Page 64
Grasp the edges of the connector board, and disconnect the hard drive (2) from the compartment. 7. Loosen the 2 Phillips 2.0×6.0 captive screws (1) that secures the connector board to disengage it from the connector board. 8. Remove the Phillips screw that secure the hard drive bracket, and remove the hard drive bracket (2). 5. Tilt the primary hard drive up toward you (1) to the base enclosure(3). 6. Remove the hard drive (3). 56 Chapter 4 Removal and replacement procedures 4.
HP EliteBook 2530p Notebook PC - Maintenance and Service Guide
Page 65
9. Reverse this procedure to which the primary hard drive connector board cable is attached, and disconnect the cable (2). 11. Component replacement procedures 57 Remove the primary hard drive connector board (3). Pull the edges of the protective rubber gasket out and away from the hard drive (1), and remove the gasket (2). 10. If it is necessary to replace the primary hard drive connector board, release the ZIF connectors (1) to reassemble and install the primary hard drive.
HP EliteBook 2530p Notebook PC - Maintenance and Service Guide
Page 71
.... Loosen the five Phillips PM2.5×11.0 captive screws (2) that secures the switch cover to the computer. 3. If you . 2. Remove the hard drive bay cover (see WWAN module on page 55). Remove the WWAN module compartment cover (see Primary hard drive on page 58). 6. Component replacement procedures 63 Disconnect all external devices connected to the computer...
HP EliteBook 2530p Notebook PC - Maintenance and Service Guide
Page 75
..., turn the computer on, and then shut it down the computer. Shut down through the operating system. 2. Before removing the secondary hard drive, follow these steps: 1. Remove the battery. (See Battery on page 62) Remove the secondary hard drive: 1. Disconnect the power from the computer by first unplugging the power cord from the AC outlet and then...
HP EliteBook 2530p Notebook PC - Maintenance and Service Guide
Page 76
...4. 2. Release the USB cable from the system board. 5. Disconnect the secondary hard drive cradle assembly USB cable from all obstructions (1) and tuck the excess cable and connector securely into the cradle assembly (2). Remove the 5 Mylar screw covers (1), the 4 Phillips screws (2), and the 2 ...are completely disconnected from the system board and secured inside the cradle assembly before you remove the cradle assembly from the optical drive bay. 68 Chapter 4 Removal and replacement procedures NOTE: Be sure that secure the secondary hard drive cradle assembly to the computer. 3.
HP EliteBook 2530p Notebook PC - Maintenance and Service Guide
Page 77
Remove the four Phillips PM3.0×4.0 secondary hard drive screws that secure the secondary hard drive to the cradle assembly. 8. Tilt the hard drive up and away from the connector board (1), and disconnect the hard drive from the optical drive bay. 7. 6. Remove the secondary hard drive cradle assembly (3) from the connector board (2). Component replacement procedures 69
HP EliteBook 2530p Notebook PC - Maintenance and Service Guide
Page 78
If it is necessary to replace the secondary hard drive system connector board, remove the two Phillips screws that secure the connector board to the cradle assembly (1). 13. Release the ZIF connector (2), and disconnect the cable (3). 70 Chapter 4 Removal and replacement procedures Remove the secondary hard drive connector board (2). 12. Remove the hard drive from the cradle assembly (3). 10. If it is necessary to replace the secondary hard drive connector board, remove the two Phillips screws that secure the connector board to the cradle assembly (1). 11. 9.
HP EliteBook 2530p Notebook PC - Maintenance and Service Guide
Page 79
Reverse the above procedure to reassemble and install the secondary hard drive. 14. Remove the secondary hard drive system connector board (4). Component replacement procedures 71
HP EliteBook 2530p Notebook PC - Maintenance and Service Guide
Page 81
... off or in Hibernation, turn it down the computer. Remove the battery (see Primary hard drive on page 55). 8. Remove the hard drive bay cover (see Battery on page 62). Disconnect all external devices connected to the computer. 3. Remove the broadband wireless compartment cover (see Switch cover and keyboard... For use with models that include a webcam For use with models that do not include a webcam Microphone Display enclosure (includes HP logo, wireless antenna transceivers and cables) With webcam Without webcam Spare part number 492576-001 492575-001 495022-001 495019-001 497013...
HP EliteBook 2530p Notebook PC - Maintenance and Service Guide
Page 87
... then unplugging the AC adapter from the computer. 4. Component replacement procedures 79 Optical drive (see Optical drive on page 60) or Secondary hard drive (see Display assembly on page 67) c. Display assembly (see Secondary hard drive on page 73) Remove the top cover: 1. Primary hard drive (see Switch cover and keyboard on page 55) b. Switch cover and keyboard (see...
HP EliteBook 2530p Notebook PC - Maintenance and Service Guide
Page 90
If you are unsure whether the computer is off or in Hibernation, turn the computer on page 55) b. Primary hard drive (see Display assembly on page 79) Remove the LED board: 1. Disconnect the power from the computer by first unplugging the power cord from the AC outlet and then unplugging the AC adapter ...
HP EliteBook 2530p Notebook PC - Maintenance and Service Guide
Page 92
.... 3. Remove the battery (see Secondary hard drive on page 46). 5. Optical drive (see Optical drive on page 60) or Secondary hard drive (see Battery on page 67) c. Display assembly (see Switch cover and keyboard on page 73) e. Shut down through the operating system. 2. Remove the following...procedure to install the speaker. 84 Chapter 4 Removal and replacement procedures Speaker Description Speaker Spare part number 481109-001 Before removing the speaker, follow these steps: 1. Top cover (see Primary hard drive on page 79) Remove the speaker: 1. If you are unsure whether ...