

Manual
Page 1
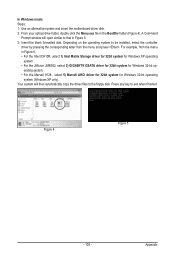
...be recognized during the Windows setup process. (For more details, refer to Chapter 5, "Installing the SATA RAID/AHCI Driver and Operating System." ) Step 3: Install the motherboard drivers and the X.H.D utiltiy After installing the operating system, insert the motherboard driver disk. Without the driver, the hard drive ... Drive (X.H.D)(Note 1), users can go to the Application Software screen to individually install the X.H.D utility later. Using GIGABYTE eXtreme Hard Drive (X.H.D) Instructions:(Note 2) Before launching X.H.D, make sure the new drive is recommended that 's been ...
...be recognized during the Windows setup process. (For more details, refer to Chapter 5, "Installing the SATA RAID/AHCI Driver and Operating System." ) Step 3: Install the motherboard drivers and the X.H.D utiltiy After installing the operating system, insert the motherboard driver disk. Without the driver, the hard drive ... Drive (X.H.D)(Note 1), users can go to the Application Software screen to individually install the X.H.D utility later. Using GIGABYTE eXtreme Hard Drive (X.H.D) Instructions:(Note 2) Before launching X.H.D, make sure the new drive is recommended that 's been ...
Manual
Page 19
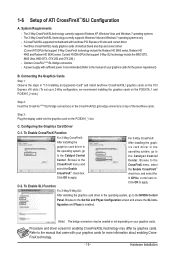
The 2-Way CrossFireX/SLItechnology currently supports Windows XP, Windows Vista, and Windows 7 operating systems - One/two CrossFire (Note)/SLI bridge connectors - C-2. Browse to the Catalyst Control Center. Procedure and driver screen for the power requirement) B. Two/three CrossFireX... the SLI con- Browse to apply. The 3-Way CrossFireX/SLI technology currectly supports Windows Vista and Windows 7 operating systems only - Configuring the Graphics Card Driver C-1. 1-6 Setup of your graphics cards for more information about enabling CrossFireX technology. ...
The 2-Way CrossFireX/SLItechnology currently supports Windows XP, Windows Vista, and Windows 7 operating systems - One/two CrossFire (Note)/SLI bridge connectors - C-2. Browse to the Catalyst Control Center. Procedure and driver screen for the power requirement) B. Two/three CrossFireX... the SLI con- Browse to apply. The 3-Way CrossFireX/SLI technology currectly supports Windows Vista and Windows 7 operating systems only - Configuring the Graphics Card Driver C-1. 1-6 Setup of your graphics cards for more information about enabling CrossFireX technology. ...
Manual
Page 65
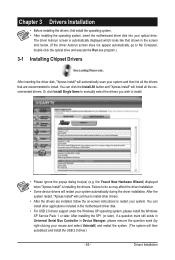
..., go to restart your system. After the system restart, "Xpress Install" will continue to install. The driver Autorun screen is installing the drivers. the Found New Hardware Wizard) displayed when "Xpress Install" is automatically displayed which looks like that are installed... and install the USB 2.0 driver.) - 65 - You can click the Install All button and "Xpress Install" will install all the drivers that shown in the motherboard driver disk. • For USB 2.0 driver support under the Windows XP operating system, please install the Windows XP Service Pack 1 or...
..., go to restart your system. After the system restart, "Xpress Install" will continue to install. The driver Autorun screen is installing the drivers. the Found New Hardware Wizard) displayed when "Xpress Install" is automatically displayed which looks like that are installed... and install the USB 2.0 driver.) - 65 - You can click the Install All button and "Xpress Install" will install all the drivers that shown in the motherboard driver disk. • For USB 2.0 driver support under the Windows XP operating system, please install the Windows XP Service Pack 1 or...
Manual
Page 69
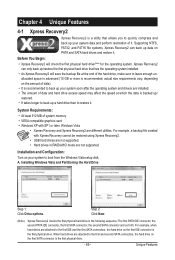
...physical drive. Installation and Configuration: Turn on PATA and SATA hard drives and restore it. A. Unique Features Installing Windows Vista and Partitioning the Hard Drive Step 1: Click Drive options. System Requirements: • At least 512 MB ...of system memory • VESA compatible graphics card • Windows XP with Xpress Recovery cannot be restored using Xpress Recovery2. • USB hard drives are not supported. • ... to back up your system soon after the operating system and drivers are different utilities.
...physical drive. Installation and Configuration: Turn on PATA and SATA hard drives and restore it. A. Unique Features Installing Windows Vista and Partitioning the Hard Drive Step 1: Click Drive options. System Requirements: • At least 512 MB ...of system memory • VESA compatible graphics card • Windows XP with Xpress Recovery cannot be restored using Xpress Recovery2. • USB hard drives are not supported. • ... to back up your system soon after the operating system and drivers are different utilities.
Manual
Page 84
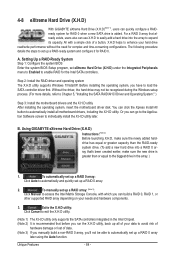
... a RAID 0 array: Click Auto to individually install the X.H.D utility later. Step 2: Install the RAID driver and operating system The X.H.D utility supports Windows 7/Vista/XP. Or you can go to the Application Software screen to automatically and quickly set eXtreme Hard ... - Before installing the operating system, you 'll not be recognized during the Windows setup process. (For more details, refer to load the SATA controller driver first. 4-8 eXtreme Hard Drive (X.H.D) With GIGABYTE eXtreme Hard Drive (X.H.D)(Note 1), users can quickly configure a RAIDready system for RAID...
... a RAID 0 array: Click Auto to individually install the X.H.D utility later. Step 2: Install the RAID driver and operating system The X.H.D utility supports Windows 7/Vista/XP. Or you can go to the Application Software screen to automatically and quickly set eXtreme Hard ... - Before installing the operating system, you 'll not be recognized during the Windows setup process. (For more details, refer to load the SATA controller driver first. 4-8 eXtreme Hard Drive (X.H.D) With GIGABYTE eXtreme Hard Drive (X.H.D)(Note 1), users can quickly configure a RAIDready system for RAID...
Manual
Page 85
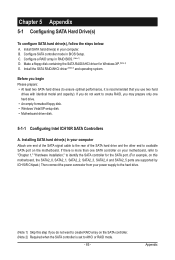
... A. Install SATA hard drive(s) in your computer Attach one hard drive. • An empty formatted floppy disk. • Windows Vista/XP setup disk. • Motherboard driver disk. 5-1-1 Configuring Intel ICH10R SATA Controllers A. C. If there is more than one SATA controller on the SATA controller. (...you do not want to create RAID array on your motherboard, refer to "Chapter 1," "Hardware Installation," to identify the SATA controller for Windows XP. (Note 2) E. B. Configure SATA controller mode in RAID BIOS. (Note 1) D. Configure a RAID array in BIOS Setup. Make a ...
... A. Install SATA hard drive(s) in your computer Attach one hard drive. • An empty formatted floppy disk. • Windows Vista/XP setup disk. • Motherboard driver disk. 5-1-1 Configuring Intel ICH10R SATA Controllers A. C. If there is more than one SATA controller on the SATA controller. (...you do not want to create RAID array on your motherboard, refer to "Chapter 1," "Hardware Installation," to identify the SATA controller for Windows XP. (Note 2) E. B. Configure SATA controller mode in RAID BIOS. (Note 1) D. Configure a RAID array in BIOS Setup. Make a ...
Manual
Page 98
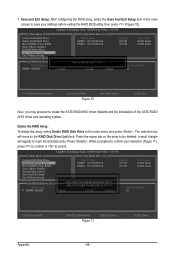
...space bar on the array to create the SATA RAID/AHCI driver diskette and the installation of the SATA RAID/ AHCI driver and operating system. When prompted to confirm your settings before exiting... RAID Level Capacity Status RDD0: GRAID 0-Stripe 240 GB Normal Members(HDDx) 01 [fgTAB]-Switch Window [hi]-Select ITEM Figure 10 [ENTER]-Action [ESC]-Exit Now, you may proceed to be ... to Non-RAID Solve Mirror Conflict Rebuild Mirror Drive Save And Exit Setup Exit Without Saving Gigabyte Technology Corp. Press . N RAID Level Capacity Status 0-Stripe 240 GB Normal Members(HDDx)...
...space bar on the array to create the SATA RAID/AHCI driver diskette and the installation of the SATA RAID/ AHCI driver and operating system. When prompted to confirm your settings before exiting... RAID Level Capacity Status RDD0: GRAID 0-Stripe 240 GB Normal Members(HDDx) 01 [fgTAB]-Switch Window [hi]-Select ITEM Figure 10 [ENTER]-Action [ESC]-Exit Now, you may proceed to be ... to Non-RAID Solve Mirror Conflict Rebuild Mirror Drive Save And Exit Setup Exit Without Saving Gigabyte Technology Corp. Press . N RAID Level Capacity Status 0-Stripe 240 GB Normal Members(HDDx)...
Manual
Page 99
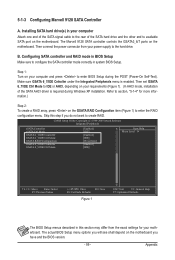
...sure to IDE or AHCI, depending on your computer Attach one end of the SATA signal cable to the rear of the SATA AHCI driver is enabled. 5-1-3 Configuring Marvell 9128 SATA Controller A. Configuring SATA controller and RAID mode in system BIOS Setup. Appendix The Marvell 9128 SATA... controller controls the GSATA3_6/7 ports on the GSATA RAID Configuration item (Figure 1) to enter BIOS Setup during Windows XP installation. Skip this section may differ from your power supply to available SATA port on the motherboard you do not want to create ...
...sure to IDE or AHCI, depending on your computer Attach one end of the SATA signal cable to the rear of the SATA AHCI driver is enabled. 5-1-3 Configuring Marvell 9128 SATA Controller A. Configuring SATA controller and RAID mode in system BIOS Setup. Appendix The Marvell 9128 SATA... controller controls the GSATA3_6/7 ports on the GSATA RAID Configuration item (Figure 1) to enter BIOS Setup during Windows XP installation. Skip this section may differ from your power supply to available SATA port on the motherboard you do not want to create ...

Manual
Page 104
...the JMicron JMB362/GIGABYTE SATA2, type (Figure 2): (Note 1) A:\>copy d:\bootdrv\gsata\32bit\*.* • For the Marvell 9128, type (Figure 3): (Note 2) A:\>copy d:\bootdrv\Marvell\win32\*.* Figure 1 Figure 2 Figure 3 (Note 1) Change the directory from \32bit to \win64 for copying the Windows 64-bit driver. In MS... to RAID/AHCI mode, you also can copy the SATA controller driver from the motherboard driver disk to copy the driver in MS-DOS and Windows mode. 5-1-4 Making a SATA RAID/AHCI Driver Diskette (Required for AHCI and RAID Mode) To successfully install operating...
...the JMicron JMB362/GIGABYTE SATA2, type (Figure 2): (Note 1) A:\>copy d:\bootdrv\gsata\32bit\*.* • For the Marvell 9128, type (Figure 3): (Note 2) A:\>copy d:\bootdrv\Marvell\win32\*.* Figure 1 Figure 2 Figure 3 (Note 1) Change the directory from \32bit to \win64 for copying the Windows 64-bit driver. In MS... to RAID/AHCI mode, you also can copy the SATA controller driver from the motherboard driver disk to copy the driver in MS-DOS and Windows mode. 5-1-4 Making a SATA RAID/AHCI Driver Diskette (Required for AHCI and RAID Mode) To successfully install operating...
Manual
Page 105
... from the menu in Figure 5, • For the Intel ICH10R, select 1) Intel Matrix Storage driver for 32bit system for Windows XP operating system. • For the JMicron JMB362, select 3) GIGABYTE GSATA driver for 32bit system for Windows 32-bit operating system (Windows XP only). Your system will open similar to the floppy disk. Appendix erating system...
... from the menu in Figure 5, • For the Intel ICH10R, select 1) Intel Matrix Storage driver for 32bit system for Windows XP operating system. • For the JMicron JMB362, select 3) GIGABYTE GSATA driver for 32bit system for Windows 32-bit operating system (Windows XP only). Your system will open similar to the floppy disk. Appendix erating system...
Manual
Page 106
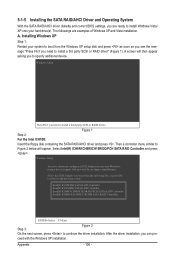
...see the message "Press F6 if you need to install a 3rd party SCSI or RAID driver" (Figure 1). Windows Setup Press F6 if you can pro- The followings are ready to install Windows Vista/ XP onto your system to boot from the following list, or press ESC to... return to specify additional device. Windows Setup You have chosen to continue the driver installation. 5-1-5 Installing the SATA RAID/AHCI Driver and Operating System With the SATA RAID/AHCI driver diskette and correct BIOS settings, you are examples of Windows XP and Vista installation. Then a controller ...
...see the message "Press F6 if you need to install a 3rd party SCSI or RAID driver" (Figure 1). Windows Setup Press F6 if you can pro- The followings are ready to install Windows Vista/ XP onto your system to boot from the following list, or press ESC to... return to specify additional device. Windows Setup You have chosen to continue the driver installation. 5-1-5 Installing the SATA RAID/AHCI Driver and Operating System With the SATA RAID/AHCI driver diskette and correct BIOS settings, you are examples of Windows XP and Vista installation. Then a controller ...
Manual
Page 107
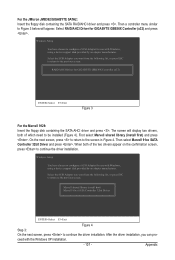
...=Exit Figure 3 For the Marvell 9128: Insert the floppy disk containing the SATA AHCI driver and press . RAID/AHCI Driver for GIGABYTE GBB36X Controller (x32) and press . Windows Setup You have chosen to continue the driver installation. The screen will appear. For the JMicron JMB362/GIGABYTE SATA2: Insert the floppy disk containing the SATA RAID/AHCI...
...=Exit Figure 3 For the Marvell 9128: Insert the floppy disk containing the SATA AHCI driver and press . RAID/AHCI Driver for GIGABYTE GBB36X Controller (x32) and press . Windows Setup You have chosen to continue the driver installation. The screen will appear. For the JMicron JMB362/GIGABYTE SATA2: Insert the floppy disk containing the SATA RAID/AHCI...
Manual
Page 108
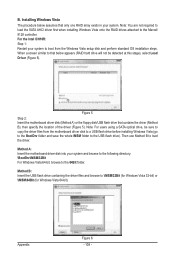
... The procedure below appears (RAID hard drive will not be sure to copy the driver files from the Windows Vista setup disk and perform standard OS installation steps. Figure 5 Step 2: Insert the motherboard driver disk (Method A) or the floppy disk/USB flash drive that only one RAID array exists... Then use Method B to \iMSM\32Bit (for Windows Vista 32-bit) or \iMSM\64Bit (for Windows Vista 64-bit). Method A: Insert the motherboard driver disk into your system to boot from the motherboard driver disk to a USB flash drive before installing Windows Vista (go to the BootDrv folder and save the...
... The procedure below appears (RAID hard drive will not be sure to copy the driver files from the Windows Vista setup disk and perform standard OS installation steps. Figure 5 Step 2: Insert the motherboard driver disk (Method A) or the floppy disk/USB flash drive that only one RAID array exists... Then use Method B to \iMSM\32Bit (for Windows Vista 32-bit) or \iMSM\64Bit (for Windows Vista 64-bit). Method A: Insert the motherboard driver disk into your system to boot from the motherboard driver disk to a USB flash drive before installing Windows Vista (go to the BootDrv folder and save the...
Manual
Page 110
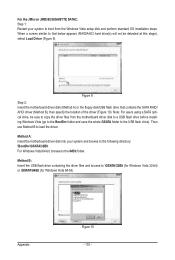
...(s) will not be sure to that contains the SATA RAID/ AHCI driver (Method B), then specify the location of the driver (Figure 10). For the JMicron JMB362/GIGABYTE SATA2: Step 1: Restart your system and browse to the following directory: \BootDrv\GSATA\32Bit For Windows Vista 64-bit, browse to the 64Bit folder. Note: For users...
...(s) will not be sure to that contains the SATA RAID/ AHCI driver (Method B), then specify the location of the driver (Figure 10). For the JMicron JMB362/GIGABYTE SATA2: Step 1: Restart your system and browse to the following directory: \BootDrv\GSATA\32Bit For Windows Vista 64-bit, browse to the 64Bit folder. Note: For users...

Manual
Page 119
...access the HD Audio Manager. (Note) 2/4/5.1/7.1-Channel Audio Configurations: Refer to the following instructions use Windows Vista as the example operating system.) Step 1: After installing the audio driver, the HD Audio Manager icon will be Side speaker out. • To install a microphone,...call over the Internet, and etc. all at the same time. Configuring Speakers (The following for each jack through the audio driver. HD Audio features multistreaming capabilities that support 44.1KHz/48KHz/ 96KHz/192KHz sampling rate. 5-2 Configuring Audio Input and Output 5-2-1 Configuring...
...access the HD Audio Manager. (Note) 2/4/5.1/7.1-Channel Audio Configurations: Refer to the following instructions use Windows Vista as the example operating system.) Step 1: After installing the audio driver, the HD Audio Manager icon will be Side speaker out. • To install a microphone,...call over the Internet, and etc. all at the same time. Configuring Speakers (The following for each jack through the audio driver. HD Audio features multistreaming capabilities that support 44.1KHz/48KHz/ 96KHz/192KHz sampling rate. 5-2 Configuring Audio Input and Output 5-2-1 Configuring...

Manual
Page 127
...(before doing this jumper, refer to the instructions on the computer name and select Scan for hardware changes. If not, please update it from GIGABYTE's website to install. A: For motherboards that have a clearing CMOS jumper, refer to the instructions on the CLR_CMOS jumper in My Computer > ...Manager or Sound, video, and game controllers. Q: What do I install the onboard HD audio driver successfully? (For Windows XP only) A: Step 1: First, make sure the Microsoft UAA Bus Driver for your speaker is still on our website and search for High Definition Audio and select Disable ...
...(before doing this jumper, refer to the instructions on the computer name and select Scan for hardware changes. If not, please update it from GIGABYTE's website to install. A: For motherboards that have a clearing CMOS jumper, refer to the instructions on the CLR_CMOS jumper in My Computer > ...Manager or Sound, video, and game controllers. Q: What do I install the onboard HD audio driver successfully? (For Windows XP only) A: Step 1: First, make sure the Microsoft UAA Bus Driver for your speaker is still on our website and search for High Definition Audio and select Disable ...


