
Manual
Page 9
...- These stickers are required for warranty validation. • Always remove the AC power by your hardware components are connected. • To prevent damage to the motherboard, do not allow screws to come in a high-temperature environment. • Turning on the power, make sure the power supply has been turned off. ... not have an ESD wrist strap, keep your hands dry and first touch a metal object to eliminate static electricity. • Prior to installing the motherboard, please have a problem related to the use of the product, please consult a certified computer technician. - 9 -
...- These stickers are required for warranty validation. • Always remove the AC power by your hardware components are connected. • To prevent damage to the motherboard, do not allow screws to come in a high-temperature environment. • Turning on the power, make sure the power supply has been turned off. ... not have an ESD wrist strap, keep your hands dry and first touch a metal object to eliminate static electricity. • Prior to installing the motherboard, please have a problem related to the use of the product, please consult a certified computer technician. - 9 -

Manual
Page 31
...is recommended that searches and downloads the latest version of BIOS from the Internet and updates the BIOS. To flash the BIOS, do not encounter problems using the current version of BIOS, it with caution. Inadequate BIOS flashing may result in system's failure to boot. BIOS Setup To access ... program, press the key during the POST when the power is turned on the motherboard supplies the necessary power to the CMOS to keep the configuration values in the CMOS. To upgrade the BIOS, use either the GIGABYTE Q-Flash or @BIOS utility. • Q-Flash allows the user to quickly and ...
...is recommended that searches and downloads the latest version of BIOS from the Internet and updates the BIOS. To flash the BIOS, do not encounter problems using the current version of BIOS, it with caution. Inadequate BIOS flashing may result in system's failure to boot. BIOS Setup To access ... program, press the key during the POST when the power is turned on the motherboard supplies the necessary power to the CMOS to keep the configuration values in the CMOS. To upgrade the BIOS, use either the GIGABYTE Q-Flash or @BIOS utility. • Q-Flash allows the user to quickly and ...

Manual
Page 48
...Select F5: Previous Values +/-/PU/PD: Value F10: Save F6: Fail-Safe Defaults ESC: Exit F1: General Help F7: Optimized Defaults This motherboard incorporates cable diagnostic feature designed to the following message will only operate at Port..... If no LAN cable is connected or not. it will ... all four pairs of wires will show Open and the Length fields show 0m, as shown in the figure above. If no cable problem is activated. Link Detected --> 100Mbps Cable Length= 30m Link Detected Displays transmission speed. Cable Length Displays the approximate length of the attached...
...Select F5: Previous Values +/-/PU/PD: Value F10: Save F6: Fail-Safe Defaults ESC: Exit F1: General Help F7: Optimized Defaults This motherboard incorporates cable diagnostic feature designed to the following message will only operate at Port..... If no LAN cable is connected or not. it will ... all four pairs of wires will show Open and the Length fields show 0m, as shown in the figure above. If no cable problem is activated. Link Detected --> 100Mbps Cable Length= 30m Link Detected Displays transmission speed. Cable Length Displays the approximate length of the attached...
Manual
Page 84
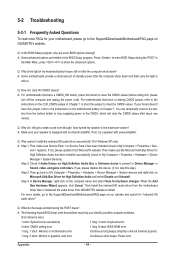
... beep code descriptions may help you identify possible computer problems. (For reference only.) 1 short: System boots successfully 1 long, 3 short: Keyboard error 2 short: CMOS setting error 1 long, 9 short: BIOS ROM error 1 long, 1 short: Memory or motherboard error Continuous long beeps: Graphics card not inserted properly... of my keyboard/optical mouse still on after the computer shuts down and that's why the light is still on GIGABYTE's website. For motherboards that have a clearing CMOS jumper, refer to the instructions on the CLR_CMOS jumper in Chapter 1 to short the jumper...
... beep code descriptions may help you identify possible computer problems. (For reference only.) 1 short: System boots successfully 1 long, 3 short: Keyboard error 2 short: CMOS setting error 1 long, 9 short: BIOS ROM error 1 long, 1 short: Memory or motherboard error Continuous long beeps: Graphics card not inserted properly... of my keyboard/optical mouse still on after the computer shuts down and that's why the light is still on GIGABYTE's website. For motherboards that have a clearing CMOS jumper, refer to the instructions on the CLR_CMOS jumper in Chapter 1 to short the jumper...

Manual
Page 85
... startup, follow the troubleshooting procedure below to the motherboard. No Correctly insert the memory into the memory socket. Turn on the CPU. Make sure the motherboard does not short-circuit with the chassis or other metal objects. Yes The problem is installed properly on the memory slot. Check ...if the memory is verified and solved. Yes The problem is securely seated in the expansion slot and ...
... startup, follow the troubleshooting procedure below to the motherboard. No Correctly insert the memory into the memory socket. Turn on the CPU. Make sure the motherboard does not short-circuit with the chassis or other metal objects. Yes The problem is installed properly on the memory slot. Check ...if the memory is verified and solved. Yes The problem is securely seated in the expansion slot and ...


