

User Guide
Page 2
... bottom of all devices connected to one line should contact your home has specially wired alarm equipment connected to the telephone line, ensure the installation of Part 68, FCC Rules and Regulations. In most (but not all of these changes are on the cabinet bottom. REN Number is a label indicating, among other information, the US number and Ringer Equivalence Number (REN) for details. Where...
... bottom of all devices connected to one line should contact your home has specially wired alarm equipment connected to the telephone line, ensure the installation of Part 68, FCC Rules and Regulations. In most (but not all of these changes are on the cabinet bottom. REN Number is a label indicating, among other information, the US number and Ringer Equivalence Number (REN) for details. Where...

User Guide
Page 4
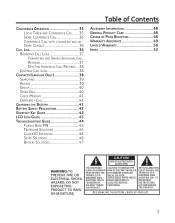
... You Begin 7 Parts Checklist 7 Telephone Jack Requirements 8 Installation 8 Digital Security System 8 Important Installation Guidelines 8 Handset Layout 9 Base Layout 9 Installing the Phone 10 Installing the Handset Battery 10 Base Station 10 Software Installation 11 SKYLINK™ Operation Guide 15 To Uninstall the Software 16 Programming the Telephone 16 Timer 17 Time Format 17 Clock (Set Date/Time 17 Alarm 17 Handset Settings 18 Language 18 Ringer Type 19 Ringer Volume 19 Message Waiting 20 Wallpaper 21 Contrast 21 Key Tones 21 Auto Answer 22 Handset Name 22...
... You Begin 7 Parts Checklist 7 Telephone Jack Requirements 8 Installation 8 Digital Security System 8 Important Installation Guidelines 8 Handset Layout 9 Base Layout 9 Installing the Phone 10 Installing the Handset Battery 10 Base Station 10 Software Installation 11 SKYLINK™ Operation Guide 15 To Uninstall the Software 16 Programming the Telephone 16 Timer 17 Time Format 17 Clock (Set Date/Time 17 Alarm 17 Handset Settings 18 Language 18 Ringer Type 19 Ringer Volume 19 Message Waiting 20 Wallpaper 21 Contrast 21 Key Tones 21 Auto Answer 22 Handset Name 22...
User Guide
Page 5
... Saving Individual Call Records 37 Deleting Individual Call Records.... 38 Deleting Call Logs 38 Contacts (Landline Only 38 Searching 39 Adding 39 Group 40 Speed Dial 40 Check Memory 41 Emergency Call 41 Changing the Battery 41 Battery Safety Precautions 42 Shortcut Key Guide 42 LCD Icon Guide 43 Troubleshooting Guide 44 Forgot Base PIN 44 Telephone Solutions 44 Caller ID Solutions 46 Skype Solutions 46 Battery Solutions 47 Table of Contents Accessory Information 48 General Product Care...
... Saving Individual Call Records 37 Deleting Individual Call Records.... 38 Deleting Call Logs 38 Contacts (Landline Only 38 Searching 39 Adding 39 Group 40 Speed Dial 40 Check Memory 41 Emergency Call 41 Changing the Battery 41 Battery Safety Precautions 42 Shortcut Key Guide 42 LCD Icon Guide 43 Troubleshooting Guide 44 Forgot Base PIN 44 Telephone Solutions 44 Caller ID Solutions 46 Skype Solutions 46 Battery Solutions 47 Table of Contents Accessory Information 48 General Product Care...
User Guide
Page 7
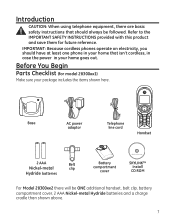
Before You Begin Parts Checklist (for future reference. Introduction CAUTION: When using telephone equipment, there are basic safety instructions that isn't cordless, in case the power in your home goes out. PAGE Base AC power adaptor Telephone line cord Handset 2 AAA Belt Nickel-metal clip Hydride batteries Battery compartment cover SKYLINK™ Dual Phone Utility SKYLINK™ Install CD ROM For Model 28300xx2 there will be followed. Refer to the...
Before You Begin Parts Checklist (for future reference. Introduction CAUTION: When using telephone equipment, there are basic safety instructions that isn't cordless, in case the power in your home goes out. PAGE Base AC power adaptor Telephone line cord Handset 2 AAA Belt Nickel-metal clip Hydride batteries Battery compartment cover SKYLINK™ Dual Phone Utility SKYLINK™ Install CD ROM For Model 28300xx2 there will be followed. Refer to the...
User Guide
Page 8
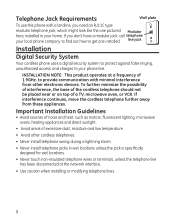
... possibility of interference, the base of the cordless telephone should not be placed near or on top of 1.9GHz. If interference continues, move the cordless telephone further away from other cordless telephones. • Never install telephone wiring during a lightning storm. • Never install telephone jacks in your phone line. line jack Installation Digital Security System Your cordless phone uses a digital security system to protect against false ringing, unauthorized access, and charges to get one pictured...
... possibility of interference, the base of the cordless telephone should not be placed near or on top of 1.9GHz. If interference continues, move the cordless telephone further away from other cordless telephones. • Never install telephone wiring during a lightning storm. • Never install telephone jacks in your phone line. line jack Installation Digital Security System Your cordless phone uses a digital security system to protect against false ringing, unauthorized access, and charges to get one pictured...

User Guide
Page 16
... [Remove] to uninstall. 3. It also displays information when using Skype. HANDSET SETTINGS Allows you access to all of your phone the handset name, time, battery charge status and wallpaper when idle. FUNCTION Games selection. 16 Go to the desired menu option. The handset menu gives you to 100 landline entries in -1 Phone Utility" from the PC. 1. CALL LOG Review Caller ID data (20 record limit) and Skype call...
... [Remove] to uninstall. 3. It also displays information when using Skype. HANDSET SETTINGS Allows you access to all of your phone the handset name, time, battery charge status and wallpaper when idle. FUNCTION Games selection. 16 Go to the desired menu option. The handset menu gives you to 100 landline entries in -1 Phone Utility" from the PC. 1. CALL LOG Review Caller ID data (20 record limit) and Skype call...
User Guide
Page 18
... are sixteen programmable menus available: Language, Ringer Type, Ringer Volume, Message Waiting, Wallpaper, Contrast, Key Tones, Auto Answer, Handset Name, Menu Color, Backlight, Skype Contacts, Registration, De-registration, Select Base and Default Setting. 1. Press the OK (SKL) button to enter the menu. Press the OK (SKL) button to confirm. The default is OFF (not in the top icon bar. Ringer Volume 1. Ringer Type 1. Use the 6 or 5 button to scroll to enter the menu...
... are sixteen programmable menus available: Language, Ringer Type, Ringer Volume, Message Waiting, Wallpaper, Contrast, Key Tones, Auto Answer, Handset Name, Menu Color, Backlight, Skype Contacts, Registration, De-registration, Select Base and Default Setting. 1. Press the OK (SKL) button to enter the menu. Press the OK (SKL) button to confirm. The default is OFF (not in the top icon bar. Ringer Volume 1. Ringer Type 1. Use the 6 or 5 button to scroll to enter the menu...

User Guide
Page 20
... to confirm your phone. Press the OK (SKL) button to MESSAGE WAITING. 2. Press the OK (SKL) button to MESSAGE WAITING. 2. To hear your messages, contact your messaging service provider. 6. Use the 6 or 5 button to scroll to enter the menu. 5. NOTE: For quick dialing you can store the voice messaging service number on the base will flash to alert you that you have listened to your messages, to turn off the flashing message light: From the HANDSET SETTINGS menu; 1.
... to confirm your phone. Press the OK (SKL) button to MESSAGE WAITING. 2. Press the OK (SKL) button to MESSAGE WAITING. 2. To hear your messages, contact your messaging service provider. 6. Use the 6 or 5 button to scroll to enter the menu. 5. NOTE: For quick dialing you can store the voice messaging service number on the base will flash to alert you that you have listened to your messages, to turn off the flashing message light: From the HANDSET SETTINGS menu; 1.
User Guide
Page 24
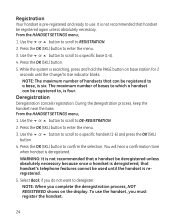
... handset be used until the Charge/In Use indicator blinks. NOTE: The maximum number of bases to which a handset can be registered to enter the menu. 3. You will hear a confirmation tone when handset is deregistered. WARNING: It is not recommended that a handset be deregistered unless absolutely necessary because once a handset is deregistered, that can be registered to REGISTRATION. 2. Press the OK (SKL) button to , is four. The maximum number of handsets that handset's telephone...
... handset be used until the Charge/In Use indicator blinks. NOTE: The maximum number of bases to which a handset can be registered to enter the menu. 3. You will hear a confirmation tone when handset is deregistered. WARNING: It is not recommended that a handset be deregistered unless absolutely necessary because once a handset is deregistered, that can be registered to REGISTRATION. 2. Press the OK (SKL) button to , is four. The maximum number of handsets that handset's telephone...

User Guide
Page 25
... return the handset to a specific base (1-4, Auto Base). 4. Make sure your selection. Select Base This option allows you to register a handset to enter the menu. 3. Press the OK (SKL) button to enter the menu. 3. Press the OK (SKL) button to confirm the selection. Use the 6 or 5 button to scroll to SELECT BASE. 2. Use the 6 or 5 button to scroll to DEFAULT. 2. Use the 6 or 5 button to scroll to factory preset settings.
... return the handset to a specific base (1-4, Auto Base). 4. Make sure your selection. Select Base This option allows you to register a handset to enter the menu. 3. Press the OK (SKL) button to enter the menu. 3. Press the OK (SKL) button to confirm the selection. Use the 6 or 5 button to scroll to SELECT BASE. 2. Use the 6 or 5 button to scroll to DEFAULT. 2. Use the 6 or 5 button to scroll to factory preset settings.
User Guide
Page 27
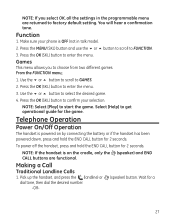
...) button and use the 6 or 5 button to scroll to GAMES. 2. Use the 6 or 5 button to scroll to FUNCTION. 3. Select [Help] to select the desired game. 4. Telephone Operation Power On/Off Operation The handset is powered on the cradle, only the (speaker) and END CALL buttons are functional. You will hear a confirmation tone. Use the 6 or 5 button to get operational guide for 2 seconds. Press the OK (SKL) button to factory default setting. To power off the handset...
...) button and use the 6 or 5 button to scroll to GAMES. 2. Use the 6 or 5 button to scroll to FUNCTION. 3. Select [Help] to select the desired game. 4. Telephone Operation Power On/Off Operation The handset is powered on the cradle, only the (speaker) and END CALL buttons are functional. You will hear a confirmation tone. Use the 6 or 5 button to get operational guide for 2 seconds. Press the OK (SKL) button to factory default setting. To power off the handset...
User Guide
Page 32
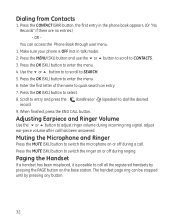
... mode). 2. Make sure your phone is possible to enter the menu. 6. Enter the first letter of the name to switch the ringer on or off during a call all the registered handsets by pressing any button. 32 Press the MUTE (SKL) button to quick search an entry. 7. You can be stopped until by pressing the PAGE button on or off during incoming ring signal, adjust ear-piece volume...
... mode). 2. Make sure your phone is possible to enter the menu. 6. Enter the first letter of the name to switch the ringer on or off during a call all the registered handsets by pressing any button. 32 Press the MUTE (SKL) button to quick search an entry. 7. You can be stopped until by pressing the PAGE button on or off during incoming ring signal, adjust ear-piece volume...

User Guide
Page 39
...) button to quick search an entry. 4. Use the 6 or 5 button to confirm selection. NOTE: Enter a number in the display. Press the OK (SKL) button to select desired group. 8. NOTE: If all the memories are occupied, "Memory Full" appears in standby mode, and then press OK (SKL) button to save a number through the Call Log (refer to "Call Log Operation"). 39 Press the OK (SKL) button to 24 digits...
...) button to quick search an entry. 4. Use the 6 or 5 button to confirm selection. NOTE: Enter a number in the display. Press the OK (SKL) button to select desired group. 8. NOTE: If all the memories are occupied, "Memory Full" appears in standby mode, and then press OK (SKL) button to save a number through the Call Log (refer to "Call Log Operation"). 39 Press the OK (SKL) button to 24 digits...
User Guide
Page 43
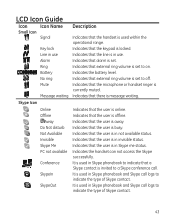
... the operational range. SkypeOut It is away. Alarm Indicates that alarm is in Skype me status. Skype Me Indicates that the user is set. LCD Icon Guide Icon Icon Name Small Icon Signal Description Indicates that the handset is message waiting. Message waiting Indicates that external ring volume is currently muted. Ring Indicates that there is used in Skype phonebook to indicate that the user is invited to a Skype conference call logs to off. Mute Indicates...
... the operational range. SkypeOut It is away. Alarm Indicates that alarm is in Skype me status. Skype Me Indicates that the user is set. LCD Icon Guide Icon Icon Name Small Icon Signal Description Indicates that the handset is message waiting. Message waiting Indicates that external ring volume is currently muted. Ring Indicates that there is used in Skype phonebook to indicate that the user is invited to a Skype conference call logs to off. Mute Indicates...
User Guide
Page 44
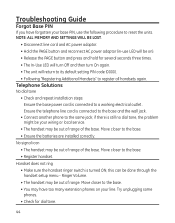
NOTE: ALL MEMORY AND SETTINGS WILL BE LOST. • Disconnect line cord and AC power adaptor. • Hold the PAGE button and reconnect AC power adaptor (in-use the following procedure to reset the units. Handset does not ring • Make sure the handset ringer switch is connected to a working electrical outlet . Telephone Solutions No dial tone • Check and repeat installation steps: Ensure the base power cord is turned ON, this can be out of range of the...
NOTE: ALL MEMORY AND SETTINGS WILL BE LOST. • Disconnect line cord and AC power adaptor. • Hold the PAGE button and reconnect AC power adaptor (in-use the following procedure to reset the units. Handset does not ring • Make sure the handset ringer switch is connected to a working electrical outlet . Telephone Solutions No dial tone • Check and repeat installation steps: Ensure the base power cord is turned ON, this can be out of range of the...

User Guide
Page 45
... you program the memory location keys correctly? • Did you follow proper dialing sequence? Remove the handset battery. Move closer to 3 minutes. 45 Wait for 30 seconds and plug the power adaptor back into an outlet with the base when the TALK/CALL BACK button is properly installed. • Disconnect the handset battery and plug it in again. Reconnect the battery and charge for "No dial tone". • Replace the battery. Unit beeps...
... you program the memory location keys correctly? • Did you follow proper dialing sequence? Remove the handset battery. Move closer to 3 minutes. 45 Wait for 30 seconds and plug the power adaptor back into an outlet with the base when the TALK/CALL BACK button is properly installed. • Disconnect the handset battery and plug it in again. Reconnect the battery and charge for "No dial tone". • Replace the battery. Unit beeps...

User Guide
Page 46
... in hibernate mode. This message indicates the presence of noise on Handset screen. Skype Solutions Unable to make Skype Call • Check to see that the unit is connected to PC and USB Driver is connected to a non-switched electrical outlet. Unit Locks Up During Skype Call • Reboot your local telephone company. Caller ID Error Message • The unit displays this message if it . Follow instructions on the line. Registration did not work • Charge the batteries for 16...
... in hibernate mode. This message indicates the presence of noise on Handset screen. Skype Solutions Unable to make Skype Call • Check to see that the unit is connected to PC and USB Driver is connected to a non-switched electrical outlet. Unit Locks Up During Skype Call • Reboot your local telephone company. Caller ID Error Message • The unit displays this message if it . Follow instructions on the line. Registration did not work • Charge the batteries for 16...
User Guide
Page 48
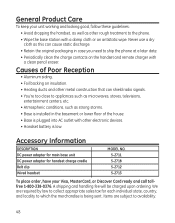
Accessory Information DESCRIPTION DC power adapter for main base unit DC power adaptor for each individual state, country, and locality to collect appropriate sales tax for handset charge cradle Belt clip Wired headset MODEL NO. 5-2711 5-2718 5-2712 5-2713 To place order, have your unit working and looking good, follow these guidelines: • Avoid dropping the handset, as well as other electronic devices. • Handset battery is...
Accessory Information DESCRIPTION DC power adapter for main base unit DC power adaptor for each individual state, country, and locality to collect appropriate sales tax for handset charge cradle Belt clip Wired headset MODEL NO. 5-2711 5-2718 5-2712 5-2713 To place order, have your unit working and looking good, follow these guidelines: • Avoid dropping the handset, as well as other electronic devices. • Handset battery is...
User Guide
Page 52
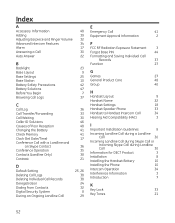
... C Call Log 36 Call Transfer/Forwarding 33 Call Waiting 30 Caller ID Solutions 46 Causes of Poor Reception 48 Changing the Battery 41 Check Memory 41 Clock (Set Date/Time) 17 Conference Call with a Landline and an Skype Contact 36 Conference Operation 35 Contacts (Landline Only) 38 Contrast 21 D Default Setting 25, 26 Deleting Call Logs 38 Deleting Individual Call Records 38 Deregistration 24 Dialing from Contacts 32 Digital Security System 8 During an Ongoing Landline Call 29 E Emergency Call...
... C Call Log 36 Call Transfer/Forwarding 33 Call Waiting 30 Caller ID Solutions 46 Causes of Poor Reception 48 Changing the Battery 41 Check Memory 41 Clock (Set Date/Time) 17 Conference Call with a Landline and an Skype Contact 36 Conference Operation 35 Contacts (Landline Only) 38 Contrast 21 D Default Setting 25, 26 Deleting Call Logs 38 Deleting Individual Call Records 38 Deregistration 24 Dialing from Contacts 32 Digital Security System 8 During an Ongoing Landline Call 29 E Emergency Call...
User Guide
Page 53
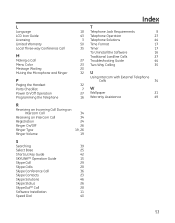
L Language 18 LCD Icon Guide 43 Licensing 3 Limited Warranty 50 Local Three-way Conference Call 35 M Making a Call 27 Menu Color 23 Message Waiting 20 Muting the Microphone and Ringer 32 P Paging the Handset 32 Parts Checklist 7 Power On/Off Operation 27 Programming the Telephone 16 R Receiving an Incoming Call During an Intercom Call 34 Receiving an Intercom Call 34 Registration 24 Ringer On/Off 26 Ringer Type 19, 26 Ringer Volume 19 S Searching 39 Select Base 25 Shortcut Key Guide 42...
L Language 18 LCD Icon Guide 43 Licensing 3 Limited Warranty 50 Local Three-way Conference Call 35 M Making a Call 27 Menu Color 23 Message Waiting 20 Muting the Microphone and Ringer 32 P Paging the Handset 32 Parts Checklist 7 Power On/Off Operation 27 Programming the Telephone 16 R Receiving an Incoming Call During an Intercom Call 34 Receiving an Intercom Call 34 Registration 24 Ringer On/Off 26 Ringer Type 19, 26 Ringer Volume 19 S Searching 39 Select Base 25 Shortcut Key Guide 42...


