
User Guide
Page 2
... your home has specially wired alarm equipment connected to the telephone line, ensure the installation of devices you may not be determined by turning the equipment off and on your local telephone company. Specific Absorption Ratio compliance for Hearing Aid Compatibility. To be certain of the number of this equipment to connect this product does not disable your body. If these changes are...
... your home has specially wired alarm equipment connected to the telephone line, ensure the installation of devices you may not be determined by turning the equipment off and on your local telephone company. Specific Absorption Ratio compliance for Hearing Aid Compatibility. To be certain of the number of this equipment to connect this product does not disable your body. If these changes are...
User Guide
Page 3
... 9 INSTALLING THE PHONE 10 WALL MOUNTING THE BASE 11 TELEPHONE SETUP 12 PROGRAMMING THE BASE 12 LANGUAGE 12 DISPLAY CONTRAST 12 ANSWERER ON/OFF 13 RING TO ANSWER 13 SECURITY CODE 14 ANNOUNCEMENT 14 RECORDING THE OUTGOING ANNOUNCEMENT 14 REVIEWING THE ANNOUNCEMENT 15 RINGER TONE 16 TONE/PULSE 16 SET DAY 17 SETTIME 17 AREA CODE 17 DEFAULT 18 PROGRAMMING THE HANDSET 18 LANGUAGE 18 HANDSET NAME 19 AREA CODE 20 RINGER TONE 20 REGISTRATION 20 DEREGISTRATION 22 DEFAULT 23 CORDLESS PHONE BASICS 24 SPEAKERPHONE 24 CHARGE INDICATOR 24 MAKING A CALL...
... 9 INSTALLING THE PHONE 10 WALL MOUNTING THE BASE 11 TELEPHONE SETUP 12 PROGRAMMING THE BASE 12 LANGUAGE 12 DISPLAY CONTRAST 12 ANSWERER ON/OFF 13 RING TO ANSWER 13 SECURITY CODE 14 ANNOUNCEMENT 14 RECORDING THE OUTGOING ANNOUNCEMENT 14 REVIEWING THE ANNOUNCEMENT 15 RINGER TONE 16 TONE/PULSE 16 SET DAY 17 SETTIME 17 AREA CODE 17 DEFAULT 18 PROGRAMMING THE HANDSET 18 LANGUAGE 18 HANDSET NAME 19 AREA CODE 20 RINGER TONE 20 REGISTRATION 20 DEREGISTRATION 22 DEFAULT 23 CORDLESS PHONE BASICS 24 SPEAKERPHONE 24 CHARGE INDICATOR 24 MAKING A CALL...
User Guide
Page 4
... RECORDS 44 CID ERRORS 45 ANSWERING SYSTEM OPERATION .......... 46 STANDBY DISPLAY 46 SPEAKER VOLUME 46 SCREENING CALLS AT THE BASE ......... 46 MESSAGE PLAYBACK 46 ERASING MESSAGES 47 MEMO 48 REMOTE ACCESS 48 ACCESSING THE ANSWERING SYSTEM WITH THE CORDLESS HANDSET 48 SCREENING CALLS WITH THE CORDLESS HANDSET 49 ACCESSING THE ANSWERING SYSTEM FROM ANOTHER LOCATION 49 MEMORY FULL 49 REPLACING THE BATTERY 50 BATTERY SAFETY PRECAUTIONS ......... 51 HEADSET AND BELT CLIP INSTALLATION .. 51 CONNECTING AN OPTIONAL HEADSET TO THE HANDSET 51 CONNECTING THE BELT CLIP 51 DISPLAY MESSAGES...
... RECORDS 44 CID ERRORS 45 ANSWERING SYSTEM OPERATION .......... 46 STANDBY DISPLAY 46 SPEAKER VOLUME 46 SCREENING CALLS AT THE BASE ......... 46 MESSAGE PLAYBACK 46 ERASING MESSAGES 47 MEMO 48 REMOTE ACCESS 48 ACCESSING THE ANSWERING SYSTEM WITH THE CORDLESS HANDSET 48 SCREENING CALLS WITH THE CORDLESS HANDSET 49 ACCESSING THE ANSWERING SYSTEM FROM ANOTHER LOCATION 49 MEMORY FULL 49 REPLACING THE BATTERY 50 BATTERY SAFETY PRECAUTIONS ......... 51 HEADSET AND BELT CLIP INSTALLATION .. 51 CONNECTING AN OPTIONAL HEADSET TO THE HANDSET 51 CONNECTING THE BELT CLIP 51 DISPLAY MESSAGES...
User Guide
Page 5
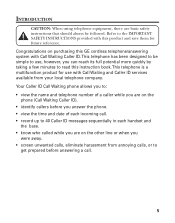
... potential more quickly by taking a few minutes to get prepared before you answer the phone. • view the time and date of a caller while you are on the phone (Call Waiting Caller ID). • identify callers before answering a call. 5 Your Caller ID Call Waiting phone allows you to: • view the name and telephone number of each incoming call. • record up to 40 Caller ID messages sequentially in each handset and the base. • know...
... potential more quickly by taking a few minutes to get prepared before you answer the phone. • view the time and date of a caller while you are on the phone (Call Waiting Caller ID). • identify callers before answering a call. 5 Your Caller ID Call Waiting phone allows you to: • view the name and telephone number of each incoming call. • record up to 40 Caller ID messages sequentially in each handset and the base. • know...
User Guide
Page 6
.... INSTALLATION NOTE: Some cordless telephones operate at least one phone in your home that may cause interference to know who is calling when the phone rings and Caller ID with each other and/or your new telephone. To minimize or prevent such interference, the base of the cordless telephone should have at frequencies that isn't cordless, in case the power in your local telephone company: the standard Name/Number Caller ID Service...
.... INSTALLATION NOTE: Some cordless telephones operate at least one phone in your home that may cause interference to know who is calling when the phone rings and Caller ID with each other and/or your new telephone. To minimize or prevent such interference, the base of the cordless telephone should have at frequencies that isn't cordless, in case the power in your local telephone company: the standard Name/Number Caller ID Service...
User Guide
Page 7
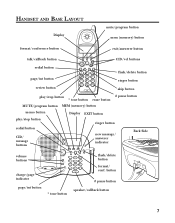
...CID Vol conference - redial page ringer flash int delete 1 2 3 abc def review play/stop skip 4 ghi 5 6 jkl mno 7 8 9 pqrs tuv wxyz * tone 0 oper erase # pause CID/vol buttons flash/delete button ringer button skip button play/stop button # pause button * tone button erase button MUTE/program button MEM (memory) button memo button play/stop button redial button CID/ message buttons volume buttons charge/page indicator Display EXIT button ringer button memo play/stop new message/ answerer es ca f r v v CID/messag v volume v d er at co ial pro MUTE gram red MEM...
...CID Vol conference - redial page ringer flash int delete 1 2 3 abc def review play/stop skip 4 ghi 5 6 jkl mno 7 8 9 pqrs tuv wxyz * tone 0 oper erase # pause CID/vol buttons flash/delete button ringer button skip button play/stop button # pause button * tone button erase button MUTE/program button MEM (memory) button memo button play/stop button redial button CID/ message buttons volume buttons charge/page indicator Display EXIT button ringer button memo play/stop new message/ answerer es ca f r v v CID/messag v volume v d er at co ial pro MUTE gram red MEM...
User Guide
Page 8
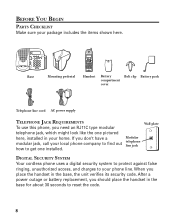
... base, the unit verifies its security code. Modular telephone line jack Wall plate DIGITAL SECURITY SYSTEM Your cordless phone uses a digital security system to protect against false ringing, unauthorized access, and charges to reset the code. 8 memo play /stop new message/ answerer es ca f r v v CID/messag v volume v d er at co ial pro MUTE gram red MEM orm EXIT ing nf. 1 2 abc 3 def flash elete 4 ghi 5 jkl 6 mno 7 pqrs 8 tuv 9 wxyz charge/ page page/int. * tone 0 oper llback speaker # pause Base Mounting pedestal mute program mem exit answerer...
... base, the unit verifies its security code. Modular telephone line jack Wall plate DIGITAL SECURITY SYSTEM Your cordless phone uses a digital security system to protect against false ringing, unauthorized access, and charges to reset the code. 8 memo play /stop new message/ answerer es ca f r v v CID/messag v volume v d er at co ial pro MUTE gram red MEM orm EXIT ing nf. 1 2 abc 3 def flash elete 4 ghi 5 jkl 6 mno 7 pqrs 8 tuv 9 wxyz charge/ page page/int. * tone 0 oper llback speaker # pause Base Mounting pedestal mute program mem exit answerer...

User Guide
Page 14
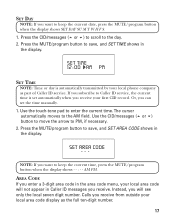
The security code is : "PLEASE LEAVE YOUR MESSAGE AFTER THE TONE." Press the MUTE/program button. Use the touch-tone pad to enter your answering system. SECURITY CODE 628 NOTE: If you should be about nine inches from a tone dialing telephone in the display, followed by the caller when the answering system answers the call. For example, press the 6, 2, and 8 number keys for remote access, and it prevents unauthorized access to your new 3-digit security code. The new numbers replace the old numbers. You...
The security code is : "PLEASE LEAVE YOUR MESSAGE AFTER THE TONE." Press the MUTE/program button. Use the touch-tone pad to enter your answering system. SECURITY CODE 628 NOTE: If you should be about nine inches from a tone dialing telephone in the display, followed by the caller when the answering system answers the call. For example, press the 6, 2, and 8 number keys for remote access, and it prevents unauthorized access to your new 3-digit security code. The new numbers replace the old numbers. You...
User Guide
Page 17
... you want to keep the current time, press the MUTE/program button when the display shows - - : - - Press the CID/messages ( or ) to scroll to enter the current time. If you subscribe to Caller ID service, the current time is automatically transmitted by your first CID record. SET AREA CODE - - - Or, you receive your local phone company as the full ten-digit number. 17 Use the touch-tone pad to...
... you want to keep the current time, press the MUTE/program button when the display shows - - : - - Press the CID/messages ( or ) to scroll to enter the current time. If you subscribe to Caller ID service, the current time is automatically transmitted by your first CID record. SET AREA CODE - - - Or, you receive your local phone company as the full ten-digit number. 17 Use the touch-tone pad to...

User Guide
Page 20
... code. 2. Calls you will not appear in the display. During the registration process, keep your handset shows the following: 1. When your handset near the base. The default setting is 2NO. 20 The default setting is 1. 2. SET AREA CODE - - - The ringer tone plays. Press the mute/program button to save , and REGISTRATION 1YES 2NO shows in Caller ID messages you receive. AREA CODE If you enter a 3-digit area code in the display. Press the mute/program button to save , and SET RINGER TONE...
... code. 2. Calls you will not appear in the display. During the registration process, keep your handset shows the following: 1. When your handset near the base. The default setting is 2NO. 20 The default setting is 1. 2. SET AREA CODE - - - The ringer tone plays. Press the mute/program button to save , and REGISTRATION 1YES 2NO shows in Caller ID messages you receive. AREA CODE If you enter a 3-digit area code in the display. Press the mute/program button to save , and SET RINGER TONE...

User Guide
Page 23
... the charge/page indicator flashes. 2. Use the CID/vol ( or ) button to scroll to use the system's original settings. The default setting is 1YES. 6. DEFAULT As you become familiar with this system, you should de-register all handsets are deregistered. Press the mute/program button to standby mode, and each handset displays HANDSET NEEDS REGISTRATION. Press and hold the base page/int button on the base. Then the base returns to confirm the deregistration. HANDSET # DEREGISTERED NOTE...
... the charge/page indicator flashes. 2. Use the CID/vol ( or ) button to scroll to use the system's original settings. The default setting is 1YES. 6. DEFAULT As you become familiar with this system, you should de-register all handsets are deregistered. Press the mute/program button to standby mode, and each handset displays HANDSET NEEDS REGISTRATION. Press and hold the base page/int button on the base. Then the base returns to confirm the deregistration. HANDSET # DEREGISTERED NOTE...

User Guide
Page 24
...; Areas with a speakerphone. MAKING A CALL WITH THE HANDSET 1. CORDLESS PHONE BASICS SPEAKERPHONE For hands-free operation and convenience, your programmed setting are talking. Pick up these sounds.) • Surfaces affected by the person to 1YES or 2NO. CHARGE/PAGE INDICATOR When the charge/page use indicator on the base return to the main menu. Listen for a dial tone. 2. Press the mute/program button to save, and the display returns to the factory default settings. • If...
...; Areas with a speakerphone. MAKING A CALL WITH THE HANDSET 1. CORDLESS PHONE BASICS SPEAKERPHONE For hands-free operation and convenience, your programmed setting are talking. Pick up these sounds.) • Surfaces affected by the person to 1YES or 2NO. CHARGE/PAGE INDICATOR When the charge/page use indicator on the base return to the main menu. Listen for a dial tone. 2. Press the mute/program button to save, and the display returns to the factory default settings. • If...
User Guide
Page 25
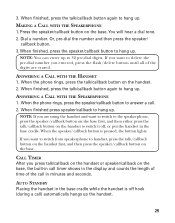
... base. MAKING A CALL WITH THE SPEAKERPHONE 1. When finished, press the speaker/callback button to 32 pre-dial digits. NOTE: If you entered, press the flash/delete button until all of the call in the base cradle. AUTO STANDBY Placing the handset in the base cradle while the handset is pressed, the button lights. When finished, press the talk/callback button again to switch it off hook (during a call . 2. Dial a number. Or, pre-dial...
... base. MAKING A CALL WITH THE SPEAKERPHONE 1. When finished, press the speaker/callback button to 32 pre-dial digits. NOTE: If you entered, press the flash/delete button until all of the call in the base cradle. AUTO STANDBY Placing the handset in the base cradle while the handset is pressed, the button lights. When finished, press the talk/callback button again to switch it off hook (during a call . 2. Dial a number. Or, pre-dial...
User Guide
Page 31
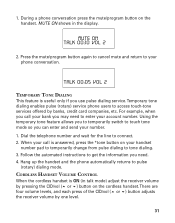
... TONE DIALING This feature is ON (in the display. CORDLESS HANDSET VOLUME CONTROL When the cordless handset is useful only if you use pulse dialing service. During a phone conversation press the mute/program button on the cordless handset. When your call your bank you call is answered, press the *tone button on your handset number pad to temporarily change from pulse dialing to enter your phone conversation. For example, when you may need . 4. MUTE ON shows in talk mode) adjust the receiver volume...
... TONE DIALING This feature is ON (in the display. CORDLESS HANDSET VOLUME CONTROL When the cordless handset is useful only if you use pulse dialing service. During a phone conversation press the mute/program button on the cordless handset. When your call your bank you call is answered, press the *tone button on your handset number pad to temporarily change from pulse dialing to enter your phone conversation. For example, when you may need . 4. MUTE ON shows in talk mode) adjust the receiver volume...
User Guide
Page 46
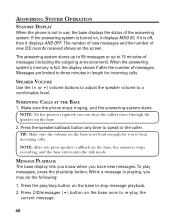
... of new CID records received shows on the base to a comfortable level. Make sure the phone stops ringing, and the answering system starts. MESSAGE PLAYBACK The base display lets you know when you may do the following: 1. Press the speaker/callback button any time to speak to re-play /stop button on the screen. Press CID/messages ( ) button on , it displays MSG 00, if it displays ANS OFF. SPEAKER VOLUME Use the ( or ) volume buttons to...
... of new CID records received shows on the base to a comfortable level. Make sure the phone stops ringing, and the answering system starts. MESSAGE PLAYBACK The base display lets you know when you may do the following: 1. Press the speaker/callback button any time to speak to re-play /stop button on the screen. Press CID/messages ( ) button on , it displays MSG 00, if it displays ANS OFF. SPEAKER VOLUME Use the ( or ) volume buttons to...

User Guide
Page 48
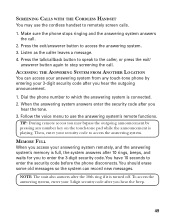
... mode. 4. ACCESSING THE ANSWERING SYSTEM WITH THE CORDLESS HANDSET 1. The display shows ANSWERER REMOTE ACCESS. 3. Press the flash/delete button on the base again. Begin speaking after you through the steps. TIPS: When you access the answering system with a different touch-tone phone, a voice menu guides you hear the beep. 3. Make sure your 3-digit security code. 3. ALL MESSAGE ERASED shows in standby mode. 2. ALL MESSAGE ERASED MEMO Use the Memo feature to access the answering system. When you are finished reviewing your messages, press button...
... mode. 4. ACCESSING THE ANSWERING SYSTEM WITH THE CORDLESS HANDSET 1. The display shows ANSWERER REMOTE ACCESS. 3. Press the flash/delete button on the base again. Begin speaking after you through the steps. TIPS: When you access the answering system with a different touch-tone phone, a voice menu guides you hear the beep. 3. Make sure your 3-digit security code. 3. ALL MESSAGE ERASED shows in standby mode. 2. ALL MESSAGE ERASED MEMO Use the Memo feature to access the answering system. When you are finished reviewing your messages, press button...
User Guide
Page 49
... erase some old messages so the system can access your answering system from any number key on the touch-tone pad while the announcement is turned off. NOTE: The unit also answers after 10 rings, beeps, and waits for you to remotely screen calls. 1. To access the answering system, enter your 3-digit security code after you hear the tone. 3. ACCESSING THE ANSWERING SYSTEM FROM ANOTHER LOCATION You can record new messages. Dial the phone number to access the answering system. SCREENING CALLS WITH THE CORDLESS HANDSET...
... erase some old messages so the system can access your answering system from any number key on the touch-tone pad while the announcement is turned off. NOTE: The unit also answers after 10 rings, beeps, and waits for you to remotely screen calls. 1. To access the answering system, enter your 3-digit security code after you hear the tone. 3. ACCESSING THE ANSWERING SYSTEM FROM ANOTHER LOCATION You can record new messages. Dial the phone number to access the answering system. SCREENING CALLS WITH THE CORDLESS HANDSET...
User Guide
Page 54
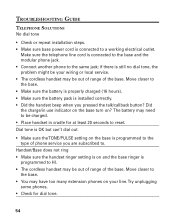
... a working electrical outlet. Handset/Base does not ring • Make sure the handset ringer setting is programmed to HI. • The cordless handset may be charged. • Place handset in use indicator on the base turn on the base is OK but can't dial out • Make sure the TONE/PULSE setting on ? Move closer to the base. • You may have too many extension phones on and the base ringer is on your wiring or local service. • The cordless handset...
... a working electrical outlet. Handset/Base does not ring • Make sure the handset ringer setting is programmed to HI. • The cordless handset may be charged. • Place handset in use indicator on the base turn on the base is OK but can't dial out • Make sure the TONE/PULSE setting on ? Move closer to the base. • You may have too many extension phones on and the base ringer is on your wiring or local service. • The cordless handset...
User Guide
Page 58
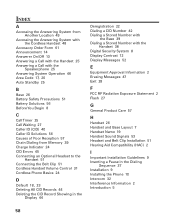
... Speakerphone 25 Answering System Operation 46 Area Code 17, 20 Auto Standby 25 B Base 26 Battery Safety Precautions 51 Battery Solutions 56 Before You Begin 8 C Call Timer 25 Call Waiting 27 Caller ID (CID) 40 Caller ID Solutions 56 Causes of Poor Reception 57 Chain Dialing from Memory 39 Charge Indicator 24 CID Errors 45 Connecting an Optional Headset to the Handset 51 Connecting the Belt Clip 51 Cordless Handset Volume Control 31 Cordless Phone Basics 24 D Default...
... Speakerphone 25 Answering System Operation 46 Area Code 17, 20 Auto Standby 25 B Base 26 Battery Safety Precautions 51 Battery Solutions 56 Before You Begin 8 C Call Timer 25 Call Waiting 27 Caller ID (CID) 40 Caller ID Solutions 56 Causes of Poor Reception 57 Chain Dialing from Memory 39 Charge Indicator 24 CID Errors 45 Connecting an Optional Headset to the Handset 51 Connecting the Belt Clip 51 Cordless Handset Volume Control 31 Cordless Phone Basics 24 D Default...
User Guide
Page 59
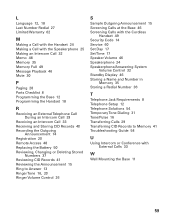
... Announcement 15 Screening Calls at the Base 46 Screening Calls with the Cordless Handset 49 Security Code 14 Service 60 Set Day 17 SetTime 17 Speaker Volume 46 Speakerphone 24 Speakerphone/Answering System Volume Control 32 Standby Display 46 Storing a Name and Number in Memory 35 Storing a Redial Number 36 T Telephone Jack Requirements 8 Telephone Setup 12 Telephone Solutions 54 Temporary Tone Dialing 31 Tone/Pulse 16 Transferring Calls 29 Transferring CID Records to Memory 41 Troubleshooting Guide 54 U Using Intercom or Conference with External Calls 33 W Wall Mounting the Base 11...
... Announcement 15 Screening Calls at the Base 46 Screening Calls with the Cordless Handset 49 Security Code 14 Service 60 Set Day 17 SetTime 17 Speaker Volume 46 Speakerphone 24 Speakerphone/Answering System Volume Control 32 Standby Display 46 Storing a Name and Number in Memory 35 Storing a Redial Number 36 T Telephone Jack Requirements 8 Telephone Setup 12 Telephone Solutions 54 Temporary Tone Dialing 31 Tone/Pulse 16 Transferring Calls 29 Transferring CID Records to Memory 41 Troubleshooting Guide 54 U Using Intercom or Conference with External Calls 33 W Wall Mounting the Base 11...


