
Service Guide
Page 65
...panel and turn it clicks in step 3. Open the multimedia board cable connector (b) and disconnect the cable (c). 7 If you try to close the clip to lock the cable in place. 10 Insert the tabs on the front side of the keyboard cover into the slots located on the cover until it over ... board" procedure on page 60. 8 Secure the multimedia board, with the connector facing up . 13 Secure the keyboard cover with the screws removed in place. www.gateway.com Caution The keyboard cover is connected to its connector on the multimedia board, then close the LCD panel. 14 Reinstall the battery. ...
...panel and turn it clicks in step 3. Open the multimedia board cable connector (b) and disconnect the cable (c). 7 If you try to close the clip to lock the cable in place. 10 Insert the tabs on the front side of the keyboard cover into the slots located on the cover until it over ... board" procedure on page 60. 8 Secure the multimedia board, with the connector facing up . 13 Secure the keyboard cover with the screws removed in place. www.gateway.com Caution The keyboard cover is connected to its connector on the multimedia board, then close the LCD panel. 14 Reinstall the battery. ...

Service Guide
Page 67
... try to close the clip to its connector on page 58. www.gateway.com 5 Secure the new multimedia board, with the screws removed in place. The keyboard cover is facing up. 10 Secure the keyboard cover with the connector facing up, on the keyboard cover. 6 Insert the multimedia cable to lock the cable in place. 7 Insert the...
... try to close the clip to its connector on page 58. www.gateway.com 5 Secure the new multimedia board, with the screws removed in place. The keyboard cover is facing up. 10 Secure the keyboard cover with the connector facing up, on the keyboard cover. 6 Insert the multimedia cable to lock the cable in place. 7 Insert the...
Service Guide
Page 69
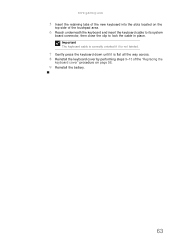
www.gateway.com 5 Insert the retaining tabs of the touchpad area. 6 Reach underneath the keyboard and insert the keyboard cable to its system board connector, then close the clip to lock the cable in place. Important The keyboard cable is correctly oriented if it is not twisted. 7 Gently press the keyboard down until it is flat all the way across. 8 Reinstall the keyboard cover by performing steps 9-13 of the "Replacing the keyboard cover" procedure on the top side of the new keyboard into the slots located on page 58. 9 Reinstall the battery. 63
www.gateway.com 5 Insert the retaining tabs of the touchpad area. 6 Reach underneath the keyboard and insert the keyboard cable to its system board connector, then close the clip to lock the cable in place. Important The keyboard cable is correctly oriented if it is not twisted. 7 Gently press the keyboard down until it is flat all the way across. 8 Reinstall the keyboard cover by performing steps 9-13 of the "Replacing the keyboard cover" procedure on the top side of the new keyboard into the slots located on page 58. 9 Reinstall the battery. 63

Service Guide
Page 82
... the palm rest. 11 Cover the new touchpad board with the tape removed in step 6. 12 Insert the touchpad cable to the touchpad board cable connector, and then close the clip to lock the cable in place. 13 Reinstall the palm rest by performing steps 19-21 of the "Replacing the palm rest" procedure... on page 68. 14 Reinstall the LCD panel assembly by performing steps 16-23 of the "Replacing the LCD panel assembly" procedure on page 64. 15 Reinstall the keyboard...
... the palm rest. 11 Cover the new touchpad board with the tape removed in step 6. 12 Insert the touchpad cable to the touchpad board cable connector, and then close the clip to lock the cable in place. 13 Reinstall the palm rest by performing steps 19-21 of the "Replacing the palm rest" procedure... on page 68. 14 Reinstall the LCD panel assembly by performing steps 16-23 of the "Replacing the LCD panel assembly" procedure on page 64. 15 Reinstall the keyboard...


