
Owner's Manual
Page 1
GPSMAP® 62 series owner's manual For use with the GPSMAP 62, 62s and, 62st
GPSMAP® 62 series owner's manual For use with the GPSMAP 62, 62s and, 62st
Owner's Manual
Page 2
...8200 or (800) 800.1020 Fax (913) 397.8282 Garmin (Europe) Ltd. Mac® is a trademark of such changes or improvements. Garmin reserves the right to change without the express permission of their respective owners. HomePort™, BaseCamp™, ANT™, and ANT+™...of Microsoft Corporation in this manual may not be reproduced, copied, transmitted, disseminated, downloaded or stored in the USA and other Garmin products. Garmin®, BlueChart®, City Navigator®, and GPSMAP® are trademarks of Garmin. © 2010 Garmin Ltd. or its products ...
...8200 or (800) 800.1020 Fax (913) 397.8282 Garmin (Europe) Ltd. Mac® is a trademark of such changes or improvements. Garmin reserves the right to change without the express permission of their respective owners. HomePort™, BaseCamp™, ANT™, and ANT+™...of Microsoft Corporation in this manual may not be reproduced, copied, transmitted, disseminated, downloaded or stored in the USA and other Garmin products. Garmin®, BlueChart®, City Navigator®, and GPSMAP® are trademarks of Garmin. © 2010 Garmin Ltd. or its products ...
Owner's Manual
Page 5
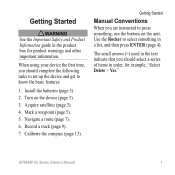
... time, you should select a series of items in order, for product warnings and other important information. Acquire satellites (page 3). 4. Calibrate the compass (page 13). GPSMAP 62 Series Owner's Manual 1 Use the Rocker to select something , use the buttons on the device (page 3). 3. Mark a waypoint (page 5). 5. Record a track (page 9). 7. Install the batteries (page 3). 2. Getting...
... time, you should select a series of items in order, for product warnings and other important information. Acquire satellites (page 3). 4. Calibrate the compass (page 13). GPSMAP 62 Series Owner's Manual 1 Use the Rocker to select something , use the buttons on the device (page 3). 3. Mark a waypoint (page 5). 5. Record a track (page 9). 7. Install the batteries (page 3). 2. Getting...
Owner's Manual
Page 6
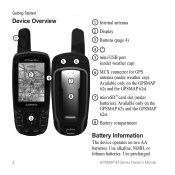
Available only on the GPSMAP 62s and the GPSMAP 62st. 8 Battery compartment Battery Information The device operates on the GPSMAP 62s and the GPSMAP 62st. 7 microSD™ card slot (under weather cap). Use precharged GPSMAP 62 Series Owner's Manual Use alkaline, NiMH, or lithium batteries. Available only on two AA batteries. Getting Started Device Overview 1 56 2 4 7 8 3 2 1 Internal antenna 2 Display 3 Buttons (page 4) 4 5 mini-USB port (under weather cap) 6 MCX connector for GPS antenna (under batteries).
Available only on the GPSMAP 62s and the GPSMAP 62st. 8 Battery compartment Battery Information The device operates on the GPSMAP 62s and the GPSMAP 62st. 7 microSD™ card slot (under weather cap). Use precharged GPSMAP 62 Series Owner's Manual Use alkaline, NiMH, or lithium batteries. Available only on two AA batteries. Getting Started Device Overview 1 56 2 4 7 8 3 2 1 Internal antenna 2 Display 3 Buttons (page 4) 4 5 mini-USB port (under weather cap) 6 MCX connector for GPS antenna (under batteries).
Owner's Manual
Page 7
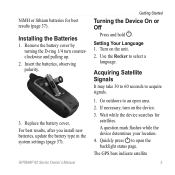
Insert the batteries, observing polarity. 3. GPSMAP 62 Series Owner's Manual Getting Started Turning the Device On or Off Press and hold . Wait while the device searches for best results (page 37). NiMH or lithium batteries ...
Insert the batteries, observing polarity. 3. GPSMAP 62 Series Owner's Manual Getting Started Turning the Device On or Off Press and hold . Wait while the device searches for best results (page 37). NiMH or lithium batteries ...
Owner's Manual
Page 8
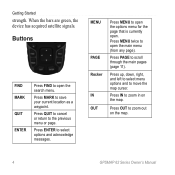
... options menu for the page that is currently open the search menu. Press QUIT to cancel or return to zoom in on the map. 4 GPSMAP 62 Series Owner's Manual Press ENTER to open the main menu (from any page). MENU PAGE Rocker IN OUT Press MENU to open . Press MENU twice to select...
... options menu for the page that is currently open the search menu. Press QUIT to cancel or return to zoom in on the map. 4 GPSMAP 62 Series Owner's Manual Press ENTER to open the main menu (from any page). MENU PAGE Rocker IN OUT Press MENU to open . Press MENU twice to select...
Owner's Manual
Page 9
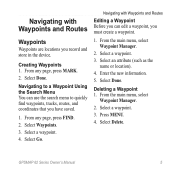
... a waypoint, you must create a waypoint. 1. Navigating with Waypoints and Routes Waypoints Waypoints are locations you have saved. 1. From the main menu, select Waypoint Manager. 2. GPSMAP 62 Series Owner's Manual 5 From any page, press FIND. 2. Select Done. Select a waypoint. 4. Enter the new information. 5. Select Waypoints. 3. Select a waypoint. 3. Select Done. Deleting a Waypoint 1. Select a waypoint. 3. From...
... a waypoint, you must create a waypoint. 1. Navigating with Waypoints and Routes Waypoints Waypoints are locations you have saved. 1. From the main menu, select Waypoint Manager. 2. GPSMAP 62 Series Owner's Manual 5 From any page, press FIND. 2. Select Done. Select a waypoint. 4. Enter the new information. 5. Select Waypoints. 3. Select a waypoint. 3. Select Done. Deleting a Waypoint 1. Select a waypoint. 3. From...
Owner's Manual
Page 10
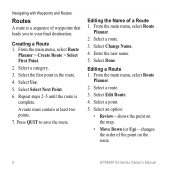
.... 3. Creating a Route 1. Select Select Next Point. 6. From the main menu, select Route Planner. 2. Select an option: • Review-shows the point on the route. 6 GPSMAP 62 Series Owner's Manual From the main menu, select Route Planner > Create Route > Select First Point. 2. Select Use. 5. Select Done. Select a point. 5. Repeat steps 2-5 until the route is...
.... 3. Creating a Route 1. Select Select Next Point. 6. From the main menu, select Route Planner. 2. Select an option: • Review-shows the point on the route. 6 GPSMAP 62 Series Owner's Manual From the main menu, select Route Planner > Create Route > Select First Point. 2. Select Use. 5. Select Done. Select a point. 5. Repeat steps 2-5 until the route is...
Owner's Manual
Page 11
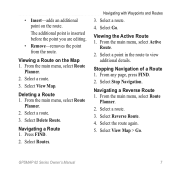
... Planner. 2. Select the route again. 5. • Insert-adds an additional point on the Map 1. From the main menu, select Route Planner. 2. Select Reverse Route. 4. GPSMAP 62 Series Owner's Manual 7 Stopping Navigation of a Route 1. Select a point in the route to view additional details. Viewing the Active Route 1. Select Delete Route. Select a route. 3. Select View...
... Planner. 2. Select the route again. 5. • Insert-adds an additional point on the Map 1. From the main menu, select Route Planner. 2. Select Reverse Route. 4. GPSMAP 62 Series Owner's Manual 7 Stopping Navigation of a Route 1. Select a point in the route to view additional details. Viewing the Active Route 1. Select Delete Route. Select a route. 3. Select View...

Owner's Manual
Page 12
... points of interest, such as restaurants, hotels, and auto services. 1. Press FIND. 2. Select Go. 8 GPSMAP 62 Series Owner's Manual Navigating with City Navigator® You can use optional City Navigator maps to http://buy.garmin.com or contact your Garmin dealer. Finding an Address with Waypoints and Routes Additional Maps To purchase preloaded detailed map...
... points of interest, such as restaurants, hotels, and auto services. 1. Press FIND. 2. Select Go. 8 GPSMAP 62 Series Owner's Manual Navigating with City Navigator® You can use optional City Navigator maps to http://buy.garmin.com or contact your Garmin dealer. Finding an Address with Waypoints and Routes Additional Maps To purchase preloaded detailed map...
Owner's Manual
Page 13
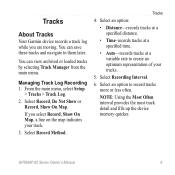
... representation of your track. 3. Tracks About Tracks Your Garmin device records a track log while you select Record, Show On Map, a line on the map indicates your tracks. 5. You can view archived or loaded tracks by selecting Track Manager from the main menu. GPSMAP 62 Series Owner's Manual 9 From the main menu, select Setup > Tracks...
... representation of your track. 3. Tracks About Tracks Your Garmin device records a track log while you select Record, Show On Map, a line on the map indicates your tracks. 5. You can view archived or loaded tracks by selecting Track Manager from the main menu. GPSMAP 62 Series Owner's Manual 9 From the main menu, select Setup > Tracks...
Owner's Manual
Page 14
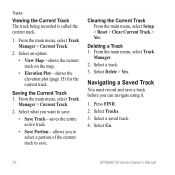
... a Saved Track You must record and save a track before you to select a portion of the current track to save . Select a track. 3. Select Go. 10 GPSMAP 62 Series Owner's Manual From the main menu, select Track Manager > Current Track. 2. Select what you want to save : • Save Track-saves the entire active track. •...
... a Saved Track You must record and save a track before you to select a portion of the current track to save . Select a track. 3. Select Go. 10 GPSMAP 62 Series Owner's Manual From the main menu, select Track Manager > Current Track. 2. Select what you want to save : • Save Track-saves the entire active track. •...
Owner's Manual
Page 15
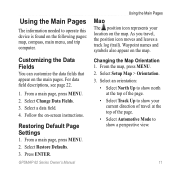
Select Change Data Fields. 3. Select a data field. 4. GPSMAP 62 Series Owner's Manual Using the Main Pages Map The position icon represents your current direction of travel , the position icon moves and leaves a track log (trail). Using the ...
Select Change Data Fields. 3. Select a data field. 4. GPSMAP 62 Series Owner's Manual Using the Main Pages Map The position icon represents your current direction of travel , the position icon moves and leaves a track log (trail). Using the ...
Owner's Manual
Page 16
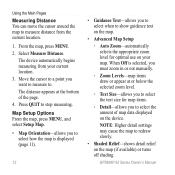
... amount of the page. 4. Using the Main Pages Measuring Distance You can move the cursor around the map to measure distance from your map. GPSMAP 62 Series Owner's Manual Move the cursor to a point you to select the text size for optimal use on the map (if available) or turns off shading. The... map, press menu, and select Setup Map. • Map Orientation-allows you to select how the map is selected, you must zoom in or out manually. ◦◦ Zoom Levels-map items draw or appear at the bottom of map data displayed on the device. note: Higher detail settings may cause...
... amount of the page. 4. Using the Main Pages Measuring Distance You can move the cursor around the map to measure distance from your map. GPSMAP 62 Series Owner's Manual Move the cursor to a point you to select the text size for optimal use on the map (if available) or turns off shading. The... map, press menu, and select Setup Map. • Map Orientation-allows you to select how the map is selected, you must zoom in or out manually. ◦◦ Zoom Levels-map items draw or appear at the bottom of map data displayed on the device. note: Higher detail settings may cause...
Owner's Manual
Page 17
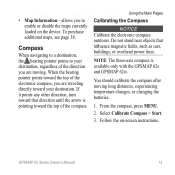
When the bearing pointer points toward the top of the compass. From the compass, press MENU. 2. GPSMAP 62 Series Owner's Manual 13 Do not stand near objects that direction until the arrow is available only with the GPSMAP 62s and GPSMAP 62st. Select Calibrate Compass > Start. 3. Follow the on the device. To purchase additional maps, see page...
When the bearing pointer points toward the top of the compass. From the compass, press MENU. 2. GPSMAP 62 Series Owner's Manual 13 Do not stand near objects that direction until the arrow is available only with the GPSMAP 62s and GPSMAP 62st. Select Calibrate Compass > Start. 3. Follow the on the device. To purchase additional maps, see page...
Owner's Manual
Page 18
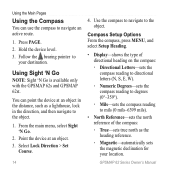
Follow the bearing pointer to navigate an active route. 1. GPSMAP 62 Series Owner's Manual Using Sight 'N Go NOTE: Sight 'N Go is available only with the GPSMAP 62s and GPSMAP 62st. Select Lock Direction > Set Course. 14 4. Hold the device level. 3. From the main menu, select Sight 'N Go. 2. Press page. 2. Point the device at an object ...
Follow the bearing pointer to navigate an active route. 1. GPSMAP 62 Series Owner's Manual Using Sight 'N Go NOTE: Sight 'N Go is available only with the GPSMAP 62s and GPSMAP 62st. Select Lock Direction > Set Course. 14 4. Hold the device level. 3. From the main menu, select Sight 'N Go. 2. Press page. 2. Point the device at an object ...

Owner's Manual
Page 19
... at a higher rate of speed for a set period of time, or turns the compass off. • Calibrate Compass-starts the compass calibration (page 13). GPSMAP 62 Series Owner's Manual 15 Using the Main Pages Elevation Plot note: The elevation plot page is displayed. ◦◦ Bearing (Small/Large) indicates the direction to your... a course line leading to a destination. • Compass-allows you to switch from an electronic compass to select how the course is available only with the GPSMAP 62s and GPSMAP 62st.
... at a higher rate of speed for a set period of time, or turns the compass off. • Calibrate Compass-starts the compass calibration (page 13). GPSMAP 62 Series Owner's Manual 15 Using the Main Pages Elevation Plot note: The elevation plot page is displayed. ◦◦ Bearing (Small/Large) indicates the direction to your... a course line leading to a destination. • Compass-allows you to switch from an electronic compass to select how the course is available only with the GPSMAP 62s and GPSMAP 62st.
Owner's Manual
Page 20
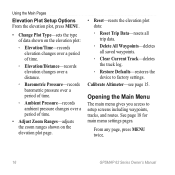
... track log. ◦◦ Restore Defaults-restores the device to setup screens including waypoints, tracks, and routes. From any page, press MENU twice. 16 GPSMAP 62 Series Owner's Manual Opening the Main Menu The main menu gives you access to factory settings. Calibrate Altimeter-see page 15. See page 18 for main menu...
... track log. ◦◦ Restore Defaults-restores the device to setup screens including waypoints, tracks, and routes. From any page, press MENU twice. 16 GPSMAP 62 Series Owner's Manual Opening the Main Menu The main menu gives you access to factory settings. Calibrate Altimeter-see page 15. See page 18 for main menu...

Owner's Manual
Page 21
... when you change profiles (page 19). Using the Main Pages • Change Dashboard-changes the theme and information displayed on the trip computer page. GPSMAP 62 Series Owner's Manual 17 For accurate information, reset the trip information before beginning a trip. • Big Numbers-changes the size of the numbers shown on the dashboard...
... when you change profiles (page 19). Using the Main Pages • Change Dashboard-changes the theme and information displayed on the trip computer page. GPSMAP 62 Series Owner's Manual 17 For accurate information, reset the trip information before beginning a trip. • Big Numbers-changes the size of the numbers shown on the dashboard...
Owner's Manual
Page 22
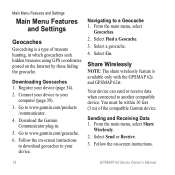
... your device. Follow the on -screen instructions. 18 GPSMAP 62 Series Owner's Manual From the main menu, select Geocaches. 2. Share Wirelessly note: The share wirelessly feature is a type of the compatible Garmin device. Go to another compatible device. Select Go. Register... From the main menu, select Share Wirelessly. 2. Navigating to www.garmin.com/geocache. 6. Downloading Geocaches 1. Main Menu Features and Settings Main Menu Features and Settings Geocaches Geocaching is available only with the GPSMAP 62s and GPSMAP 62st. Select a geocache. 4. You must be within 10 feet (3...
... your device. Follow the on -screen instructions. 18 GPSMAP 62 Series Owner's Manual From the main menu, select Geocaches. 2. Share Wirelessly note: The share wirelessly feature is a type of the compatible Garmin device. Go to another compatible device. Select Go. Register... From the main menu, select Share Wirelessly. 2. Navigating to www.garmin.com/geocache. 6. Downloading Geocaches 1. Main Menu Features and Settings Main Menu Features and Settings Geocaches Geocaching is available only with the GPSMAP 62s and GPSMAP 62st. Select a geocache. 4. You must be within 10 feet (3...


