
Flush Mount Template
Page 1
... and tighten the second Hex Nut on one in to swing open freely. 100.0 mm (3.93") 138.0 mm (5.43") © Copyright 2004 Garmin Ltd. Place washers over the Mounting Studs, then thread on all four until the stop contacts the case. or its subsidiaries...per Mounting Stud. Use a .050" Allen Wrench to overtighten as this hole, there is snug against the mounting surface. FLUSH MOUNT TEMPLATE GPSMAP 172C/178C (EXTERNAL ANTENNA VERSIONS ONLY) UNIT OUTLINE CUT MOUNTING SURFACE ALONG THE INSIDE OF THIS LINE Be very careful when cutting this may damage the Mounting Stud! ...
... and tighten the second Hex Nut on one in to swing open freely. 100.0 mm (3.93") 138.0 mm (5.43") © Copyright 2004 Garmin Ltd. Place washers over the Mounting Studs, then thread on all four until the stop contacts the case. or its subsidiaries...per Mounting Stud. Use a .050" Allen Wrench to overtighten as this hole, there is snug against the mounting surface. FLUSH MOUNT TEMPLATE GPSMAP 172C/178C (EXTERNAL ANTENNA VERSIONS ONLY) UNIT OUTLINE CUT MOUNTING SURFACE ALONG THE INSIDE OF THIS LINE Be very careful when cutting this may damage the Mounting Stud! ...
Owner's Manual
Page 8
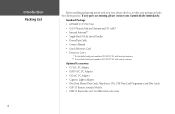
...• BlueChart Marine Data Cards, MapSource CDs, USB Data Card Programmer, and Data Cards • GSD 20 Remote Sounder Module • GBR 23 Beacon Receiver for differential corrections Standard Package: • GPSMAP 172/172C Unit • GA 29 Remote External Antenna and 30' cable* • Internal Antenna** • ... Not included with part numbers 010-00327-01 with internal antenna. ** Not included with part numbers 010-00327-00 with your unit, please check to see that your package includes the following items. If any parts are missing, please contact your Garmin dealer immediately.
...• BlueChart Marine Data Cards, MapSource CDs, USB Data Card Programmer, and Data Cards • GSD 20 Remote Sounder Module • GBR 23 Beacon Receiver for differential corrections Standard Package: • GPSMAP 172/172C Unit • GA 29 Remote External Antenna and 30' cable* • Internal Antenna** • ... Not included with part numbers 010-00327-01 with internal antenna. ** Not included with part numbers 010-00327-00 with your unit, please check to see that your package includes the following items. If any parts are missing, please contact your Garmin dealer immediately.

Owner's Manual
Page 99
...cause failure of the mount over the swivel base and secure with the built-in internal antenna, it is designed to be mounted in exposed locations or at the nav station. To swivel mount the GPSMAP 172/172C display: Tools (not included) - DO NOT OVERTIGHTEN. 4. If you use a ...bracket that has the clearest, most unobstructed view of the antenna (external antenna only), power/data cables. • The mounting surface should be heavy enough to support the unit and protect it from excessive vibration and shock. • For GPSMAP 172/172C unit's with the short knob. If securing the base ...
...cause failure of the mount over the swivel base and secure with the built-in internal antenna, it is designed to be mounted in exposed locations or at the nav station. To swivel mount the GPSMAP 172/172C display: Tools (not included) - DO NOT OVERTIGHTEN. 4. If you use a ...bracket that has the clearest, most unobstructed view of the antenna (external antenna only), power/data cables. • The mounting surface should be heavy enough to support the unit and protect it from excessive vibration and shock. • For GPSMAP 172/172C unit's with the short knob. If securing the base ...

Owner's Manual
Page 101
... to overtighten as needed to obtain the best fit. 6. Place washers over the Mounting Studs, then thread on a flat panel. To flush mount the GPSMAP 172/172C (External Antenna ONLY): Included Mounting Hardware - 4 - 3mm Studs, 4 - Be very careful when cutting this may be prudent to determine a location. Trim the ... and then sand or file the panel as this hole, there is snug against the mounting surface. Flush Mounting the GPSMAP 172/172C External Antenna Unit The GPSMAP 172/172C External Antenna only can be flush mounted on one Hex Nut per Mounting Stud. Tools (not included) -
... to overtighten as needed to obtain the best fit. 6. Place washers over the Mounting Studs, then thread on a flat panel. To flush mount the GPSMAP 172/172C (External Antenna ONLY): Included Mounting Hardware - 4 - 3mm Studs, 4 - Be very careful when cutting this may be prudent to determine a location. Trim the ... and then sand or file the panel as this hole, there is snug against the mounting surface. Flush Mounting the GPSMAP 172/172C External Antenna Unit The GPSMAP 172/172C External Antenna only can be flush mounted on one Hex Nut per Mounting Stud. Tools (not included) -


