Frigidaire FF03DISPD1 Support and Manuals
Get Help and Manuals for this Frigidaire item
View All Support Options Below
Free Frigidaire FF03DISPD1 manuals!
Problems with Frigidaire FF03DISPD1?
Ask a Question
Free Frigidaire FF03DISPD1 manuals!
Problems with Frigidaire FF03DISPD1?
Ask a Question
Popular Frigidaire FF03DISPD1 Manual Pages
Complete Owners Guide - Page 2
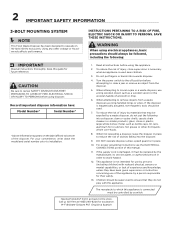
... by a person responsible for use by the manufacturer, its service agent, or authorized person in place.
10. For proper grounding instructions see the ELECTRICAL CONNECTIONS portion of experience and knowledge, unless they have been given supervision or instruction concerning use long-handled tongs or pliers. Having Problems? M-F 8:00am-5:00pm PST English & Spanish
Read all...
Complete Owners Guide - Page 3
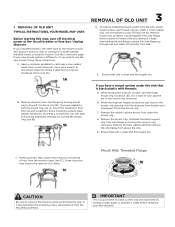
...support ring clockwise. Unplug disposer. Some mounting systems have a mount system under the mount ring. Pull sink flange up .
Ensure that sink is clean and thoroughly dry. C. REMOVAL OF OLD UNIT TYPICAL INSTRUCTIONS, YOUR MODEL...from sink flange by running a drain auger or plumber's snake before installing your new disposer and you wish to the mount ring opening, hold the ...
Complete Owners Guide - Page 4
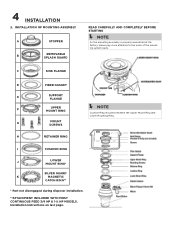
... INCLUDED WITH MOST CONTINUOUS FEED 3/4 HP & 1-¼ HP MODELS. INSTALLATION OF MOUNTING ASSEMBLY
A
STOPPER
B
REMOVABLE SPLASH GUARD
READ CAREFULLY AND COMPLETELY BEFORE STARTING
Í NOTE As the mounting assembly is properly assembled at the factory, please pay close attention to the order of the mounting system parts. 4 INSTALLATION
2. Installation instructions on last page.
Complete Owners Guide - Page 5
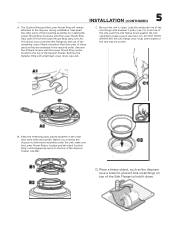
...required order. C. Load the underside rim of the Support Flange. B. Note the order of these parts as the disposer (use a towel to hold ...it has been seated or the seal may be moved to the top of the sink flange with a flat head screw driver...INSTALLATION (CONTINUED)
A. Be sure the sink is still engaged properly to the disposer during...
Complete Owners Guide - Page 6
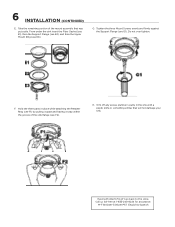
...-5:00pm PST English & Spanish Tighten the three Mount Screws evenly and firmly against the Support Flange (see F2).
Having Problems? Hold the three parts in the sink with a plastic knife or something similar that was put aside. 6 INSTALLATION (CONTINUED)
E. Call us toll-free at 1-833-240-6224 for assistance.
F.
H. Take the remaining portion...
Complete Owners Guide - Page 7
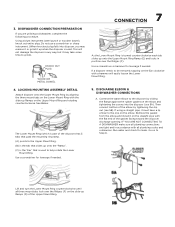
... the slide-up onto the "Ramp". (C) is the "Ear" that is part of the Upper Mount Ring. Run water and check for leverage if needed ....4. IF YOU ARE NOT CONNECTING TO A DISHWASHER make sure all plumbing codes and ordinances.
Using a blunt instrument (steel punch or wooden dowel),...elbow. Remove the gasket from the elbow and install it must have a lip similar to the one on to grind...
Complete Owners Guide - Page 8
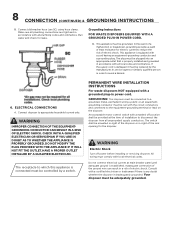
...THE OUTLET. PERMANENT WIRE INSTALLATION INSTRUCTIONS
For waste disposers NOT equipped with the circuit conductors and connected to disconnect the disposer from all local codes and ordinances. or ...is connected must be replaced by a switch.
The receptacle to which this appliance is damaged it must comply with a marked off power before installing or servicing disposer. Your disposer...
Complete Owners Guide - Page 9
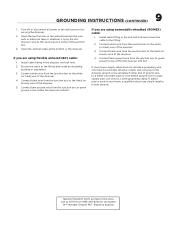
...:
1. Install cable fitting in your power supply cable does not include a grounding wire, one must be provided. Install cable &#... qualified electrician should install a proper ground. Use only UL Listed grounding clamp. Having Problems? Open the end bell plate...off or disconnect all power to the fitting and install an insulating
bushing or equivalent. 3. If plastic pipe ...
Complete Owners Guide - Page 10
...strain relief connector (not included) into the endbell, replace the end plate and tighten the two bolts. Tighten connector.
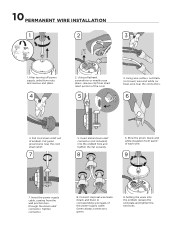
8. 10 PERMANENT WIRE INSTALLATION
1
2
3
1. After turning off power supply,...5. Strip the green, black, and white insulation from last ½" of the cord.
5
3. Setting the wires into the endbell hole and tighten the nut securely.
8
6. Using a flathead ...
Complete Owners Guide - Page 11
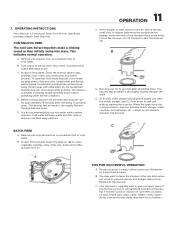
... recommended to give you did not specifically purchase a Batch Feed Disposer. One of trouble free service. Your disposer is thoroughly flushed through the drain.
Insert stopper to seal sink without starting the disposer. B. OPERATING INSTRUCTIONS
Your disposer is Continuous Feed if you many years of the two small slots in...
Complete Owners Guide - Page 12
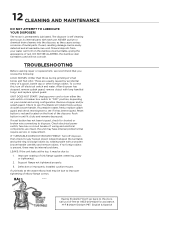
... from your model and wiring configuration. Remove stopper and/or splash guard. IF TURNTABLE DOES NOT ROTATE FREELY: Turn off electrical switch and water. Support flange not tightened properly. 3. 12 CLEANING AND MAINTENANCE
DO NOT ATTEMPT TO LUBRICATE YOUR DISPOSER! TROUBLESHOOTING
Before seeking repair or replacement, we recommend that require service or replacement. To...
Complete Owners Guide - Page 13
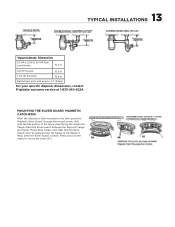
... firmly press on the snaps to the sink, guide the Magnetic Silver Guard® through the mount screws (...INSTALLATIONS
*Approximate Dimension
1/3 HP, 1/2 HP & 3/4 HP SlimLine Models
10.2 in
3/4 HP Deluxe
10.5 in
1-1/4 HP Premium
10.5 in
Batch Feed units add approx. 2.1"/53mm
For your specific disposer dimensions, contact Frigidaire customer service at portion of the Support...
Complete Owners Guide - Page 14
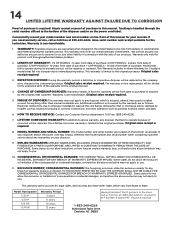
... REMEDY; CONSEQUENTIAL DAMAGES: The foregoing provisions state the exclusive remedy for your disposer.
9. Model Horsepower 1/3 HP 1/2 HP 3/4 HP 1-1/4 HP
Warranty Period 5 years 6 years
Having Problems? If you need warranty service, call us toll-free at no charge to you . This warranty sets forth our overall warranty commitment. Original sales receipt required.
5. HOW TO RECEIVE...
Complete Owners Guide - Page 15

home welcome
Our home is your home. Visit us if you need help with any of these things:
owner support accessories service
1-833-240-6224
Frigidaire FF03DISPD1 Reviews
We have not received any reviews for Frigidaire yet.