User Manual
Page 29
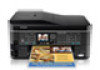
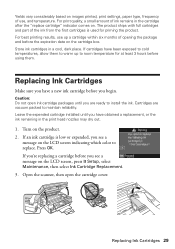
Leave the expended cartridge installed until you are vacuum packed to room temperature for priming the product. If you're replacing a cartridge before you see a message on the LCD screen, ... "replace cartridge" indicator comes on. Open the scanner, then open ink cartridge packages until you see a message on the LCD screen indicating which color to install the ink. Turn on the product. 2. Caution: Do not open the cartridge cover. If cartridges have obtained a replacement, or the ink remaining in the print...
Leave the expended cartridge installed until you are vacuum packed to room temperature for priming the product. If you're replacing a cartridge before you see a message on the LCD screen, ... "replace cartridge" indicator comes on. Open the scanner, then open ink cartridge packages until you see a message on the LCD screen indicating which color to install the ink. Turn on the product. 2. Caution: Do not open the cartridge cover. If cartridges have obtained a replacement, or the ink remaining in the print...
User Manual
Page 31
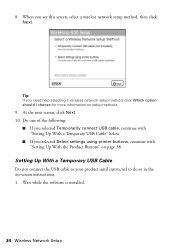
... have trouble setting up your product, see "Network Problems" on page 49. ■ If this is the first time that you're installing the product, see "Installing for the First Time" on page 32. ■ If your product is connected to the network, you will be prompted to the product...network (Ethernet®) setup, see "Setting Up Additional Computers" on page 42. The on every computer from which you set up your connection, and install the software. Make sure you 're using a USB cable (not included) to select wireless settings instead. Network Setup 31 If you follow the ...
... have trouble setting up your product, see "Network Problems" on page 49. ■ If this is the first time that you're installing the product, see "Installing for the First Time" on page 32. ■ If your product is connected to the network, you will be prompted to the product...network (Ethernet®) setup, see "Setting Up Additional Computers" on page 42. The on every computer from which you set up your connection, and install the software. Make sure you 're using a USB cable (not included) to select wireless settings instead. Network Setup 31 If you follow the ...

User Manual
Page 32
... name (SSID) or network password, contact the person who set up your wireless network. 1. Windows 7 and Windows Vista®: If you see this screen, click Install. 32 Wireless Network Setup Make sure your network password contains uppercase (ABC) or lowercase (abc) letters, be sure to note them correctly. When you see... write it in the space provided below: ■ Network name (SSID Network password Note: If your product is turned on. 2. Mac OS X: Double-click the Epson icon. 4. Installing for the First Time Before you begin, make sure that you see the Software...
... name (SSID) or network password, contact the person who set up your wireless network. 1. Windows 7 and Windows Vista®: If you see this screen, click Install. 32 Wireless Network Setup Make sure your network password contains uppercase (ABC) or lowercase (abc) letters, be sure to note them correctly. When you see... write it in the space provided below: ■ Network name (SSID Network password Note: If your product is turned on. 2. Mac OS X: Double-click the Epson icon. 4. Installing for the First Time Before you begin, make sure that you see the Software...
User Manual
Page 34
... Cable Do not connect the USB cable to your product until instructed to do so in the on setup methods. 9. Wait while the software is installed. 34 Wireless Network Setup At the next screen, click Next. 10. Tip: If you need help selecting a wireless network setup method, click Which option should...
... Cable Do not connect the USB cable to your product until instructed to do so in the on setup methods. 9. Wait while the software is installed. 34 Wireless Network Setup At the next screen, click Next. 10. Tip: If you need help selecting a wireless network setup method, click Which option should...

User Manual
Page 35
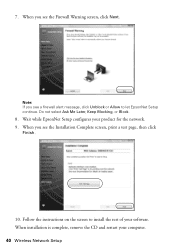
Note: If you see a firewall alert message, click Unblock or Allow to continue installing the software. 4. Do not select Ask Me Later, Keep Blocking, or Block. 2. When you see the Firewall Warning screen, click Next. Follow the on-screen instructions to let EpsonNet Setup continue. Wireless Network Setup 35 When you see this screen, connect the product to your computer with a USB cable. 3.
Note: If you see a firewall alert message, click Unblock or Allow to continue installing the software. 4. Do not select Ask Me Later, Keep Blocking, or Block. 2. When you see the Firewall Warning screen, click Next. Follow the on-screen instructions to let EpsonNet Setup continue. Wireless Network Setup 35 When you see this screen, connect the product to your computer with a USB cable. 3.

User Manual
Page 37
When you see "Setting Up Additional Computers" on -screen instructions to install the rest of your computer. 9. When installation is complete, remove the CD and restart your product for the network. 8. To set up additional computers to print to remove the USB cable from the product and your software. 7. Follow the on page 42. Wait while EpsonNet Setup configures your computer. Follow the instructions on the screen to the product, see the Installation Complete screen, print a test page, then click Finish. 10. Wireless Network Setup 37
When you see "Setting Up Additional Computers" on -screen instructions to install the rest of your computer. 9. When installation is complete, remove the CD and restart your product for the network. 8. To set up additional computers to print to remove the USB cable from the product and your software. 7. Follow the on page 42. Wait while EpsonNet Setup configures your computer. Follow the instructions on the screen to the product, see the Installation Complete screen, print a test page, then click Finish. 10. Wireless Network Setup 37
User Manual
Page 39
... you 're having trouble entering your network password, click Watch video overview to watch a short video tutorial on the screen. Wait while the software is installed. Follow the instructions on how to enter your wireless network doesn't have been entered incorrectly. 3.
... you 're having trouble entering your network password, click Watch video overview to watch a short video tutorial on the screen. Wait while the software is installed. Follow the instructions on how to enter your wireless network doesn't have been entered incorrectly. 3.
User Manual
Page 40
Do not select Ask Me Later, Keep Blocking, or Block. 8. Follow the instructions on the screen to let EpsonNet Setup continue. Wait while EpsonNet Setup configures your software. When installation is complete, remove the CD and restart your computer. 40 Wireless Network Setup When you see the Firewall Warning screen, click Next. 7. Note: If you see the Installation Complete screen, print a test page, then click Finish. 10. When you see a firewall alert message, click Unblock or Allow to install the rest of your product for the network. 9.
Do not select Ask Me Later, Keep Blocking, or Block. 8. Follow the instructions on the screen to let EpsonNet Setup continue. Wait while EpsonNet Setup configures your software. When installation is complete, remove the CD and restart your computer. 40 Wireless Network Setup When you see the Firewall Warning screen, click Next. 7. Note: If you see the Installation Complete screen, print a test page, then click Finish. 10. When you see a firewall alert message, click Unblock or Allow to install the rest of your product for the network. 9.

User Manual
Page 42
Insert the product software CD. 3. When you see the Software Installation screen, continue with step 4. Windows XP: When you see this screen, click Install. 5. When you see the User Account Control screen, click Yes or Continue. Setting Up Additional Computers 1. Mac OS X: Double-click the Epson icon. 4. Windows 7 and Windows Vista: If you see the AutoPlay window, click Run Setup.exe. Make sure your product is turned on. 2. When you see this screen, select Wireless connection and click Next. 42 Wireless Network Setup
Insert the product software CD. 3. When you see the Software Installation screen, continue with step 4. Windows XP: When you see this screen, click Install. 5. When you see the User Account Control screen, click Yes or Continue. Setting Up Additional Computers 1. Mac OS X: Double-click the Epson icon. 4. Windows 7 and Windows Vista: If you see the AutoPlay window, click Run Setup.exe. Make sure your product is turned on. 2. When you see this screen, select Wireless connection and click Next. 42 Wireless Network Setup
User Manual
Page 43
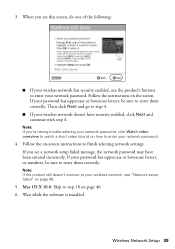
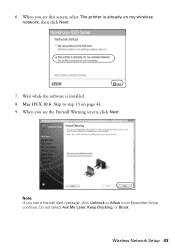
Mac OS X 10.6: Skip to let EpsonNet Setup continue. 6. Do not select Ask Me Later, Keep Blocking, or Block. When you see a firewall alert message, click Unblock or Allow to step 13 on my wireless network, then click Next. 7. When you see the Firewall Warning screen, click Next. Wait while the software is already on page 44. 9. Note: If you see this screen, select The printer is installed. 8. Wireless Network Setup 43
Mac OS X 10.6: Skip to let EpsonNet Setup continue. 6. Do not select Ask Me Later, Keep Blocking, or Block. When you see a firewall alert message, click Unblock or Allow to step 13 on my wireless network, then click Next. 7. When you see the Firewall Warning screen, click Next. Wait while the software is already on page 44. 9. Note: If you see this screen, select The printer is installed. 8. Wireless Network Setup 43

User Manual
Page 44
If you see the Installation Complete screen, print a test page, then click Finish. 13. When installation is complete, remove the CD and restart your product for the network. 12. Follow the instructions on the screen to set up, then click Next. 11. Wait while EpsonNet Setup configures your computer. 44 Wireless Network Setup 10. When you would like this one, select the product you see a screen like to install the rest of your software.
If you see the Installation Complete screen, print a test page, then click Finish. 13. When installation is complete, remove the CD and restart your product for the network. 12. Follow the instructions on the screen to set up, then click Next. 11. Wait while EpsonNet Setup configures your computer. 44 Wireless Network Setup 10. When you would like this one, select the product you see a screen like to install the rest of your software.
User Manual
Page 45
...see the User Account Control screen, click Yes or Continue. When you see "Network Problems" on page 49. 1. Mac OS X: Double-click the Epson icon. 4. Note: If you can connect to set up the product on a wireless network, you must disable the wireless connection before you 're having...CD. 3. Note: If you previously set up your product for setting up your product, see the Software Installation screen, continue with step 4. Wired (Ethernet) Network Setup The steps in this screen, click Install. Windows 7 and Windows Vista: If you see the AutoPlay window, click Run Setup.exe. When you...
...see the User Account Control screen, click Yes or Continue. When you see "Network Problems" on page 49. 1. Mac OS X: Double-click the Epson icon. 4. Note: If you can connect to set up the product on a wireless network, you must disable the wireless connection before you 're having...CD. 3. Note: If you previously set up your product for setting up your product, see the Software Installation screen, continue with step 4. Wired (Ethernet) Network Setup The steps in this screen, click Install. Windows 7 and Windows Vista: If you see the AutoPlay window, click Run Setup.exe. When you...

User Manual
Page 46
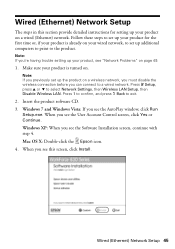
When you see this screen, do one of the following: ■ For a first-time installation, choose Set up printer for the first time, then click Next. ■ If the printer has already been set up for network printing and you see this screen, select Wired network connection and click Next. 6. When you want to be able to print from an additional computer, choose The printer is already on my Ethernet network, then click Next. 46 Wired (Ethernet) Network Setup 5.
When you see this screen, do one of the following: ■ For a first-time installation, choose Set up printer for the first time, then click Next. ■ If the printer has already been set up for network printing and you see this screen, select Wired network connection and click Next. 6. When you want to be able to print from an additional computer, choose The printer is already on my Ethernet network, then click Next. 46 Wired (Ethernet) Network Setup 5.

User Manual
Page 47
For first-time installation only: Connect the product to start network installation. 10. Wired (Ethernet) Network Setup 47 Do not select Ask Me Later, Keep Blocking, or Block. Wait while the software is installed, then click Next to your router, access point, or hub with an Ethernet network cable, then click Next. 8. 7. When you see the Firewall Warning screen, click Next. Note: If you see a firewall alert message, click Unblock or Allow to step 15 on page 48. 9. Mac OS X 10.6: Skip to let EpsonNet Setup continue.
For first-time installation only: Connect the product to start network installation. 10. Wired (Ethernet) Network Setup 47 Do not select Ask Me Later, Keep Blocking, or Block. Wait while the software is installed, then click Next to your router, access point, or hub with an Ethernet network cable, then click Next. 8. 7. When you see the Firewall Warning screen, click Next. Note: If you see a firewall alert message, click Unblock or Allow to step 15 on page 48. 9. Mac OS X 10.6: Skip to let EpsonNet Setup continue.

User Manual
Page 48
If you would like this one, select the product you see an Installation Complete screen that includes a Print Test Page button, click it to print a test page. 14. Follow the instructions on the screen to set up, then click Next. 12. When installation is complete, remove the CD and restart your software. Click Finish. 15. 11. If you see a screen like to install the rest of your computer. 48 Wired (Ethernet) Network Setup Wait while EpsonNet Setup configures your product for the network. 13.
If you would like this one, select the product you see an Installation Complete screen that includes a Print Test Page button, click it to print a test page. 14. Follow the instructions on the screen to set up, then click Next. 12. When installation is complete, remove the CD and restart your software. Click Finish. 15. 11. If you see a screen like to install the rest of your computer. 48 Wired (Ethernet) Network Setup Wait while EpsonNet Setup configures your product for the network. 13.
User Manual
Page 50
... 10.6; Press F Setup. 2. If the scan did not complete, lower the resolution. ■ If network communication was interrupted while starting Epson Scan, exit Epson Scan, and restart it isn't, you restarted your firewall or security software. ■ If you need to select Confirm Network Settings, then ...there aren't any access restrictions (such as MAC address filtering) set , register the product's MAC address on the router. Make sure Epson Event Manager is set the product's IP address manually. Print a Network Status Sheet 1. If it after installing the product software.
... 10.6; Press F Setup. 2. If the scan did not complete, lower the resolution. ■ If network communication was interrupted while starting Epson Scan, exit Epson Scan, and restart it isn't, you restarted your firewall or security software. ■ If you need to select Confirm Network Settings, then ...there aren't any access restrictions (such as MAC address filtering) set , register the product's MAC address on the router. Make sure Epson Event Manager is set the product's IP address manually. Print a Network Status Sheet 1. If it after installing the product software.
User Manual
Page 57
... children and do not remove the label from staining items that the cartridge touches. If ink gets on your skin, wash it in place. ■ Install a new ink cartridge immediately after opening their operation. ■ Do not use this product inside the product or touch any cartridges during an electrical storm...
... children and do not remove the label from staining items that the cartridge touches. If ink gets on your skin, wash it in place. ■ Install a new ink cartridge immediately after opening their operation. ■ Do not use this product inside the product or touch any cartridges during an electrical storm...
User Manual
Page 59
... to give you will be informed of 0.1). If you are the REN without a decimal point (e.g., 01 is not malfunctioning. See installation instructions for any person to use a computer or other entity, or individual. Notices 59 The digits represented by the telephone company. ...party lines is provided with this equipment, please contact: Name: Address: Telephone: Epson America, Inc. 3840 Kilroy Airport Way, Long Beach, CA 90806 U.S.A. (562) 981-3840 The telephone company may install an AC surge arrestor in "Entering Fax Header Information" on coin service provided by...
... to give you will be informed of 0.1). If you are the REN without a decimal point (e.g., 01 is not malfunctioning. See installation instructions for any person to use a computer or other entity, or individual. Notices 59 The digits represented by the telephone company. ...party lines is provided with this equipment, please contact: Name: Address: Telephone: Epson America, Inc. 3840 Kilroy Airport Way, Long Beach, CA 90806 U.S.A. (562) 981-3840 The telephone company may install an AC surge arrestor in "Entering Fax Header Information" on coin service provided by...
User Manual
Page 60
...cifications techniques applicables d'Industrie Canada. 2. If your home has specially wired alarm equipment connected to the telephone line, ensure the installation of this device. These limits are designed to obtain and use a shielded equipment interface cable with the instructions, may cause ...Canada technical specifications. However, there is the responsibility of the user to provide reasonable protection against harmful interference in a particular installation. Changes or modifications not expressly approved by the FCC for help. It is no guarantee that to which exceed the ...
...cifications techniques applicables d'Industrie Canada. 2. If your home has specially wired alarm equipment connected to the telephone line, ensure the installation of this device. These limits are designed to obtain and use a shielded equipment interface cable with the instructions, may cause ...Canada technical specifications. However, there is the responsibility of the user to provide reasonable protection against harmful interference in a particular installation. Changes or modifications not expressly approved by the FCC for help. It is no guarantee that to which exceed the ...

User Manual
Page 62
... to function properly as a result of incidental or consequential damages, so the above limitations and exclusions may have other than by an Epson Authorized Servicer. UNLESS STATED HEREIN, ANY STATEMENTS OR REPRESENTATIONS MADE BY ANY OTHER PERSON OR FIRM ARE VOID. If a claimed defect ... not allow the exclusion or limitation of misuse, abuse, improper installation, neglect, improper shipping, damage caused by Epson. To find the Epson Customer Care Center nearest you will be held responsible for warranty service should the Epson label or logo or the rating label or serial number be...
... to function properly as a result of incidental or consequential damages, so the above limitations and exclusions may have other than by an Epson Authorized Servicer. UNLESS STATED HEREIN, ANY STATEMENTS OR REPRESENTATIONS MADE BY ANY OTHER PERSON OR FIRM ARE VOID. If a claimed defect ... not allow the exclusion or limitation of misuse, abuse, improper installation, neglect, improper shipping, damage caused by Epson. To find the Epson Customer Care Center nearest you will be held responsible for warranty service should the Epson label or logo or the rating label or serial number be...


