
Technical Reference Guide
Page 3
.... It comprises a set of their respective owners and used for damages, losses, costs, or expenses incurred by Seiko Epson Corporation. All rights reserved. 3 TM-L90/TM-L90 Peeler Model Technical Reference Guide Cautions ❏ No part of this document may be reproduced, stored in a retrieval system, or transmitted in any form or by ...
.... It comprises a set of their respective owners and used for damages, losses, costs, or expenses incurred by Seiko Epson Corporation. All rights reserved. 3 TM-L90/TM-L90 Peeler Model Technical Reference Guide Cautions ❏ No part of this document may be reproduced, stored in a retrieval system, or transmitted in any form or by ...

Technical Reference Guide
Page 5
Warnings TM-L90/TM-L90 Peeler Model Technical Reference Guide WARNING: ❏ Shut down your equipment immediately if it in. • Be sure to push the plug all the way in. 5 ...
Warnings TM-L90/TM-L90 Peeler Model Technical Reference Guide WARNING: ❏ Shut down your equipment immediately if it in. • Be sure to push the plug all the way in. 5 ...
Technical Reference Guide
Page 7
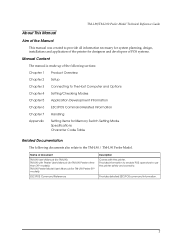
... documents also relate to use the printer safely and correctly. Provides information to enable POS operators to the TM-L90 / TM-L90 Peeler Model. TM-L90/TM-L90 Peeler Model Technical Reference Guide About This Manual Aim of the Manual This manual was created to provide all information...and developers of POS systems. Manual Content The manual is made up of document TM-L90 User's Manual (for TM-L90) TM-L90 with Peeler User's Manual (for TM-L90 Peeler other than 39* models) TM-L90 Peeler Model User's Manual (for Memory Switch Setting Mode Specifications Character Code Table Related...
... documents also relate to use the printer safely and correctly. Provides information to enable POS operators to the TM-L90 / TM-L90 Peeler Model. TM-L90/TM-L90 Peeler Model Technical Reference Guide About This Manual Aim of the Manual This manual was created to provide all information...and developers of POS systems. Manual Content The manual is made up of document TM-L90 User's Manual (for TM-L90) TM-L90 with Peeler User's Manual (for TM-L90 Peeler other than 39* models) TM-L90 Peeler Model User's Manual (for Memory Switch Setting Mode Specifications Character Code Table Related...

Technical Reference Guide
Page 8
...Installation Procedures 24 Precaution For Installation 24 Instructions for Installation 25 Adjusting Roll Paper Near-End Detection Position 27 With TM-L90 27 With the TM-L90 Peeler Model 31 Connecting AC adapter (PS-180 35 Attaching AC adapter 35 Caution about AC adapter and Supply Voltage 36... Paper Width 40 DIP Switch Settings 42 Memory Switch Settings 44 Memory switches of TM-L90 45 Memory switches of TM-L90 Peeler Model 50 Paper Loading Method 55 With TM-L90 55 With the TM-L90 Peeler Model 56 Setting Paper Layout 59 Clearing Paper Layout Setting 64 Chapter 3 Connecting ...
...Installation Procedures 24 Precaution For Installation 24 Instructions for Installation 25 Adjusting Roll Paper Near-End Detection Position 27 With TM-L90 27 With the TM-L90 Peeler Model 31 Connecting AC adapter (PS-180 35 Attaching AC adapter 35 Caution about AC adapter and Supply Voltage 36... Paper Width 40 DIP Switch Settings 42 Memory Switch Settings 44 Memory switches of TM-L90 45 Memory switches of TM-L90 Peeler Model 50 Paper Loading Method 55 With TM-L90 55 With the TM-L90 Peeler Model 56 Setting Paper Layout 59 Clearing Paper Layout Setting 64 Chapter 3 Connecting ...

Technical Reference Guide
Page 9
... 74 Setting the internal buzzer (for models with an internal buzzer 74 Chapter 4 Setting/Checking Modes Setting/Checking Modes of TM-L90 4** models, TM-L90 Peeler 39* models 77 Self-test Mode 78 NV Graphics Information Print Mode 79 Memory Switch Setting Mode 80 Hexadecimal Dump Mode ... than 4** models, TM-L90 Peeler other than 39* models 82 Self-test Mode 82 Memory Switch Setting Mode 83 Hexadecimal Dump Mode 84 Chapter 5 Application Development Information Introduction of Control Methods 85 Windows Driver (EPSON Advanced Printer Driver 85 EPSON OPOS ADK 87 ESC/POS Commands 90 ...
... 74 Setting the internal buzzer (for models with an internal buzzer 74 Chapter 4 Setting/Checking Modes Setting/Checking Modes of TM-L90 4** models, TM-L90 Peeler 39* models 77 Self-test Mode 78 NV Graphics Information Print Mode 79 Memory Switch Setting Mode 80 Hexadecimal Dump Mode ... than 4** models, TM-L90 Peeler other than 39* models 82 Self-test Mode 82 Memory Switch Setting Mode 83 Hexadecimal Dump Mode 84 Chapter 5 Application Development Information Introduction of Control Methods 85 Windows Driver (EPSON Advanced Printer Driver 85 EPSON OPOS ADK 87 ESC/POS Commands 90 ...

Technical Reference Guide
Page 10
... items for Memory Switch Setting Mode 121 Setting items of TM-L90 4** models 121 Setting items of TM-L90 other than 4** models 125 Setting items of TM-L90 Peeler 39* models 126 Setting items of TM-L90 Peeler other than 39* models 128 Product Specifications 130 Product Specifications...Specifications 138 Paper Specifications 138 Printing Area 139 Printing Position in Relation to Cutter Position (TM-L90 141 Printing Position, Peeling Position, Manual Cutter Position (TM-L90 Peeler Model 142 Overview of External Dimensions 143 Interface And Connectors 146 RS-232 Serial Interface ...
... items for Memory Switch Setting Mode 121 Setting items of TM-L90 4** models 121 Setting items of TM-L90 other than 4** models 125 Setting items of TM-L90 Peeler 39* models 126 Setting items of TM-L90 Peeler other than 39* models 128 Product Specifications 130 Product Specifications...Specifications 138 Paper Specifications 138 Printing Area 139 Printing Position in Relation to Cutter Position (TM-L90 141 Printing Position, Peeling Position, Manual Cutter Position (TM-L90 Peeler Model 142 Overview of External Dimensions 143 Interface And Connectors 146 RS-232 Serial Interface ...

Technical Reference Guide
Page 13
...) • USB (USB2.0) • Ethernet (10BASE-T/100BASE-T) • Wireless LAN (IEEE802.11a/b/g/n for TM-L90 4** models, TM-L90 Peeler 39* models) • Wireless LAN (IEEE802.11b for the other models) TM-L90 4** models and TM-L90 Peeler 39* models may have the build-in-USB. 1.1.2 Accessories TM-L90 ❏ Start Here ❏ Label roll paper ❏ Manual CD ❏ Power switch cover...
...) • USB (USB2.0) • Ethernet (10BASE-T/100BASE-T) • Wireless LAN (IEEE802.11a/b/g/n for TM-L90 4** models, TM-L90 Peeler 39* models) • Wireless LAN (IEEE802.11b for the other models) TM-L90 4** models and TM-L90 Peeler 39* models may have the build-in-USB. 1.1.2 Accessories TM-L90 ❏ Start Here ❏ Label roll paper ❏ Manual CD ❏ Power switch cover...

Technical Reference Guide
Page 14
TM-L90 Peeler Model ❏ Start Here ❏ Label roll paper ❏ Manual CD ❏ Power switch cover ❏ Operation label (an instruction label for the peeler open lever and the cover open lever) ❏ Roll paper spacer ❏ Screw for installation of the roll paper spacer ❏ Wire saddle ❏ AC ...
TM-L90 Peeler Model ❏ Start Here ❏ Label roll paper ❏ Manual CD ❏ Power switch cover ❏ Operation label (an instruction label for the peeler open lever and the cover open lever) ❏ Roll paper spacer ❏ Screw for installation of the roll paper spacer ❏ Wire saddle ❏ AC ...

Technical Reference Guide
Page 15
Product Overview 15 TM-L90/TM-L90 Peeler Model Technical Reference Guide 1.2 Name and Description of Each Part 1.2.1 Part Names (TM-L90) Power switch Rocker switch (with a power switch soft cover) or Non-locking push button Cutter cover Perforation to pass the cables through FEED Button Manual cutter Cover open lever Roll paper cover Control panel Printer Part Names * Refer to page 44 for the location of the DIP switches (available only for TM-L90 other than 4** models).
Product Overview 15 TM-L90/TM-L90 Peeler Model Technical Reference Guide 1.2 Name and Description of Each Part 1.2.1 Part Names (TM-L90) Power switch Rocker switch (with a power switch soft cover) or Non-locking push button Cutter cover Perforation to pass the cables through FEED Button Manual cutter Cover open lever Roll paper cover Control panel Printer Part Names * Refer to page 44 for the location of the DIP switches (available only for TM-L90 other than 4** models).

Technical Reference Guide
Page 16
1.2.2 Part Names (TM-L90 Peeler Model) Power switch Rocker switch (with a power switch soft cover) or Non-locking push button Power switch Peeler open lever Cover open lever FEED Button Control panel Cutter cover Label peeling sensor Manual cutter Peeler cover Wiring knockout Roll paper cover Part Names of TM-L90 Peeler Model * Refer to page 44 for the DIP switch positions. (available only for TM-L90 Peeler other than 39* models) 16 Product Overview
1.2.2 Part Names (TM-L90 Peeler Model) Power switch Rocker switch (with a power switch soft cover) or Non-locking push button Power switch Peeler open lever Cover open lever FEED Button Control panel Cutter cover Label peeling sensor Manual cutter Peeler cover Wiring knockout Roll paper cover Part Names of TM-L90 Peeler Model * Refer to page 44 for the DIP switch positions. (available only for TM-L90 Peeler other than 39* models) 16 Product Overview

Technical Reference Guide
Page 17
... cover initializes the mechanism. (After closing the roll paper cover, the status changes to waiting to the next print starting position. TM-L90/TM-L90 Peeler Model Technical Reference Guide 1.2.3 Paper FEED button inside the printer) 1.2.4 Control Panel FEED Button PAPER OUT LED ERROR LED POWER LED... button (inside the printer Another FEED button is pressed) Product Overview 17 FEED button (with the TM-L90 Peeler Model) When using label paper or receipt paper with the TM-L90) When using receipt paper: ❏ Pressing this button down feeds paper continuously. Holding this button ...
... cover initializes the mechanism. (After closing the roll paper cover, the status changes to waiting to the next print starting position. TM-L90/TM-L90 Peeler Model Technical Reference Guide 1.2.3 Paper FEED button inside the printer) 1.2.4 Control Panel FEED Button PAPER OUT LED ERROR LED POWER LED... button (inside the printer Another FEED button is pressed) Product Overview 17 FEED button (with the TM-L90 Peeler Model) When using label paper or receipt paper with the TM-L90) When using receipt paper: ❏ Pressing this button down feeds paper continuously. Holding this button ...

Technical Reference Guide
Page 18
PAPER OUT LED (with the TM-L90 Peeler Model) ❏ Lights when there is no more roll paper or there is in progress... this button once feeds paper by memory switch 8-1, if a paper layout error occurs, pressing FEED button recovers from the peeler. Refer to "Memory Switch Settings" on page 44 and "Error Code" on page 113 for details.) ❏ Off...varies according to go on page 113 for details.) ❏ Off when there is issued. PAPER OUT LED (with the TM-L90) ❏ Lights when there is no more roll paper or there is ejected and the LED starts flashing. ERROR LED...
PAPER OUT LED (with the TM-L90 Peeler Model) ❏ Lights when there is no more roll paper or there is in progress... this button once feeds paper by memory switch 8-1, if a paper layout error occurs, pressing FEED button recovers from the peeler. Refer to "Memory Switch Settings" on page 44 and "Error Code" on page 113 for details.) ❏ Off...varies according to go on page 113 for details.) ❏ Off when there is issued. PAPER OUT LED (with the TM-L90) ❏ Lights when there is no more roll paper or there is ejected and the LED starts flashing. ERROR LED...

Technical Reference Guide
Page 19
...marks on the switch: ( / ) Non-locking push button (TM-L90 other than 4** models, TM-L90 Peeler other than 39* models): Turn on the power by holding down the POWER button 3 seconds or longer. Rocker switch (TM-L90 4** models, TM-L90 Peeler 39* models): Turns the printer on or off. Turn off... the power by holding down the POWER button 1 second or longer. TM-L90/TM-L90 Peeler Model Technical Reference Guide 1.2.5 Power Switch Refer to "Printer Part...
...marks on the switch: ( / ) Non-locking push button (TM-L90 other than 4** models, TM-L90 Peeler other than 39* models): Turn on the power by holding down the POWER button 3 seconds or longer. Rocker switch (TM-L90 4** models, TM-L90 Peeler 39* models): Turns the printer on or off. Turn off... the power by holding down the POWER button 1 second or longer. TM-L90/TM-L90 Peeler Model Technical Reference Guide 1.2.5 Power Switch Refer to "Printer Part...

Technical Reference Guide
Page 20
... Switch Cover To prevent unintentional contact or improper changes and to turn on or off the TM printer, press the power switch through the hole in the illustrations below. TM-L90 4** models, TM-L90 Peeler 39* models 1 2 3 TM-L90 other than 4** models, TM-L90 Peeler other than 39* models 1 2 WARNING: If an accident occurs with the power switch cover attached, unplug...
... Switch Cover To prevent unintentional contact or improper changes and to turn on or off the TM printer, press the power switch through the hole in the illustrations below. TM-L90 4** models, TM-L90 Peeler 39* models 1 2 3 TM-L90 other than 4** models, TM-L90 Peeler other than 39* models 1 2 WARNING: If an accident occurs with the power switch cover attached, unplug...

Technical Reference Guide
Page 21
... the peeling issuing mode and continuous issuing mode with the covers closed . Product Overview 21 TM-L90/TM-L90 Peeler Model Technical Reference Guide 1.2.7 Mode Switch (TM-L90 Peeler Model Only) With the TM-L90 Peeler Model, you can damage the switch. Note: Be sure that the peeler cover and the roll paper cover are closed , the setting will not be changed...
... the peeling issuing mode and continuous issuing mode with the covers closed . Product Overview 21 TM-L90/TM-L90 Peeler Model Technical Reference Guide 1.2.7 Mode Switch (TM-L90 Peeler Model Only) With the TM-L90 Peeler Model, you can damage the switch. Note: Be sure that the peeler cover and the roll paper cover are closed , the setting will not be changed...

Technical Reference Guide
Page 22
The connector panel differs, depending on page 65. 22 Product Overview TM-L90 4** models, TM-L90 Peeler 39* models power supply connector USB interface drawer kick connector TM-L90 other than 4** models, TM-L90 Peeler other information on interfaces and connectors, refer to the connector panel located on the lower rear side of the cover as shown in the illustration ...
The connector panel differs, depending on page 65. 22 Product Overview TM-L90 4** models, TM-L90 Peeler 39* models power supply connector USB interface drawer kick connector TM-L90 other than 4** models, TM-L90 Peeler other information on interfaces and connectors, refer to the connector panel located on the lower rear side of the cover as shown in the illustration ...

Technical Reference Guide
Page 23
Determine how to increase the printer's functionality. Configure the printer appropriately depending on the environment. Chapter 2 Setup TM-L90/TM-L90 Peeler Model Technical Reference Guide 2.1 Setup Flow Before using the printer, you need to set various settings to install the printer (install it vertically or horizontally) Set the Roll Paper Near-End Detector Connect the AC adapter Autocutter settings (TM-L90 only) Set the Roll Paper width DIP switch settings Memory switch settings Set the Paper layout Setup 23
Determine how to increase the printer's functionality. Configure the printer appropriately depending on the environment. Chapter 2 Setup TM-L90/TM-L90 Peeler Model Technical Reference Guide 2.1 Setup Flow Before using the printer, you need to set various settings to install the printer (install it vertically or horizontally) Set the Roll Paper Near-End Detector Connect the AC adapter Autocutter settings (TM-L90 only) Set the Roll Paper width DIP switch settings Memory switch settings Set the Paper layout Setup 23

Technical Reference Guide
Page 24
...cables or other objects. • Consider vibration during paper cutting and drawer usage. 2.2 Installation Procedures 2.2.1 Precaution For Installation ❏ TM-L90 • Locate the printer on a flat surface, whichever orientation you choose. • Avoid locations susceptible to dust and other foreign ... objects. • Consider vibration during paper cutting and drawer usage. Take measures to prevent the printer from moving. ❏ TM-L90 Peeler Model • Locate the printer on a flat surface. • Avoid locations susceptible to prevent the printer from moving. •...
...cables or other objects. • Consider vibration during paper cutting and drawer usage. 2.2 Installation Procedures 2.2.1 Precaution For Installation ❏ TM-L90 • Locate the printer on a flat surface, whichever orientation you choose. • Avoid locations susceptible to dust and other foreign ... objects. • Consider vibration during paper cutting and drawer usage. Take measures to prevent the printer from moving. ❏ TM-L90 Peeler Model • Locate the printer on a flat surface. • Avoid locations susceptible to prevent the printer from moving. •...

Technical Reference Guide
Page 25
...is being loaded or a drawer is recommended to adjust the following figure shows the TM-L90 placed both vertically and horizontally. Setup 25 The DF-10 (affixing tapes) for the TM-L90 Peeler Model. With the TM-L90 Peeler Model, you need to take some measures so that a peeled label will not ... (paper outlet at the top), or attached to a wall (using the peeler). Note: For the TM-L90 Peeler Model, horizontal installation is prohibited to install the printer so that the printer will cause jams. For the TM-L90, when changing the way of backing paper and a label. When using the...
...is being loaded or a drawer is recommended to adjust the following figure shows the TM-L90 placed both vertically and horizontally. Setup 25 The DF-10 (affixing tapes) for the TM-L90 Peeler Model. With the TM-L90 Peeler Model, you need to take some measures so that a peeled label will not ... (paper outlet at the top), or attached to a wall (using the peeler). Note: For the TM-L90 Peeler Model, horizontal installation is prohibited to install the printer so that the printer will cause jams. For the TM-L90, when changing the way of backing paper and a label. When using the...

Technical Reference Guide
Page 27
... the remaining amount of remaining paper desired. Open the roll paper cover. 2. detector holder Detector adjustment screw N.E. detector components 1. TM-L90/TM-L90 Peeler Model Technical Reference Guide 2.3 Adjusting Roll Paper Near-End Detection Position 2.3.1 With TM-L90 Below are manufactured according to various specifications, making it impossible to suit the diameter of the roll paper core...
... the remaining amount of remaining paper desired. Open the roll paper cover. 2. detector holder Detector adjustment screw N.E. detector components 1. TM-L90/TM-L90 Peeler Model Technical Reference Guide 2.3 Adjusting Roll Paper Near-End Detection Position 2.3.1 With TM-L90 Below are manufactured according to various specifications, making it impossible to suit the diameter of the roll paper core...