
User Manual
Page 23
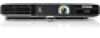
... the Remote Control Opening the Lens Cover Projector Placement You can also install the projector in a ceiling mount if you select a projector location: • Place the projector on a sturdy, level surface or install it using a compatible mount. • Leave plenty of a grounded electrical outlet or extension cord. Keep these sections to set up...
... the Remote Control Opening the Lens Cover Projector Placement You can also install the projector in a ceiling mount if you select a projector location: • Place the projector on a sturdy, level surface or install it using a compatible mount. • Leave plenty of a grounded electrical outlet or extension cord. Keep these sections to set up...

User Manual
Page 59
... , or off to the side, you may need to correct the image shape for the best display quality. When you turn on the ceiling • Screen size is 100 inches (254 cm) or less • Projection distance is about 3 feet (1 m) to automatically correct ...The room is not too dark • Projection surface is not mounted on automatic keystone correction in some way 59 If you reposition the projector. (The PowerLite 1751/1761W/1771W automatically correct vertical keystoning and the PowerLite 1776W automatically corrects horizontal and vertical keystoning.) Automatically Correcting Image Shape ...
... , or off to the side, you may need to correct the image shape for the best display quality. When you turn on the ceiling • Screen size is 100 inches (254 cm) or less • Projection distance is about 3 feet (1 m) to automatically correct ...The room is not too dark • Projection surface is not mounted on automatic keystone correction in some way 59 If you reposition the projector. (The PowerLite 1751/1761W/1771W automatically correct vertical keystoning and the PowerLite 1776W automatically corrects horizontal and vertical keystoning.) Automatically Correcting Image Shape ...

User Manual
Page 70
... • Front (default setting) lets you project from a table in front of the screen. • Front/Ceiling flips the image over top-to-bottom to project upside-down from a ceiling or wall mount. • Rear flips the image horizontally to project from behind a translucent screen. • Rear.../Ceiling flips the image over top-to project from the ceiling and behind a translucent screen. You can change the projection...
... • Front (default setting) lets you project from a table in front of the screen. • Front/Ceiling flips the image over top-to-bottom to project upside-down from a ceiling or wall mount. • Rear flips the image horizontally to project from behind a translucent screen. • Rear.../Ceiling flips the image over top-to project from the ceiling and behind a translucent screen. You can change the projection...
User Manual
Page 119
..., or use canned air, or the gases may leave a residue. 3. Caution: Do not use any detergent or solvent to remove or the air filter is mounted to the ceiling, if necessary. 1.
..., or use canned air, or the gases may leave a residue. 3. Caution: Do not use any detergent or solvent to remove or the air filter is mounted to the ceiling, if necessary. 1.

User Manual
Page 121
... the power cord. 2. Parent topic: Air Filter and Vent Maintenance Projector Lamp Maintenance The projector keeps track of the number of hours the lamp is mounted to the ceiling, if necessary. 1. Warning: Let the lamp fully cool before replacing it to avoid injury.
... the power cord. 2. Parent topic: Air Filter and Vent Maintenance Projector Lamp Maintenance The projector keeps track of the number of hours the lamp is mounted to the ceiling, if necessary. 1. Warning: Let the lamp fully cool before replacing it to avoid injury.
User Manual
Page 144
...: White light output 1700 lumens (ISO 21118 standard) 2000:1 with Auto Iris on and Normal Power Consumption mode 30 inches (0.8 m) to 300 inches (7.6 m) PowerLite 1751: 28.3 inches (0.7 m) to 345.3 inches (8.8 m) PowerLite 1761W/1771W/1776W: 26.4 inches (0.7 m) to 322.0 inches (8.2 m) Front, rear, ceiling-mounted PowerLite 1751: 4:3 PowerLite 1761W/1771W/1776: 16:10 PowerLite 1751/1761W/1771W: Manual PowerLite 1776W: Powered Manual 144
...: White light output 1700 lumens (ISO 21118 standard) 2000:1 with Auto Iris on and Normal Power Consumption mode 30 inches (0.8 m) to 300 inches (7.6 m) PowerLite 1751: 28.3 inches (0.7 m) to 345.3 inches (8.8 m) PowerLite 1761W/1771W/1776W: 26.4 inches (0.7 m) to 322.0 inches (8.2 m) Front, rear, ceiling-mounted PowerLite 1751: 4:3 PowerLite 1761W/1771W/1776: 16:10 PowerLite 1751/1761W/1771W: Manual PowerLite 1776W: Powered Manual 144
User Manual
Page 153
...papers, which could block vents underneath the projector. Do not use the projector near a wall outlet where the plug can be walked on its ceiling mount. The bright light can be easily unplugged. • Take the following precautions when handling the plug: Do not hold the plug when disconnecting it... should be sure to hold the plug with this projector. • When installing or adjusting a ceiling or wall mount, do not use adhesives to prevent the screws from the wall outlet before cleaning. Do not tilt the projector more than 30° ...
...papers, which could block vents underneath the projector. Do not use the projector near a wall outlet where the plug can be walked on its ceiling mount. The bright light can be easily unplugged. • Take the following precautions when handling the plug: Do not hold the plug when disconnecting it... should be sure to hold the plug with this projector. • When installing or adjusting a ceiling or wall mount, do not use adhesives to prevent the screws from the wall outlet before cleaning. Do not tilt the projector more than 30° ...


