
Reference Guide
Page 3
... This Manual 6 Warnings, Cautions, and Notes 7 Safety Instructions 7 Hot parts caution symbol 7 When setting up the printer 8 When operating the printer 9 When handling paper 9 When maintaining the printer 10 Chapter 1 Paper Handling Printing on Continuous Paper 11 Printing with the push tractor 12 Printing with the pull tractor 17... Printing on Special Paper 29 Adjusting the paper thickness lever 29 Multipart forms 30 Labels 31 Envelopes 32 Chapter 2 Using the Printer Software Accessing the Printer Driver 34 From Windows applications 34 From the Start menu 36 Changing the...
... This Manual 6 Warnings, Cautions, and Notes 7 Safety Instructions 7 Hot parts caution symbol 7 When setting up the printer 8 When operating the printer 9 When handling paper 9 When maintaining the printer 10 Chapter 1 Paper Handling Printing on Continuous Paper 11 Printing with the push tractor 12 Printing with the pull tractor 17... Printing on Special Paper 29 Adjusting the paper thickness lever 29 Multipart forms 30 Labels 31 Envelopes 32 Chapter 2 Using the Printer Software Accessing the Printer Driver 34 From Windows applications 34 From the Start menu 36 Changing the...
Reference Guide
Page 6
... load various types of up to possible problems. 6 Introduction About This Manual This manual provides detailed information about your printer contains the printer driver for Microsoft® Windows® 98, Me, 2000, XP and NT 4.0, plus the EPSON Status Monitor 3 utility. Introduction Your Epson® LX-300+II printer provides high-quality printing and superior performance in a compact design.
... load various types of up to possible problems. 6 Introduction About This Manual This manual provides detailed information about your printer contains the printer driver for Microsoft® Windows® 98, Me, 2000, XP and NT 4.0, plus the EPSON Status Monitor 3 utility. Introduction Your Epson® LX-300+II printer provides high-quality printing and superior performance in a compact design.

Reference Guide
Page 33
.... Note: ❏ Before proceeding, make sure you have installed the printer software on your Windows software applications to take full advantage of your printer, alerts you when errors occur, and provides you install the printer driver. The printer driver software and EPSON Status Monitor 3 can function only in the User's Guide. ❏ Make sure the software...
.... Note: ❏ Before proceeding, make sure you have installed the printer software on your Windows software applications to take full advantage of your printer, alerts you when errors occur, and provides you install the printer driver. The printer driver software and EPSON Status Monitor 3 can function only in the User's Guide. ❏ Make sure the software...
Reference Guide
Page 34
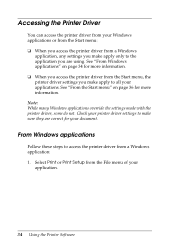
... menu" on page 34 for more information. Accessing the Printer Driver You can access the printer driver from your Windows applications or from the Start menu: ❏ When you access the printer driver from a Windows application, any settings you make sure they are using. Check your printer driver settings to make apply only to access the...
... menu" on page 34 for more information. Accessing the Printer Driver You can access the printer driver from your Windows applications or from the Start menu: ❏ When you access the printer driver from a Windows application, any settings you make sure they are using. Check your printer driver settings to make apply only to access the...
Reference Guide
Page 35
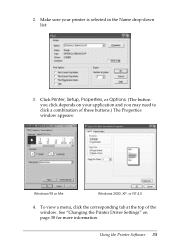
Using the Printer Software 35 See "Changing the Printer Driver Settings" on your printer is selected in the Name drop-down list: 3. Click Printer, Setup, Properties, or Options. (The button you may need to click a combination of the window. To view a menu, click the corresponding tab at the top of these buttons.) The Properties window appears: Windows 98 or Me Windows 2000, XP, or NT 4.0 4. 2. Make sure your application and you click depends on page 38 for more information.
Using the Printer Software 35 See "Changing the Printer Driver Settings" on your printer is selected in the Name drop-down list: 3. Click Printer, Setup, Properties, or Options. (The button you may need to click a combination of the window. To view a menu, click the corresponding tab at the top of these buttons.) The Properties window appears: Windows 98 or Me Windows 2000, XP, or NT 4.0 4. 2. Make sure your application and you click depends on page 38 for more information.
Reference Guide
Page 36
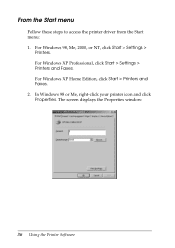
In Windows 98 or Me, right-click your printer icon and click Properties. From the Start menu Follow these steps to access the printer driver from the Start menu: 1. For Windows XP Professional, click Start > Settings > Printers and Faxes. For Windows XP Home Edition, click Start > Printers and Faxes. 2. The screen displays the Properties window: . 36 Using the Printer Software For Windows 98, Me, 2000, or NT, click Start > Settings > Printers.
In Windows 98 or Me, right-click your printer icon and click Properties. From the Start menu Follow these steps to access the printer driver from the Start menu: 1. For Windows XP Professional, click Start > Settings > Printers and Faxes. For Windows XP Home Edition, click Start > Printers and Faxes. 2. The screen displays the Properties window: . 36 Using the Printer Software For Windows 98, Me, 2000, or NT, click Start > Settings > Printers.
Reference Guide
Page 37
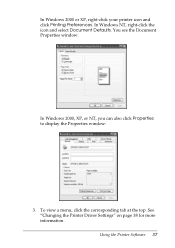
To view a menu, click the corresponding tab at the top. See "Changing the Printer Driver Settings" on page 38 for more information. You see the Document Properties window: In Windows 2000, XP, or NT, you can also click Properties to display the Properties window: 3. Using the Printer Software 37 In Windows 2000 or XP, right-click your printer icon and click Printing Preferences. In Windows NT, right-click the icon and select Document Defaults.
To view a menu, click the corresponding tab at the top. See "Changing the Printer Driver Settings" on page 38 for more information. You see the Document Properties window: In Windows 2000, XP, or NT, you can also click Properties to display the Properties window: 3. Using the Printer Software 37 In Windows 2000 or XP, right-click your printer icon and click Printing Preferences. In Windows NT, right-click the icon and select Document Defaults.
Reference Guide
Page 38
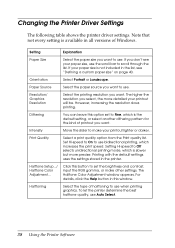
... darker. If you want . Print Quality Select a print quality option from the Print quality list. The Halftone Color Adjustment window appears. To let the printer determine the best halftone quality, use the scroll bar to Fine, which increases the print speed. Click this... window. Printing with the default settings uses the settings stored in all versions of printout you want . Changing the Printer Driver Settings The following table shows the printer driver settings. Setting Explanation Paper Size Select the paper size...
... darker. If you want . Print Quality Select a print quality option from the Print quality list. The Halftone Color Adjustment window appears. To let the printer determine the best halftone quality, use the scroll bar to Fine, which increases the print speed. Click this... window. Printing with the default settings uses the settings stored in all versions of printout you want . Changing the Printer Driver Settings The following table shows the printer driver settings. Setting Explanation Paper Size Select the paper size...
Reference Guide
Page 39
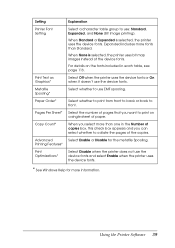
.... Select Enable or Disable for more than Standard. Select Disable when the printer does not use : Standard, Expanded, and None (Bit Image printing). When None is selected, the printer uses the device fonts. Select Off when the printer uses the device fonts or On when it doesn't use EMF spooling. ...Per Sheet* Copy Count* Advanced Printing Features* Print Optimizations* Explanation Select a character table group to use the device fonts and select Enable when the printer uses the device fonts. * See Windows Help for the metafile Spooling. When Standard or Expanded is selected, the...
.... Select Enable or Disable for more than Standard. Select Disable when the printer does not use : Standard, Expanded, and None (Bit Image printing). When None is selected, the printer uses the device fonts. Select Off when the printer uses the device fonts or On when it doesn't use EMF spooling. ...Per Sheet* Copy Count* Advanced Printing Features* Print Optimizations* Explanation Select a character table group to use the device fonts and select Enable when the printer uses the device fonts. * See Windows Help for the metafile Spooling. When Standard or Expanded is selected, the...
Reference Guide
Page 40
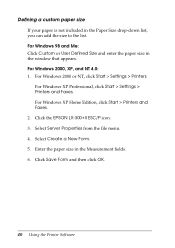
... Properties from the file menu. 4. Click Save Form and then click OK. 40 Using the Printer Software For Windows 2000 or NT, click Start > Settings > Printers. Enter the paper size in the window that appears. Defining a custom paper size If your paper is not included in the Paper Size... drop-down list, you can add the size to the list. For Windows XP Home Edition, click Start > Printers and Faxes. 2. Select Create a New Form. 5. Click the EPSON LX-300+II ESC/P icon. 3. For Windows ...
... Properties from the file menu. 4. Click Save Form and then click OK. 40 Using the Printer Software For Windows 2000 or NT, click Start > Settings > Printers. Enter the paper size in the window that appears. Defining a custom paper size If your paper is not included in the Paper Size... drop-down list, you can add the size to the list. For Windows XP Home Edition, click Start > Printers and Faxes. 2. Select Create a New Form. 5. Click the EPSON LX-300+II ESC/P icon. 3. For Windows ...

Reference Guide
Page 41
... 3 Monitoring Preferences Explanation You can access EPSON Status Monitor 3 when you when printer errors occur, and provides troubleshooting instructions when needed. Using EPSON Status Monitor 3 EPSON Status Monitor 3 allows you to monitor your printer's status, alerts you click this button to open the Monitoring Preferences window, where you install the printer driver (as described in the User...
... 3 Monitoring Preferences Explanation You can access EPSON Status Monitor 3 when you when printer errors occur, and provides troubleshooting instructions when needed. Using EPSON Status Monitor 3 EPSON Status Monitor 3 allows you to monitor your printer's status, alerts you click this button to open the Monitoring Preferences window, where you install the printer driver (as described in the User...
Reference Guide
Page 42
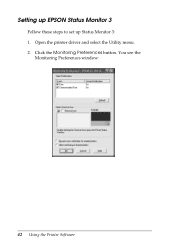
Setting up EPSON Status Monitor 3 Follow these steps to set up Status Monitor 3: 1. Open the printer driver and select the Utility menu. 2. You see the Monitoring Preferences window: 42 Using the Printer Software Click the Monitoring Preferences button.
Setting up EPSON Status Monitor 3 Follow these steps to set up Status Monitor 3: 1. Open the printer driver and select the Utility menu. 2. You see the Monitoring Preferences window: 42 Using the Printer Software Click the Monitoring Preferences button.
Reference Guide
Page 43
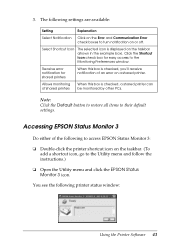
...other PCs. Note: Click the Default button to restore all items to turn notification on a shared printer. 3. Receive error notification for easy access to the Monitoring Preferences window. Allows monitoring of the following to the Utility menu and follow the instructions.) ❏ Open ...the Utility menu and click the EPSON Status Monitor 3 icon. Accessing EPSON Status Monitor 3 Do either of shared printers When this box is displayed ...
...other PCs. Note: Click the Default button to restore all items to turn notification on a shared printer. 3. Receive error notification for easy access to the Monitoring Preferences window. Allows monitoring of the following to the Utility menu and follow the instructions.) ❏ Open ...the Utility menu and click the EPSON Status Monitor 3 icon. Accessing EPSON Status Monitor 3 Do either of shared printers When this box is displayed ...
Reference Guide
Page 44
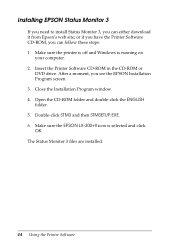
Make sure the printer is off and Windows is selected and click OK. Insert the Printer Software CD-ROM in the CD-ROM or DVD drive. Open the CD-ROM folder and double-click the ENGLISH folder. 5. After a moment, you can either download it from Epson's web site; ...3 files are installed. 44 Using the Printer Software Installing EPSON Status Monitor 3 If you need to install Status Monitor 3, you can follow these steps: 1. Make sure the EPSON LX-300+II icon is running on your computer. 2. Close the Installation Program window. 4. or if you have the Printer Software CD-ROM, you see the...
Make sure the printer is off and Windows is selected and click OK. Insert the Printer Software CD-ROM in the CD-ROM or DVD drive. Open the CD-ROM folder and double-click the ENGLISH folder. 5. After a moment, you can either download it from Epson's web site; ...3 files are installed. 44 Using the Printer Software Installing EPSON Status Monitor 3 If you need to install Status Monitor 3, you can follow these steps: 1. Make sure the EPSON LX-300+II icon is running on your computer. 2. Close the Installation Program window. 4. or if you have the Printer Software CD-ROM, you see the...
Reference Guide
Page 45
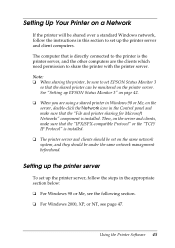
...same network system, and they should be set up EPSON Status Monitor 3" on page 42. ❏ When you are the clients which need permission to the printer is the printer server, and the other computers are using a shared printer in Windows 98 or Me, on the server, double-click ... page 47. The computer that is directly connected to share the printer with the printer server. See "Setting up the printer server and client computers. Setting Up Your Printer on a Network If the printer will be shared over a standard Windows network, follow the steps in the Control panel and make sure...
...same network system, and they should be set up EPSON Status Monitor 3" on page 42. ❏ When you are the clients which need permission to the printer is the printer server, and the other computers are using a shared printer in Windows 98 or Me, on the server, double-click ... page 47. The computer that is directly connected to share the printer with the printer server. See "Setting up the printer server and client computers. Setting Up Your Printer on a Network If the printer will be shared over a standard Windows network, follow the steps in the Control panel and make sure...
Reference Guide
Page 46
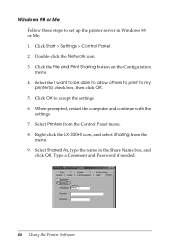
... print to accept the settings. 6. Select Shared As, type the name in Windows 98 or Me: 1. Click the File and Print Sharing button on the Configuration menu. 4. Click OK to my printer(s) check box, then click OK. 5. Right-click the LX-300+II icon, and select Sharing from the Control Panel menu. 8. Click Start > Settings...
... print to accept the settings. 6. Select Shared As, type the name in Windows 98 or Me: 1. Click the File and Print Sharing button on the Configuration menu. 4. Click OK to my printer(s) check box, then click OK. 5. Right-click the LX-300+II icon, and select Sharing from the Control Panel menu. 8. Click Start > Settings...
Reference Guide
Page 47
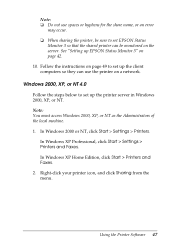
... Administrators of the local machine. 1. In Windows XP Professional, click Start > Settings > Printers and Faxes. In Windows 2000 or NT, click Start > Settings > Printers. Follow the instructions on page 49 to set EPSON Status Monitor 3 so that the shared printer can be sure to set up EPSON Status Monitor 3" on a network. Windows 2000, XP, or NT 4.0 Follow the...
... Administrators of the local machine. 1. In Windows XP Professional, click Start > Settings > Printers and Faxes. In Windows 2000 or NT, click Start > Settings > Printers. Follow the instructions on page 49 to set EPSON Status Monitor 3 so that the shared printer can be sure to set up EPSON Status Monitor 3" on a network. Windows 2000, XP, or NT 4.0 Follow the...
Reference Guide
Page 48
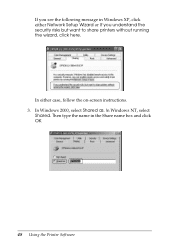
Then type the name in Windows XP, click either case, follow the on-screen instructions. 3. In Windows 2000, select Shared as. In Windows NT, select Shared. If you understand the security risks but want to share printers without running the wizard, click here. In either Network Setup Wizard or If you see the following message in the Share name box and click OK. 48 Using the Printer Software
Then type the name in Windows XP, click either case, follow the on-screen instructions. 3. In Windows 2000, select Shared as. In Windows NT, select Shared. If you understand the security risks but want to share printers without running the wizard, click here. In either Network Setup Wizard or If you see the following message in the Share name box and click OK. 48 Using the Printer Software

Reference Guide
Page 49
...share name. Note: Do not use the printer on a network. Setting up the clients This section describes how to set up the client computers so they can use spaces or hyphens for your operating system: ❏ Windows 98 or Me: see page 50. ❏ Windows 2000 or XP: see page 52. ❏...; Windows NT 4.0: see page 55. Follow the instructions on page 49 to install the printer driver on the client computers by accessing the shared...
...share name. Note: Do not use the printer on a network. Setting up the clients This section describes how to set up the client computers so they can use spaces or hyphens for your operating system: ❏ Windows 98 or Me: see page 50. ❏ Windows 2000 or XP: see page 52. ❏...; Windows NT 4.0: see page 55. Follow the instructions on page 49 to install the printer driver on the client computers by accessing the shared...

Reference Guide
Page 50
... your network administrator for assistance. ❏ This section describes how to the shared printer)\(the shared printer's name)" in the Network path or queue name. 50 Using the Printer Software Windows 98 or Me Follow these steps to install both the printer driver and Status Monitor 3 on a standard network system using the server (Microsoft workgroup...
... your network administrator for assistance. ❏ This section describes how to the shared printer)\(the shared printer's name)" in the Network path or queue name. 50 Using the Printer Software Windows 98 or Me Follow these steps to install both the printer driver and Status Monitor 3 on a standard network system using the server (Microsoft workgroup...


