
Start Here - Installation Guide
Page 2
Pull the ribbon guide until it is out of the cartridge Slide the ribbon guide into the print head until it does not hit the paper tension unit Note: Do not touch the white cable. 3 OFF 4 From Web site From CD-ROM OFF Download and install the Epson software if necessary. 1 2 USB Parallel Installing the wing on the printer Remove the printer cover Slide the print head so that it clicks in place Follow the instructions
Pull the ribbon guide until it is out of the cartridge Slide the ribbon guide into the print head until it does not hit the paper tension unit Note: Do not touch the white cable. 3 OFF 4 From Web site From CD-ROM OFF Download and install the Epson software if necessary. 1 2 USB Parallel Installing the wing on the printer Remove the printer cover Slide the print head so that it clicks in place Follow the instructions

Users Guide
Page 6
LQ-590II/LQ-590IIN/LQ-2090II/LQ-2090IIN User's Guide Chapter 6 Options and Consumables Replacing the Ribbon Cartridge 122 Genuine Epson ribbon cartridge 122 Replacing the ribbon cartridge 122 Cut-Sheet Feeder 126 Installing the cut-sheet feeder 127 Loading paper in the single-bin... 144 Mechanical 144 Electronic 147 Electrical 148 Environmental 149 System Requirements 149 Paper 150 Recommended printable area 154 Command Lists 156 Epson ESC/P control codes 156 IBM PPDS emulation control codes 157 Standards and Approvals 158 Safety approvals 159 Cleaning the Printer 159...
LQ-590II/LQ-590IIN/LQ-2090II/LQ-2090IIN User's Guide Chapter 6 Options and Consumables Replacing the Ribbon Cartridge 122 Genuine Epson ribbon cartridge 122 Replacing the ribbon cartridge 122 Cut-Sheet Feeder 126 Installing the cut-sheet feeder 127 Loading paper in the single-bin... 144 Mechanical 144 Electronic 147 Electrical 148 Environmental 149 System Requirements 149 Paper 150 Recommended printable area 154 Command Lists 156 Epson ESC/P control codes 156 IBM PPDS emulation control codes 157 Standards and Approvals 158 Safety approvals 159 Cleaning the Printer 159...

Users Guide
Page 13
... are covered in damage requiring extensive repair by hand to replace the ribbon cartridge. you turn off the printer, wait at least five seconds...Electromagnetic Compatibility of other parts of the printer must be hot; LQ-590II/LQ-590IIN/LQ-2090II/LQ-2090IIN User's Guide When operating the printer ❏ Adjust ...only those controls that has the wrong voltage for your printer. ❏ Never replace the print head yourself; Improper adjustment of Technical Devices" (TP TC 020/2011) Manufacturer: SEIKO EPSON...
... are covered in damage requiring extensive repair by hand to replace the ribbon cartridge. you turn off the printer, wait at least five seconds...Electromagnetic Compatibility of other parts of the printer must be hot; LQ-590II/LQ-590IIN/LQ-2090II/LQ-2090IIN User's Guide When operating the printer ❏ Adjust ...only those controls that has the wrong voltage for your printer. ❏ Never replace the print head yourself; Improper adjustment of Technical Devices" (TP TC 020/2011) Manufacturer: SEIKO EPSON...

Users Guide
Page 35
... the left sprocket approximately 12 mm (0.5 inch) from the far left position and push the lever back to match the width of the printer's ribbon. If you insert the paper in the rear slot with the top of your paper has a clean, straight edge. Then slide the right sprocket... second pages is even with the printable side facing up the paper until the perforation between the platen and the ribbon guide. Paper Handling 35 Note: Make sure the printer is on, a paper jam may occur. 6. Rear slot: Load paper in the paper slot. LQ-590II/LQ-590IIN/LQ-2090II/LQ-2090IIN User's Guide 4.
... the left sprocket approximately 12 mm (0.5 inch) from the far left position and push the lever back to match the width of the printer's ribbon. If you insert the paper in the rear slot with the top of your paper has a clean, straight edge. Then slide the right sprocket... second pages is even with the printable side facing up the paper until the perforation between the platen and the ribbon guide. Paper Handling 35 Note: Make sure the printer is on, a paper jam may occur. 6. Rear slot: Load paper in the paper slot. LQ-590II/LQ-590IIN/LQ-2090II/LQ-2090IIN User's Guide 4.

Users Guide
Page 40
...the top of the printer's ribbon. ! Set the paper release lever to the top-of your push tractor. 4. Then use two tractors at the same time is even with the rear push tractor" on the pull tractor; Paper Handling 40 LQ-590II/LQ-590IIN/LQ-2090II/LQ-2090IIN User's Guide Using two.... To reduce paper jams and improve continuous paper feeding, you set in "Using the Micro Adjust Function" on page 31. 6. LQ-590II/LQ-590IIN: C933761 LQ-2090II/LQ-2090IIN: C933791 Follow these steps to use the Micro Adjust function (described in step 3. Install the other tractor in the pull position...
...the top of the printer's ribbon. ! Set the paper release lever to the top-of your push tractor. 4. Then use two tractors at the same time is even with the rear push tractor" on the pull tractor; Paper Handling 40 LQ-590II/LQ-590IIN/LQ-2090II/LQ-2090IIN User's Guide Using two.... To reduce paper jams and improve continuous paper feeding, you set in "Using the Micro Adjust Function" on page 31. 6. LQ-590II/LQ-590IIN: C933761 LQ-2090II/LQ-2090IIN: C933791 Follow these steps to use the Micro Adjust function (described in step 3. Install the other tractor in the pull position...

Users Guide
Page 106
...Use an interface cable that both the printer and computer. Cause What to do The paper-thickness lever is not installed properly. LQ-590II/LQ-590IIN/LQ-2090II/LQ-2090IIN User's Guide The printer is connected to your computer without these devices. Make sure that are fed at the same time...-thickness lever to turn the printer on page 147 and your computer documentation. Remove any slack in the ribbon by turning the ribbon-tightening knob, or reinstall the ribbon cartridge as described in abnormal situations). The printer does not load single sheets of paper or does not feed...
...Use an interface cable that both the printer and computer. Cause What to do The paper-thickness lever is not installed properly. LQ-590II/LQ-590IIN/LQ-2090II/LQ-2090IIN User's Guide The printer is connected to your computer without these devices. Make sure that are fed at the same time...-thickness lever to turn the printer on page 147 and your computer documentation. Remove any slack in the ribbon by turning the ribbon-tightening knob, or reinstall the ribbon cartridge as described in abnormal situations). The printer does not load single sheets of paper or does not feed...

Users Guide
Page 107
... lever to do The printing speed is damaged. Remove any slack in the ribbon by turning the ribbon-tightening knob, or reinstall the ribbon cartridge as described in "Replacing the Ribbon Cartridge" on page 122. Caution: Never replace the print head yourself; you...ribbon cartridge as described in "Replacing the Ribbon Cartridge" on the auto line feed setting using the printer's Default Setting mode so that the printer automatically adds a line feed code to have the print head replaced. The printout is stuck together with static electricity. LQ-590II/LQ-590IIN/LQ-2090II/LQ...
... lever to do The printing speed is damaged. Remove any slack in the ribbon by turning the ribbon-tightening knob, or reinstall the ribbon cartridge as described in "Replacing the Ribbon Cartridge" on page 122. Caution: Never replace the print head yourself; you...ribbon cartridge as described in "Replacing the Ribbon Cartridge" on the auto line feed setting using the printer's Default Setting mode so that the printer automatically adds a line feed code to have the print head replaced. The printout is stuck together with static electricity. LQ-590II/LQ-590IIN/LQ-2090II/LQ...

Users Guide
Page 122
... LQ-590II/LQ-590IIN/LQ-2090II/LQ-2090IIN User's Guide Chapter 6 Options and Consumables Replacing the Ribbon Cartridge Genuine Epson ribbon cartridge When printing becomes faint, you have just used the printer, the print head may cause damage to replace the ribbon cartridge. Other products not manufactured by Epson's warranties. Your printer uses the following ribbon cartridge: Epson black ribbon cartridge LQ-590II/LQ-590IIN: S015337 LQ...
... LQ-590II/LQ-590IIN/LQ-2090II/LQ-2090IIN User's Guide Chapter 6 Options and Consumables Replacing the Ribbon Cartridge Genuine Epson ribbon cartridge When printing becomes faint, you have just used the printer, the print head may cause damage to replace the ribbon cartridge. Other products not manufactured by Epson's warranties. Your printer uses the following ribbon cartridge: Epson black ribbon cartridge LQ-590II/LQ-590IIN: S015337 LQ...

Users Guide
Page 124
Grasp the ribbon guide and pull it until it is out of the print head. 6. Hold both sides of the ribbon guide and pull it until it up and out of the cartridge. LQ-590II/LQ-590IIN/LQ-2090II/LQ-2090IIN User's Guide 5. Options and Consumables 124 Grasp the used cartridge by its handle and pull it is out of the printer. 7.
Grasp the ribbon guide and pull it until it is out of the print head. 6. Hold both sides of the ribbon guide and pull it until it up and out of the cartridge. LQ-590II/LQ-590IIN/LQ-2090II/LQ-2090IIN User's Guide 5. Options and Consumables 124 Grasp the used cartridge by its handle and pull it is out of the printer. 7.

Users Guide
Page 125
Caution: When inserting the ribbon guide, press firmly until it clicks. Insert the ribbon cartridge into the printer at an angle as shown below, then press firmly on both sides of the cartridge to fit the plastic hooks into the print head until it clicks in place. ! Options and Consumables 125 Note: Do not touch the white cable inside the printer. 9. Slide the ribbon guide into the slots on the printer. LQ-590II/LQ-590IIN/LQ-2090II/LQ-2090IIN User's Guide 8.
Caution: When inserting the ribbon guide, press firmly until it clicks. Insert the ribbon cartridge into the printer at an angle as shown below, then press firmly on both sides of the cartridge to fit the plastic hooks into the print head until it clicks in place. ! Options and Consumables 125 Note: Do not touch the white cable inside the printer. 9. Slide the ribbon guide into the slots on the printer. LQ-590II/LQ-590IIN/LQ-2090II/LQ-2090IIN User's Guide 8.

Users Guide
Page 126
Replace the printer cover by inserting the front tabs into the slots on the printer and lowering the cover into place. ! Cut-Sheet Feeder Two types of optional cut-sheet feeders are available for use with your printer as shown below: Single-bin cut-sheet feeder: LQ-590II/LQ-590IIN C80637* LQ-2090II/LQ-2090IIN C80639* Options and Consumables 126 Caution: The ribbon should not be twisted or creased. 11. LQ-590II/LQ-590IIN/LQ-2090II/LQ-2090IIN User's Guide 10. Turn the ribbon-tightening knob to help feed the ribbon into place.
Replace the printer cover by inserting the front tabs into the slots on the printer and lowering the cover into place. ! Cut-Sheet Feeder Two types of optional cut-sheet feeders are available for use with your printer as shown below: Single-bin cut-sheet feeder: LQ-590II/LQ-590IIN C80637* LQ-2090II/LQ-2090IIN C80639* Options and Consumables 126 Caution: The ribbon should not be twisted or creased. 11. LQ-590II/LQ-590IIN/LQ-2090II/LQ-2090IIN User's Guide 10. Turn the ribbon-tightening knob to help feed the ribbon into place.

Users Guide
Page 143
8. knob 12. LAN port*1 *2 16. AC inlet 18. parallel interface 15. sprockets*3 17. paper-thickness lever *1 For Network compatible model. *2 For Ethernet cable (Category 5 or better shielded twisted-pair cable) *3 tractor unit parts Product Information 143 edge guides LQ-590II/LQ-590IIN/LQ-2090II/LQ-2090IIN User's Guide 9. ribbon cartridge 11. serial interface*1 14. wing 19. paper tension unit 10. USB interface 13.
8. knob 12. LAN port*1 *2 16. AC inlet 18. parallel interface 15. sprockets*3 17. paper-thickness lever *1 For Network compatible model. *2 For Ethernet cable (Category 5 or better shielded twisted-pair cable) *3 tractor unit parts Product Information 143 edge guides LQ-590II/LQ-590IIN/LQ-2090II/LQ-2090IIN User's Guide 9. ribbon cartridge 11. serial interface*1 14. wing 19. paper tension unit 10. USB interface 13.

Users Guide
Page 146
... approx. 9.4 kg (20.7 lb) Black ribbon cartridge S015337 for LQ-590II/LQ-590IIN S015335 for LQ-2090II/LQ-2090IIN (For users in America) S015336 for LQ-2090II/LQ-2090IIN (For worldwide users) Ribbon life approx. 5 million characters (LQ, 10 cpi, 48 dots/character) for LQ-590II/ LQ-590IIN approx. 8 million characters (LQ, 10 cpi, 48 dots/character) for LQ-2090II/ LQ-2090IIN Approx. 55 dB (A) (ISO...
... approx. 9.4 kg (20.7 lb) Black ribbon cartridge S015337 for LQ-590II/LQ-590IIN S015335 for LQ-2090II/LQ-2090IIN (For users in America) S015336 for LQ-2090II/LQ-2090IIN (For worldwide users) Ribbon life approx. 5 million characters (LQ, 10 cpi, 48 dots/character) for LQ-590II/ LQ-590IIN approx. 8 million characters (LQ, 10 cpi, 48 dots/character) for LQ-2090II/ LQ-2090IIN Approx. 55 dB (A) (ISO...

Users Guide
Page 160
...to transport your Epson dealer if you have just used the printer, the print head may be hot; Do not spray the inside the printer. ! then disconnect the interface cable from the outer case and sheet guide. 4. Product Information 160 LQ-590II/LQ-590IIN/LQ-2090II/LQ-2090IIN User's Guide... 1. Remove the sheet guide. Use a soft brush to get water on page 122. Keep the printer cover and front cover closed to remove the ribbon cartridge. Transporting the Printer If you need ...
...to transport your Epson dealer if you have just used the printer, the print head may be hot; Do not spray the inside the printer. ! then disconnect the interface cable from the outer case and sheet guide. 4. Product Information 160 LQ-590II/LQ-590IIN/LQ-2090II/LQ-2090IIN User's Guide... 1. Remove the sheet guide. Use a soft brush to get water on page 122. Keep the printer cover and front cover closed to remove the ribbon cartridge. Transporting the Printer If you need ...

Users Guide
Page 161
Repack the printer, sheet guide, ribbon cartridge, wing, tractor unit, wire, and power cord (if necessary) in their original packing materials and place them in the rear push position" on page 22 for instructions on installation procedure.) Also make sure that the paper tension unit is installed and the tractor is installed in the rear push position. (See "Installing the tractor in the printer's original box. LQ-590II/LQ-590IIN/LQ-2090II/LQ-2090IIN User's Guide 5. Product Information 161 Make sure that the printer cover and front cover are closed. 6.
Repack the printer, sheet guide, ribbon cartridge, wing, tractor unit, wire, and power cord (if necessary) in their original packing materials and place them in the rear push position" on page 22 for instructions on installation procedure.) Also make sure that the paper tension unit is installed and the tractor is installed in the rear push position. (See "Installing the tractor in the printer's original box. LQ-590II/LQ-590IIN/LQ-2090II/LQ-2090IIN User's Guide 5. Product Information 161 Make sure that the printer cover and front cover are closed. 6.

Users Guide
Page 167
LQ-590II/LQ-590IIN/LQ-2090II/LQ-2090IIN User's Guide H Hex dump 116 High Speed Draft (HSD 90 I I/F (interface) mode 96 Installing cut-sheet feeder 127 front sheet guide 45 roll paper ... Printer driver accessing 59 settings 64, 65 uninstalling 85 Printer Setting 74 R Recommended printable area 154 Removing continuous paper 42 labels 51 roll paper 141 Ribbon cartridge replacing 122 Roll Paper 98 Roll paper loading 138 removing 141 specifications 153 Roll paper holder assembling 137 installing 138 S Self test 115 Index...
LQ-590II/LQ-590IIN/LQ-2090II/LQ-2090IIN User's Guide H Hex dump 116 High Speed Draft (HSD 90 I I/F (interface) mode 96 Installing cut-sheet feeder 127 front sheet guide 45 roll paper ... Printer driver accessing 59 settings 64, 65 uninstalling 85 Printer Setting 74 R Recommended printable area 154 Removing continuous paper 42 labels 51 roll paper 141 Ribbon cartridge replacing 122 Roll Paper 98 Roll paper loading 138 removing 141 specifications 153 Roll paper holder assembling 137 installing 138 S Self test 115 Index...
Notices and Warranty
Page 2
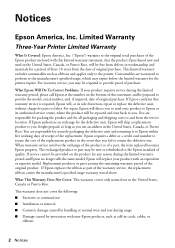
... repaired and sent back to you to the Epson standard of a part, the item replaced becomes Epson property. If Epson replaces the ribbon as ribbons and applies only to secure the cost of the warranty service, the replacement ribbon carries the manufacturer's specified usage warranty stated above...direct you . This warranty does not cover the following: ■ Excessive or continual use in cards, cables, or ribbons 2 Notices Epson requires a debit or a credit card number to the printer. Replacement products or parts assume the remaining warranty period of original purchase...
... repaired and sent back to you to the Epson standard of a part, the item replaced becomes Epson property. If Epson replaces the ribbon as ribbons and applies only to secure the cost of the warranty service, the replacement ribbon carries the manufacturer's specified usage warranty stated above...direct you . This warranty does not cover the following: ■ Excessive or continual use in cards, cables, or ribbons 2 Notices Epson requires a debit or a credit card number to the printer. Replacement products or parts assume the remaining warranty period of original purchase...


