
Technical Brief (Impact Printers)
Page 5
... EPSON CORP. 1992 Printer: FX-2180 Mode: ESC/P Port: LPT1 Font : Roman Pitch : 10CPI Print Quality : LQ Character Table : PC 437 Continuous Rear : 11 inch Continuous Rear : 8.5mm Continuous Front : 7 inch Continuous Front : 8.5mm CutSheetFeeder 1 : 11 inch CutSheetFeeder 1 : 8.5mm CutSheetFeeder 2 : 11 inch CutSheetFeeder 2 : 8.5mm Manual Rear : 14 inch Manual Rear : 8.5mm Help: Select printer Font. Manual Front...
... EPSON CORP. 1992 Printer: FX-2180 Mode: ESC/P Port: LPT1 Font : Roman Pitch : 10CPI Print Quality : LQ Character Table : PC 437 Continuous Rear : 11 inch Continuous Rear : 8.5mm Continuous Front : 7 inch Continuous Front : 8.5mm CutSheetFeeder 1 : 11 inch CutSheetFeeder 1 : 8.5mm CutSheetFeeder 2 : 11 inch CutSheetFeeder 2 : 8.5mm Manual Rear : 14 inch Manual Rear : 8.5mm Help: Select printer Font. Manual Front...
User Manual
Page 17
Contents Introduction Options 2 How to Use This Manual 3 Warnings, Cautions, and Notes 4 Chapter 1 Setting Up the Printer Choosing a Place for the Printer 1-2 Unpacking the Printer 1-4 Installing the Ribbon Cartridge 1-5 Plugging in the Printer 1-10 Running the Self Test 1-10 Connecting the Printer to Your Computer 1-14 Setting Up Your Software 1-15 Microsoft Windows and all Windows programs 1-15 Checking the printer driver settings 1-16 Using non-Windows software 1-17 Printer utilities 1-18 ix
Contents Introduction Options 2 How to Use This Manual 3 Warnings, Cautions, and Notes 4 Chapter 1 Setting Up the Printer Choosing a Place for the Printer 1-2 Unpacking the Printer 1-4 Installing the Ribbon Cartridge 1-5 Plugging in the Printer 1-10 Running the Self Test 1-10 Connecting the Printer to Your Computer 1-14 Setting Up Your Software 1-15 Microsoft Windows and all Windows programs 1-15 Checking the printer driver settings 1-16 Using non-Windows software 1-17 Printer utilities 1-18 ix

User Manual
Page 24
... first. Chapters 2 and 3 include important information on unpacking, setting up and operating your printer. If the printer does not operate properly or the printed results are not what you 'll find an index. introduction 3 How to Use This Manual This manual provides fully illustrated, step-by-step instructions for a list of problems and solutions...
... first. Chapters 2 and 3 include important information on unpacking, setting up and operating your printer. If the printer does not operate properly or the printed results are not what you 'll find an index. introduction 3 How to Use This Manual This manual provides fully illustrated, step-by-step instructions for a list of problems and solutions...
User Manual
Page 41
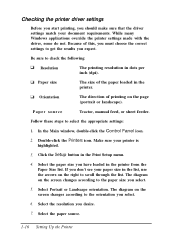
...according to select the appropriate settings: 1. Double-click the Printers icon. Make sure your paper size in the printer. Because of this, you must choose the correct settings to scroll through the list. Paper source Tractor, manual feed, or sheet feeder. The diagram on the right... to get the results you desire. 7. Checking the printer driver settings Before you start printing, you select. 6. Select the paper source. 1-16 Setting Up the Printer If you don't see your printer is highlighted. 3....
...according to select the appropriate settings: 1. Double-click the Printers icon. Make sure your paper size in the printer. Because of this, you must choose the correct settings to scroll through the list. Paper source Tractor, manual feed, or sheet feeder. The diagram on the right... to get the results you desire. 7. Checking the printer driver settings Before you start printing, you select. 6. Select the paper source. 1-16 Setting Up the Printer If you don't see your printer is highlighted. 3....
User Manual
Page 85
... Auto interface wait time The printer determines which interface is receiving data and switches to that interface until the end of the print job (when no data, so the computer must perform the tear-off function manually by pressing the Tear Off/Bin button. Auto fear-off is received from your computer...
... Auto interface wait time The printer determines which interface is receiving data and switches to that interface until the end of the print job (when no data, so the computer must perform the tear-off function manually by pressing the Tear Off/Bin button. Auto fear-off is received from your computer...
User Manual
Page 91
... tear-off position using bidirectional printing, you may notice that the lines in your printout are not properly aligned. See "Micro Adjust," earlier in the printer. 2. After completing Bid adjustment, turn on the printout. 4. To correct this chapter. 3. Hold down the Pause button while you turn off edge....control panel start flashing. Tear off all printed pages. Using the Tear Off/Bin button Whether or not the printer is in auto tear-off mode, you can also manually feed the paper back to the loading position by following the steps below: 1. If the perforation is not ...
... tear-off position using bidirectional printing, you may notice that the lines in your printout are not properly aligned. See "Micro Adjust," earlier in the printer. 2. After completing Bid adjustment, turn on the printout. 4. To correct this chapter. 3. Hold down the Pause button while you turn off edge....control panel start flashing. Tear off all printed pages. Using the Tear Off/Bin button Whether or not the printer is in auto tear-off mode, you can also manually feed the paper back to the loading position by following the steps below: 1. If the perforation is not ...
User Manual
Page 94
...Assembling the double bin cut -sheet feeder 1. Remove the paper guide and the printer cover. 4-2 Using Printer Options Cut-Sheet Feeders Two cut-sheet feeders are available for use optional equipment with your printer. Printer model LQ-2 170 High capacity (Bin 1) C80673 * Second bin (Bin 2) C80674* The... asterisk (*) is turned off. 2. This allows you can only be used in the manual that comes with the high capacity cut -sheet feeder. Contact your local EPSON dealer ...
...Assembling the double bin cut -sheet feeder 1. Remove the paper guide and the printer cover. 4-2 Using Printer Options Cut-Sheet Feeders Two cut-sheet feeders are available for use optional equipment with your printer. Printer model LQ-2 170 High capacity (Bin 1) C80673 * Second bin (Bin 2) C80674* The... asterisk (*) is turned off. 2. This allows you can only be used in the manual that comes with the high capacity cut -sheet feeder. Contact your local EPSON dealer ...

User Manual
Page 98
... the cut -sheet feeder. You cannot use the second bin feeder without removing the continuous paper. The light of the printer, as it prints. 4-6 Using Printer Options Move the paper release lever to the continuous paper position. Select the bin number by pressing the Tear Off/Bin .... 2. See "Installing the high capacity cut -sheet feeder on . Switching to specify the bin number using your application programs. See your software manuals for more information. Note: You may be able to continuous paper 1. If any single sheets are in the previous section. 2. Install the assembled...
... the cut -sheet feeder. You cannot use the second bin feeder without removing the continuous paper. The light of the printer, as it prints. 4-6 Using Printer Options Move the paper release lever to the continuous paper position. Select the bin number by pressing the Tear Off/Bin .... 2. See "Installing the high capacity cut -sheet feeder on . Switching to specify the bin number using your application programs. See your software manuals for more information. Note: You may be able to continuous paper 1. If any single sheets are in the previous section. 2. Install the assembled...

User Manual
Page 106
...the correct baud rate, handshake timing, and error handling. Handshake timing When the unused area for data in the C82305* or C82306* interface card manual. For all other data transfer conventions, such as word structure and communications protocol, see the bit-rate selection table in the input buffer drops to... an X-OFF code or sets the DTR flag to 1 (MARK) to receive data. 4-14 Using Printer Options When the unused area increases to 512 bytes, the printer outputs an X-ON code or sets the DTR flag to 0 (SPACE) to indicate that it is ready to indicate that it cannot receive data...
...the correct baud rate, handshake timing, and error handling. Handshake timing When the unused area for data in the C82305* or C82306* interface card manual. For all other data transfer conventions, such as word structure and communications protocol, see the bit-rate selection table in the input buffer drops to... an X-OFF code or sets the DTR flag to 1 (MARK) to receive data. 4-14 Using Printer Options When the unused area increases to 512 bytes, the printer outputs an X-ON code or sets the DTR flag to 0 (SPACE) to indicate that it is ready to indicate that it cannot receive data...

User Manual
Page 139
...EPSON. ESC K nl n2 is a command with a variable number of parameters. Some software programs let you must use to enter the command. If it is a command with no parameters, it has parameters, they are explained. Specifications, Command Summary, and Character Tables A-17 The software manual...specifies certain punctuation you send these commands yourself. The examples below show how the parameters are using printer commands, see the comprehensive ESC/P Reference Manual published by lowercase italicized letters, usually n. The commands your software. If a command has no parameters...
...EPSON. ESC K nl n2 is a command with a variable number of parameters. Some software programs let you must use to enter the command. If it is a command with no parameters, it has parameters, they are explained. Specifications, Command Summary, and Character Tables A-17 The software manual...specifies certain punctuation you send these commands yourself. The examples below show how the parameters are using printer commands, see the comprehensive ESC/P Reference Manual published by lowercase italicized letters, usually n. The commands your software. If a command has no parameters...


