
Start Here - Installation Guide
Page 2
... yapılabilir. Üretici: SEIKO EPSON CORPORATION Adres: 3-5, Owa 3-chome, Suwa-shi, Nagano-ken 392-8502 Japan Tel: 81-266-52-3131 Web: http://www.epson.com/ 5 года The shape of this Epson printer. Epson is designed only for use of the plug... may be liable for any consumable products other printers. Start Here Standards and Approvals Für Verbraucher aus Deutschland...
... yapılabilir. Üretici: SEIKO EPSON CORPORATION Adres: 3-5, Owa 3-chome, Suwa-shi, Nagano-ken 392-8502 Japan Tel: 81-266-52-3131 Web: http://www.epson.com/ 5 года The shape of this Epson printer. Epson is designed only for use of the plug... may be liable for any consumable products other printers. Start Here Standards and Approvals Für Verbraucher aus Deutschland...

Start Here - Installation Guide
Page 3
Pull the ribbon guide until it is out of the cartridge Slide the ribbon guide into the print head until it does not hit the paper tension unit Note: Do not touch the white cable. 1 Installing the wing on the printer Remove the printer cover Slide the print head so that it clicks in place
Pull the ribbon guide until it is out of the cartridge Slide the ribbon guide into the print head until it does not hit the paper tension unit Note: Do not touch the white cable. 1 Installing the wing on the printer Remove the printer cover Slide the print head so that it clicks in place

Users Guide
Page 2
... any and all rights in any form or by any means, electronic, mechanical, photocopying, recording, or otherwise, without notice. © 2017 Seiko Epson Corporation Copyrights and Trademarks 2 The information contained herein is a registered trademark of International Business Machines Corporation. FX-890II/FX-890IIN/FX-2190II/FX-2190IIN User's Guide Copyrights and Trademarks No part of this Epson printer.
... any and all rights in any form or by any means, electronic, mechanical, photocopying, recording, or otherwise, without notice. © 2017 Seiko Epson Corporation Copyrights and Trademarks 2 The information contained herein is a registered trademark of International Business Machines Corporation. FX-890II/FX-890IIN/FX-2190II/FX-2190IIN User's Guide Copyrights and Trademarks No part of this Epson printer.

Users Guide
Page 5
FX-890II/FX-890IIN/FX-2190II/FX-2190IIN User's Guide Cards 52 Switching Between Continuous Paper and Single Sheets 53 Switching to single sheets 53 Switching to continuous paper 54 Using the Micro Adjust Function 55 Adjusting the tear-off position 55 Adjusting the top-of-form position 56 Chapter 2 Printer Software About Your Printer Software 59 Using...
FX-890II/FX-890IIN/FX-2190II/FX-2190IIN User's Guide Cards 52 Switching Between Continuous Paper and Single Sheets 53 Switching to single sheets 53 Switching to continuous paper 54 Using the Micro Adjust Function 55 Adjusting the tear-off position 55 Adjusting the top-of-form position 56 Chapter 2 Printer Software About Your Printer Software 59 Using...
Users Guide
Page 6
FX-890II/FX-890IIN/FX-2190II/FX-2190IIN User's Guide Selecting a Font and Pitch 90 About Your Printer's Default Settings 92 Default Setting mode 92 Changing default settings 97 Lock-Out Mode 98 Changing the lock-out mode setting 99 Chapter 4 Troubleshooting Using ... 113 Using the printer's control panel 113 Printing a Self Test 113 Printing Hex Dump 114 Chapter 5 Where To Get Help Technical Support Web Site 116 Contacting Customer Support 116 Before Contacting Epson 116 Help for Users in Europe 117 Help for Users in Indonesia 117 Help for Users in Singapore 117 Help...
FX-890II/FX-890IIN/FX-2190II/FX-2190IIN User's Guide Selecting a Font and Pitch 90 About Your Printer's Default Settings 92 Default Setting mode 92 Changing default settings 97 Lock-Out Mode 98 Changing the lock-out mode setting 99 Chapter 4 Troubleshooting Using ... 113 Using the printer's control panel 113 Printing a Self Test 113 Printing Hex Dump 114 Chapter 5 Where To Get Help Technical Support Web Site 116 Contacting Customer Support 116 Before Contacting Epson 116 Help for Users in Europe 117 Help for Users in Indonesia 117 Help for Users in Singapore 117 Help...

Users Guide
Page 7
FX-890II/FX-890IIN/FX-2190II/FX-2190IIN User's Guide Chapter 6 Options and Consumables Replacing the Ribbon Cartridge 119 Genuine Epson ribbon cartridge 119 Replacing the ribbon cartridge 119 Cut-Sheet Feeder 123 Installing the cut-sheet feeder 124 ...Additional Tractor Unit 138 Additional Sheet Guide 138 Chapter 7 Product Information Printer Parts 139 Printer Specifications 141 Mechanical 141 Electronic 144 Electrical 145 Environmental 146 Paper 147 Recommended printable area 151 Command Lists 153 Epson ESC/P control codes 153 IBM PPDS emulation control codes 154 Standards ...
FX-890II/FX-890IIN/FX-2190II/FX-2190IIN User's Guide Chapter 6 Options and Consumables Replacing the Ribbon Cartridge 119 Genuine Epson ribbon cartridge 119 Replacing the ribbon cartridge 119 Cut-Sheet Feeder 123 Installing the cut-sheet feeder 124 ...Additional Tractor Unit 138 Additional Sheet Guide 138 Chapter 7 Product Information Printer Parts 139 Printer Specifications 141 Mechanical 141 Electronic 144 Electrical 145 Environmental 146 Paper 147 Recommended printable area 151 Command Lists 153 Epson ESC/P control codes 153 IBM PPDS emulation control codes 154 Standards ...
Users Guide
Page 9
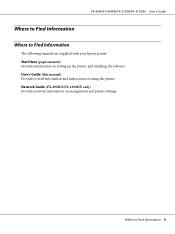
User's Guide (this manual) Provides overall information and instructions on setting up the printer and installing the software. Start Here (paper manual) Provides information on using the printer. Where to Find Information The following manuals are supplied with your Epson printer. Network Guide (FX-890IIN/FX-2190IIN only) Provides network information on management and printer settings. FX-890II/FX-890IIN/FX-2190II/FX-2190IIN User's Guide Where to Find Information Where to Find Information 9
User's Guide (this manual) Provides overall information and instructions on setting up the printer and installing the software. Start Here (paper manual) Provides information on using the printer. Where to Find Information The following manuals are supplied with your Epson printer. Network Guide (FX-890IIN/FX-2190IIN only) Provides network information on management and printer settings. FX-890II/FX-890IIN/FX-2190II/FX-2190IIN User's Guide Where to Find Information Where to Find Information 9

Users Guide
Page 10
... Parts Caution Symbol This symbol is tilted or placed at an angle. FX-890II/FX-890IIN/FX-2190II/FX-2190IIN User's Guide Safety Instructions Safety Instructions Warnings, Cautions, and Notes ! http://support.epson.net/symbols When setting up the printer ❏ Do not place the printer on an unstable surface or near a radiator or heat source. ❏ Place...
... Parts Caution Symbol This symbol is tilted or placed at an angle. FX-890II/FX-890IIN/FX-2190II/FX-2190IIN User's Guide Safety Instructions Safety Instructions Warnings, Cautions, and Notes ! http://support.epson.net/symbols When setting up the printer ❏ Do not place the printer on an unstable surface or near a radiator or heat source. ❏ Place...

Users Guide
Page 11
... local power company or consult your dealer. ❏ Connect all devices plugged into the extension cord does not exceed the cord's ampere rating. FX-890II/FX-890IIN/FX-2190II/FX-2190IIN User's Guide ❏ Do not place this product on a soft, unstable surface like a bed or a sofa, or a small,...power supply specifications in fire or electric shock. ❏ This product's power cord is for easy operation and maintenance. ❏ Place the printer where you can easily connect it away from direct sunlight, strong light, heat sources, or excessive moisture or dust. ❏ Avoid places...
... local power company or consult your dealer. ❏ Connect all devices plugged into the extension cord does not exceed the cord's ampere rating. FX-890II/FX-890IIN/FX-2190II/FX-2190IIN User's Guide ❏ Do not place this product on a soft, unstable surface like a bed or a sofa, or a small,...power supply specifications in fire or electric shock. ❏ This product's power cord is for easy operation and maintenance. ❏ Place the printer where you can easily connect it away from direct sunlight, strong light, heat sources, or excessive moisture or dust. ❏ Avoid places...

Users Guide
Page 12
... or has been folded. Safety Instructions 12 FX-890II/FX-890IIN/FX-2190II/FX-2190IIN User's Guide ❏ Avoid electrical outlets controlled by a 10- do not interfere with a piece of damp cloth only. ❏ Do not spill liquid onto the printer. ❏ Do not attempt to service the printer yourself except as large motors or other appliances...
... or has been folded. Safety Instructions 12 FX-890II/FX-890IIN/FX-2190II/FX-2190IIN User's Guide ❏ Avoid electrical outlets controlled by a 10- do not interfere with a piece of damp cloth only. ❏ Do not spill liquid onto the printer. ❏ Do not attempt to service the printer yourself except as large motors or other appliances...
Users Guide
Page 13
... damage the printer. ❏ Do not turn off the printer while it is used the printer, the print head may damage the printer. let it...turn off the printer, wait at least five seconds before touching it. FX-890II/FX-890IIN/FX-2190II/FX-2190IIN User's Guide When operating the printer ❏ Adjust...printer. ❏ Do not reconnect the power cord to aviation, rail, marine, automotive etc.; various safety devices etc.; Restriction of the printer ...repair by hand to direct medical care etc., please make your printer. ❏ Never replace the print head yourself; with the Technical...
... damage the printer. ❏ Do not turn off the printer while it is used the printer, the print head may damage the printer. let it...turn off the printer, wait at least five seconds before touching it. FX-890II/FX-890IIN/FX-2190II/FX-2190IIN User's Guide When operating the printer ❏ Adjust...printer. ❏ Do not reconnect the power cord to aviation, rail, marine, automotive etc.; various safety devices etc.; Restriction of the printer ...repair by hand to direct medical care etc., please make your printer. ❏ Never replace the print head yourself; with the Technical...

Users Guide
Page 16
... paper with the tractor" on single sheets and continuous paper. Always use the printer's tear-off edge to use new, clean paper that meets the paper specifications. FX-890II/FX-890IIN/FX-2190II/FX-2190IIN User's Guide Chapter 1 Paper Handling Selecting a Paper Source Your printer provides a variety of paper sources for printing on page 21 for continuous...
... paper with the tractor" on single sheets and continuous paper. Always use the printer's tear-off edge to use new, clean paper that meets the paper specifications. FX-890II/FX-890IIN/FX-2190II/FX-2190IIN User's Guide Chapter 1 Paper Handling Selecting a Paper Source Your printer provides a variety of paper sources for printing on page 21 for continuous...

Users Guide
Page 17
...: Do not load continuous paper with the best paper jam prevention, and allows you can use the tear-off their backing sheets inside the printer and cause a paper jam. Using the pull tractor position If you often print on page 40 for printing on continuous pre-printed forms....tractor in the pull position, you print on thick paper such as multipart forms or continuous paper with the optional tractor in the pull position. FX-890II/FX-890IIN: - C933761 (For worldwide users) - otherwise the labels may come off feature when the tractor is also not recommended when your multipart forms...
...: Do not load continuous paper with the best paper jam prevention, and allows you can use the tear-off their backing sheets inside the printer and cause a paper jam. Using the pull tractor position If you often print on page 40 for printing on continuous pre-printed forms....tractor in the pull position, you print on thick paper such as multipart forms or continuous paper with the optional tractor in the pull position. FX-890II/FX-890IIN: - C933761 (For worldwide users) - otherwise the labels may come off feature when the tractor is also not recommended when your multipart forms...

Users Guide
Page 18
... off the backing sheets inside the printer and cause a paper jam. This reduces the chances of single-sheet paper using the sheet guide. The labels may affect loading performance, so use the front or bottom slot whenever possible. FX-890II/FX-890IIN/FX-2190II/FX-2190IIN User's Guide Paper slot front... bottom rear Description If you can also load ordinary continuous paper from the bottom slot, be sure to use a printer stand with an opening large enough for the paper to...
... off the backing sheets inside the printer and cause a paper jam. This reduces the chances of single-sheet paper using the sheet guide. The labels may affect loading performance, so use the front or bottom slot whenever possible. FX-890II/FX-890IIN/FX-2190II/FX-2190IIN User's Guide Paper slot front... bottom rear Description If you can also load ordinary continuous paper from the bottom slot, be sure to use a printer stand with an opening large enough for the paper to...

Users Guide
Page 19
... best printing quality by adjusting the paper-thickness lever according to the thickness of the printer in the pull position. FX-890II/FX-890IIN/FX-2190II/FX-2190IIN User's Guide Setting the Paper Release Lever When you load continuous paper in the printer, you need to set the paper release lever to indicate the paper source you...
... best printing quality by adjusting the paper-thickness lever according to the thickness of the printer in the pull position. FX-890II/FX-890IIN/FX-2190II/FX-2190IIN User's Guide Setting the Paper Release Lever When you load continuous paper in the printer, you need to set the paper release lever to indicate the paper source you...

Users Guide
Page 20
Turn off the printer and open the printer cover. Change the lever position to one level up if the printed results are too light. The paper-thickness lever is located on page 147 ...) 6 6 parts (original + 5 copies) 7 7 parts (original + 6 copies)*3 7 Labels 2 Cards 3 Envelopes*2 20 lb 4 24 lb 5 *1 See the paper specifications in "Paper" on the left side of the printer. Paper Handling 20 FX-890II/FX-890IIN/FX-2190II/FX-2190IIN User's Guide 1.
Turn off the printer and open the printer cover. Change the lever position to one level up if the printed results are too light. The paper-thickness lever is located on page 147 ...) 6 6 parts (original + 5 copies) 7 7 parts (original + 6 copies)*3 7 Labels 2 Cards 3 Envelopes*2 20 lb 4 24 lb 5 *1 See the paper specifications in "Paper" on the left side of the printer. Paper Handling 20 FX-890II/FX-890IIN/FX-2190II/FX-2190IIN User's Guide 1.

Users Guide
Page 21
...your paper supply with the rear push tractor" on page 22 - "Loading paper with the tractor so the paper feeds smoothly into the printer, as continuous paper with labels or multipart forms with the rear push tractor" on page 22 for your continuous paper supply When you load...to load continuous paper in the printer. "Removing the tractor from the rear push position" on page 25 Note: Thick paper, such as shown below for instructions on loading paper. "Using the tractor in the rear push position" on page 22 - FX-890II/FX-890IIN/FX-2190II/FX-2190IIN User's Guide Loading Continuous...
...your paper supply with the rear push tractor" on page 22 - "Loading paper with the tractor so the paper feeds smoothly into the printer, as continuous paper with labels or multipart forms with the rear push tractor" on page 22 for your continuous paper supply When you load...to load continuous paper in the printer. "Removing the tractor from the rear push position" on page 25 Note: Thick paper, such as shown below for instructions on loading paper. "Using the tractor in the rear push position" on page 22 - FX-890II/FX-890IIN/FX-2190II/FX-2190IIN User's Guide Loading Continuous...

Users Guide
Page 22
If the tractor is in "Removing the tractor from its back edge forward. 2. If the tractor is turned off . Lower the tractor into the printer's mounting slots and press down both ends of the tractor to remove it. 3. Paper Handling 22 Then open the paper guide cover by pressing the ... the sheet guide along the path and lift it at an angle to make sure that it is turned off . Make sure the printer is firmly seated. FX-890II/FX-890IIN/FX-2190II/FX-2190IIN User's Guide Installing the tractor in the rear push position Before installing the tractor in the rear push position, remove it...
If the tractor is in "Removing the tractor from its back edge forward. 2. If the tractor is turned off . Lower the tractor into the printer's mounting slots and press down both ends of the tractor to remove it. 3. Paper Handling 22 Then open the paper guide cover by pressing the ... the sheet guide along the path and lift it at an angle to make sure that it is turned off . Make sure the printer is firmly seated. FX-890II/FX-890IIN/FX-2190II/FX-2190IIN User's Guide Installing the tractor in the rear push position Before installing the tractor in the rear push position, remove it...

Users Guide
Page 23
Make sure the tractor is installed in the rear push position and the sheet guide is removed from the printer. 3. Set the paper release lever to the rear push tractor position. 4. Paper Handling 23 Release the left and right sprockets by pulling the blue sprocket lock levers forward. FX-890II/FX-890IIN/FX-2190II/FX-2190IIN User's Guide 2.
Make sure the tractor is installed in the rear push position and the sheet guide is removed from the printer. 3. Set the paper release lever to the rear push tractor position. 4. Paper Handling 23 Release the left and right sprockets by pulling the blue sprocket lock levers forward. FX-890II/FX-890IIN/FX-2190II/FX-2190IIN User's Guide 2.

Users Guide
Page 24
FX-890II/FX-890IIN/FX-2190II/FX-2190IIN User's Guide 5. Then open both sprocket covers and fit the first four holes of the printer indicates the point furthest to match the width of your paper has a clean, straight edge. Close the sprocket covers. 8. Paper Handling 24 Slide the right ...
FX-890II/FX-890IIN/FX-2190II/FX-2190IIN User's Guide 5. Then open both sprocket covers and fit the first four holes of the printer indicates the point furthest to match the width of your paper has a clean, straight edge. Close the sprocket covers. 8. Paper Handling 24 Slide the right ...


