
Installation Instructions (All Languages)
Page 1
... PS board 2 at ESEC 30 UIB connector P7, pins 1 & 5. F14 TST Display tail missing 1.Test ribbon harness and connections between EOC & ESEC. (Electric models only) 1. Replace the EOC. If incoming power is overheating dsiconnect power from the range and unplug connector P1 from... the use by persons having electrical and mechanical training and a level of knowledge of personal injury...
... PS board 2 at ESEC 30 UIB connector P7, pins 1 & 5. F14 TST Display tail missing 1.Test ribbon harness and connections between EOC & ESEC. (Electric models only) 1. Replace the EOC. If incoming power is overheating dsiconnect power from the range and unplug connector P1 from... the use by persons having electrical and mechanical training and a level of knowledge of personal injury...
Complete Owner's Guide (English)
Page 2
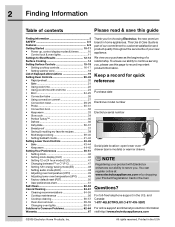
... time 23 • Broil 24-25 • Convection bake 26 • Using convection convert 27 • Convection roast 28-29 • Probe 30-31 • Convection broil 32 • Keep warm 33 • Slow cook 34 • Perfect Turkey 35 • Defrost 36 • ...to Common Problems 62-64 Warranty 67 Thank you for quick reference Purchase date Electrolux model number Electrolux serial number Serial plate location: open lower oven drawer (some models) or warmer drawer. Keep a record for choosing Electrolux, the new premium brand in the U.S. For toll-free telephone support in ...
... time 23 • Broil 24-25 • Convection bake 26 • Using convection convert 27 • Convection roast 28-29 • Probe 30-31 • Convection broil 32 • Keep warm 33 • Slow cook 34 • Perfect Turkey 35 • Defrost 36 • ...to Common Problems 62-64 Warranty 67 Thank you for quick reference Purchase date Electrolux model number Electrolux serial number Serial plate location: open lower oven drawer (some models) or warmer drawer. Keep a record for choosing Electrolux, the new premium brand in the U.S. For toll-free telephone support in ...
Complete Owner's Guide (English)
Page 3
... be secured by properly installed anti-tip bracket provided with the range. Destroy the carton and plastic bags after unpacking the range. latest edition, or in Canada CAN/CGA B149.1 and CAN/GGA B149.2, and the National Electrical Code ANSI/NFPA No.70-latest edition, or in the literature package...; Never modify or alter the construction of a range by a qualified technician in accordance with the National Fuel Gas Code ANSI Z223- Ask your appliance is inserted into and fully secured by the anti-tip bracket by a qualified technician. For models with a warmer drawer, grasp the top rear edge ...
... be secured by properly installed anti-tip bracket provided with the range. Destroy the carton and plastic bags after unpacking the range. latest edition, or in Canada CAN/CGA B149.1 and CAN/GGA B149.2, and the National Electrical Code ANSI/NFPA No.70-latest edition, or in the literature package...; Never modify or alter the construction of a range by a qualified technician in accordance with the National Fuel Gas Code ANSI Z223- Ask your appliance is inserted into and fully secured by the anti-tip bracket by a qualified technician. For models with a warmer drawer, grasp the top rear edge ...

Complete Owner's Guide (English)
Page 5
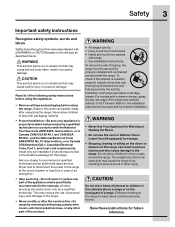
...a hot cooking area, be allowed to accumulate. • Kitchen cleaners and aerosols-Always follow the manufacturer's recommended directions for models equipped with both hands to another wellventilated room. Use potholders and grasp the rack with ceramicglass cook tops. Some cleaners can ...Do not use . • When flaming foods under the left rear surface element if your range • Clean the range regularly to keep all utensils from the high heat of electric shock. Important instructions for at least 3 hours before you remove or replace food in temperature....
...a hot cooking area, be allowed to accumulate. • Kitchen cleaners and aerosols-Always follow the manufacturer's recommended directions for models equipped with both hands to another wellventilated room. Use potholders and grasp the rack with ceramicglass cook tops. Some cleaners can ...Do not use . • When flaming foods under the left rear surface element if your range • Clean the range regularly to keep all utensils from the high heat of electric shock. Important instructions for at least 3 hours before you remove or replace food in temperature....

Complete Owner's Guide (English)
Page 9
.... Extendable Luxury-Glide™ telescoping interior oven rack(s). 9. 1 offset interior oven rack (not shown). 10. Broiler pan insert 21 (some models). 5 6 10 11 18 2 1 16 4 3 7 89 11 13 12 15 14 17 20 19 Full-width tinted oven door window... 16. Broiler pan (some models). 20. Leveling legs & anti-tip bracket (included). 19. Wave-Touch™ activated glass control panel. 2. Theatre style upper oven interior halogen Luxury-Lighting™ system. 7. Oven rack sensor. 11. Features 9 Wave-Touch™ range features Your electric range features include: 1. Wave-Touch&#...
.... Extendable Luxury-Glide™ telescoping interior oven rack(s). 9. 1 offset interior oven rack (not shown). 10. Broiler pan insert 21 (some models). 5 6 10 11 18 2 1 16 4 3 7 89 11 13 12 15 14 17 20 19 Full-width tinted oven door window... 16. Broiler pan (some models). 20. Leveling legs & anti-tip bracket (included). 19. Wave-Touch™ activated glass control panel. 2. Theatre style upper oven interior halogen Luxury-Lighting™ system. 7. Oven rack sensor. 11. Features 9 Wave-Touch™ range features Your electric range features include: 1. Wave-Touch&#...
Complete Owner's Guide (English)
Page 11
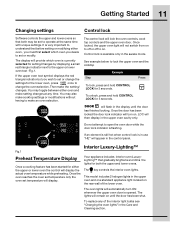
... Temperature Display Once a cooking feature has been started for setting/changes by displaying a small red triangle indicator next to change the settings for 3 seconds. This model includes 2 halogen lights in the display until the door has been shut. To replace any time. It is very important to understand that before setting...
... Temperature Display Once a cooking feature has been started for setting/changes by displaying a small red triangle indicator next to change the settings for 3 seconds. This model includes 2 halogen lights in the display until the door has been shut. To replace any time. It is very important to understand that before setting...
Complete Owner's Guide (English)
Page 41
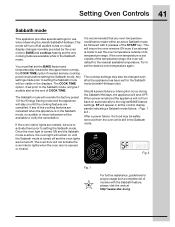
.... 1 & 2 After a power failure, the food may also be followed with the Sabbath feature, please visit the web at the end of the temperature range, the oven will give 1 audible alert at http:\\www.star-k.org. Fig. 2 Fig. 1 For further assistance, guidelines for the upper/lower oven(s), the... to set for use when observing the Jewish Sabbath/Holidays. BAKE and cooktop heating are needed for proper usage and a complete list of models with 2 presses of the START key. If the oven temperature is recommended that any cooktop power levels before setting the Sabbath mode. Setting...
.... 1 & 2 After a power failure, the food may also be followed with the Sabbath feature, please visit the web at the end of the temperature range, the oven will give 1 audible alert at http:\\www.star-k.org. Fig. 2 Fig. 1 For further assistance, guidelines for the upper/lower oven(s), the... to set for use when observing the Jewish Sabbath/Holidays. BAKE and cooktop heating are needed for proper usage and a complete list of models with 2 presses of the START key. If the oven temperature is recommended that any cooktop power levels before setting the Sabbath mode. Setting...
Complete Owner's Guide (English)
Page 54
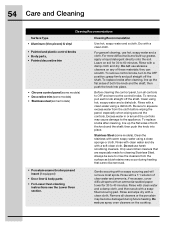
...; Painted and plastic control knobs • Body parts, • Painted decorative trim • Chrome control panel (some models) • Decorative trim (some models) • Stainless steel (some models). To remove, pull each knob straight off the shaft. Clean using hot, soapy water and a dishcloth. Rinse with clean... with clean water and a damp cloth, and then scrub with a clean cloth. For general cleaning, use abrasive cleaners on soil for 30 to 40 minutes. Do not use hot, soapy water and a cloth. To remove control knobs, turn all cleaners or the porcelain may...
...; Painted and plastic control knobs • Body parts, • Painted decorative trim • Chrome control panel (some models) • Decorative trim (some models) • Stainless steel (some models). To remove, pull each knob straight off the shaft. Clean using hot, soapy water and a dishcloth. Rinse with clean... with clean water and a damp cloth, and then scrub with a clean cloth. For general cleaning, use abrasive cleaners on soil for 30 to 40 minutes. Do not use hot, soapy water and a cloth. To remove control knobs, turn all cleaners or the porcelain may...
Complete Owner's Guide (English)
Page 55
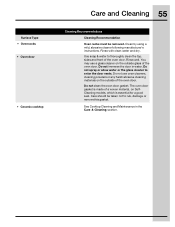
... be removed. Use soap & water to enter the door vents. You may use oven cleaners, cleaning powders or any harsh abrasive cleaning materials on SelfCleaning models, which is essential for a good seal. See Cooktop Cleaning and Maintenance in water. Do not spray or allow water or the glass cleaner to thoroughly...
... be removed. Use soap & water to enter the door vents. You may use oven cleaners, cleaning powders or any harsh abrasive cleaning materials on SelfCleaning models, which is essential for a good seal. See Cooktop Cleaning and Maintenance in water. Do not spray or allow water or the glass cleaner to thoroughly...

Complete Owner's Guide (English)
Page 63
... display & stop position. • Meat too close to the broil element. Reposition the broil rack to prevent curling, but do not cut into pan (some models). • Grease has built up excessive spillovers before starting oven. If the F code error repeats, remove power supply to appliance, wait 5 minutes and then repower...
... display & stop position. • Meat too close to the broil element. Reposition the broil rack to prevent curling, but do not cut into pan (some models). • Grease has built up excessive spillovers before starting oven. If the F code error repeats, remove power supply to appliance, wait 5 minutes and then repower...


