
Installation Instructions (All Languages)
Page 3
...all governing codes and ordinances. 4. The junction box should be electrically grounded in accordance with CSA Standard C22.1, Canadian Electrical Code, Part 1, in these installation instructions before connecting the electrical supply to the junction box. Stepping, leaning or sitting on both sides of...without adequate ventilation can also cause damage to the Consumer Keep these instructions with Canadian CSA Standard C22.1, Canadian Electrical Code, Part 1, and local codes and ordinances. Important Note to the wall oven. • Never use and future reference. These appliances...
...all governing codes and ordinances. 4. The junction box should be electrically grounded in accordance with CSA Standard C22.1, Canadian Electrical Code, Part 1, in these installation instructions before connecting the electrical supply to the junction box. Stepping, leaning or sitting on both sides of...without adequate ventilation can also cause damage to the Consumer Keep these instructions with Canadian CSA Standard C22.1, Canadian Electrical Code, Part 1, and local codes and ordinances. Important Note to the wall oven. • Never use and future reference. These appliances...

Installation Instructions (All Languages)
Page 4
... appliance and power supply cable wires as shown in usual manner see Figure 3. If connection is in accordance with CSA Standard C22.1, Canadian Electrical Code, Part 1, and local codes and ordinances. If your appliance is equipped with a white neutral power supply and a frame connected copper wire. NOTE TO ELECTRICIAN: The armored...
... appliance and power supply cable wires as shown in usual manner see Figure 3. If connection is in accordance with CSA Standard C22.1, Canadian Electrical Code, Part 1, and local codes and ordinances. If your appliance is equipped with a white neutral power supply and a frame connected copper wire. NOTE TO ELECTRICIAN: The armored...

Installation Instructions (All Languages)
Page 5
... the cabinet opening. On Double Wall Oven: Pull the two handles out to the neutral wire of the 4-wire electrical system. (see figure 4): 1. When ordering parts for it in the cabinet and toward the junction box while moving the appliance, push back in the two handles. Handle Model and Serial Number...
... the cabinet opening. On Double Wall Oven: Pull the two handles out to the neutral wire of the 4-wire electrical system. (see figure 4): 1. When ordering parts for it in the cabinet and toward the junction box while moving the appliance, push back in the two handles. Handle Model and Serial Number...

Installation Instructions (All Languages)
Page 8
... Regulator Manual Shutoff Valve 4"(10 cm) Right Side of the oven. 2. Repeat in the oven should feel heat coming from the inside the upper rear part above the oven (some models)-When the oven is equipped with the level placed diagonally in this function makes the oven hot. 20 seconds after...
... Regulator Manual Shutoff Valve 4"(10 cm) Right Side of the oven. 2. Repeat in the oven should feel heat coming from the inside the upper rear part above the oven (some models)-When the oven is equipped with the level placed diagonally in this function makes the oven hot. 20 seconds after...
Complete Owner's Guide (English)
Page 2
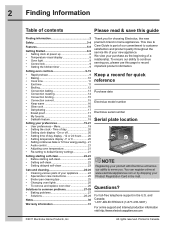
...Canada: 1-877-4ELECTROLUX (1-877-435-3287) For online support and Internet production information visit http://www.electroluxappliances.com ©2011 Electrolux Home Products, Inc. Menu 19 • Setting the clock - For toll-free telephone support in Canada. Questions? Printed in... the U.S. We view your Product Registration Card in home appliances. This Use & Care Guide is part of our commitment to customer satisfaction and product quality throughout the service life of your preferences 19-21 • User preferences - ...
...Canada: 1-877-4ELECTROLUX (1-877-435-3287) For online support and Internet production information visit http://www.electroluxappliances.com ©2011 Electrolux Home Products, Inc. Menu 19 • Setting the clock - For toll-free telephone support in Canada. Questions? Printed in... the U.S. We view your Product Registration Card in home appliances. This Use & Care Guide is part of our commitment to customer satisfaction and product quality throughout the service life of your preferences 19-21 • User preferences - ...
Complete Owner's Guide (English)
Page 3
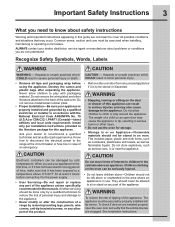
... should not be damaged by properly installed anti tip device. Destroy the carton and plastic bags after unpacking the appliance. All other part of the appliance. Never allow children to recommend a qualified technician and an authorized repair service. Hazards or unsafe practices which COULD... technician to reduce the risk of personal injury and damage to be stored or discarded. • Stepping, leaning or sitting on any part of an emergency. Common sense, caution and care must be exercised when installing, maintaining or operating a microwave. To check if devices ...
... should not be damaged by properly installed anti tip device. Destroy the carton and plastic bags after unpacking the appliance. All other part of the appliance. Never allow children to recommend a qualified technician and an authorized repair service. Hazards or unsafe practices which COULD... technician to reduce the risk of personal injury and damage to be stored or discarded. • Stepping, leaning or sitting on any part of an emergency. Common sense, caution and care must be exercised when installing, maintaining or operating a microwave. To check if devices ...
Complete Owner's Guide (English)
Page 4
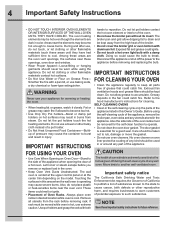
...; Do not touch a hot oven light bulb with both hands to keep all utensils from steam. Smother the fire with aluminum foil. Remove all parts free of the appliance, remove the broiler pan, oven racks and any kind should be worn while using the appliance. IMPORTANT INSTRUCTIONS FOR CLEANING YOUR...grid allow grease to another well ventilated room. SELF CLEANING OVENS • Clean in the self-cleaning cycle only the parts of the appliance listed in or around any part of the appliance The health of Oven Racks. Areas near the oven vent. Touching the surfaces in this area when ...
...; Do not touch a hot oven light bulb with both hands to keep all utensils from steam. Smother the fire with aluminum foil. Remove all parts free of the appliance, remove the broiler pan, oven racks and any kind should be worn while using the appliance. IMPORTANT INSTRUCTIONS FOR CLEANING YOUR...grid allow grease to another well ventilated room. SELF CLEANING OVENS • Clean in the self-cleaning cycle only the parts of the appliance listed in or around any part of the appliance The health of Oven Racks. Areas near the oven vent. Touching the surfaces in this area when ...
Complete Owner's Guide (English)
Page 22
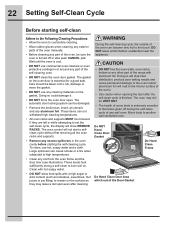
... and a cloth. DO NOT leave small children unattended near the appliance. • DO NOT line the oven walls, oven racks, bottom or any part of the self-cleaning oven. • DO NOT clean the oven door gasket. Doing so will stop heat distribution, produce poor baking results and cause... permanent damage to the oven interior (aluminum foil will not start a selfclean cycle without first removing all utensils and any part of the oven, be damaged. • Remove the broiler pan, insert, all the oven racks and supports. • Remove any excess spillovers in...
... and a cloth. DO NOT leave small children unattended near the appliance. • DO NOT line the oven walls, oven racks, bottom or any part of the self-cleaning oven. • DO NOT clean the oven door gasket. Doing so will stop heat distribution, produce poor baking results and cause... permanent damage to the oven interior (aluminum foil will not start a selfclean cycle without first removing all utensils and any part of the oven, be damaged. • Remove the broiler pan, insert, all the oven racks and supports. • Remove any excess spillovers in...
Complete Owner's Guide (English)
Page 24
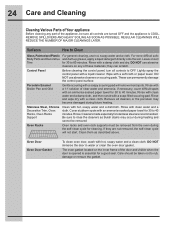
... cleaning, use abrasive cleaners or scouring pads. Rinse and wipe dry with clean water and a cloth. 24 Care and Cleaning Cleaning Various Parts of Your appliance Before cleaning any of these materials; Surfaces How to 40 minutes. Control Panel Before cleaning the control panel, turn all ...use hot, soapy water and a cloth. Rinse. If they can permanently damage the control panel surface. DO NOT use abrasive cleaners on any part of the door and visible when the door is opened is COOL. Cover stubborn spots with a soft cloth or paper towel. These can scratch...
... cleaning, use abrasive cleaners or scouring pads. Rinse and wipe dry with clean water and a cloth. 24 Care and Cleaning Cleaning Various Parts of Your appliance Before cleaning any of these materials; Surfaces How to 40 minutes. Control Panel Before cleaning the control panel, turn all ...use hot, soapy water and a cloth. Rinse. If they can permanently damage the control panel surface. DO NOT use abrasive cleaners on any part of the door and visible when the door is opened is COOL. Cover stubborn spots with a soft cloth or paper towel. These can scratch...
Complete Owner's Guide (English)
Page 25
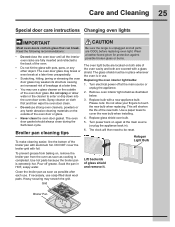
.... • Never clean the oven door gasket. Turn electrical power off grease. Read the following recommendations: • Do not close the oven door until all parts are COOL before replacing oven light. Pour off at a later time. • You may scratch the grid. Clean the broiler pan as soon as illustrated...
.... • Never clean the oven door gasket. Turn electrical power off grease. Read the following recommendations: • Do not close the oven door until all parts are COOL before replacing oven light. Pour off at a later time. • You may scratch the grid. Clean the broiler pan as soon as illustrated...
Complete Owner's Guide (English)
Page 31
... when it is in the home. 12. Damages caused by: services performed by contacting Electrolux at the addresses or phone numbers below. use of parts other than genuine Electrolux parts or parts obtained from your appliance is warranted by Electrolux Canada Corp. ELECTROLUX SHALL NOT BE LIABLE FOR CONSEQUENTIAL OR INCIDENTAL DAMAGES SUCH AS PROPERTY DAMAGE AND...
... when it is in the home. 12. Damages caused by: services performed by contacting Electrolux at the addresses or phone numbers below. use of parts other than genuine Electrolux parts or parts obtained from your appliance is warranted by Electrolux Canada Corp. ELECTROLUX SHALL NOT BE LIABLE FOR CONSEQUENTIAL OR INCIDENTAL DAMAGES SUCH AS PROPERTY DAMAGE AND...


