User Manual (English)
Page 5
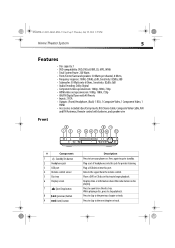
...the previous chapter or track. Plug a set of headphones into this port. Press to skip to stop playback. Detects the signal from the remote control. Press to skip to open/close the disc tray. Plug a USB device into 6 Ohms, Sensitivity: 82dB±3dB • Audio... 1 Standby/On button 2 Headphone jack 3 USB port 4 Remote control sensor 5 Disc tray 6 Display screen 7 Eject/Stop button 8 (previous) button 9 (next) button Description Press to turn your player on. Press to the next chapter or track. DX-HTIB_10-0823_MAN_ENG_V3.fm Page 5 Thursday, July 29, 2010 2:57...
...the previous chapter or track. Plug a set of headphones into this port. Press to skip to stop playback. Detects the signal from the remote control. Press to skip to open/close the disc tray. Plug a USB device into 6 Ohms, Sensitivity: 82dB±3dB • Audio... 1 Standby/On button 2 Headphone jack 3 USB port 4 Remote control sensor 5 Disc tray 6 Display screen 7 Eject/Stop button 8 (previous) button 9 (next) button Description Press to turn your player on. Press to the next chapter or track. DX-HTIB_10-0823_MAN_ENG_V3.fm Page 5 Thursday, July 29, 2010 2:57...
User Manual (English)
Page 7
... mode. Connect a Dolby Digital amplifier with L/R audio inputs to put your player. These cables normally have red and white connectors. Press again to these jacks. DX-HTIB_10-0823_MAN_ENG_V3.fm Page 7 Thursday, July 29, 2010 2:57 PM Home Theater System 7 # Component 10 Audio (L & R) output 11 Video output jack 12 Optical output jack...
... mode. Connect a Dolby Digital amplifier with L/R audio inputs to put your player. These cables normally have red and white connectors. Press again to these jacks. DX-HTIB_10-0823_MAN_ENG_V3.fm Page 7 Thursday, July 29, 2010 2:57 PM Home Theater System 7 # Component 10 Audio (L & R) output 11 Video output jack 12 Optical output jack...
User Manual (English)
Page 12
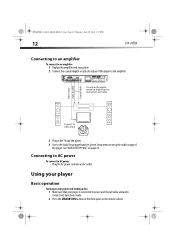
Connecting to AC power To connect to setup the audio output of the player to the amplifier. DX-HTIB_10-0823_MAN_ENG_V3.fm Page 12 Thursday, July 29, 2010 2:57 PM 12 DX-HTIB Connecting to an amplifier To connect to an amplifier: 1 Unplug the amplifier and your player is connected to power and ...output of the player. Use either the digital coaxial or digital optical connection and cable. See "AUDIO SETUP PAGE" on the front panel or the remote control. Video cable Optical cable Coaxial cable Connect to video input 3 Plug in the TV and the player. 4 Access the Audio Setup page from ...
Connecting to AC power To connect to setup the audio output of the player to the amplifier. DX-HTIB_10-0823_MAN_ENG_V3.fm Page 12 Thursday, July 29, 2010 2:57 PM 12 DX-HTIB Connecting to an amplifier To connect to an amplifier: 1 Unplug the amplifier and your player is connected to power and ...output of the player. Use either the digital coaxial or digital optical connection and cable. See "AUDIO SETUP PAGE" on the front panel or the remote control. Video cable Optical cable Coaxial cable Connect to video input 3 Plug in the TV and the player. 4 Access the Audio Setup page from ...
User Manual (English)
Page 13
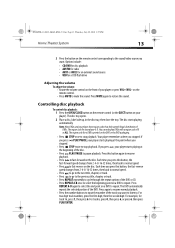
...stopped. • Press STOP twice to stop playback. Controlling disc playback To control disc playback: 1 Press the OPEN/CLOSE button on the remote control (or the EJECT button on your player starts playing at the point where you press PLAY/PAUSE, your player is printed on the ...player). on a DVD to cycle through the repeat options of the track you stopped. The DVD automatically repeats the selected portion of 1 or ALL. DX-HTIB_10-0823_MAN_ENG_V3.fm Page 13 Thursday, July 29, 2010 2:57 PM Home Theater System 13 3 Press the button on the disc. For track 6, press...
...stopped. • Press STOP twice to stop playback. Controlling disc playback To control disc playback: 1 Press the OPEN/CLOSE button on the remote control (or the EJECT button on your player starts playing at the point where you press PLAY/PAUSE, your player is printed on the ...player). on a DVD to cycle through the repeat options of the track you stopped. The DVD automatically repeats the selected portion of 1 or ALL. DX-HTIB_10-0823_MAN_ENG_V3.fm Page 13 Thursday, July 29, 2010 2:57 PM Home Theater System 13 3 Press the button on the disc. For track 6, press...
User Manual (English)
Page 15
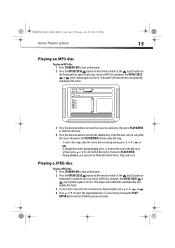
... playback, you want. Playing a JPEG disc To play a JPEG disc: 1 Press STANDBY/ON to turn on the player. 2 Press the OPEN/CLOSE button on the remote control (or the (eject) button on the front panel) to open the disc tray. Insert a JPEG disc and press the OPEN/CLOSE or (eject) button... to close it keep pressing the PLAY/ ENTER button until you find the picture you can use Fast forward/rewind, Pause, Stop, and so on. DX-HTIB_10-0823_MAN_ENG_V3.fm Page 15 Thursday, July 29, 2010 2:57 PM Home Theater System 15 Playing an MP3 disc To play an MP3 disc: 1 Press...
... playback, you want. Playing a JPEG disc To play a JPEG disc: 1 Press STANDBY/ON to turn on the player. 2 Press the OPEN/CLOSE button on the remote control (or the (eject) button on the front panel) to open the disc tray. Insert a JPEG disc and press the OPEN/CLOSE or (eject) button... to close it keep pressing the PLAY/ ENTER button until you find the picture you can use Fast forward/rewind, Pause, Stop, and so on. DX-HTIB_10-0823_MAN_ENG_V3.fm Page 15 Thursday, July 29, 2010 2:57 PM Home Theater System 15 Playing an MP3 disc To play an MP3 disc: 1 Press...
User Manual (English)
Page 16
... FM mode, press the MO/ST button.When you manually tune to an FM station with a weak signal, press the MO/ST button on the remote control to switch from stereo mode to mono mode to reduce the background noise. This is caused by Photoshop. Note: Press the 0 and 1 buttons ... options such as a preset. • Press the TUNE+/TUNE- Note: Stereo is not strong enough, you want to allocate. DX-HTIB_10-0823_MAN_ENG_V3.fm Page 16 Thursday, July 29, 2010 2:57 PM 16 DX-HTIB • To view a specific picture, input its number using the number buttons or press or . • To repeat a picture...
... FM mode, press the MO/ST button.When you manually tune to an FM station with a weak signal, press the MO/ST button on the remote control to switch from stereo mode to mono mode to reduce the background noise. This is caused by Photoshop. Note: Press the 0 and 1 buttons ... options such as a preset. • Press the TUNE+/TUNE- Note: Stereo is not strong enough, you want to allocate. DX-HTIB_10-0823_MAN_ENG_V3.fm Page 16 Thursday, July 29, 2010 2:57 PM 16 DX-HTIB • To view a specific picture, input its number using the number buttons or press or . • To repeat a picture...
User Manual (English)
Page 17
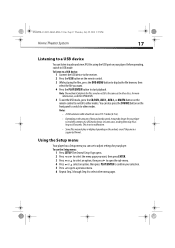
..., even if they are in a supported format. To listen to a USB device: 1 Connect the USB device to the receiver. 2 Press the USB button on the remote control. 3 While playing the files, press the DVD MENU button to display the file browser, then select the file you want , then press ENTER. 3 Press...; Some files may be as long as for your selection. 5 Press to go to a previous menu. 6 Repeat Step 2 through Step 4 to select other menu pages. DX-HTIB_10-0823_MAN_ENG_V3.fm Page 17 Thursday, July 29, 2010 2:57 PM Home Theater System 17 Listening to a USB device You can also press the SOURCE...
..., even if they are in a supported format. To listen to a USB device: 1 Connect the USB device to the receiver. 2 Press the USB button on the remote control. 3 While playing the files, press the DVD MENU button to display the file browser, then select the file you want , then press ENTER. 3 Press...; Some files may be as long as for your selection. 5 Press to go to a previous menu. 6 Repeat Step 2 through Step 4 to select other menu pages. DX-HTIB_10-0823_MAN_ENG_V3.fm Page 17 Thursday, July 29, 2010 2:57 PM Home Theater System 17 Listening to a USB device You can also press the SOURCE...
User Manual (English)
Page 21
...The DVD's region code is on the TV Picture is distorted. Caution: Do not use liquid cleaners or aerosol cleaners because they may be damaged. DX-HTIB_10-0823_MAN_ENG_V3.fm Page 21 Thursday, July 29, 2010 2:57 PM Home Theater System 21 Problem No picture on the DVD or the DVD packaging...• Make sure that the battery is fresh. • Make sure that nothing is blocking the IR sensor. • Make sure that you point the remote directly at the IR sensor and that the disc is compatible with your player with a clean cloth, slightly dampened with water. Maintaining Cleaning your player...
...The DVD's region code is on the TV Picture is distorted. Caution: Do not use liquid cleaners or aerosol cleaners because they may be damaged. DX-HTIB_10-0823_MAN_ENG_V3.fm Page 21 Thursday, July 29, 2010 2:57 PM Home Theater System 21 Problem No picture on the DVD or the DVD packaging...• Make sure that the battery is fresh. • Make sure that nothing is blocking the IR sensor. • Make sure that you point the remote directly at the IR sensor and that the disc is compatible with your player with a clean cloth, slightly dampened with water. Maintaining Cleaning your player...
User Manual (English)
Page 22
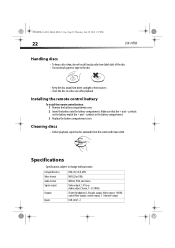
... subject to the disc. • Keep the disc away from the center with clean cloth. DX-HTIB_10-0823_MAN_ENG_V3.fm Page 22 Thursday, July 29, 2010 2:57 PM 22 DX-HTIB Handling discs • To keep a disc clean, do not touch the play side (non-... V (RMS) (Front) Headphone, L/R audio output, Video output, 1 HDMI, optical fiber output, coaxial output, 5.1 channel output. Installing the remote control battery To install the remote control battery: 1 Remove the battery compartment cover. 2 Insert the battery into the battery compartment. symbols on the battery match the + and - symbols...
... subject to the disc. • Keep the disc away from the center with clean cloth. DX-HTIB_10-0823_MAN_ENG_V3.fm Page 22 Thursday, July 29, 2010 2:57 PM 22 DX-HTIB Handling discs • To keep a disc clean, do not touch the play side (non-... V (RMS) (Front) Headphone, L/R audio output, Video output, 1 HDMI, optical fiber output, coaxial output, 5.1 channel output. Installing the remote control battery To install the remote control battery: 1 Remove the battery compartment cover. 2 Insert the battery into the battery compartment. symbols on the battery match the + and - symbols...


