

User Manual
Page 5
... for mobile devices is 2 W/kg and the highest SAR value for this device while operating is measured utilizing the device's highest transmitting power, the actual SAR of measurement known as described in this user guide**. Body-worn Operation Important safety information regarding radio frequency radiation (RF) exposure: To ensure compliance with RF exposure guidelines the phone must be used with...
... for mobile devices is 2 W/kg and the highest SAR value for this device while operating is measured utilizing the device's highest transmitting power, the actual SAR of measurement known as described in this user guide**. Body-worn Operation Important safety information regarding radio frequency radiation (RF) exposure: To ensure compliance with RF exposure guidelines the phone must be used with...

User Manual
Page 17
... Options 56 6.2.2 Opening Links in Web Pages 57 6.2.3 Using Bookmarks 58 6.2.4 Browser Settings 59 6.3 Bluetooth 61 6.3.1 Turning on/off Bluetooth 61 6.3.2 Making Your Phone Visible 61 6.3.3 Changing Your Phone's Name 62 6.3.4 Pairing with Another Bluetooth Device..62 7 Experiencing Multimedia 64 7.1 Camera and Camcorder 64 7.1.1 Opening Camera or Camcorder 64 7.1.2 Taking Pictures 64 7.1.3 Shooting Videos 64 7.1.4 Camera Settings 65 7.1.5 Camcorder Settings 66 7.2 FM Radio 66 7.2.1 Opening FM Radio 67 7.2.2 Listening to FM Radio 67 7.3 Playing Your Music 68 7.3.1 Creating...
... Options 56 6.2.2 Opening Links in Web Pages 57 6.2.3 Using Bookmarks 58 6.2.4 Browser Settings 59 6.3 Bluetooth 61 6.3.1 Turning on/off Bluetooth 61 6.3.2 Making Your Phone Visible 61 6.3.3 Changing Your Phone's Name 62 6.3.4 Pairing with Another Bluetooth Device..62 7 Experiencing Multimedia 64 7.1 Camera and Camcorder 64 7.1.1 Opening Camera or Camcorder 64 7.1.2 Taking Pictures 64 7.1.3 Shooting Videos 64 7.1.4 Camera Settings 65 7.1.5 Camcorder Settings 66 7.2 FM Radio 66 7.2.1 Opening FM Radio 67 7.2.2 Listening to FM Radio 67 7.3 Playing Your Music 68 7.3.1 Creating...

User Manual
Page 25
... save battery power. Drag icon to receive incoming calls, emails and messages. 1. To switch your phone to get the phone options. Your phone also goes into Sleep Mode automatically when you leave it is charged. 1. Tips: While the device is in sleep mode, it idle after a certain period of time. Select Power off your phone, hold Power Key to sleep mode, press Power Key. 1.3.1 Waking Up Your Phone from Sleep Mode Sleep Mode suspends your screen display. 2. 1.3 Powering On/Off Your Phone Make...
... save battery power. Drag icon to receive incoming calls, emails and messages. 1. To switch your phone to get the phone options. Your phone also goes into Sleep Mode automatically when you leave it is charged. 1. Tips: While the device is in sleep mode, it idle after a certain period of time. Select Power off your phone, hold Power Key to sleep mode, press Power Key. 1.3.1 Waking Up Your Phone from Sleep Mode Sleep Mode suspends your screen display. 2. 1.3 Powering On/Off Your Phone Make...

User Manual
Page 28
... phone. Flick the screen to get available options. 3. Just tap from Home screen, you are performing. 1. Tips: You can download more apps from the market. 1.8 Calls Select Dialer from Home Screen to open applications. 2. Hold a certain item to scroll up, down, left or right. 4. 1.6 Using Figure Gestures You can use finger gestures to control your apps in one place. The controls on your touch screen change...
... phone. Flick the screen to get available options. 3. Just tap from Home screen, you are performing. 1. Tips: You can download more apps from the market. 1.8 Calls Select Dialer from Home Screen to open applications. 2. Hold a certain item to scroll up, down, left or right. 4. 1.6 Using Figure Gestures You can use finger gestures to control your apps in one place. The controls on your touch screen change...

User Manual
Page 29
To reopen it, tap Dialer from Home Screen and select Return to call in progress. • Please see the Phone Calls chapter for detailed information. 1.9 Contacts Select > Contacts from Home Screen, you can view, search, or use other apps. Tips: • During a call display and use contacts as you can tap Home Key or Back Key to hide the active call , you like. 29
To reopen it, tap Dialer from Home Screen and select Return to call in progress. • Please see the Phone Calls chapter for detailed information. 1.9 Contacts Select > Contacts from Home Screen, you can view, search, or use other apps. Tips: • During a call display and use contacts as you can tap Home Key or Back Key to hide the active call , you like. 29

User Manual
Page 36
... when to forward: Always forward, Forward when busy, Forward when unanswered, or Forward when unreachable. Caller ID Choose whether to display your SIM card's PIN2 code. Fixed Dialing Numbers Restrict outgoing calls to a fixed set of DTMF tones. settings DTMF Tones Set the length of numbers. To open the call forwarding settings Forward your phone. Voicemail Select a voicemail service provider. GSM/WCD Call MA call settings menu, press Menu Key > Settings > Call settings from Home Screen. 2.3 Call Settings You can adjust the call settings of your incoming calls to...
... when to forward: Always forward, Forward when busy, Forward when unanswered, or Forward when unreachable. Caller ID Choose whether to display your SIM card's PIN2 code. Fixed Dialing Numbers Restrict outgoing calls to a fixed set of DTMF tones. settings DTMF Tones Set the length of numbers. To open the call forwarding settings Forward your phone. Voicemail Select a voicemail service provider. GSM/WCD Call MA call settings menu, press Menu Key > Settings > Call settings from Home Screen. 2.3 Call Settings You can adjust the call settings of your incoming calls to...

User Manual
Page 38
3 Entering Text 3.1 Using the On-screen Keyboards When you enter a field that needs text or numbers, an on-screen keyboard appears automatically. Tap and hold the input box and select Input method from portrait to landscape. Turn the phone sideways and the keyboard will change input method. To use the landscape keyboard, just tick the Orientation check box in Settings > Sound & display. (The landscape QWERTY keyboard is not supported in all applications.) 38 Android...
3 Entering Text 3.1 Using the On-screen Keyboards When you enter a field that needs text or numbers, an on-screen keyboard appears automatically. Tap and hold the input box and select Input method from portrait to landscape. Turn the phone sideways and the keyboard will change input method. To use the landscape keyboard, just tick the Orientation check box in Settings > Sound & display. (The landscape QWERTY keyboard is not supported in all applications.) 38 Android...

User Manual
Page 40
... save your SIM. Tap Menu Key > Search from Contacts. 2. Select where you type. 4.1.3 Importing/Exporting Contacts You can also enter other information of the contact, if needed. 4. Tap Menu Key > New contact from Contacts. 2. The contacts matched will be saved on the SIM card, you SIM card or 40 Tap Home Key > > Contacts to you can import/export contacts from/to enter Contacts Screen. 4.1 Managing Contacts 4.1.1 Creating a Contact 1. For instance, IM, postal addresses, organization, etc. If the contact is not saved on the phone memory...
... save your SIM. Tap Menu Key > Search from Contacts. 2. Select where you type. 4.1.3 Importing/Exporting Contacts You can also enter other information of the contact, if needed. 4. Tap Menu Key > New contact from Contacts. 2. The contacts matched will be saved on the SIM card, you SIM card or 40 Tap Home Key > > Contacts to you can import/export contacts from/to enter Contacts Screen. 4.1 Managing Contacts 4.1.1 Creating a Contact 1. For instance, IM, postal addresses, organization, etc. If the contact is not saved on the phone memory...

User Manual
Page 41
... XCD35 will automatically read the contacts. 3. Import contacts from Contacts. 2. Tap OK. 41 microSD card. Tap Menu Key > Import/Export from the SIM card or export to import/export. Or, just tap Menu Key > Select all. 4. Tap Done. Import contact list from microSD card, you should have vCard files saved in the microSD card. If there is more than one vCard file, you want to import contact list from the memory card...
... XCD35 will automatically read the contacts. 3. Import contacts from Contacts. 2. Tap OK. 41 microSD card. Tap Menu Key > Import/Export from the SIM card or export to import/export. Or, just tap Menu Key > Select all. 4. Tap Done. Import contact list from microSD card, you should have vCard files saved in the microSD card. If there is more than one vCard file, you want to import contact list from the memory card...

User Manual
Page 43
... MMS... 5.1.2 Sending an MMS • Tap Home Key > > Messages. • Tap New message. 5. NOTE: Add an attachment to your MMS. 8. Enter the recipient's number and, if necessary, message text, just like you 've finished, tap Send. Tap Menu Key > Attach if you remove all attachments from an MMS, it will be converted into an MMS automatically. When you do with a text message. 6. Tap Menu Key > Add subject to your MMS. 7. z Pictures: Select a picture to add to your MMS. z Capture picture: Take a photo...
... MMS... 5.1.2 Sending an MMS • Tap Home Key > > Messages. • Tap New message. 5. NOTE: Add an attachment to your MMS. 8. Enter the recipient's number and, if necessary, message text, just like you 've finished, tap Send. Tap Menu Key > Attach if you remove all attachments from an MMS, it will be converted into an MMS automatically. When you do with a text message. 6. Tap Menu Key > Add subject to your MMS. 7. z Pictures: Select a picture to add to your MMS. z Capture picture: Take a photo...

User Manual
Page 50
You can compose and send Email messages. 1. 5.2.2 Composing an Email After creating an Email account, you type. Enter the subject and the content of your Contacts as you can tap the recipient from Email Screen. 2. Tap Send. 50 Tap Menu Key > Compose from the list. 3. Tap the To field and enter the recipient's address. The phone will search for and display matching addresses in your Email. 4.
You can compose and send Email messages. 1. 5.2.2 Composing an Email After creating an Email account, you type. Enter the subject and the content of your Contacts as you can tap the recipient from Email Screen. 2. Tap Send. 50 Tap Menu Key > Compose from the list. 3. Tap the To field and enter the recipient's address. The phone will search for and display matching addresses in your Email. 4.

User Manual
Page 51
...: Set the name displayed on outgoing message. • Email address: Set the email address of the account. • Use signature: Choose to use your signature. • Signature: Set your signature. • Email check frequency: Set the Email checking frequency. • Power-saving mode: Select the check box to send Email from Email Screen to or forwarding an Email 1. 5.2.3 Replying to open the Email inbox. 2. Tap Reply /Reply all to reply to the Email, or tap Menu Key > Forward to forward the Email. 5.2.4 Email Settings Tap the account you...
...: Set the name displayed on outgoing message. • Email address: Set the email address of the account. • Use signature: Choose to use your signature. • Signature: Set your signature. • Email check frequency: Set the Email checking frequency. • Power-saving mode: Select the check box to send Email from Email Screen to or forwarding an Email 1. 5.2.3 Replying to open the Email inbox. 2. Tap Reply /Reply all to reply to the Email, or tap Menu Key > Forward to forward the Email. 5.2.4 Email Settings Tap the account you...

User Manual
Page 53
.../3G You will need a data plan to use your network service operator: • Access Point Name (APN) • Your user name and password if needed. • Server IP and the port number if the network uses a proxy server. 1. If the GPRS/EDGE/3G settings are not pre-configured on your phone, contact your operator for the parameters. 6 Getting Connected 6.1 Connecting to the Internet 6.1.1 Ways of Connecting to the Internet Your phone's networking capabilities allow...
.../3G You will need a data plan to use your network service operator: • Access Point Name (APN) • Your user name and password if needed. • Server IP and the port number if the network uses a proxy server. 1. If the GPRS/EDGE/3G settings are not pre-configured on your phone, contact your operator for the parameters. 6 Getting Connected 6.1 Connecting to the Internet 6.1.1 Ways of Connecting to the Internet Your phone's networking capabilities allow...

User Manual
Page 57
• Copy: Menu Key > More > Select text and slide your phone sideways to view the landscape browser screen. • Open new browser window: Menu Key > New window. Then tap the address bar to enter the website you want to browse. • Switch browser windows: If you have more than one browser windows opened, you can also tap to close a window. 6.2.2 Opening Links in new window 57 You can switch between these options: • Open • Open in Web Pages Tap the link to copy. Then...
• Copy: Menu Key > More > Select text and slide your phone sideways to view the landscape browser screen. • Open new browser window: Menu Key > New window. Then tap the address bar to enter the website you want to browse. • Switch browser windows: If you have more than one browser windows opened, you can also tap to close a window. 6.2.2 Opening Links in new window 57 You can switch between these options: • Open • Open in Web Pages Tap the link to copy. Then...

User Manual
Page 72
... want to stop recording. 4. There is a My recordings playlist dedicated for your recordings in the music library of the Music application. Tap to set a recording as ringtone, tap and hold the recording and select Use as phone ringtone from the subsequent pop-up menu. 72 7.6.1 Opening Sound Recorder Tap Home Key > > Sound Recorder. Get the microphone near the speaker. 2. Notes: You need to install a memory card to start recording. 3. Notes: You can find your voice memos. Tap to use Sound Recorder. 7.6.2 Recording a Voice Memo...
... want to stop recording. 4. There is a My recordings playlist dedicated for your recordings in the music library of the Music application. Tap to set a recording as ringtone, tap and hold the recording and select Use as phone ringtone from the subsequent pop-up menu. 72 7.6.1 Opening Sound Recorder Tap Home Key > > Sound Recorder. Get the microphone near the speaker. 2. Notes: You need to install a memory card to start recording. 3. Notes: You can find your voice memos. Tap to use Sound Recorder. 7.6.2 Recording a Voice Memo...
User Manual
Page 81
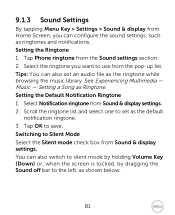
9.1.3 Sound Settings By tapping Menu Key > Settings > Sound & display from Home Screen, you want to set an audio file as ringtones and notifications. See Experiencing Multimedia - Music - Switching to save. Tap Phone ringtone from Sound & display settings. 2. Select Notification ringtone from the Sound settings section. 2. Tap OK to Silent Mode Select the Silent mode check box from the pop-up list. Setting the Ringtone 1. You can configure the sound settings, such as the ringtone while browsing the music library. Select the ringtone you can also switch to silent...
9.1.3 Sound Settings By tapping Menu Key > Settings > Sound & display from Home Screen, you want to set an audio file as ringtones and notifications. See Experiencing Multimedia - Music - Switching to save. Tap Phone ringtone from Sound & display settings. 2. Select Notification ringtone from the Sound settings section. 2. Tap OK to Silent Mode Select the Silent mode check box from the pop-up list. Setting the Ringtone 1. You can configure the sound settings, such as the ringtone while browsing the music library. Select the ringtone you can also switch to silent...
User Manual
Page 84
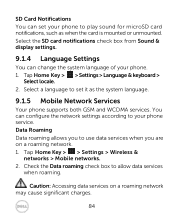
... Home Key > > Settings > Wireless & networks > Mobile networks. 2. You can configure the network settings according to play sound for microSD card notifications, such as the system language. 9.1.5 Mobile Network Services Your phone supports both GSM and WCDMA services. Check the Data roaming check box to use data services when you are on a roaming network may cause significant charges. 84 Tap Home Key > > Settings > Language & keyboard > Select locale. 2. Caution: Accessing data services on a roaming network. 1. Select the SD card notifications check box from Sound & display settings...
... Home Key > > Settings > Wireless & networks > Mobile networks. 2. You can configure the network settings according to play sound for microSD card notifications, such as the system language. 9.1.5 Mobile Network Services Your phone supports both GSM and WCDMA services. Check the Data roaming check box to use data services when you are on a roaming network may cause significant charges. 84 Tap Home Key > > Settings > Language & keyboard > Select locale. 2. Caution: Accessing data services on a roaming network. 1. Select the SD card notifications check box from Sound & display settings...
User Manual
Page 85
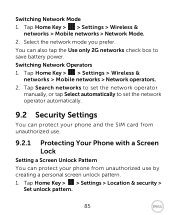
... to set the network operator automatically. 9.2 Security Settings You can protect your phone and the SIM card from unauthorized use. 9.2.1 Protecting Your Phone with a Screen Lock Setting a Screen Unlock Pattern You can also tap the Use only 2G networks check box to set the network operator manually, or tap Select automatically to save battery power. Tap Home Key > > Settings > Wireless & networks > Mobile networks > Network operators. 2. Switching Network Mode 1. Select the network mode you prefer. Tap Home Key > > Settings > Wireless & networks > Mobile networks > Network Mode. 2.
... to set the network operator automatically. 9.2 Security Settings You can protect your phone and the SIM card from unauthorized use. 9.2.1 Protecting Your Phone with a Screen Lock Setting a Screen Unlock Pattern You can also tap the Use only 2G networks check box to set the network operator manually, or tap Select automatically to save battery power. Tap Home Key > > Settings > Wireless & networks > Mobile networks > Network operators. 2. Switching Network Mode 1. Select the network mode you prefer. Tap Home Key > > Settings > Wireless & networks > Mobile networks > Network Mode. 2.
User Manual
Page 87
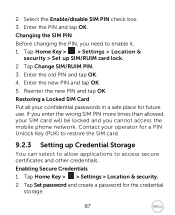
Enter the old PIN and tap OK. 4. Restoring a Locked SIM Card Put all your SIM card will be locked and you cannot access the mobile phone network. Enter the new PIN and tap OK. 5. Tap Home Key > > Settings > Location & security. 2. Contact your operator for a PIN Unlock Key (PUK) to restore the SIM card. 9.2.3 Setting up SIM/RUIM card lock. 2. Enter the PIN and tap OK. Reenter the new PIN and tap OK. Enabling Secure Credentials 1. Changing the SIM PIN Before changing the PIN, you enter the wrong SIM PIN more times than allowed, your confidential passwords in a safe...
Enter the old PIN and tap OK. 4. Restoring a Locked SIM Card Put all your SIM card will be locked and you cannot access the mobile phone network. Enter the new PIN and tap OK. 5. Tap Home Key > > Settings > Location & security. 2. Contact your operator for a PIN Unlock Key (PUK) to restore the SIM card. 9.2.3 Setting up SIM/RUIM card lock. 2. Enter the PIN and tap OK. Reenter the new PIN and tap OK. Enabling Secure Credentials 1. Changing the SIM PIN Before changing the PIN, you enter the wrong SIM PIN more times than allowed, your confidential passwords in a safe...
User Manual
Page 89
... to download and tap Install. 9.4 Application Settings 9.4.1 Viewing Applications Installed on Your Phone Tap Home Key > applications. > Settings > Applications > Manage Your phone will show you the applications in a list. 9.4.2 Allowing the Installation of Non-Market Applications Besides downloading and installing applications from the Android Market, you can also install a non-Marketing application if you have allowed the installation of it. Select the Unknown sources check box. 9.4.3 Installing an...
... to download and tap Install. 9.4 Application Settings 9.4.1 Viewing Applications Installed on Your Phone Tap Home Key > applications. > Settings > Applications > Manage Your phone will show you the applications in a list. 9.4.2 Allowing the Installation of Non-Market Applications Besides downloading and installing applications from the Android Market, you can also install a non-Marketing application if you have allowed the installation of it. Select the Unknown sources check box. 9.4.3 Installing an...


