Owners Manual
Page 4
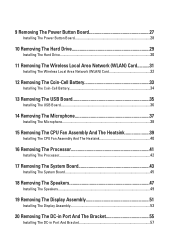
9 Removing The Power Button Board 27 Installing The Power Button Board 28 10 Removing The Hard Drive 29 Installing The Hard Drive 30 11 Removing The Wireless Local Area Network (WLAN) Card...........31 Installing The Wireless Local Area Network (WLAN) Card 32 12 Removing The Coin-Cell ...
9 Removing The Power Button Board 27 Installing The Power Button Board 28 10 Removing The Hard Drive 29 Installing The Hard Drive 30 11 Removing The Wireless Local Area Network (WLAN) Card...........31 Installing The Wireless Local Area Network (WLAN) Card 32 12 Removing The Coin-Cell ...

Owners Manual
Page 29
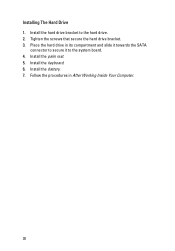
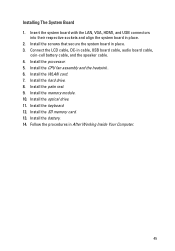
Remove the battery. 3. Slide the hard drive and lift it from the hard drive. 29 Remove the keyboard. 4. Removing The Hard Drive 1. Remove the palm rest. 5. Follow the procedures in Before Working On Your Computer. 2. Remove the screws that secure the hard drive bracket and detach it out of the computer. 10 6.
Remove the battery. 3. Slide the hard drive and lift it from the hard drive. 29 Remove the keyboard. 4. Removing The Hard Drive 1. Remove the palm rest. 5. Follow the procedures in Before Working On Your Computer. 2. Remove the screws that secure the hard drive bracket and detach it out of the computer. 10 6.
Owners Manual
Page 30
Installing The Hard Drive 1. Place the hard drive in After Working Inside Your Computer. 30 Install the battery. 7. Install the palm rest. 5. Install the keyboard. 6. Follow the procedures in its compartment and slide it towards the SATA connector to secure it to the hard drive. 2. Tighten the screws that secure the hard drive bracket. 3. Install the hard drive bracket to the system board. 4.
Installing The Hard Drive 1. Place the hard drive in After Working Inside Your Computer. 30 Install the battery. 7. Install the palm rest. 5. Install the keyboard. 6. Follow the procedures in its compartment and slide it towards the SATA connector to secure it to the hard drive. 2. Tighten the screws that secure the hard drive bracket. 3. Install the hard drive bracket to the system board. 4.
Owners Manual
Page 43
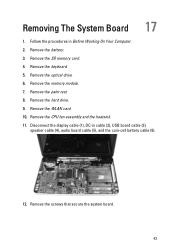
Remove the optical drive. 6. Remove the SD memory card. 4. Remove the memory module. 7. Remove the palm rest. 8. Remove the hard drive. 9. Remove the battery. 3. Remove the WLAN card. 10. Removing The System Board 17 1. Remove the screws that secure the system board. 43 Remove the keyboard. 5. Follow the procedures in cable (2), USB board cable (3), speaker cable (4), audio board cable (5), and the coin-cell battery cable (6). 12. Remove the CPU fan assembly and the heatsink. 11. Disconnect the display cable (1), DC-in Before Working On Your Computer. 2.
Remove the optical drive. 6. Remove the SD memory card. 4. Remove the memory module. 7. Remove the palm rest. 8. Remove the hard drive. 9. Remove the battery. 3. Remove the WLAN card. 10. Removing The System Board 17 1. Remove the screws that secure the system board. 43 Remove the keyboard. 5. Follow the procedures in cable (2), USB board cable (3), speaker cable (4), audio board cable (5), and the coin-cell battery cable (6). 12. Remove the CPU fan assembly and the heatsink. 11. Disconnect the display cable (1), DC-in Before Working On Your Computer. 2.
Owners Manual
Page 45
... sockets and align the system board in place. 3. Install the battery. 14. Install the screws that secure the system board in place. 2. Install the optical drive. 11. Connect the LCD cable, DC-in After Working Inside Your Computer. 45 Install the palm rest. 9. Installing The System Board 1. Follow the procedures in...
... sockets and align the system board in place. 3. Install the battery. 14. Install the screws that secure the system board in place. 2. Install the optical drive. 11. Connect the LCD cable, DC-in After Working Inside Your Computer. 45 Install the palm rest. 9. Installing The System Board 1. Follow the procedures in...
Owners Manual
Page 47
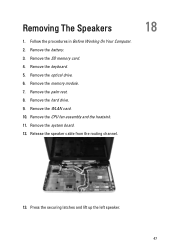
Remove the keyboard. 5. Remove the system board. 12. Press the securing latches and lift up the left speaker. 47 Remove the battery. 3. Remove the CPU fan assembly and the heatsink. 11. Remove the memory module. 7. Remove the hard drive. 9. Remove the palm rest. 8. Release the speaker cable from the routing channel. 18 13. Remove the SD memory card. 4. Remove the optical drive. 6. Remove the WLAN card. 10. Removing The Speakers 1. Follow the procedures in Before Working On Your Computer. 2.
Remove the keyboard. 5. Remove the system board. 12. Press the securing latches and lift up the left speaker. 47 Remove the battery. 3. Remove the CPU fan assembly and the heatsink. 11. Remove the memory module. 7. Remove the hard drive. 9. Remove the palm rest. 8. Release the speaker cable from the routing channel. 18 13. Remove the SD memory card. 4. Remove the optical drive. 6. Remove the WLAN card. 10. Removing The Speakers 1. Follow the procedures in Before Working On Your Computer. 2.
Owners Manual
Page 49
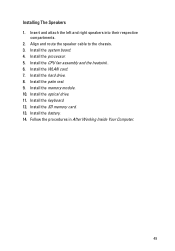
Install the memory module. 10. Install the optical drive. 11. Install the WLAN card. 7. Install the hard drive. 8. Follow the procedures in After Working Inside Your Computer. 49 Install the CPU fan assembly and the heatsink . 6. Install the keyboard. 12. Install the SD memory card. 13. Install the processor. 5. Install the battery. 14. Installing The Speakers 1. Install the system board. 4. Insert and attach the left and right speakers into their respective compartments. 2. Install the palm rest. 9. Align and route the speaker cable to the chassis. 3.
Install the memory module. 10. Install the optical drive. 11. Install the WLAN card. 7. Install the hard drive. 8. Follow the procedures in After Working Inside Your Computer. 49 Install the CPU fan assembly and the heatsink . 6. Install the keyboard. 12. Install the SD memory card. 13. Install the processor. 5. Install the battery. 14. Installing The Speakers 1. Install the system board. 4. Insert and attach the left and right speakers into their respective compartments. 2. Install the palm rest. 9. Align and route the speaker cable to the chassis. 3.

Owners Manual
Page 71
.... 3. This field provides a menu to navigate. Turn on your computer. This prompt can cause your computer. • set the type of hard drive installed. Then, shut down the System Setup screen information for this keystroke will be lost. 4. This field provides a menu to work incorrectly. Appears... on top of the System Setup window. Press < Left Arrow > 71 Entering System Setup 25 1. When the blue DELL logo is recommended that you write down your computer. 2. If you press before you must watch for it is displayed, you are an...
.... 3. This field provides a menu to navigate. Turn on your computer. This prompt can cause your computer. • set the type of hard drive installed. Then, shut down the System Setup screen information for this keystroke will be lost. 4. This field provides a menu to work incorrectly. Appears... on top of the System Setup window. Press < Left Arrow > 71 Entering System Setup 25 1. When the blue DELL logo is recommended that you write down your computer. 2. If you press before you must watch for it is displayed, you are an...

Owners Manual
Page 73
... Adapter Type Advanced Intel SpeedStep Virtualization Integrated NIC Re-sets the time on the computer. Displays the BIOS revision. Displays the type of the optical drive. Displays the processor ID. Displays the processor L2 cache size. Displays the model number and capacity of processor. Displays the speed of the AC adapter... the computer. Displays the asset tag of your computer (if available). Displays the processor L3 cache size. Displays the model number and capacity of the hard drive.
... Adapter Type Advanced Intel SpeedStep Virtualization Integrated NIC Re-sets the time on the computer. Displays the BIOS revision. Displays the type of the optical drive. Displays the processor ID. Displays the processor L2 cache size. Displays the model number and capacity of processor. Displays the speed of the AC adapter... the computer. Displays the asset tag of your computer (if available). Displays the processor L3 cache size. Displays the model number and capacity of the hard drive.

Owners Manual
Page 74
... Set Supervisor Password Set HDD Password Password Bypass Computrace This field displays your computer. 74 Enable or disable the Computrace feature on the computer's internal hard drive (HDD). This feature is enabled only when the AC adapter is not already set, this field can be charged when connected to either ATA or...
... Set Supervisor Password Set HDD Password Password Bypass Computrace This field displays your computer. 74 Enable or disable the Computrace feature on the computer's internal hard drive (HDD). This feature is enabled only when the AC adapter is not already set, this field can be charged when connected to either ATA or...
Owners Manual
Page 75
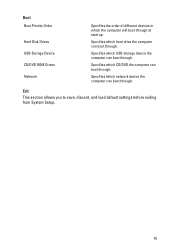
Specifies which USB storage device the computer can boot through . Specifies which network device the computer can boot through . Specifies which hard drive the computer can boot through. Exit This section allows you to save, discard, and load default settings before exiting from System Setup. 75 Boot Boot Priority Order Hard Disk Drives USB Storage Device CD/DVD ROM Drives Network Specifies the order of different devices in which the computer will boot through . Specifies which CD/DVD the computer can boot through at start up.
Specifies which USB storage device the computer can boot through . Specifies which network device the computer can boot through . Specifies which hard drive the computer can boot through. Exit This section allows you to save, discard, and load default settings before exiting from System Setup. 75 Boot Boot Priority Order Hard Disk Drives USB Storage Device CD/DVD ROM Drives Network Specifies the order of different devices in which the computer will boot through . Specifies which CD/DVD the computer can boot through at start up.


